Do it yourself
Life hacks, master classes, useful tips, recipes.
home » Handicraft techniques » Beading » Beaded decoration » Master class on weaving a bracelet from beads
bead bracelet

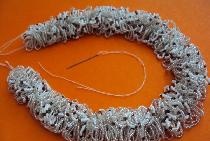
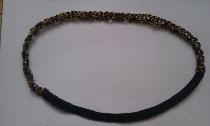
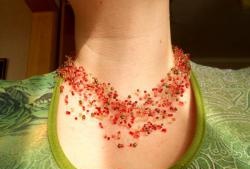
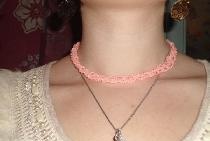
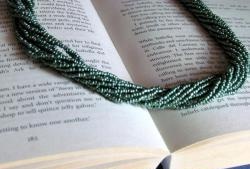
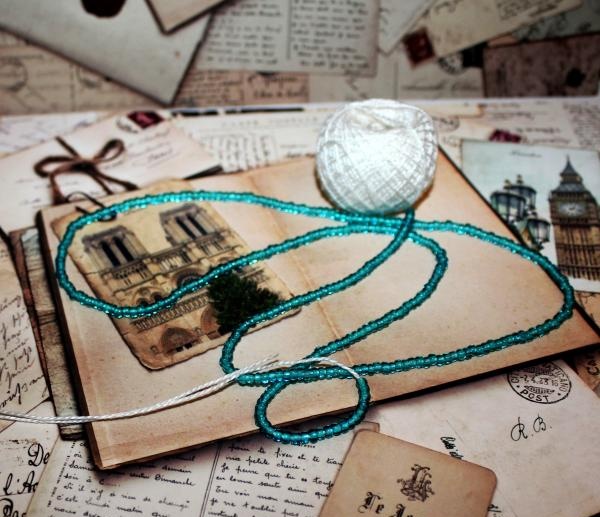
A strand of beads is a great addition to any outfit. Exactly knitting allows you to make it even, and even uncalibrated beads will look great.

To make a tourniquet you will need:

  • Small hook;
  • Crochet threads (I use “Iris”);
  • Beads No. 10 (15-20 g);
  • A needle with a small eye for stringing beads;
  • End caps (2 pcs.) Pins (2 pcs.)
  • Round nose pliers;
  • Lock.
bead bracelet

Let's start weaving:

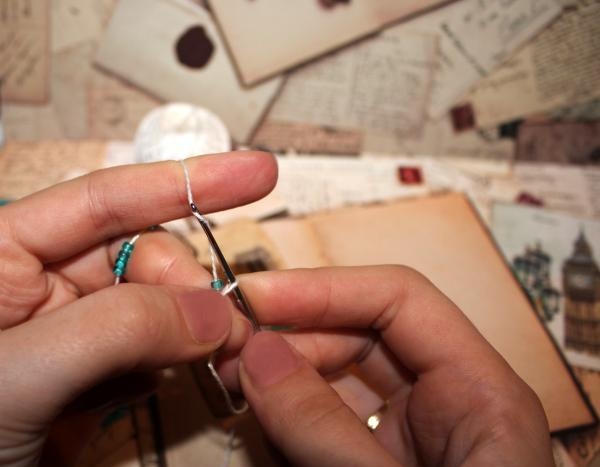
1) Pour the beads into a convenient flat container (you can use a saucer). We thread the thread into the needle without breaking it from the ball.

bead bracelet

2) We collect beads on the thread. The length of the thread with beads is 80-100 cm.

bead bracelet

3) Make a loop, as when casting on loops, for crocheting.

bead bracelet

4) We knit one loop.

bead bracelet

5) Adjust the bead and secure it with a new loop.

bead bracelet
bead bracelet

6) Similar to the fifth point, we knit 4 more beads.

bead bracelet
bead bracelet

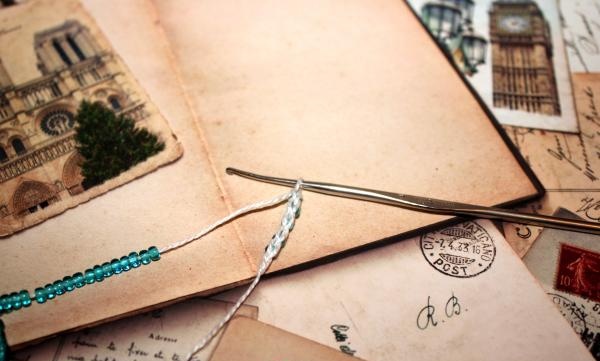
7) We close the set of loops with beads into a ring; to do this, we knit the first and last loop together.

bead bracelet

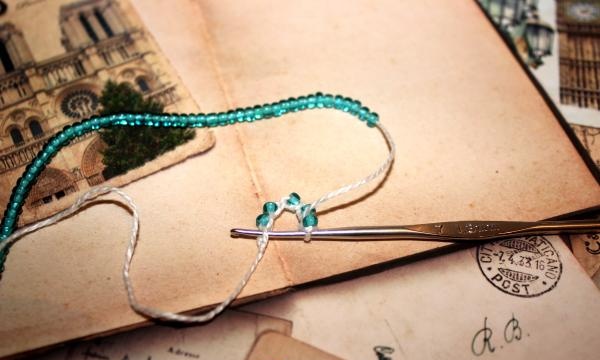
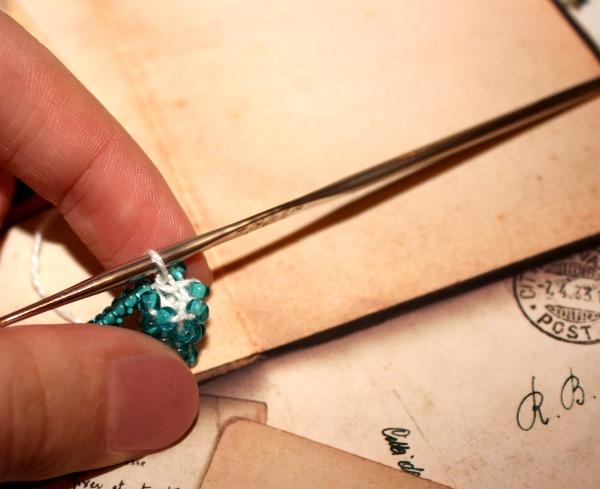
8) Insert the hook into the first loop, under the thread on which the bead is located (to the left of the bead).

We adjust the new bead and knit it. Using this principle, we knit the entire tourniquet (in a circle). It is worth considering that the density of the knitting plays an important role; the tighter the loops are tightened, the smoother the beads lie.

bead bracelet
bead bracelet

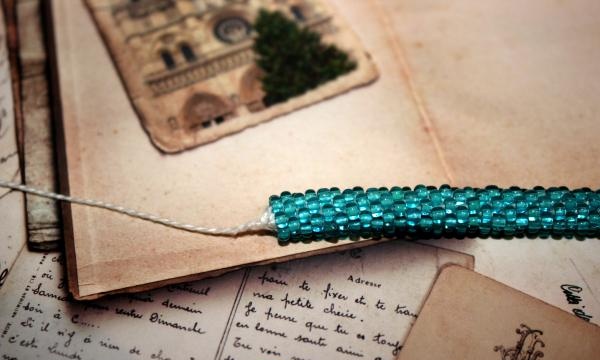
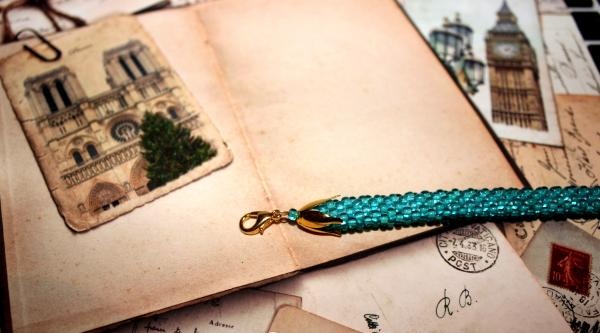
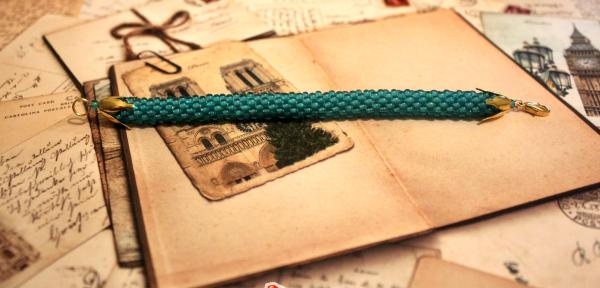
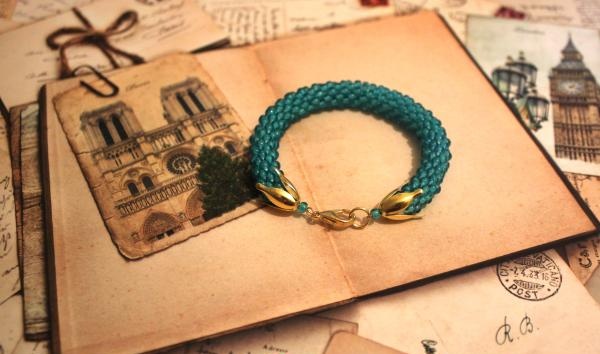
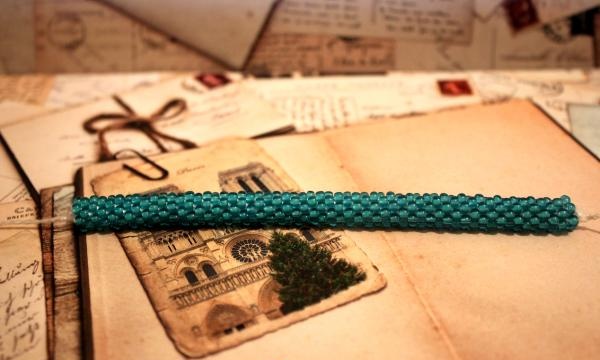
9) The length of the harness must be determined taking into account the future lock. The last row is knitted in the same way as the previous ones, only without adjusting the beads.

bead bracelet

10) To complete the bracelet, bend the pin using pliers and bring it out through the center.

bead bracelet
bead bracelet

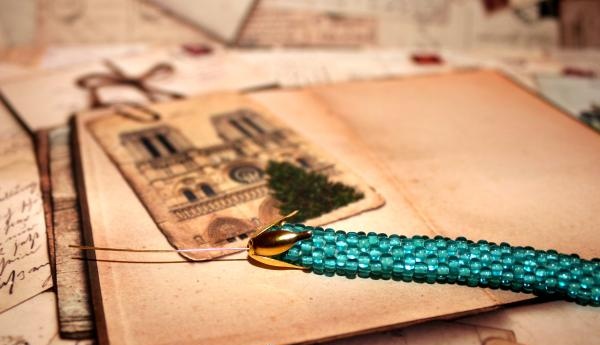
11) We put on a bead and a lock.

bead bracelet

12) Cut off the excess wire and bend it into a ring. Using the same principle, we design the second end of the bracelet.

bead bracelet
bead bracelet
bead bracelet
come back
Comment
  • bowtiesmilelaughingblushsmileyrelaxed relaxedsmirk
    heart_eyeskissing_heartkissing_closed_eyesflushedrelievedsatisfiedgrin
    winkstuck_out_tongue_winking_eyestuck_out_tongue_closed_eyesgrinningkissingstuck_out_tonguesleeping
    worriedfrowninganguishedopen_mouthgrimacingconfusedhushed
    expressionlessunamusedsweat_smilesweatdisappointed_relievedwearypassive
    disappointedconfoundedfearfulcold_sweatperseverecrysob
    joyastonishedscreamtired_faceangryragetriumph
    sleepyyummasksunglassesdizzy_faceimpsmiling_imp
    neutral_faceno_mouthinnocent
5+two=
Comments (1)
  1. lenavt
    #1 lenavt Guests 28 August 2017 19:14
    0
    The harnesses generally look very cool. Here, by the way, it shows very well how to make a fastener. The best clasp I've ever tried.

Decorative pillow “Cloud” | Do it yourself

Cleaning drains with baking soda and vinegar

How to quickly clean battery terminals

How to turn an electric motor armature into an effective tool

«Do it yourself - with your own hands» - a site of interesting homemade products made from scrap materials and items at home. Step-by-step master classes with photos and descriptions, technologies, life hacks - everything a real master or just a craftsman needs for needlework. Crafts of any complexity, a large selection of directions and ideas for creativity.

We recommend reading

Washing machine error codes