And now a little history, and everything in order:
Building a wind turbine has been my long-time dream, but there were many obstacles. He lived in a city apartment, but there was no dacha. Then moving from one city to another, then to a third. I have been living in Svetlovodsk for the last 18 years. There are all the conditions here - a private cottage for two families, 5 acres of vegetable garden and the same amount of garden. To the east and south there is open terrain, to the north and west the terrain is higher than mine. The winds are not kind, i.e. not very strong. Well, I think I'll build a windmill here for the soul.
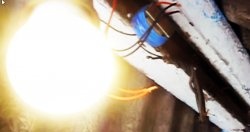
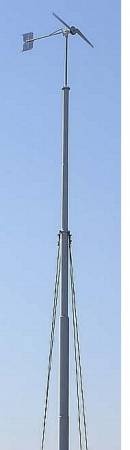
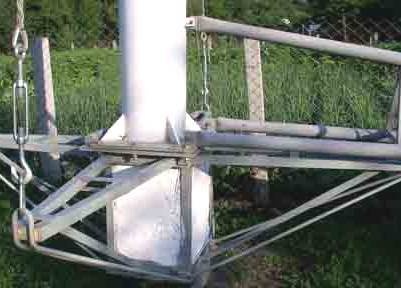
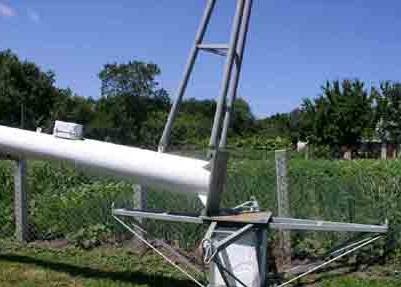
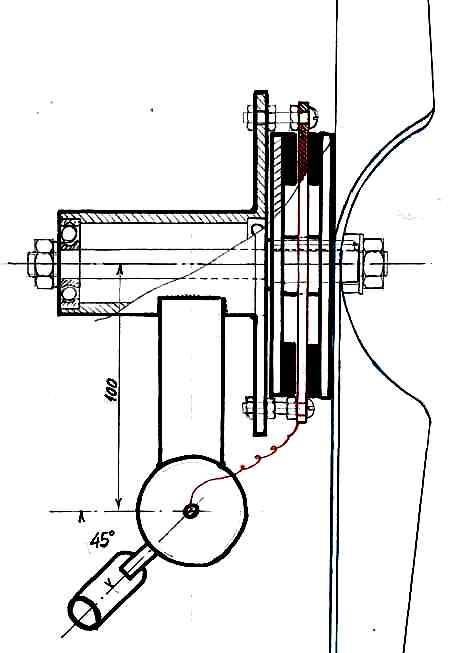
But when I got serious, it turned out to be not so simple. I did not find any suitable literature. For a long time I couldn’t decide on a generator; I didn’t know how to make the blades correctly, what gearbox to use, how to protect it from a hurricane, etc.As they say, it was stewed in its own juice. But I knew that if I really wanted it, everything would work out. I slowly made the mast. Using ferrous metal, I selected suitable pieces of pipe, starting with a diameter of 325 mm and 1.5 m long (to fit in the trunk of my car). In exchange, he sold scrap metal. The result was a mast 12 m long. For the foundation, I brought a defective foundation block from a high-voltage support. I buried it 2 meters into the ground and 1 meter remained above the ground. Then I scalded it with two belts from the corner and welded brackets to them. At the ends of the brackets, I welded “plates” of 16mm iron measuring 50 x 50 cm to the anchor bolts, connected to each other by powerful hinges. I bought soft 10 mm cables and turnbuckles on the market, everything is anodized and does not rust. I welded and buried an anchor under the removable winch. The winch also had to be made homemade, using a ready-made worm gear. In addition, I installed a U-shaped support about 2 m high, on which the mast should rest. Since there was nowhere to rush, the mast was made without haste and therefore, in my opinion, it turned out beautiful and reliable.
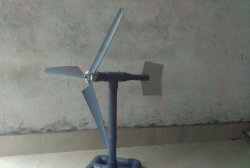
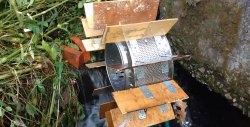
I decided to build a working smaller model that would deliver up to 1 amp per 12-volt battery.
To make a rotor I bought 24 pieces. disk neodymium magnet 20x5 mm. I found a hub from a walk-behind tractor wheel, the turner, according to my drawings, turned two steel disks with a diameter of 105 mm and a thickness of 5 mm, a spacer sleeve with a thickness of 15 mm, and a shaft. I glued magnets, 12 each for each, and filled them halfway with epoxy, alternating their polarity.

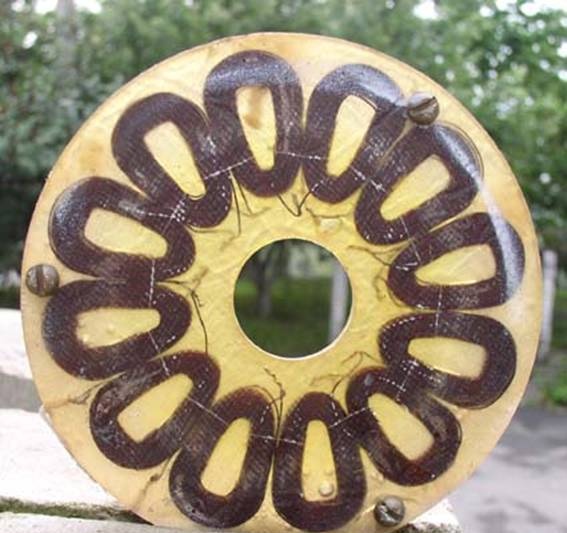
To make the stator, I wound 12 coils of enamel wire with a diameter of 0.5 mm, 60 turns per coil (I took the wire from the demagnetization loop of an old unusable color picture tube, there is enough of it). I soldered the coils in series, end to end, beginning to beginning, etc.It turned out to be one phase (I was afraid that there would be not enough voltage). I cut a shape out of 4 mm plywood and rubbed it with wax.
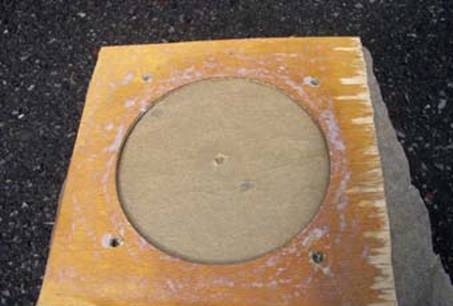
It's a pity that the complete form has not been preserved. I put wax paper on the bottom base (I stole it from my wife in the kitchen, she bakes on it), and placed a mold with a round piece in the center on it. Then I cut out two circles from fiberglass. One laid on wax paper the bottom base of the mold. I laid out the coils soldered together on it. The leads from the stranded insulated wire were laid into shallow grooves cut with a hacksaw. I filled it all with epoxy. I waited about an hour for the air bubbles to all come out and the epoxy to spread evenly throughout the entire mold and saturate the coils, top up where necessary, and cover with a second circle of fiberglass. Place a second sheet of wax paper on top and press it with the top base (a piece of chipboard). The main thing is that both bases are strictly flat. In the morning I disconnected the mold and removed a beautiful transparent stator 4mm thick.
It’s a pity that epoxy is not suitable for a more powerful windmill, because... afraid of high temperatures.
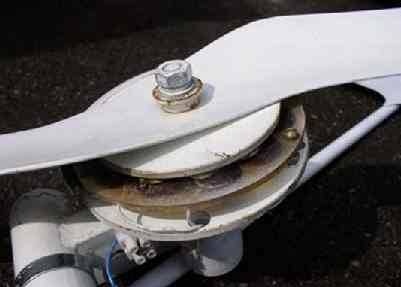
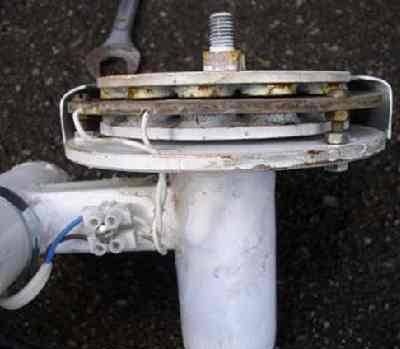
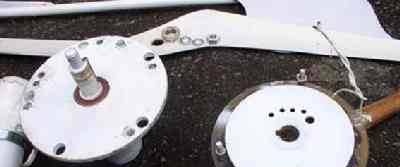
I inserted 2 bearings into the hub, a shaft with a key in them, the first rotor disk with magnets glued and half filled with epoxy, then a spacer sleeve 15mm thick. The thickness of the stator with filled coils is 4mm, the thickness of the magnets is 5mm, a total of 5+4+5=14mm. On the rotor disks, 0.5 mm edges are left on the edges so that the magnets rest against centrifugal force (just in case). Therefore, we will subtract 1mm. 13mm left. There is 1mm left for the gaps. Therefore the spacer is 15mm. Then the stator (a transparent disk with coils), which is attached to the hub with three 5 mm copper bolts, they can be seen in the photo. Then a second rotor disk is installed, which rests on the spacer sleeve. You need to be careful not to get your finger caught under the magnets - they get pinched very painfully.(Opposite magnets on the disks must have different polarities, i.e. attract.)
The gaps between the magnets and the stator are adjusted by copper nuts placed on copper bolts on both sides of the hub.
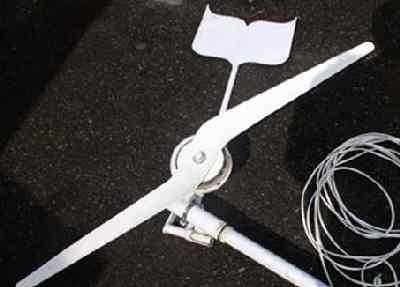
A propeller is put on the remaining protruding part of the shaft with a key, which is pressed to the rotor with a nut through a washer (and, if necessary, a bushing) and a bushing. It is advisable to cover the nut with a fairing (I never made one).
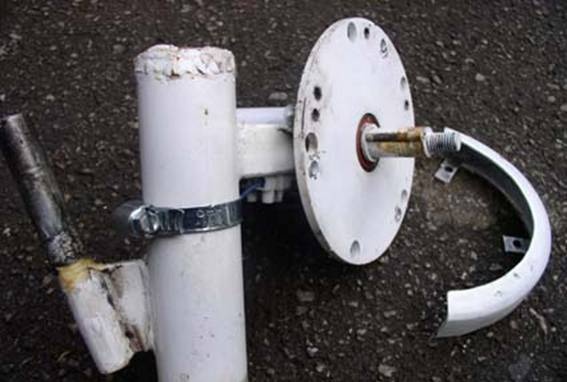
But I made a canopy roof over the rotor and stator by sawing an aluminum pan so as to cover part of the bottom and part of the side wall.

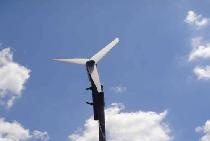
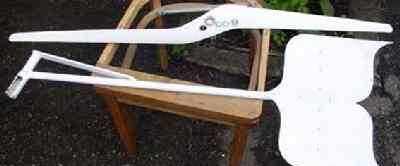
The propeller was made from a meter-long piece of duralumin irrigation pipe with a diameter of 220 mm and a wall thickness of 2.5 mm.
I simply drew a two-bladed propeller on it and cut it out with a jigsaw. (From the same piece I also cut out three blades 1 m long for a windmill on a self-generator, and as you can see, there are still some left). I rounded the leading edge of the blades “by eye” with a radius equal to half the thickness of the duralumin, and sharpened the rear edge with a chamfer of approximately 1 cm at the ends and up to 3 cm towards the center.
In the center of the propeller, I first drilled a hole with a 1mm drill for balancing. You can balance it directly on the drill, placing the drill on the table, or hang it on a thread from the ceiling. You need to balance very carefully. I balanced the rotor discs and the propeller separately. After all, the speed reaches 1500 rpm.
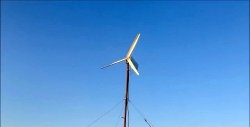
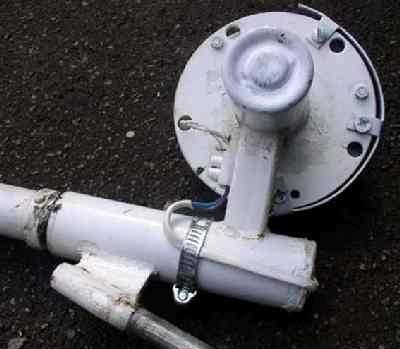
Since there is no magnetic sticking, the propeller rotates happily from the slightest breeze, which you can’t even feel on the ground. During operating wind it develops high speeds, I have a 2A direct-connection ammeter, so it often goes off scale with a 12 volt old car battery. True, at the same time the tail begins to fold and rise upward, i.e.automatic protection against strong wind and excessive speed is activated.
The protection is made on the basis of the inclined axis of rotation of the tail.
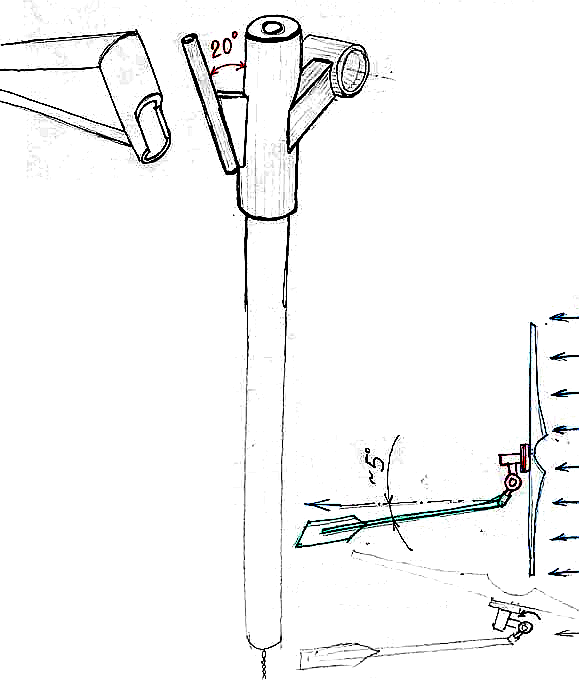
The axis deviation is 18-20 degrees from the vertical.
This windmill worked for me for 3 months. I took it off and disassembled it - the bearings are fine, the stator is also intact. The magnets are a little rusty in places where the paint did not get on. The cable goes directly without a current collector. I have it made, but I changed my mind about installing it. When I dismantled the small windmill, it was not twisted. So I was convinced that it was not needed, just unnecessary trouble. It produced up to 30 watts of power. The noise from the propeller is inaudible with the windows closed. And when open, it’s not very audible; if you’re sleeping soundly, it won’t wake you up, especially against the background of the noise of the wind itself.