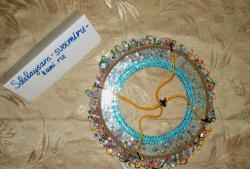
Materials for work:
1. Decorative self-adhesive film - according to the height and width of the door;
2. Bottle – spray – 1 piece;
3. Paint – spray – 1 can;
4. Colorless acrylic varnish – 1 can;
5. Round brush (squirrel), wide brush (bristles), plasticine, varnish, gouache paints, scissors.
Stages of work:
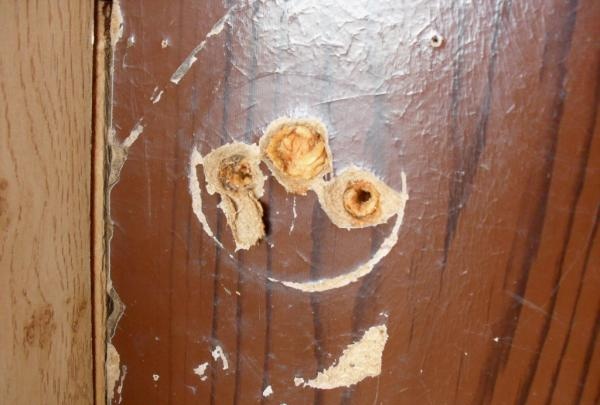
First stage: mask the bulges and depressions.
To apply the paint evenly, remove all bulges from the door (cut with a knife or grind with sandpaper).
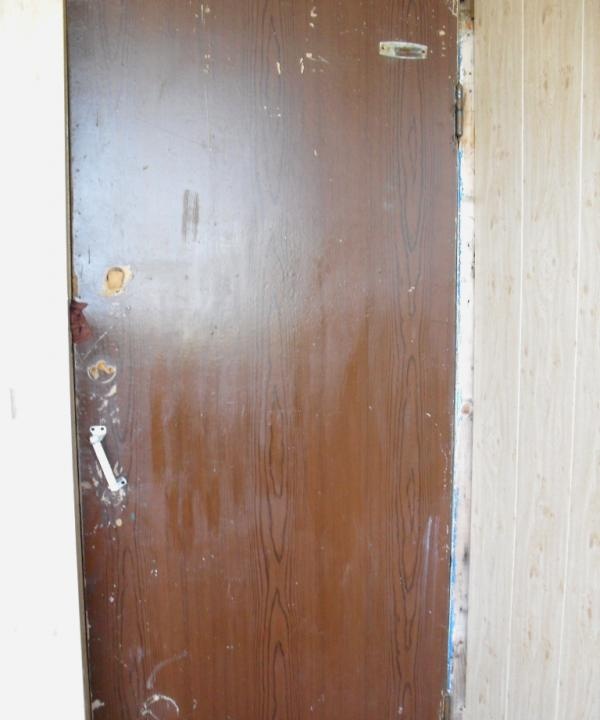
We fill out the dents with plasticine.
Second stage: preparing the base.
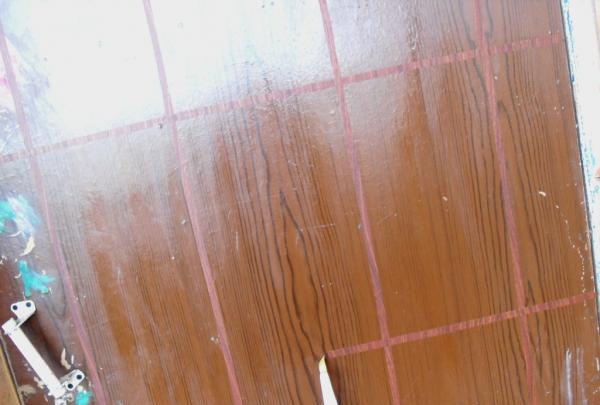
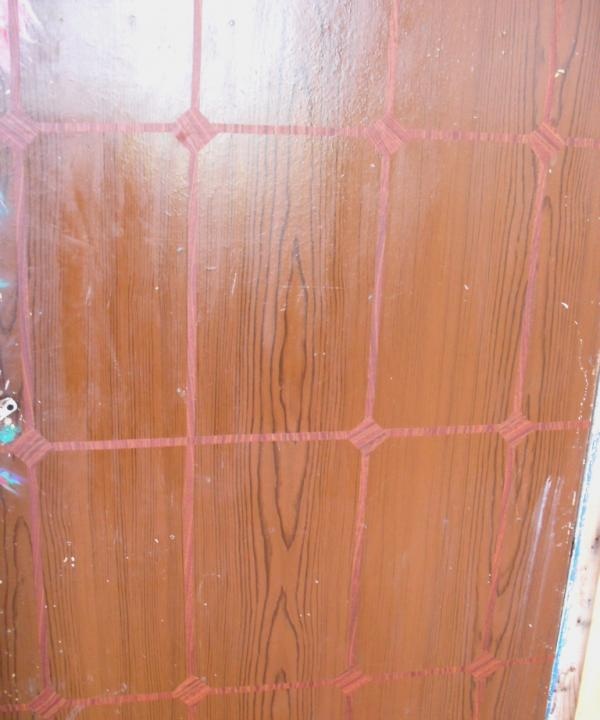
Along the hatching pattern on the back side of the self-adhesive film, we cut narrow strips along the length and width of the door (in the presented version - 4 strips each). According to the number of joints of narrow strips, we cut squares of adhesive tape measuring 4 x 4 (16 pieces).
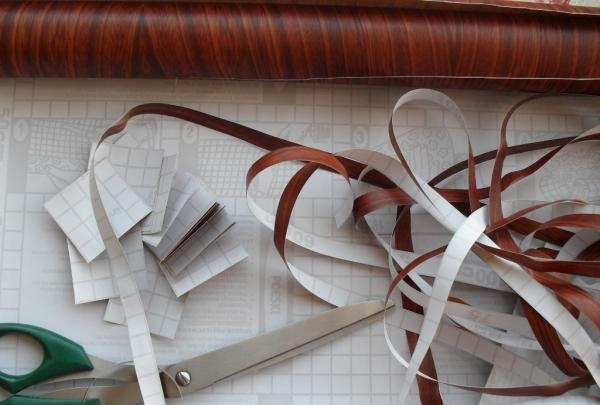
We first glue vertical strips (approximately at an equal distance from each other) onto the previously degreased surface of the door.
Then we glue the horizontal stripes.
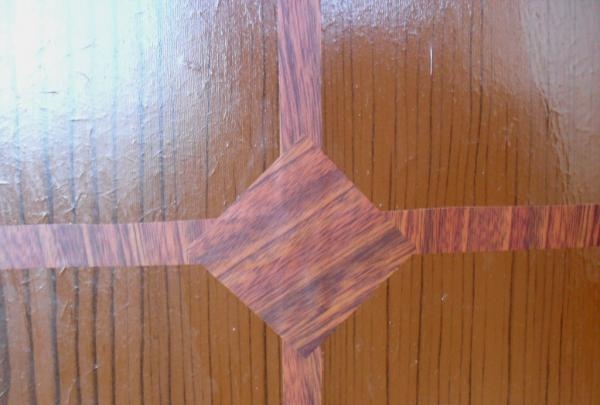
We mask the joints of the strips with squares, placing them at an angle (in the form of a diamond).
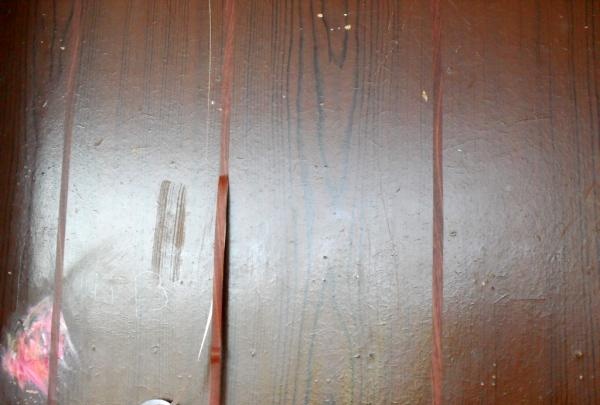
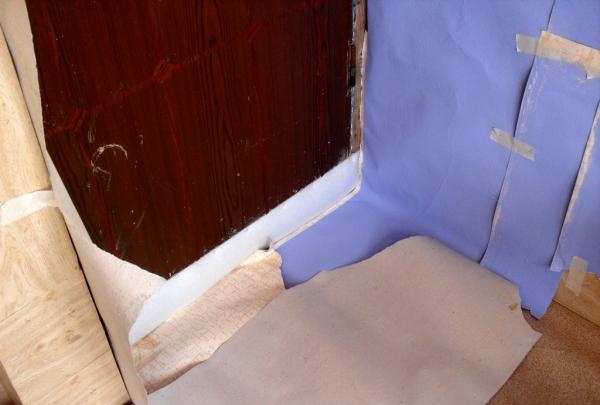
We close the joints between the door and the walls (by securing plastic film or old wallpaper with construction tape).
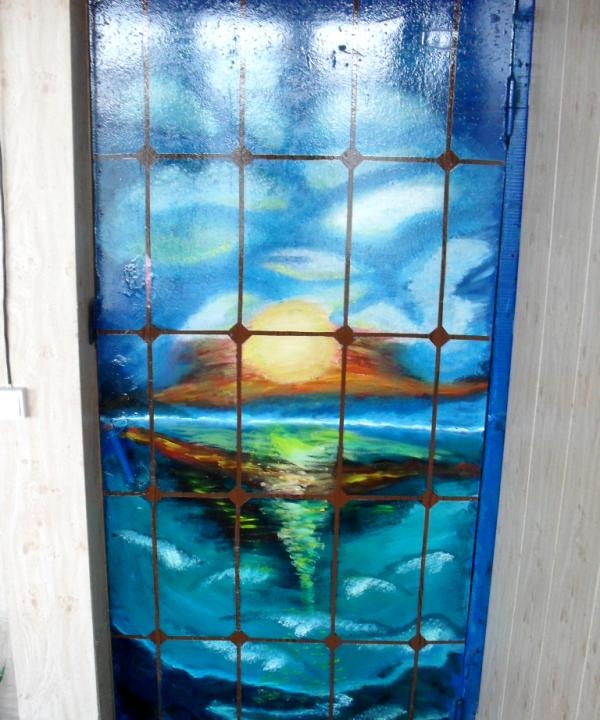
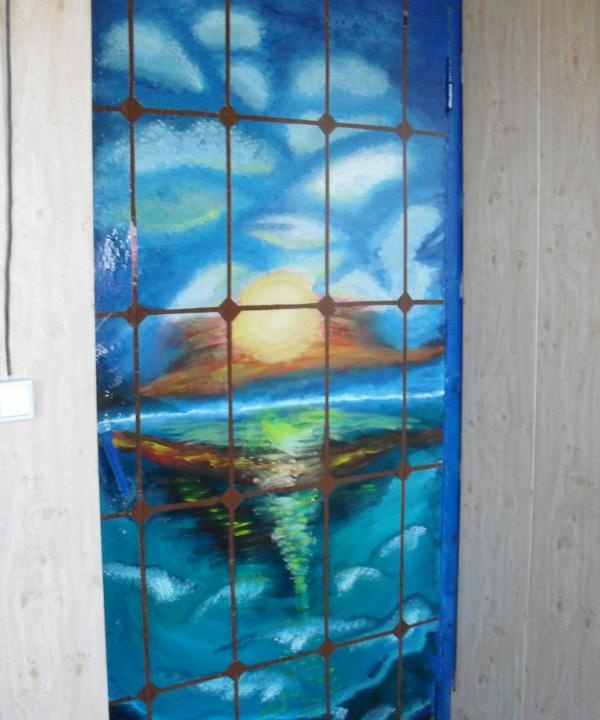
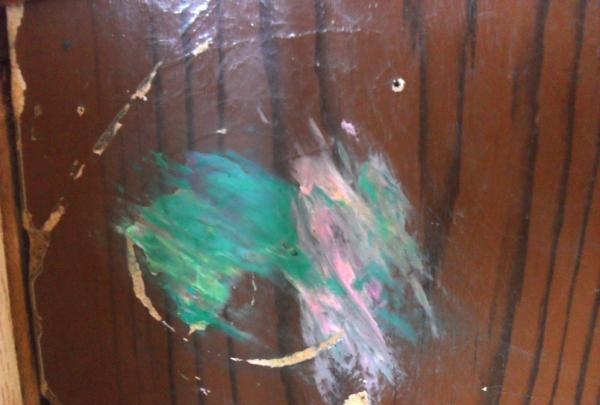
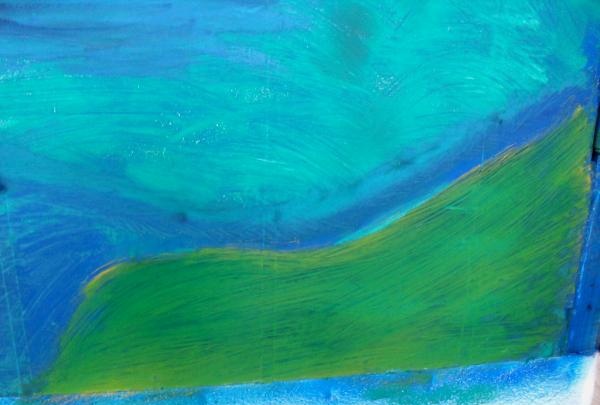
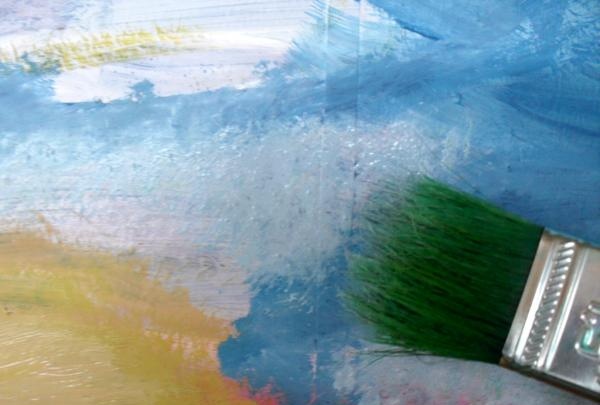
Third stage: apply basic paints to the entire surface.
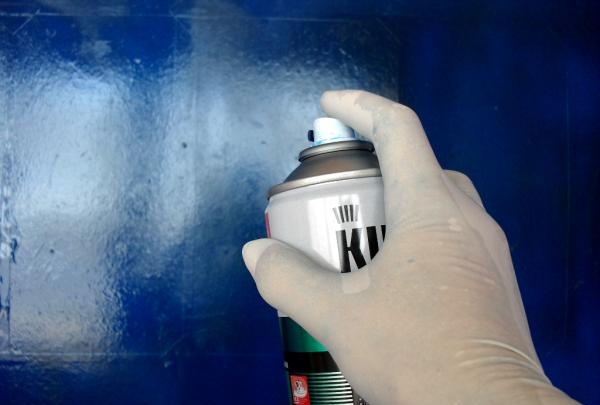
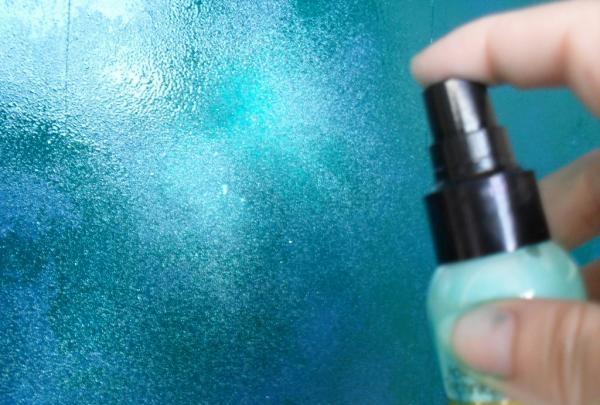
We cover the entire surface of the door with blue paint. For this part of the work it is more convenient to use a spray. Dry according to the instructions on the bottle.
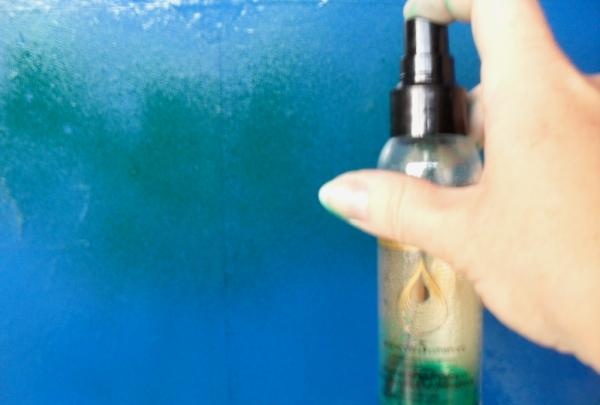
Pour green paint into a small spray bottle (you can dilute the gouache with water or use tinted paint). We visually divide the door into “heavenly” (upper) and “sea” (lower) parts. We make uneven sprays on the bottom of the door.
We spray white paint on the top and bottom of the door.
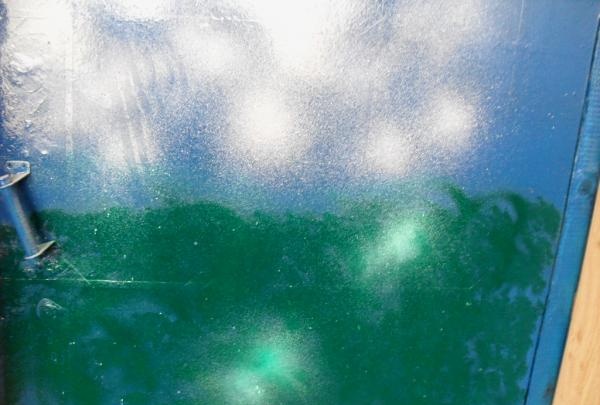
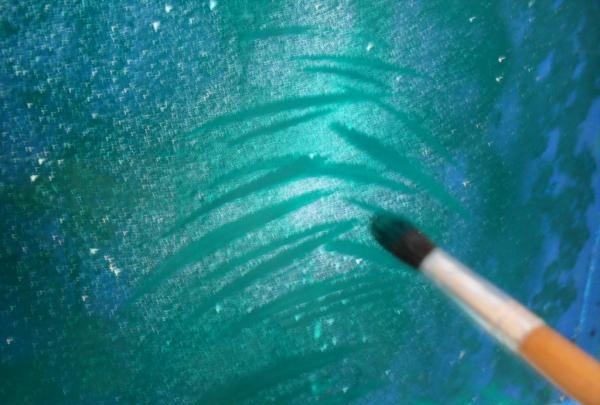
Using a round dry brush, we apply chaotic strokes over the still wet paint.
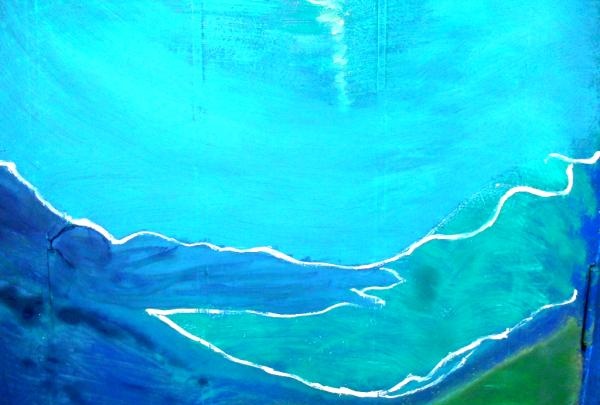
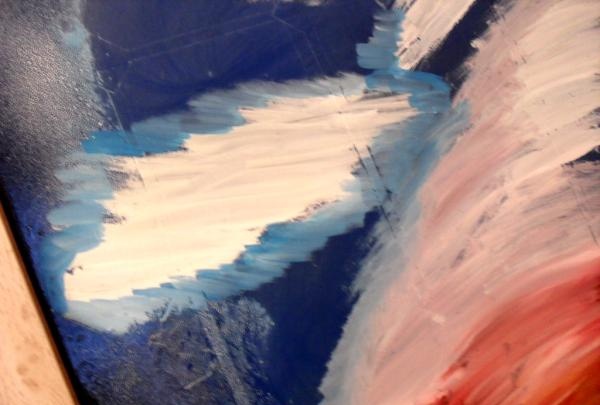
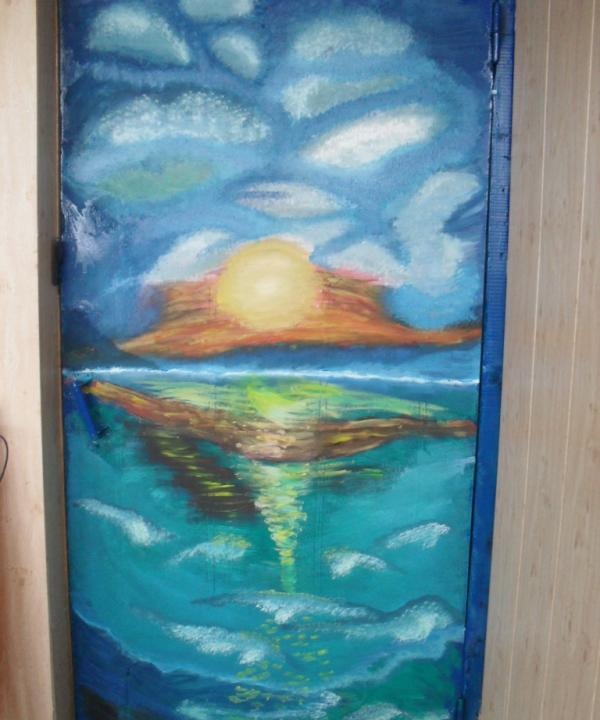
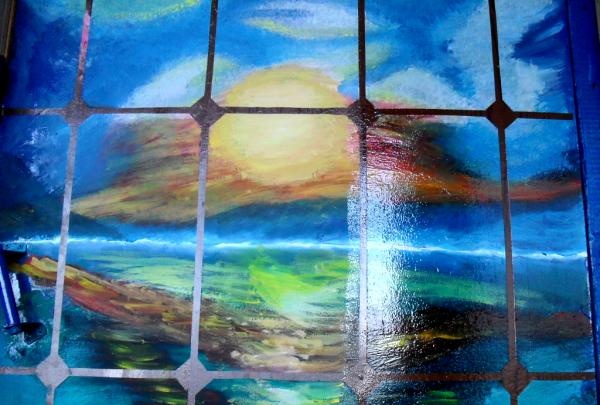
Stage four: draw the horizon.
We draw a clear, narrow white stripe across the door. While the paint is not dry, apply blue strokes to the top and bottom of the strip, blurring the clarity of the color transition. When applying up-down-up strokes, the paints mix, giving a new color and forming a smooth transition.
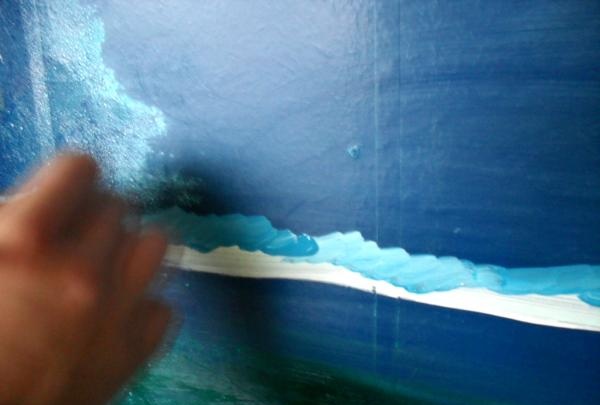
The edges of the blue color are shaded with blue.
Closer to the edges of the door, we expand the width of the blue and blue strokes.
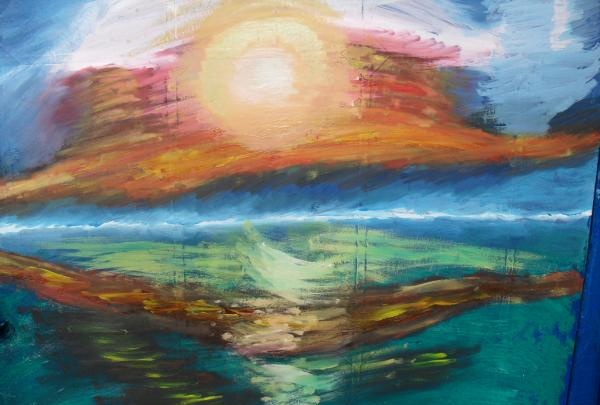
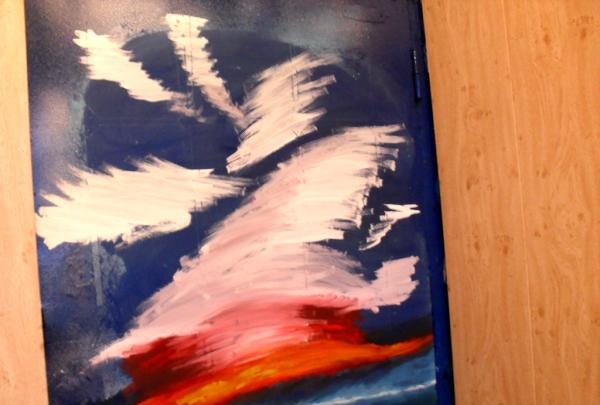
Fifth stage: forming the sunset.
Above the blue horizon we draw an irregular red stripe. You can apply yellow strokes over the “raw” one.
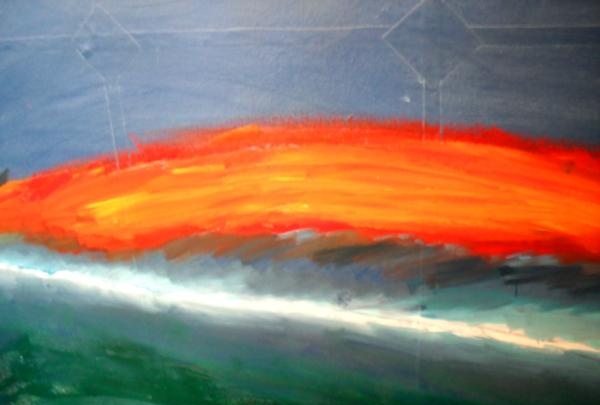
We shade even higher with dark red paint. Add red and white in the center, move the white to the sides.
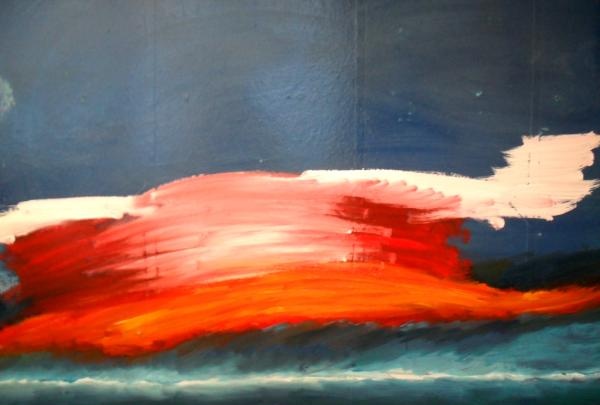
Below the blue horizon, draw a red stripe narrower than the top one, trying to imitate a mirror reflection.
Add yellow strokes to the redness of the horizon. We draw the reflections of the sunset on the sea part of the door (by making several strokes in red and then immediately in yellow).
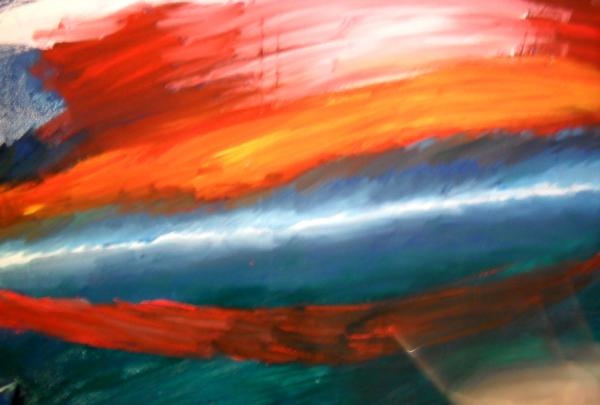
Sixth stage: draw the sun and its glare.
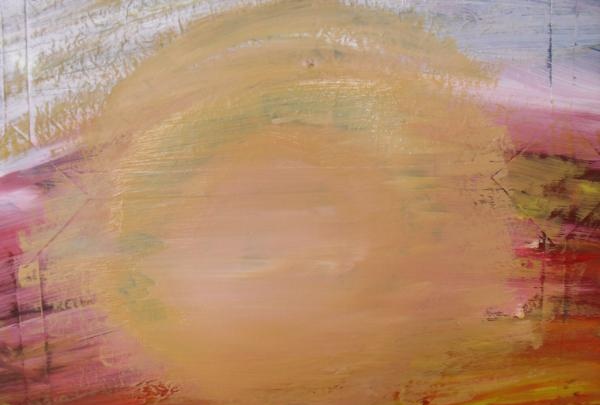
Using ocher color (or a mixture of yellow with a drop of red) we draw a circle on the redness of the horizon.
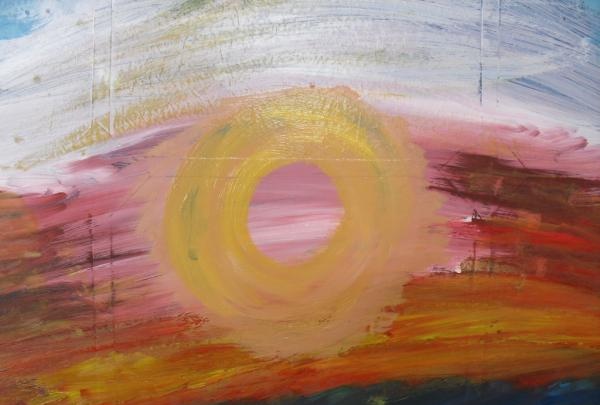
Let the paint dry a little and spread the not-dry paint with transverse strokes towards the center of the circle.
Using yellow we draw the specular highlights of the sun under the horizon line.
Between the yellow highlights of the mirror reflection of the sun we make several white strokes. In the center of the sun we whiten with circular movements of the brush.
We extend the white highlights, gradually narrowing the strokes. Add a little yellow on top of the white.
Once again we whiten the middle of the sun and expand the highlights under the horizon, adding a drop of green to the yellow paint.
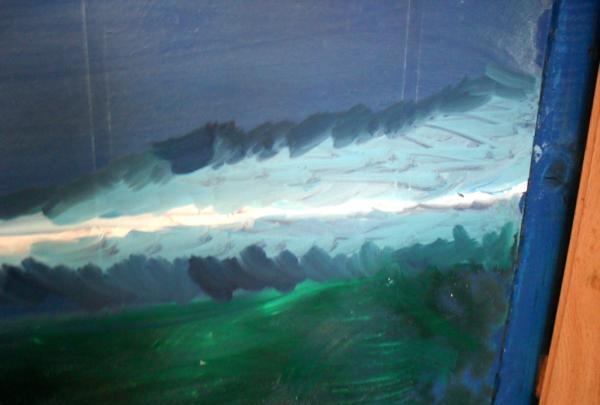
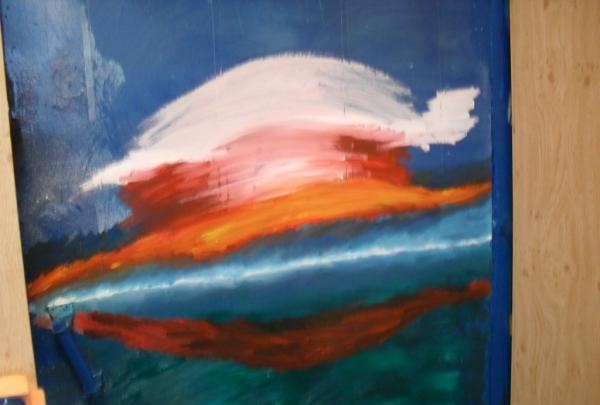
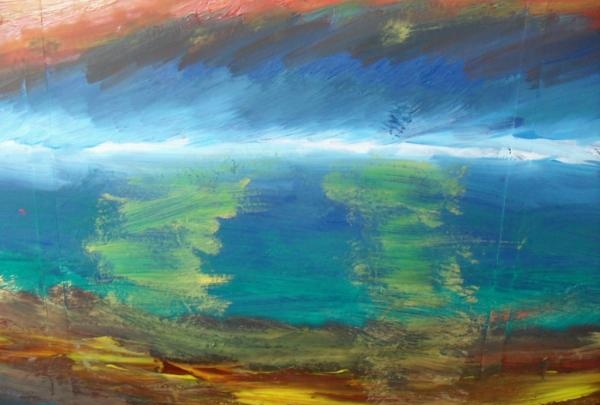
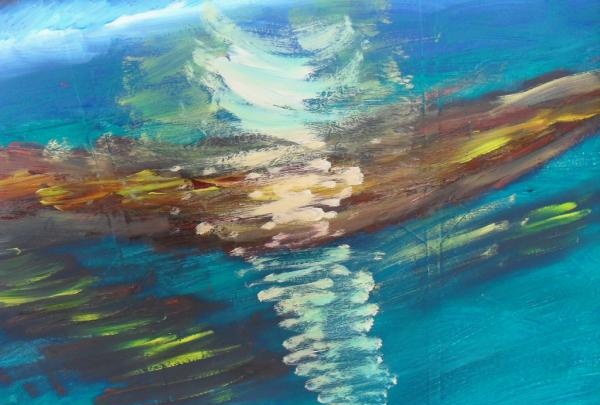
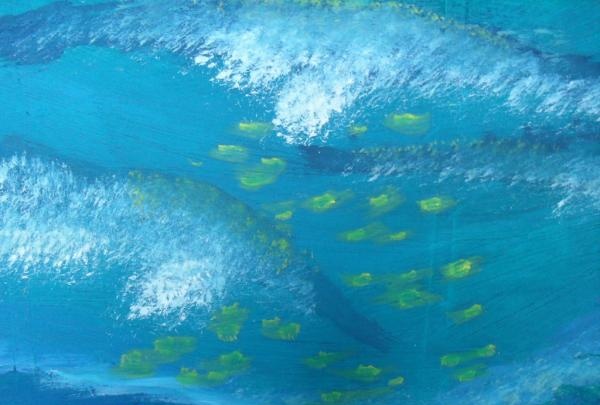
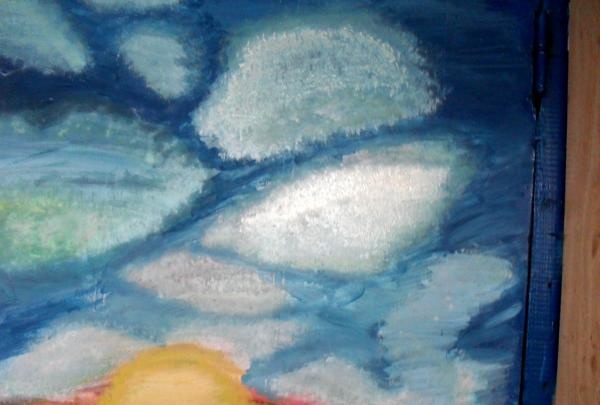
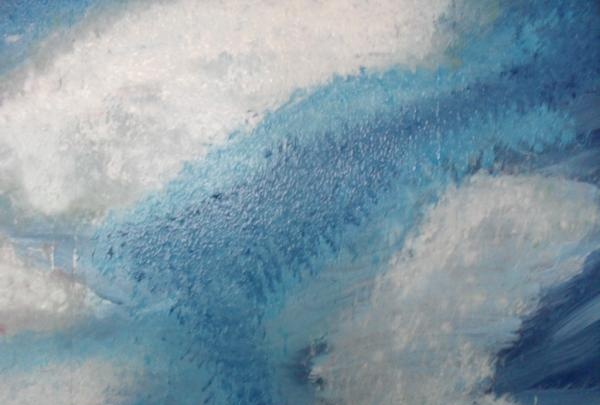
Seventh stage: forming the sea.
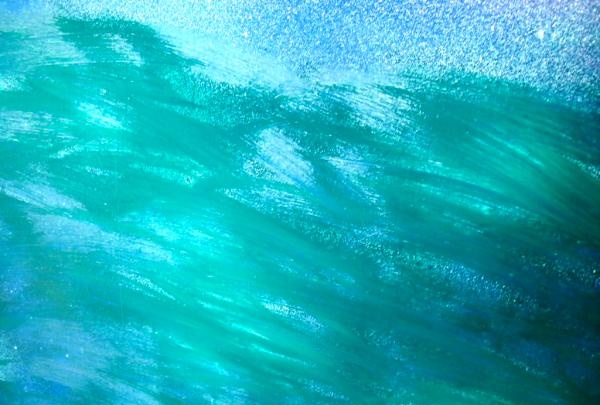
We divide the sea in half in a semicircle, wiping off an irregular strip of blue paint (with a wet cloth until a blue base appears). Paint the upper part of the sea with dove, applying broad strokes of a mixture of white and blue paints.
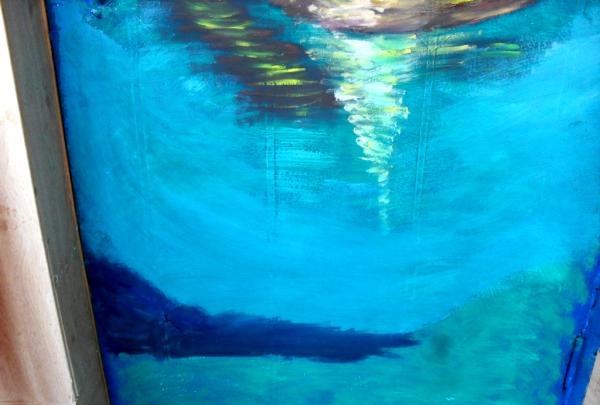
We again divide the lower part of the green sea with blue, wiping off the strip with a wet cloth.
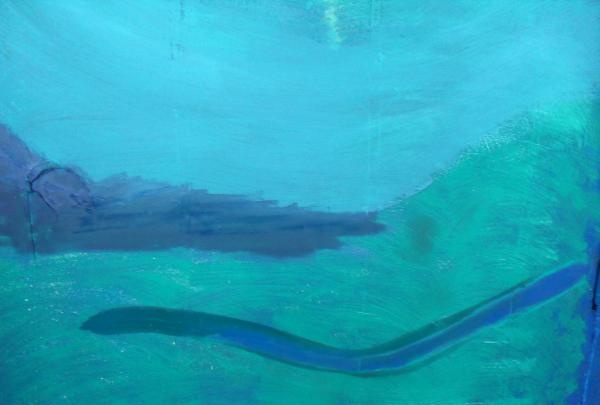
We make the bottom of the green sea even greener (applying long strokes with a mixture of green and yellow paints). This will already be the shore.
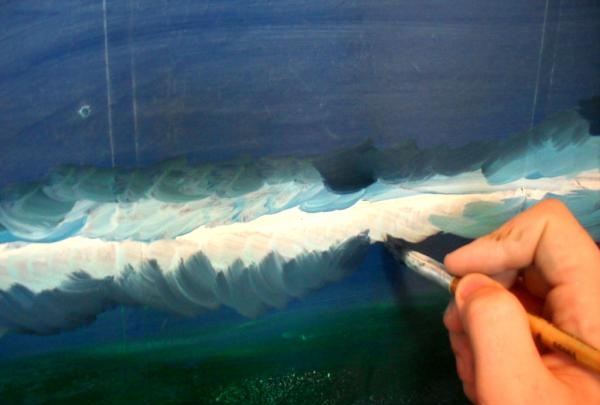
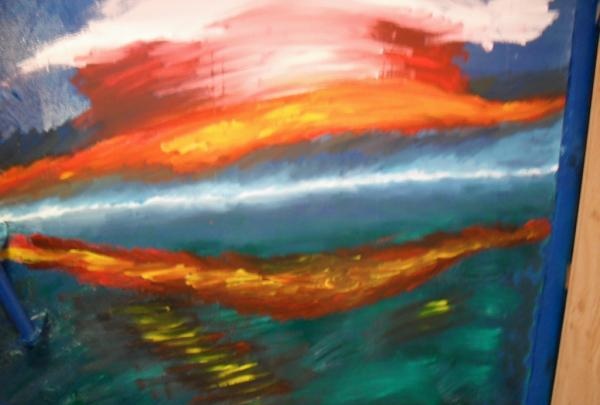
Eighth stage: bringing the waves to life.
Draw the junction of the colored stripes with white.
We smear the still wet paint, erasing the clear boundaries of color.
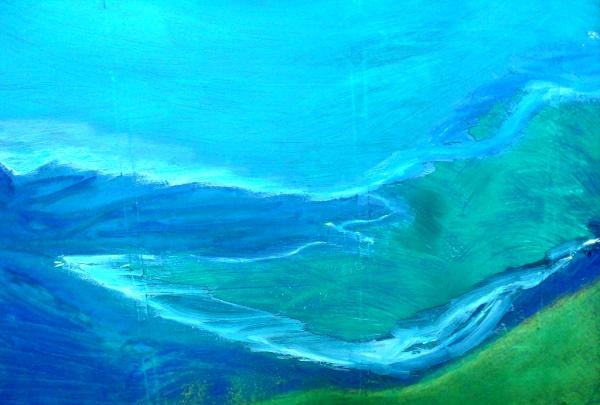
We connect the green of the sea and the white with dark blue strokes.

Apply blue strokes to the lower part of the sea.
We decorate the upper part of the sea with irregular blue-blue stripes.
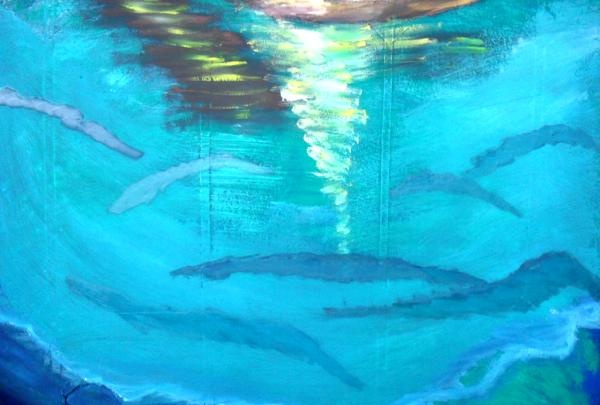
Underneath them we make white “poke marks” with a wide brush.
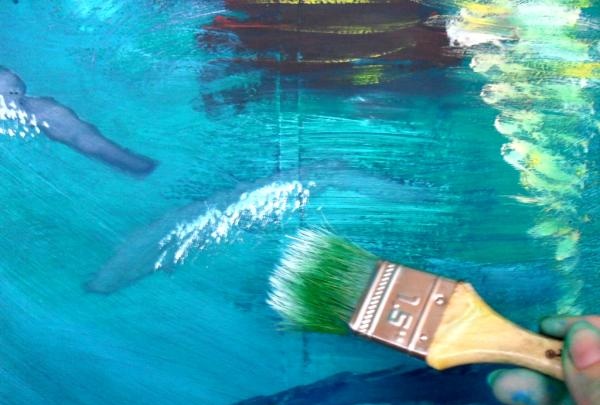
On top of the waves we place several yellow “pokes” with a small brush.
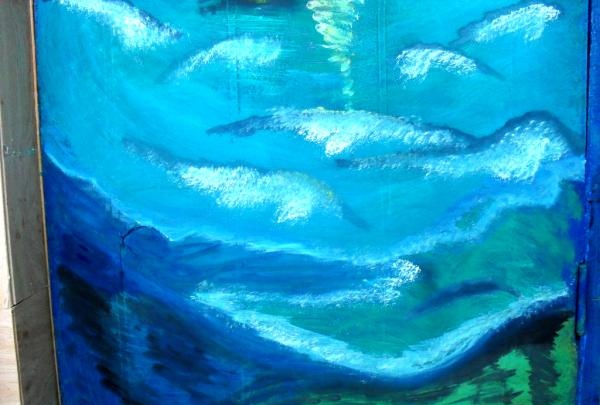
Using yellow “poke” we extend the glare of the sun, gradually expanding it.
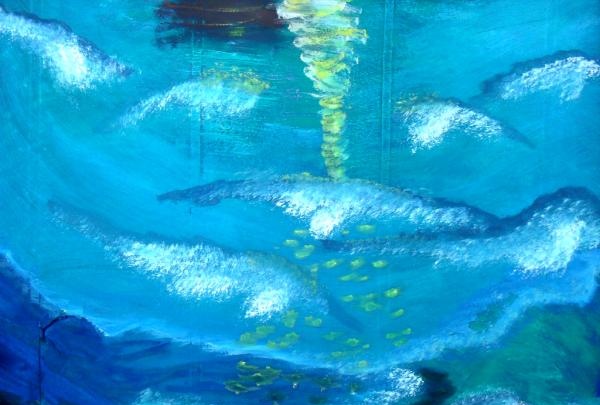
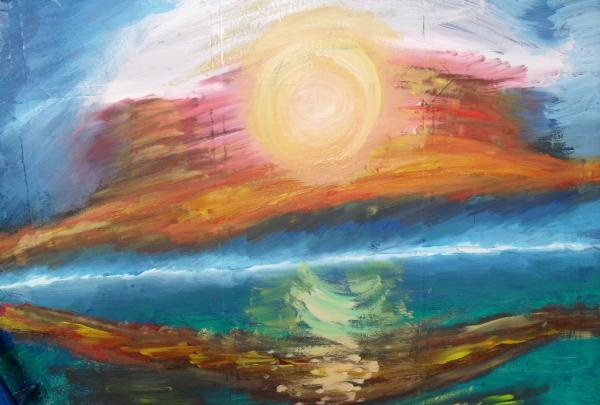
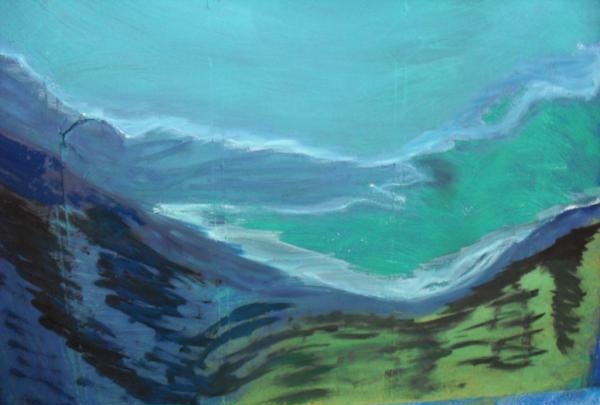
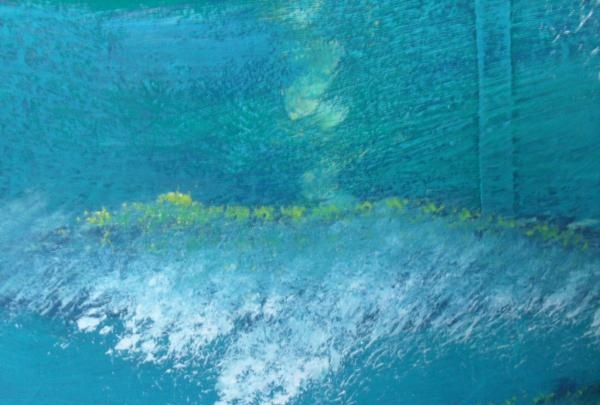
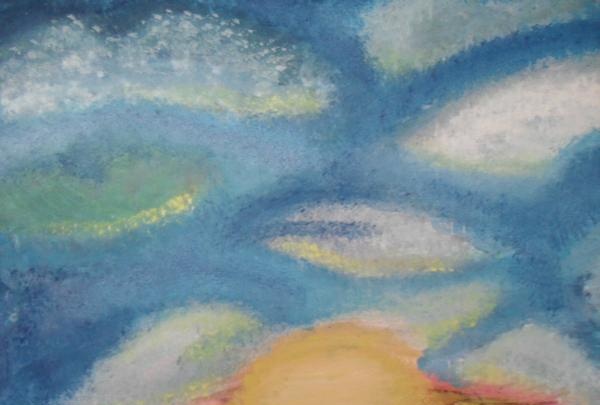
Ninth stage: draw clouds.
At the top of the door we apply random strokes of white.
Without allowing the paint to dry, we shade the edges of the clouds with blue. Blue the gaps between the clouds.
Use a gentle blue color to “poke” the transitions of the clouds into the sky (with a wide brush).
We “poke” the top of the clouds with white. You can add yellow “poke” randomly.
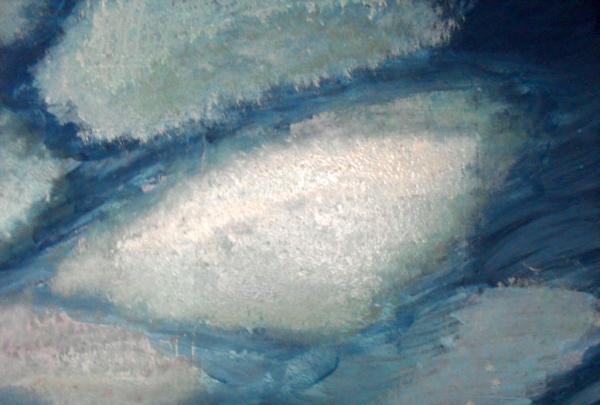
We “poke” the intercloud space with dark blue paint, hiding the excess blue.
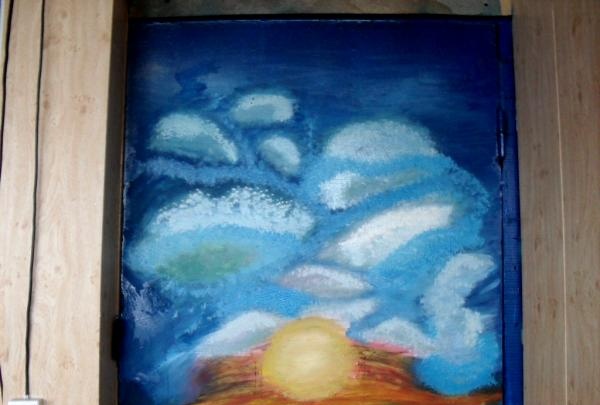
Tenth stage: final.
After thoroughly drying all layers of paint, remove the sticky strips.
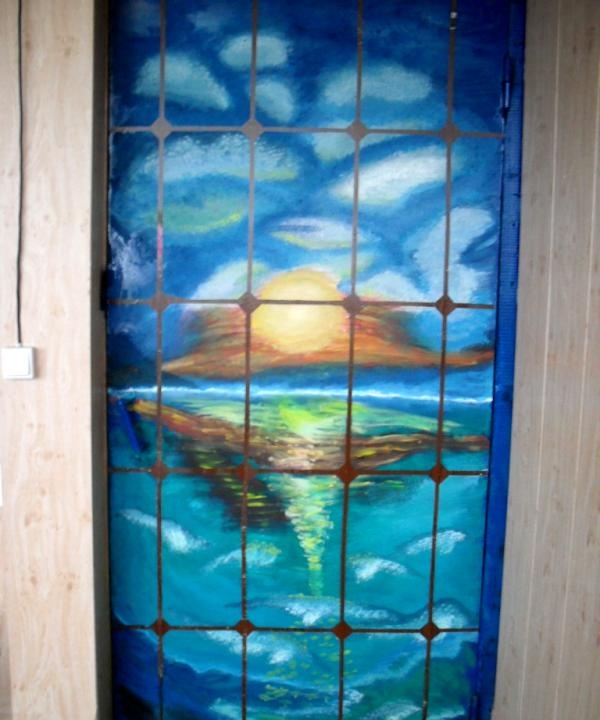
We varnish the entire surface of the door with acrylic varnish.
And we admire our creativity, proudly demonstrating it to invited and uninvited visitors to the family hearth.