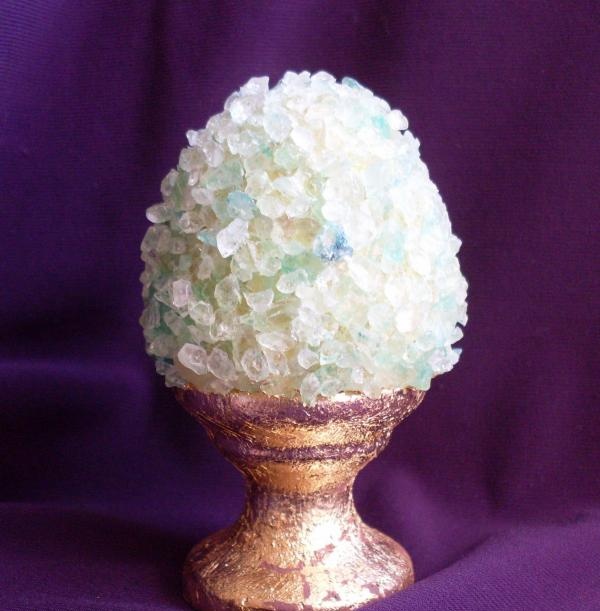
To decorate an Easter egg you will need:
- a wooden Easter egg blank on a stand;
- light lemon acrylic paint with pearlescent effect;
- acrylic paint dark brown;
- brush of medium thickness, 2 pcs.;
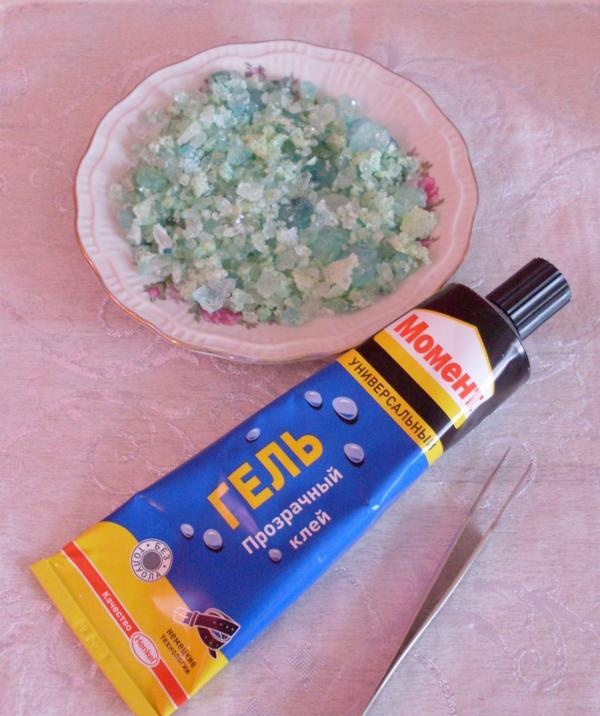
- glue "Moment gel transparent";
- Mordan, a varnish-based adhesive mixture;
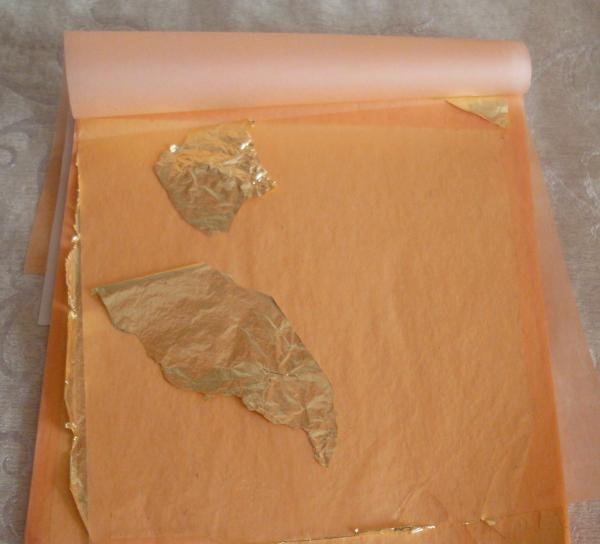
- gold leaf, 1 sheet;
- tweezers with sharp ends;
- solvent;
- coarse sea salt, 6-8 tablespoons.
Stage 1. The wooden Easter egg blank must first be prepared for decoration.
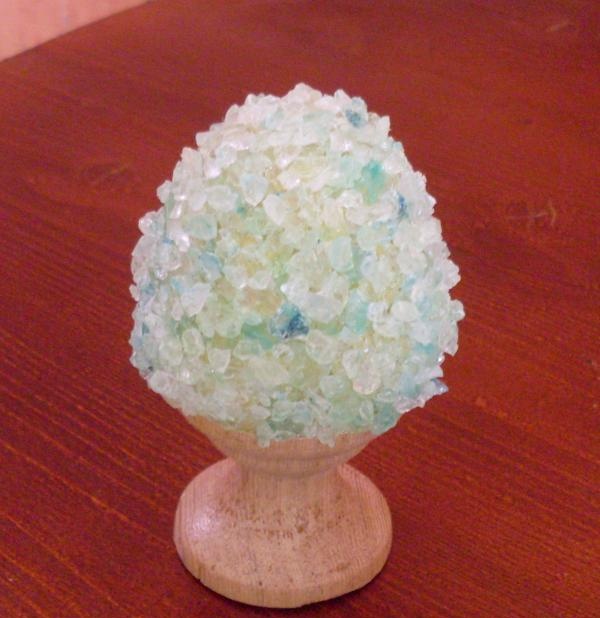
Sea salt glued to the surface of the egg will make the wood show through.Therefore, it is necessary to prime the egg with a color similar to the color of sea salt (if it has color), or choose any delicate color that will look good through transparent salt crystals.
Cover the egg itself with a layer of light lemon paint, and the stand with a layer of dark brown paint. Let the paint air dry thoroughly, or if you want to speed up the process, use a hairdryer.
Stage 2. Sea salt should be soaked for a short time in a bowl of warm water. Then use a tablespoon to scoop out all the salt and place it on a plastic bag on the table to dry. Soaking is necessary so that the salt acquires a bright shine and transparency. Stir the salt periodically while drying.
Stage 3. The prepared salt needs to be glued onto the Easter egg. For convenience, you can use tweezers with sharp ends. First glue the large salt crystals, then the medium and small ones on top of them. Give the glue time to dry thoroughly.
Stage 4. Cover the Easter egg stand primed with brown acrylic with a thin layer of Mordan. Clean the brush with solvent. Mordan takes a long time to dry. To understand whether you need to glue the gold leaf or not, run the edge of your finger along the face-covered surface. If you hear a creaking sound, it means it’s time to glue the gold leaf. If your finger sticks, it’s too early.

Stage 5. When the mordan has dried sufficiently, take the gold leaf and, placing small pieces on the Easter egg stand, use a dry brush to fix it on the surface. It will stick to the muzzle. Since the surface of the stand is curved, in some places the gold leaf will lie poorly and unevenly.Where the gold leaf has not stuck, there will be dark places (surface covered with brown acrylic), imitating aged gold.
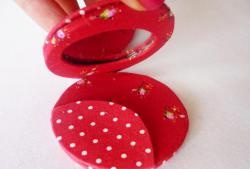
Easter egg is ready!