To make such a composition we take the following materials:
- plastic suede in white, green and yellow.
- scissors.
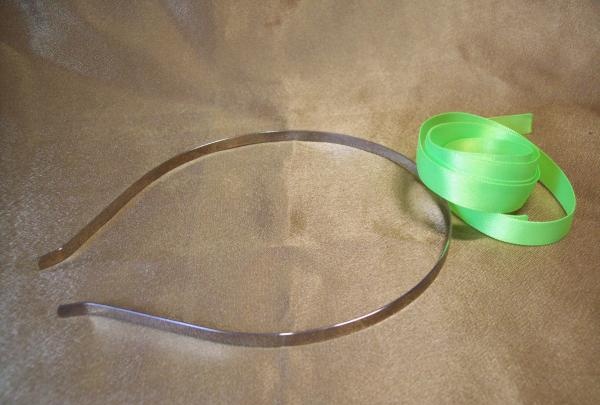
- iron rim.
- satin ribbon 1 cm wide.
- lighter.
- tweezers.
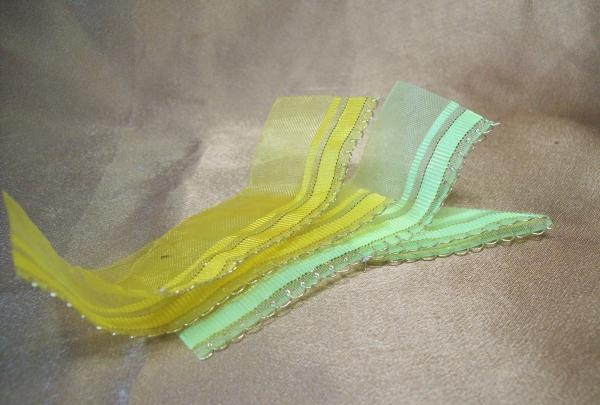
- a little wide nylon tape of two colors.
- thin wire.
- foil.
- glue gun.
- four yellow semi-beads for daisies.
- several green leaves made of fabric.
- needle and thread.
- stamens for flowers.
- some thin green fabric.
- ladybug for decoration.
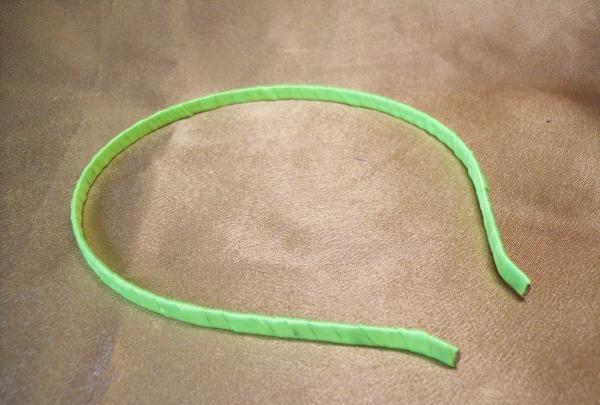
We will work without templates and tools. Let's start by preparing the base for the entire composition. Take an iron rim and a thin green ribbon 1 cm wide.
And carefully wrap the entire rim with this tape, gluing it in several places with a gun. The base is ready. The fabric will allow a strong connection of all small parts.
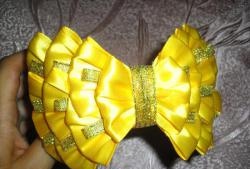
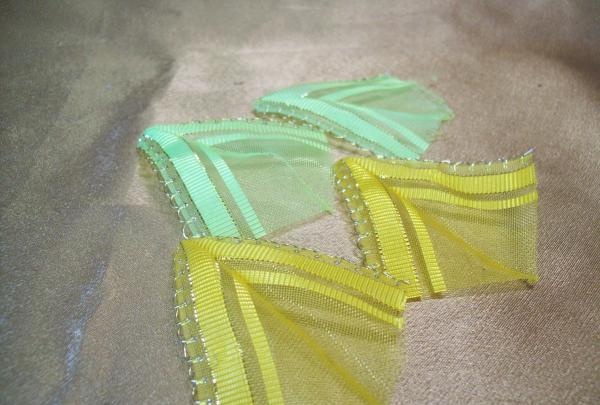
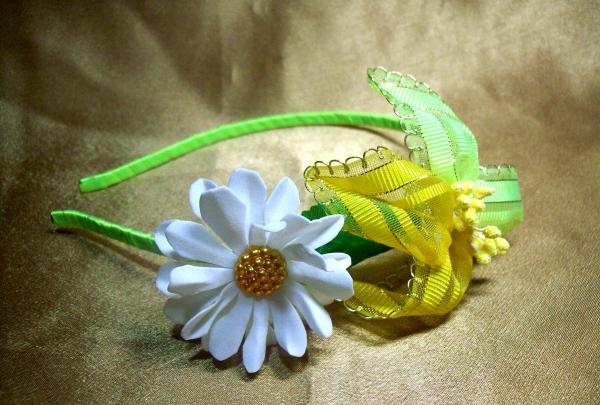
Now we will make a bow. We take a wide ribbon of either one color or two shades. Cut 4 strips of 11 cm each.
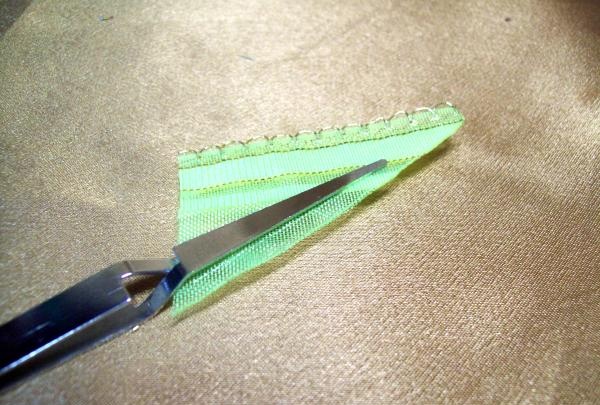
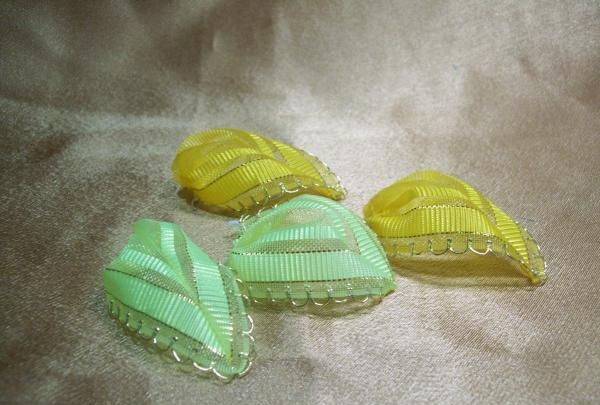
Alternately, fold each piece in half.We should leave the triangle. To do this, use tweezers to press the folded tape from corner to corner. The narrow side of the triangle should be on the fold of the tape. We cut it close to the tweezers and burn this edge with a lighter, the tape is soldered and an even seam is obtained.
And interesting preparations are obtained.
Now, using a needle and thread, we assemble the wide side of the parts with small stitches and tighten them. This results in four voluminous petals.
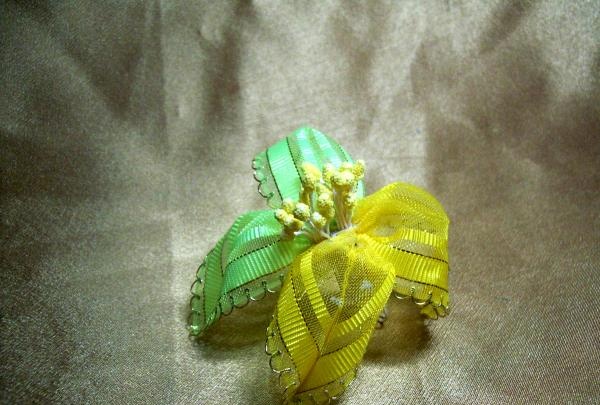
All that remains is to connect them together and secure the flower stamens in the middle of a large bow.
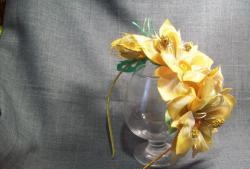
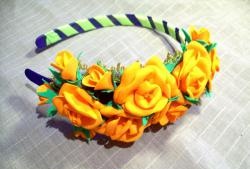
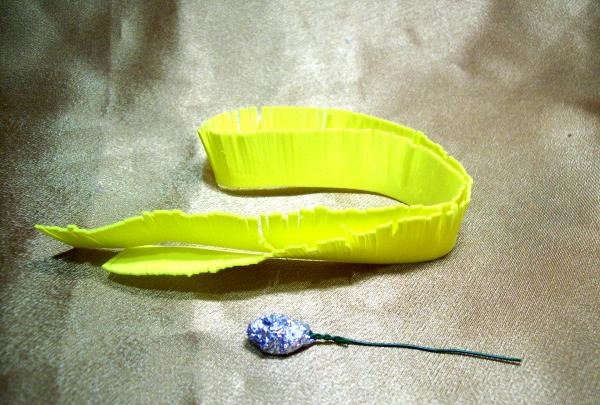
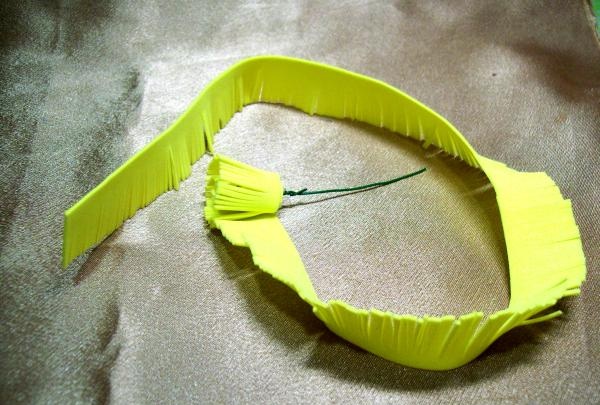
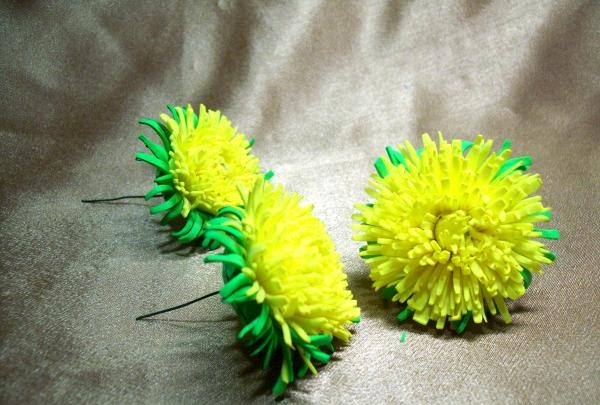
Now let's start making dandelions. From yellow suede we cut 3 strips of 40 cm long and 1.5 cm wide. Then they need to be cut with scissors like fringe. And for the base of the flower you need to attach a little foil to an 8 cm wire and form a 1 cm droplet.
Then you should glue this strip by twisting it onto the base. Make sure that the bottom cut is even and on the same line.
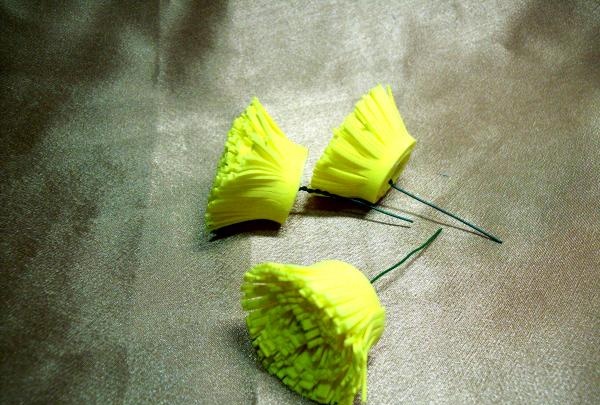
To make a sepal for flowers, cut a 1.5 cm wide strip of green suede. And the length should be measured on the flowers, you may end up with different lengths. But with the green fringe you still need to twist it. Just fold the strip several times, and then lightly roll the thin free edges with your fingers. And then secure it along the edge with a gun.
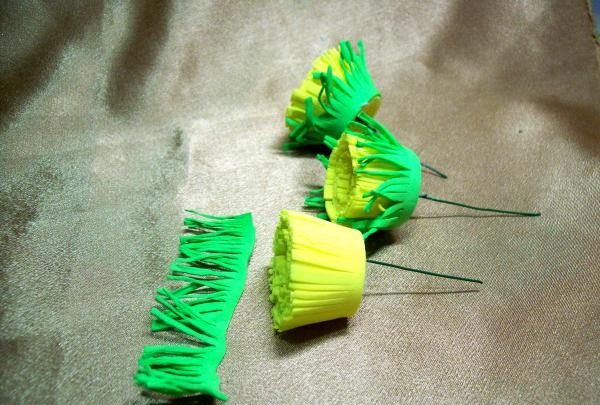
And the bottom of the dandelion should be covered with a green circle.
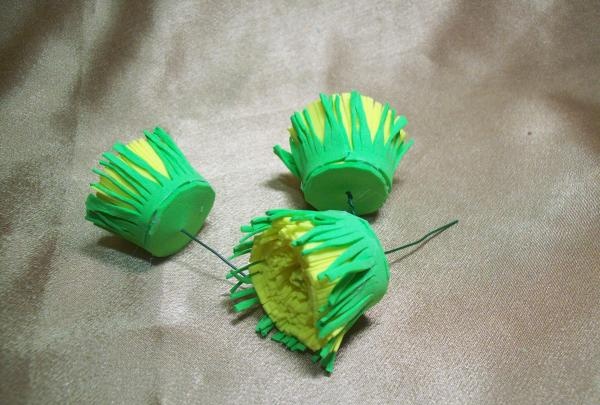
And then, using the heat from a lighter, you need to open first the sepals, and then the flower itself. Gently warm the dandelion petals and straighten them with your fingers and open them.
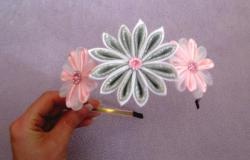
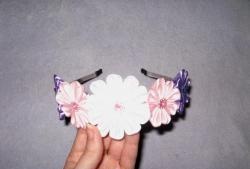
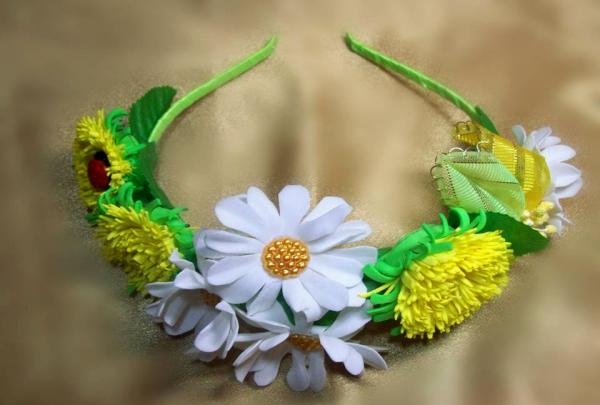
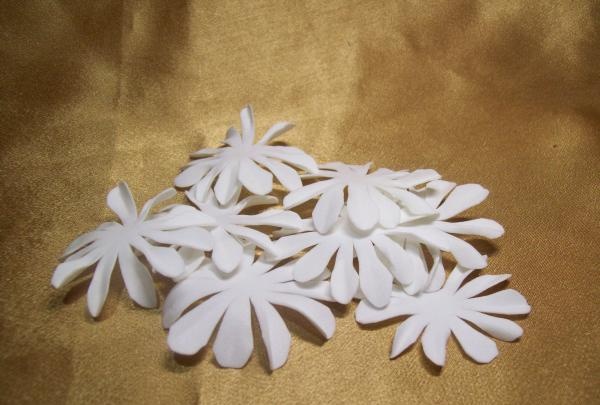
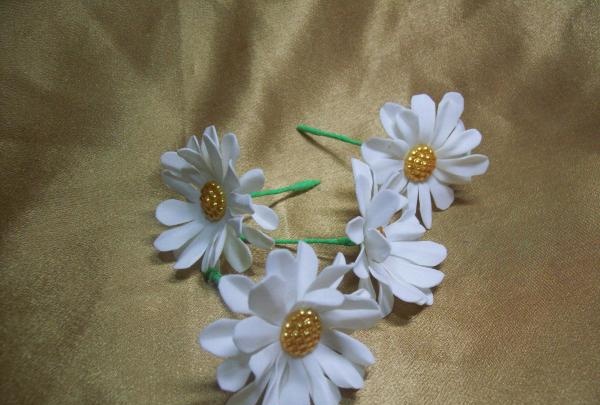
But there are also daisies on our headband. We will make 4 flowers. Each daisy has two rows of petals. Therefore, we cut out 8 circles with a diameter of 5 cm from white foamiran. Then we divide each circle into 12 petals. It’s easier to first cut into 6 slices, and then each one in half.The 1 cm center of the flower circle should not be cut.
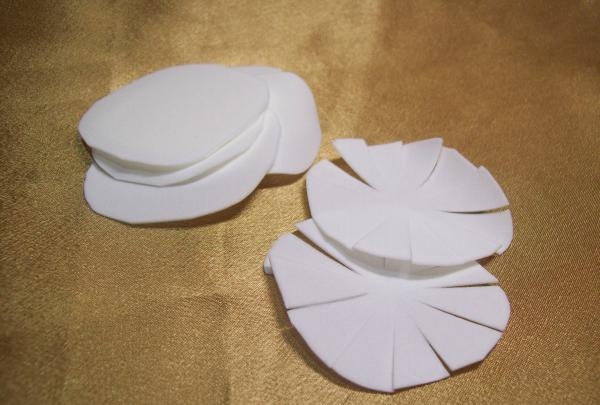
Next, you should cut off the upper corners of each petal and give it the correct shape.
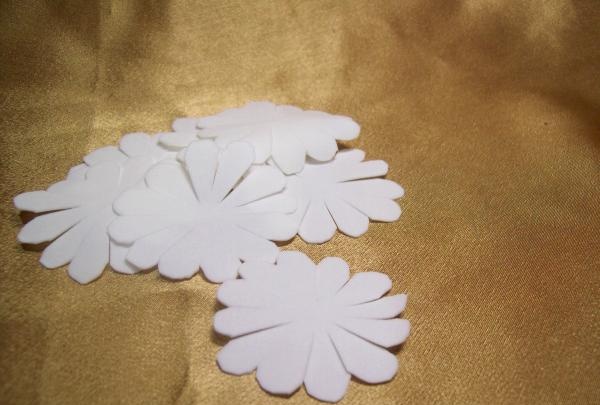
And to give a new shape we will use a lighter again. Separately, warm each petal from below, and fold it in half lengthwise with your fingers. We process all flower circles.
All that remains is to collect the flowers. For one, we take a wire 8 cm long. On one side we make a rounding of several turns. Take a yellow semi-bead, cut out a small green circle and a strip of green fabric.
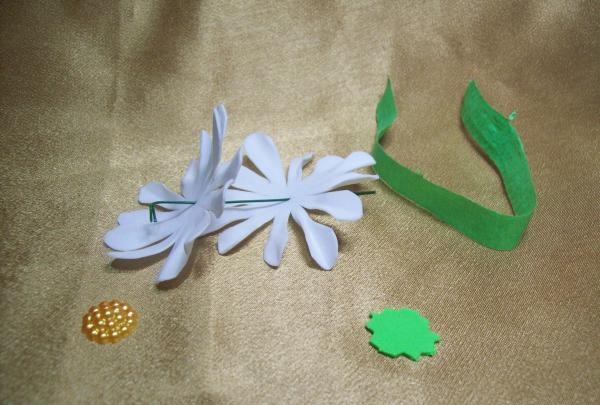
The assembly itself is simple. We pierce two petal circles with wire and glue them in a checkerboard pattern. In the middle of the flower, we attach a yellow blank to a twisted wire. The sepal will be a small circle and we will cover the wire itself with a strip of fabric.
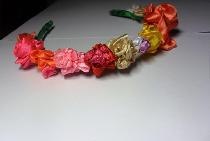
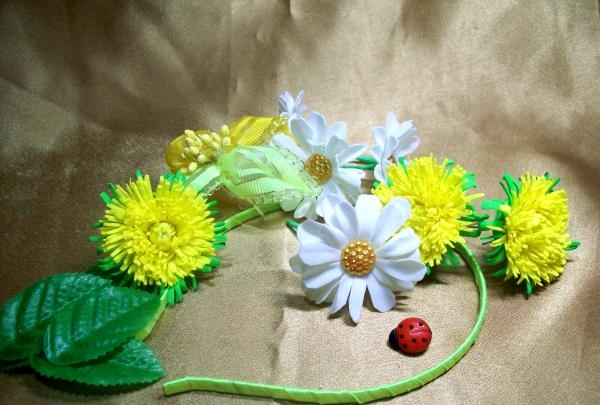
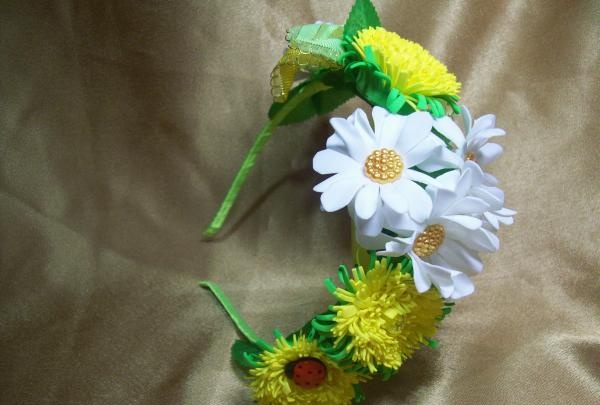
We have all the flowers ready and now we move on to assembling them onto the headband itself. We have 3 dandelions, 4 daisies, a ribbon ornament, a ladybug for extras, some fabric leaves.
Let's start gluing the ribbon decoration with a gun. Place it below the middle. We divide the tails from the stamens and place them along the rim in different directions and glue them tightly. And we attach the tapes themselves in two places.

Further down, where there is less distance to the edge, we attach the chamomile. We place the stem along the rim and cover it with a green leaf.
Now on the other side of the ribbons we attach the dandelion. We wrap the rim itself with wire from it. And immediately next to it, going down, we glue three daisies. We cover the fastening points with the rim with tape and sheet.
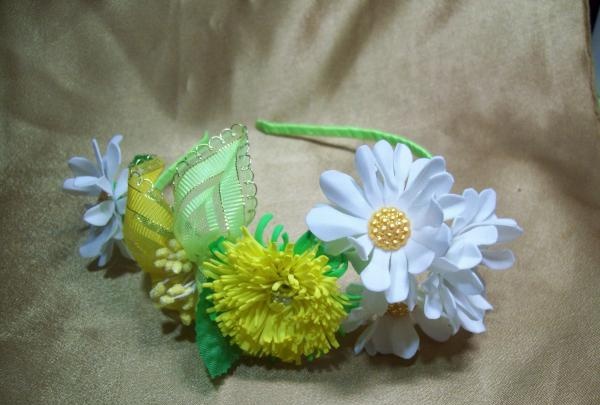
After the bouquet of daisies, we attach two more dandelions, adding leaves.
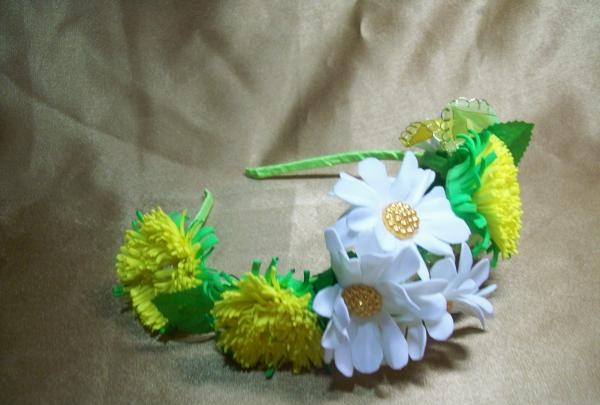
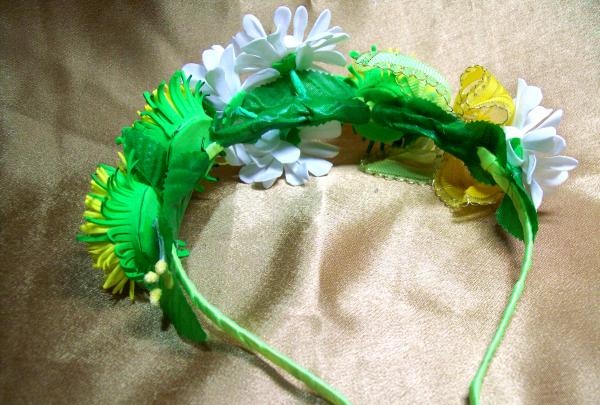
Now you should pay attention to the wrong side of the rim. And where the gluing points are visible, you need to secure the green leaves.Everything must be neat.
Along the edges of the flower row we glue a leaf, maybe with stamens. And now all that remains is to glue a ladybug onto one dandelion. The entire headband is assembled, the decoration is ready.
Good luck to all!