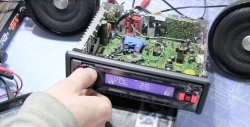
Greetings, dear friends. Finally, I got around to recording a lesson on working with the voice module. I see you liked my homemade product with voice control and many have already begun to wonder when a practical lesson on working with the voice control module will be released.
About the advantages of this recognition module:
- The module is autonomous and can operate without an external control controller, which is very important for radio amateurs not familiar with programming.
- Along with other models, this module compares favorably with its functionality, price and relative ease of management and connection.
- Has high recognition ability.
- No smartphone required.
And so let's go! This video will be aimed primarily at beginners, those who are not familiar with programming and interfaces, in general, for ordinary radio amateurs. In the video I will show everything from “A” to “Z”: we’ll start with installing programs and connecting and end with the concrete result of the module’s autonomous operation.
Let’s start anyway with theoretical knowledge in order to understand how this miracle of engineering actually works. First of all, you need to know some characteristics of this voice recognition module:
Current consumption: no more than 40 mA, the current is not critical, so just take it into account. The supply voltage is 5 V, we will power the computer’s USB port module during programming, and then during operation you will decide where to power it from. Voice command recognition accuracy is 99% under ideal conditions. The voice recognition module version V3.1 is capable of remembering 80 voice commands! Which, in my opinion, is quite enough for any purpose. But again this is a “BUT”. But the module can only recognize any seven commands per unit of time, and which commands are up to you to choose.

That is, you can write all 80 commands into the database, but select only seven for recognition, any seven out of eighty. It’s like with a computer: you can write 80 commands on the hard drive, but only work with 7 commands in the RAM. If it’s difficult for you to understand now, then a little later in practice, I think it will become clear to you what we’re talking about. The length of the voice command is 1.5 seconds (1500ms) maximum value. The module board can be controlled via the UART interface, but information can be retrieved either from the UART or from the GPIO ports located on the board. As a matter of fact, this is what we will do: we will remove the signal from the port output.
Let's move on to the practical part.
What do we need for work?
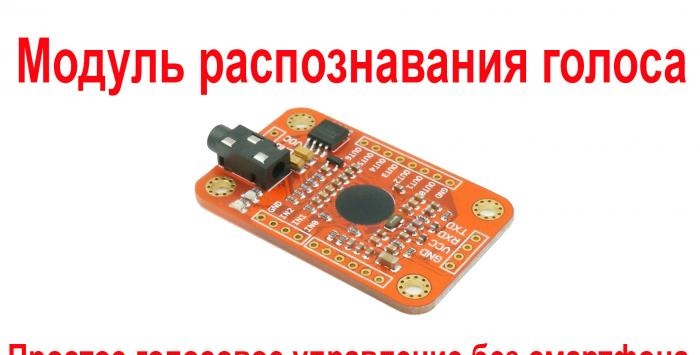
- The voice recognition module itself is version V3 (V3.1). The version is not so important - the principle of operation is the same for all. The module comes with a microphone.
- Module manual, that is, date sheet.
- Terminal program.
- USB-UART interface converter.
All links to purchase and download software are under the video, at the end of the article.
That's all. As Gagarin said, “Let’s go.”
Download the manual and terminal. We install the terminal.We connect the module to the interface converter.
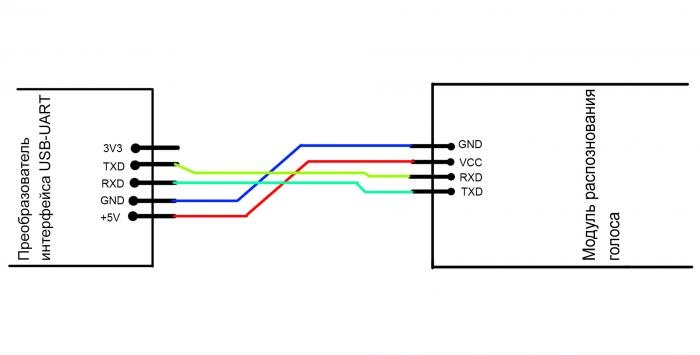
Be very careful when connecting. It's okay, if you confuse TXD and RXD, nothing bad will happen. But if you confuse the power plus with the common wire, it will be a disaster! As happened to me, the module and computer port immediately burned out! Be very careful and don't repeat my mistakes. Don’t fuss, don’t rush, check the circuit several times before turning it on, and only after that connect to USB.
After connecting to USB, your system will begin searching for drivers for the converter; in 90% of cases, the system itself finds the driver and installs it, but if for some reason this does not happen, then you will need to find the driver on the network yourself and install it. To do this, write “CP2102 driver download” or something like that in the search bar, the module is common, there are plenty of driver options.
Next, after successfully installing the equipment, go to the device manager and look at the ports. We are interested in the assigned number of our converter. When we find out the port number, we launch the terminal. Let's go to the settings and set the values as in my picture.
We write the command in the terminal window - “AA 02 00 0A” (from the datasheet | AA | 02 | 00 | 0A |). All teams always use capital letters and Latin letters.
The sending field should give you a response like: “AA 08 00 STA BR IOM IOPW AL GRP 0A” (or from the datasheet | AA | 08 | 00 | STA | BR | IOM | IOPW | AL | GRP | 0A |). If the answer comes, then everything is fine, half the job is done. If not, we play with the settings of the transfer speed settings in the terminal, it’s just possible that the module is configured for a different speed.
I won’t dwell on what this module response means, you can look it up yourself in the instructions.And the command is a request for the installed settings.

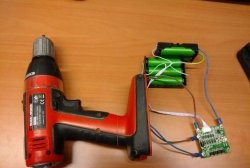
Now you need to connect the load to the module. As a load I will use LEDs with resistors. Well, in the future, when using these LEDs will be replaced with load control relays with transistor switches, I think this is understandable.
Let me explain the command itself “AA 02 00 0A" is a packet consisting of 4 bytes, bytes are paired characters in hexadecimal - AA,02,00,0A. In all commands the packet will begin with the byte A.A. and end with a byte 0A (Zero and A) is a prerequisite. The module's responses will also begin and end with these characters.
«AA 02 00 0A" - the second byte of this command means the number of bytes between the start and end bytes, in short except A.A. And 0A. And we count and write everything between them into the second byte. As we see in this example, what is between A.A. And 0A cost two bytes - 02 00, therefore – 02, that is, the number counts itself. Another example, "AA 03 20 01 0A"that is, between A.A. And 0A cost three bytes - «03 20 01", therefore, the second byte is 03. I think you will understand.
Team "12" - setting up module ports.
On the module board there are ports from which we will remove the signal; before doing this, we need to configure these ports. You can configure ports with the command
"AA 03 12 01 0A" - the third byte is the command, and the fourth is the command value. The fourth byte can take the following values and set the following options: if “00” is pulse mode, that is, when a voice command is recognized, a short pulse is sent to the port we need. If “01” is the inversion mode, that is, when a voice command is recognized, the port we need will change its state to the opposite, if it was 0, it will become 1 and vice versa.If “02” is the mode in which the port goes to zero. If “03” is the mode in which the port goes to one.
Team "20" - setting up module ports.
"AA 03 20 01 0A" - the third byte is the number of the command that we will write. An example of writing two commands 1 and 2: "AA 04 20 01 02 0A." An example of writing two commands 1, 2, 3: "AA 05 20 01 02 03 0A."
Team "30" - loading a record into the module’s “recognizer”.
"AA 03 30 01 0A" - the third byte is a command for loading into the memory of record recognizer 01. If you need to write two commands - "AA 04 30 01 02 0A", if you need to write down all seven commands - "AA 09 30 01 02 03 04 05 06 07 0A."
Team "15" - Autoloading of voice commands into the recognizer when the power is turned on - offline operation without an external controller.
"AA 03 15 07 01 02 03 0A" - the third byte is a command, the fourth byte is a command label, that is, a kind of identifier, and is equal to 01 for loading one command, 03 for loading two commands, 07 for loading three commands, and so on, see the datasheet table. Well, then there are the command numbers that need to be loaded.
That's all: we checked the connection with the module, configured the ports, recorded commands, and configured auto-loading of voice commands.
Read about other commands in the datasheet. I just explained an approximate way of working with the module.
Purchase links:
Module –
Converter -
Converter with wires -
Download links:
Date is set -
Terminal -