What is needed for modernization
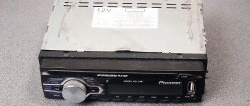
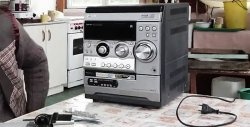
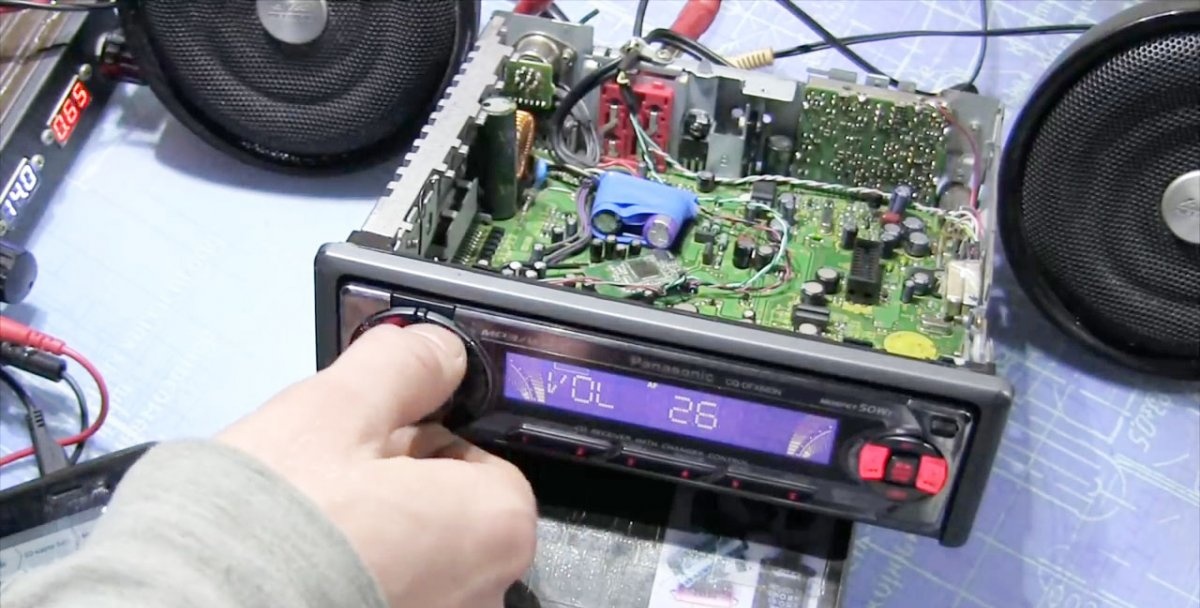
Firstly, of course, the radio itself. The task will be easier if your radio has an AUX output. I will have to upgrade a very old model, which naturally does not have an AUX output. Therefore, I previously implemented AUX in it.
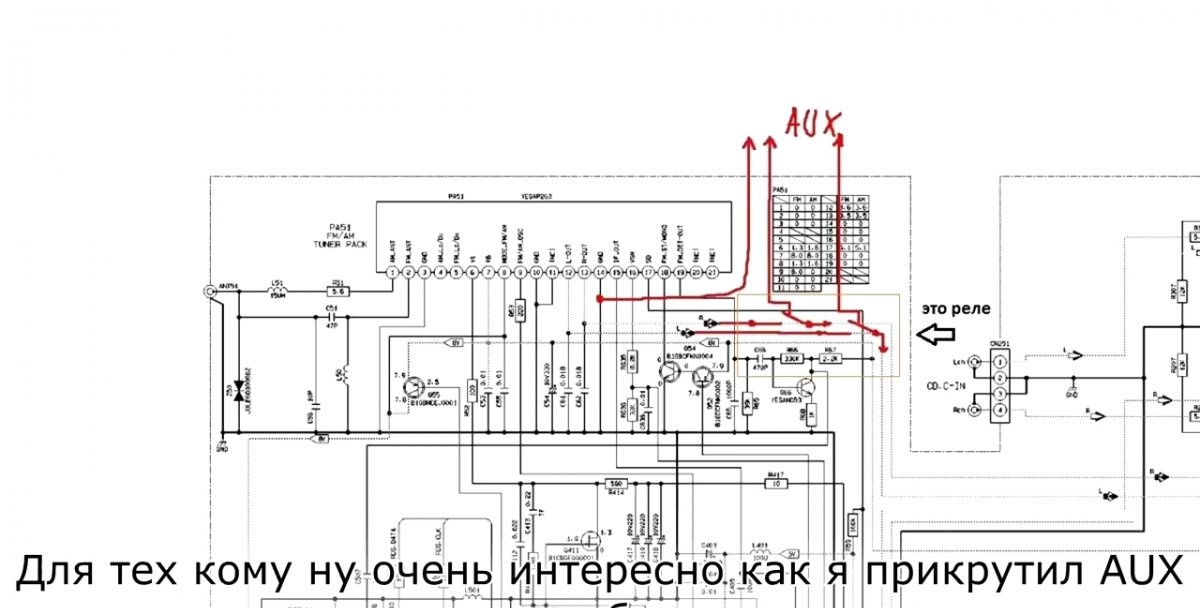
Let's not get distracted by how to do this, since this is a topic for a separate discussion; the relevant materials can be easily found.
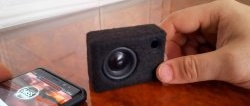
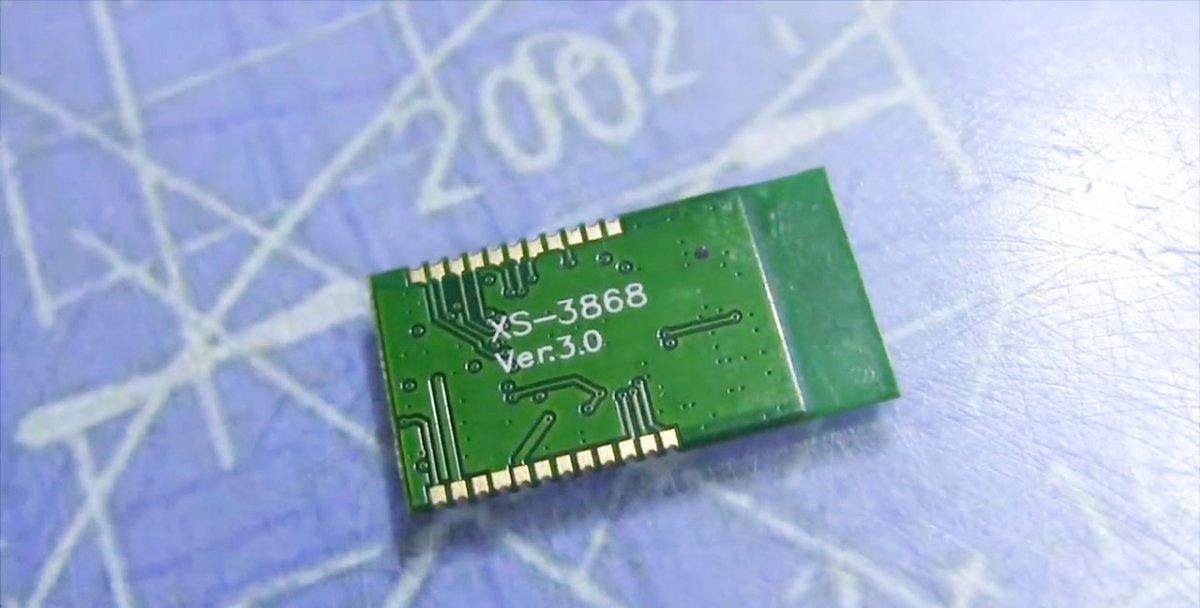
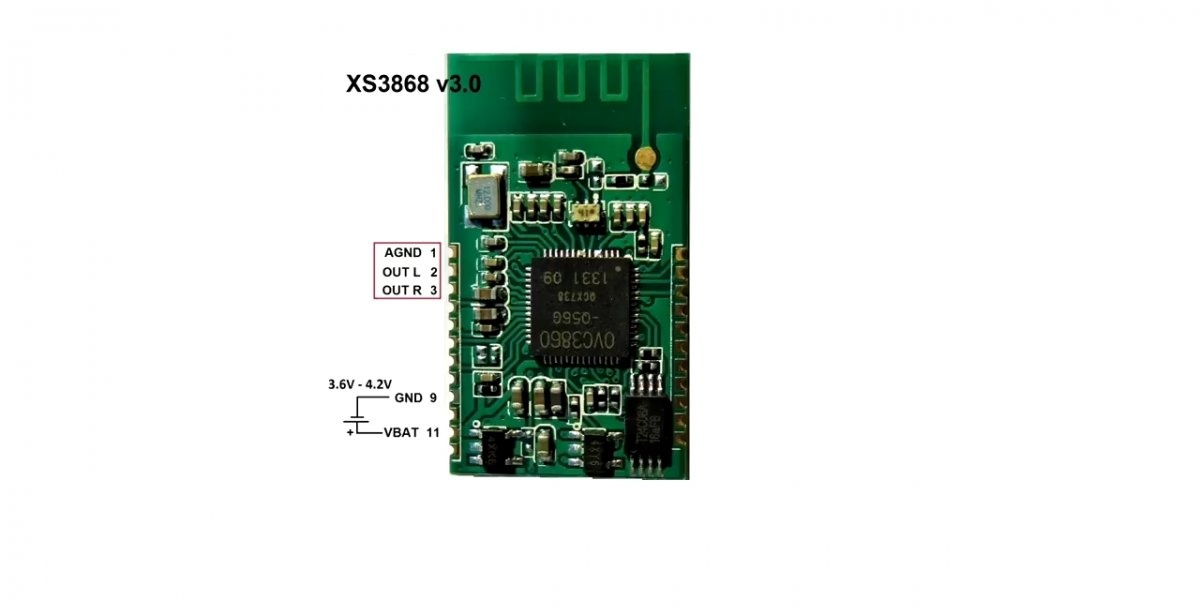
We also need a Bluetooth adapter (“whistle”). The first model that came to me was unsuccessful. The audio output turned out to be single-channel (mono), and the model was unstable. I just had to throw it away.Ordered in China module XS-3868 (http://ali.pub/559gxh) turned out to be quite good. This is what I will be introducing into the radio today.
Description of the connection process
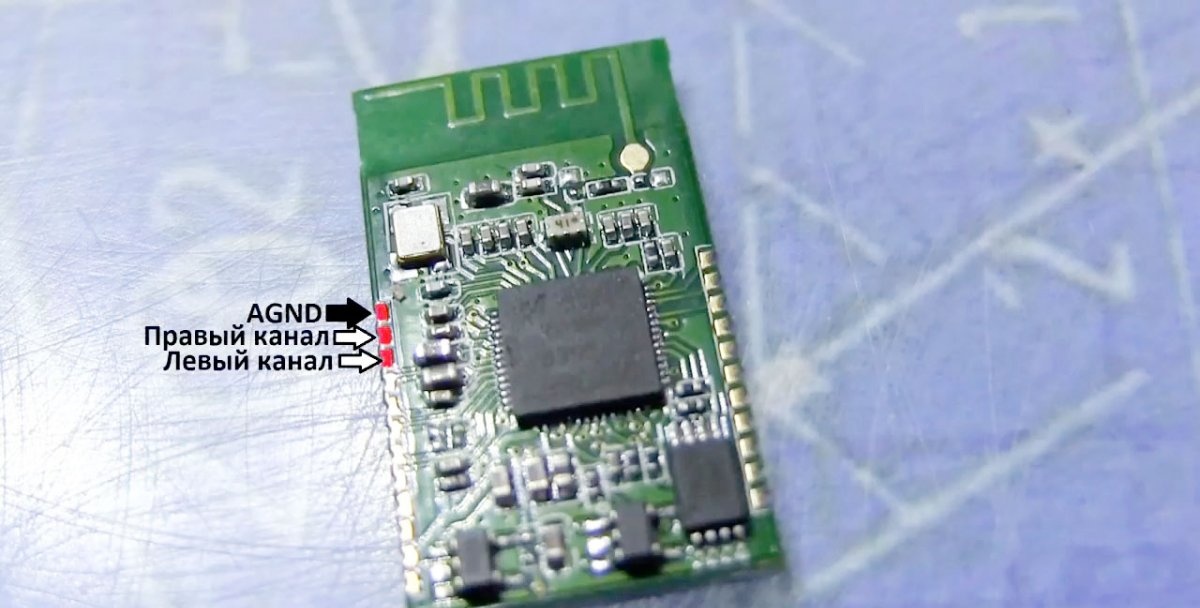
Connecting the signal will not be difficult even for a beginner. “Ground” can be connected both to the body of the radio and to the AUX connector. We connect the left and right channels of the Bluetooth module to the corresponding contacts on the radio connector. Don’t be afraid to confuse the channels with each other; in my opinion, this is not important for listening to music. Particularly meticulous radio amateurs can get to the bottom of the truth and make the connection correctly.
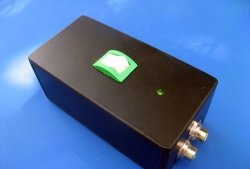
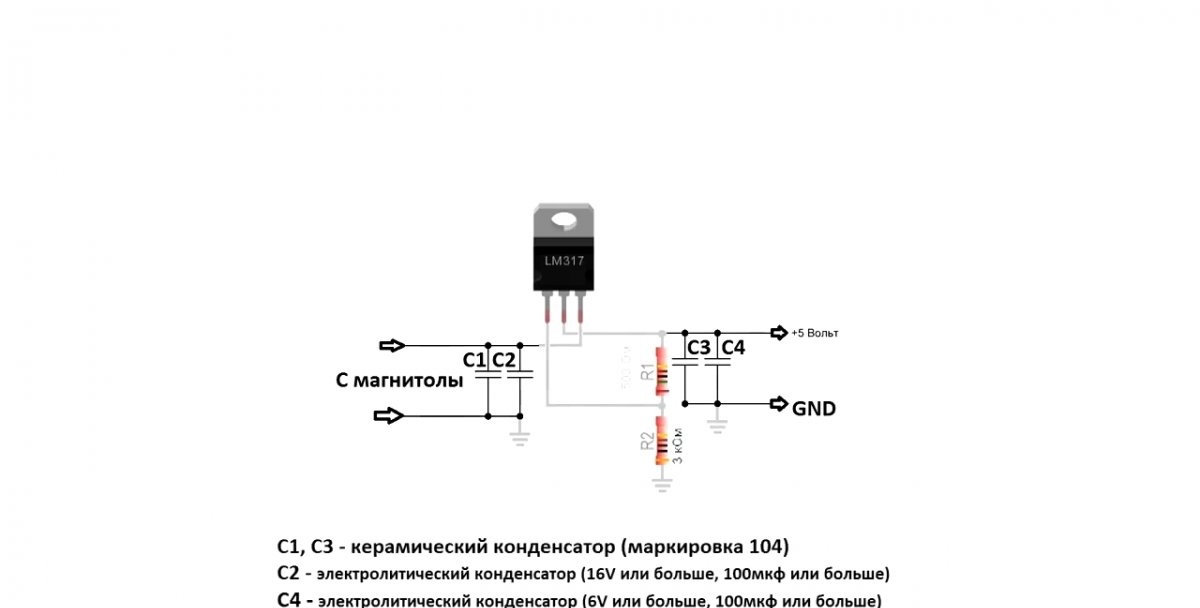
The most serious need to approach the issue of powering our module. In the case of a 5-volt Bluetooth adapter, you can connect to the USB connector of the radio, if available. You can also try to find a 5-volt linear stabilizer on the radio board. The marking of this element may contain the numbers 7805. Of course, it is not a fact that it has the reserve power necessary to power our adapter. The best option is to additionally buy such a stabilizer and assemble the circuit shown here.
As for the XS-3868 module that I have, the situation is somewhat more complicated. The supply voltage required for it is 3.6 - 4.2 volts. This is unlikely to be found on the radio board. As far as I know, there is also no integrated linear stabilizer for 4 volts, at least among widely used devices.
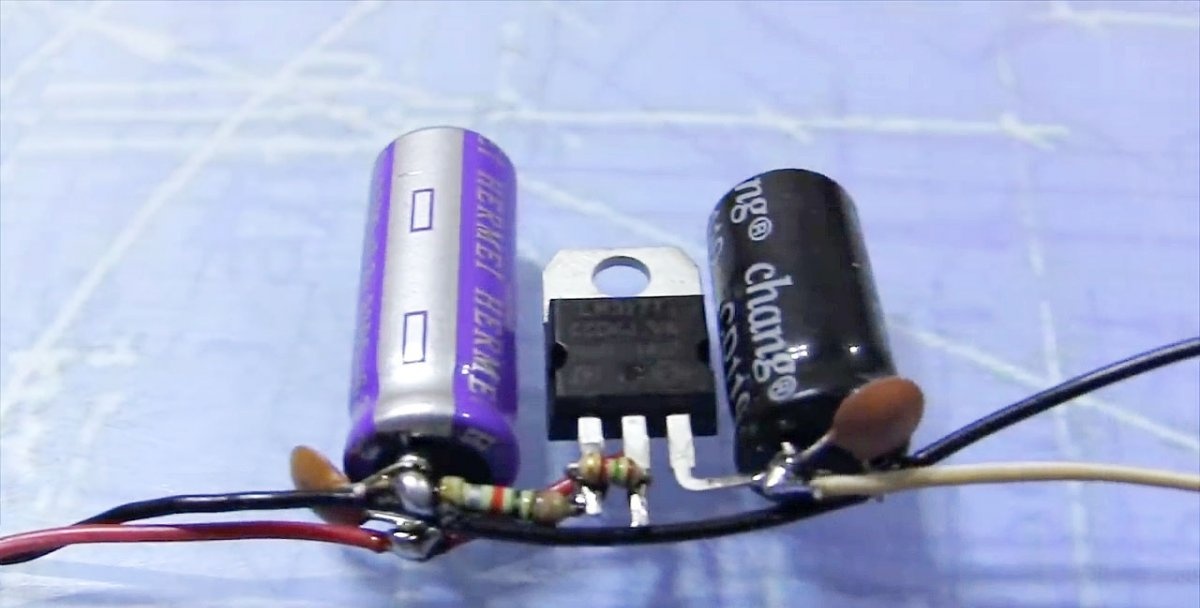
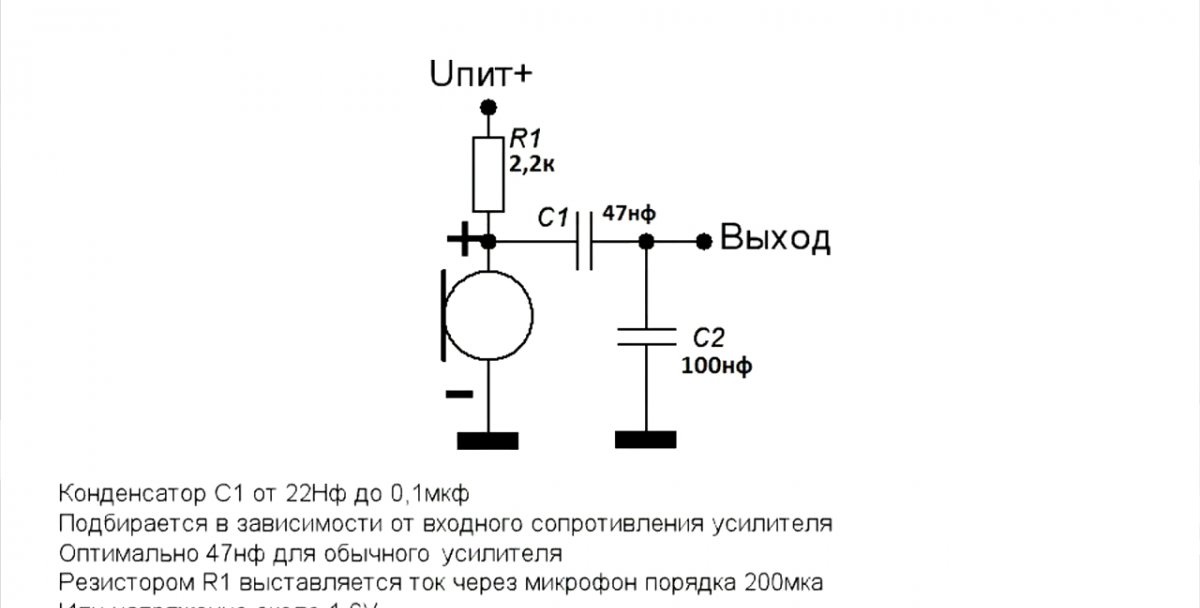
It follows that I will have to assemble the power source myself. To do this, I took two electrolytic polar capacitors, two ceramic non-polar capacitors and a very useful LM317 microcircuit. In addition, you will need a pair of resistors to set the required output voltage.I took one with a nominal value of 1.5 kOhm, the second with a nominal value of 3 kOhm. Attached is a link to a calculator for LM317, where you can select resistor values. There is also a diagram of a voltage stabilizer based on LM317.
I assembled this circuit using the surface-mounting method, simply soldering the parts together.
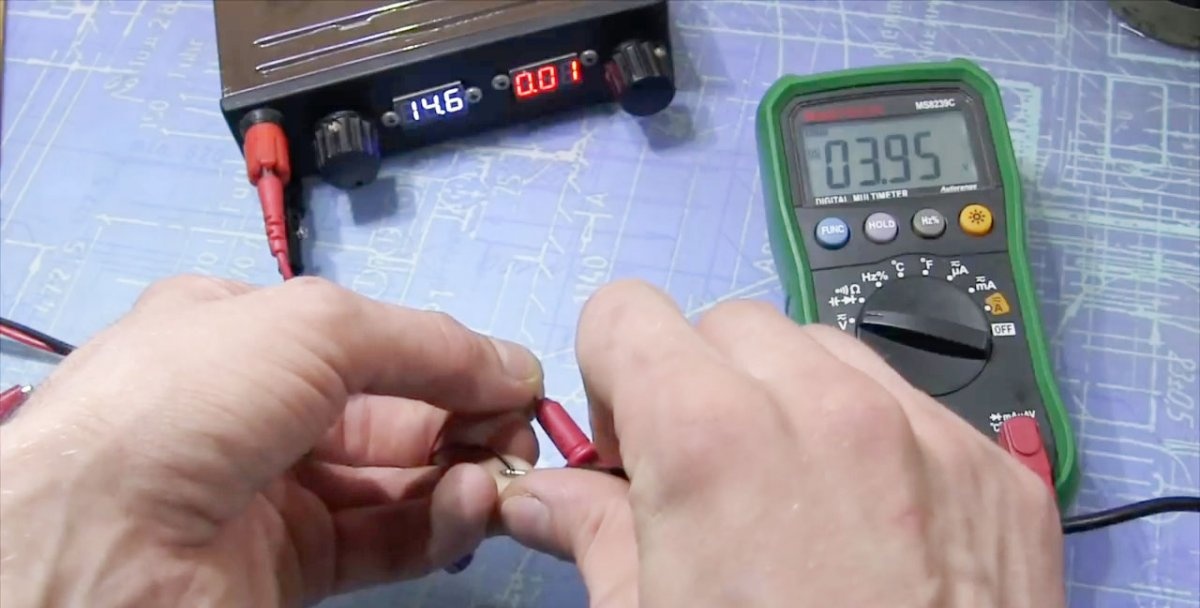
The permissible input voltage for LM317 reaches 37 volts, which creates a large margin of reliability, since in the vehicle’s on-board network this value is no higher than 15 volts. At the output of my homemade stub, I found 3.95 volts, which is exactly what I needed.
Now you can connect Bluetooth and make sure it works. I supply power to the circuit and look for available Bluetooth devices on the phone. A password is required to log in. In 99 cases out of 100, standard for such devices the password is four zeros (0000).
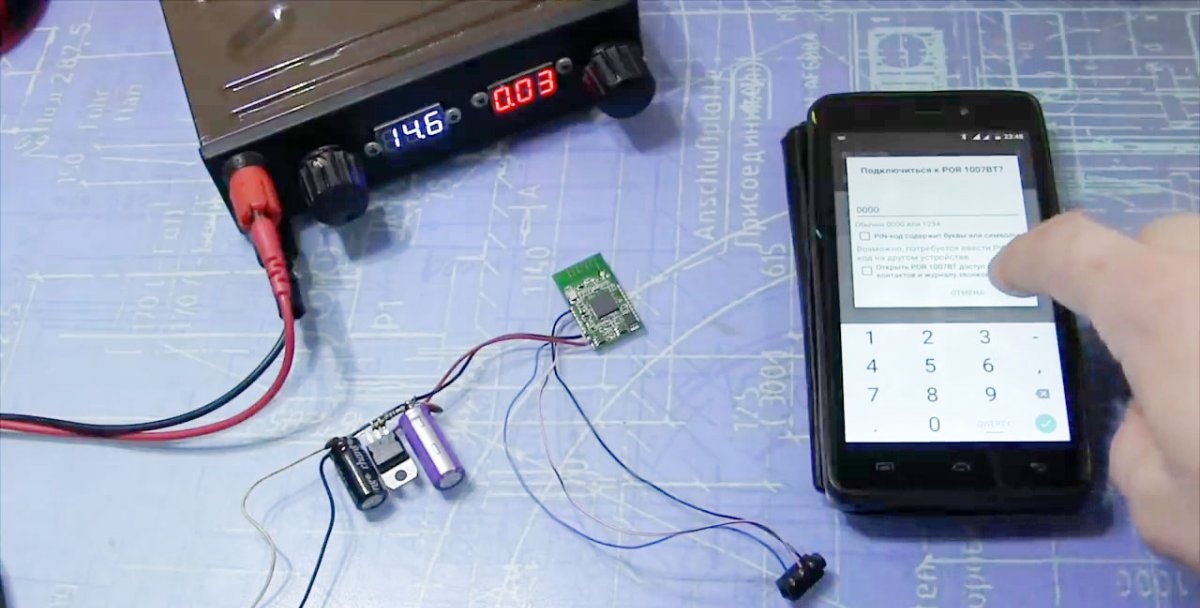
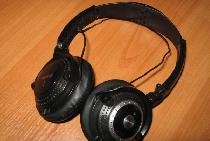
Having connected to Bluetooth and connecting the headphones, I launch the sound file on the phone. As a result, I get a real stereo signal. The sound quality personally suits me quite well.
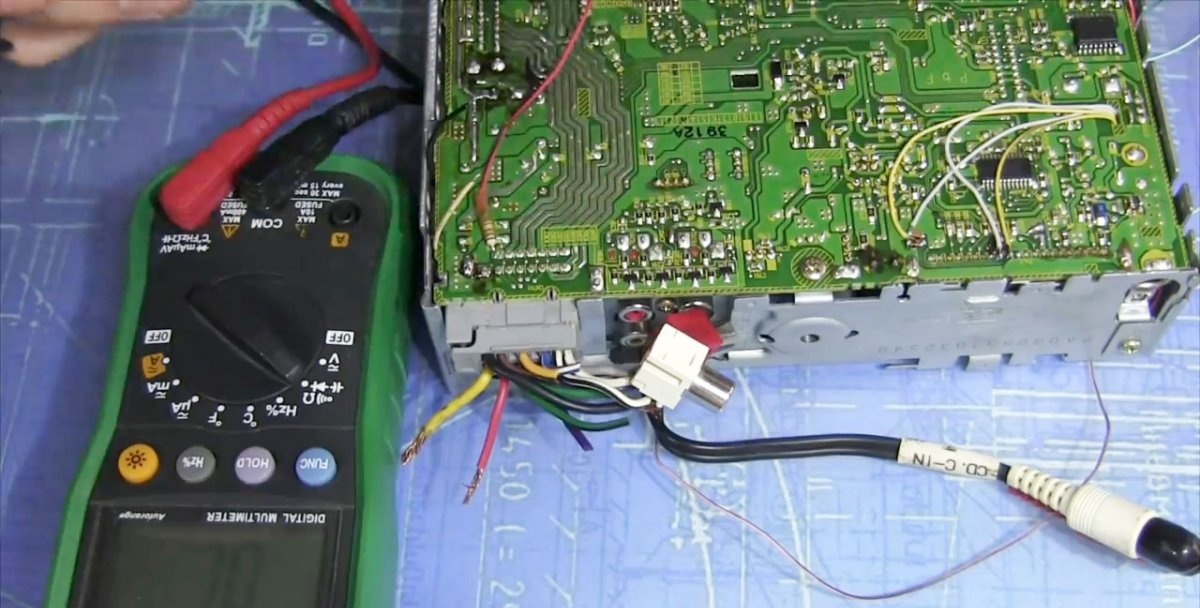
I came across information on the Internet that this Bluetooth module, when turned on, can briefly consume current up to 1 ampere. For this reason, I chose the LM317 chip, rated for current up to 1.5 amperes. I could not verify the presence of a current surge when turned on, since I do not have an oscilloscope, multimeter it does not respond to such short bursts. Constant consumption in operating mode, according to my observations, does not exceed 70 mA.
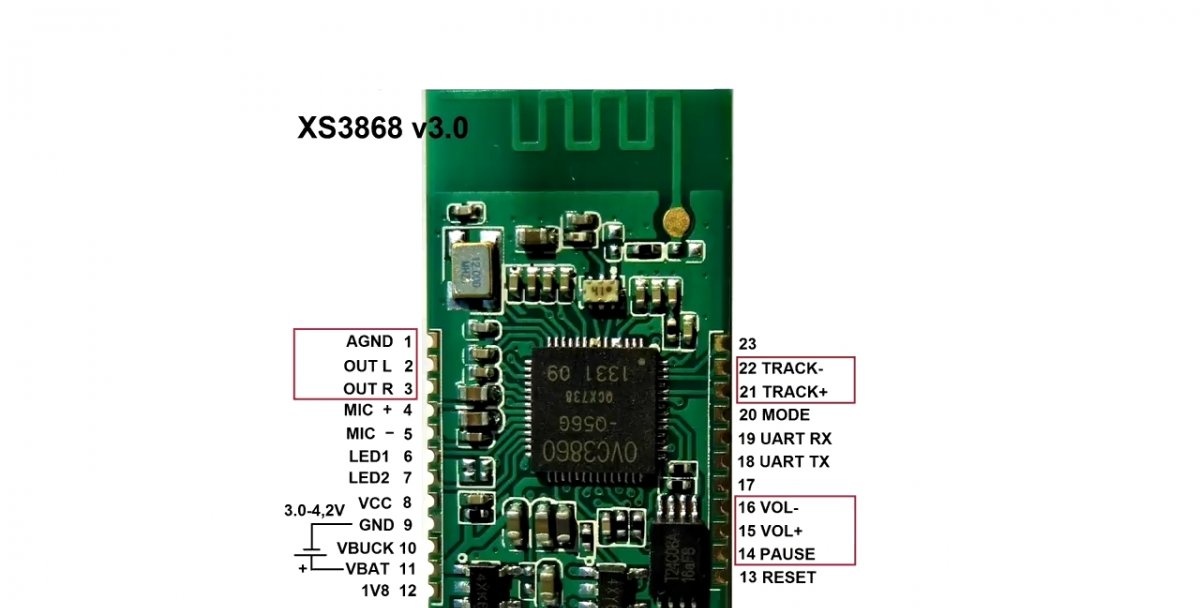
The XS-3868 module has additional capabilities that I also decided to use. In particular, there are contacts for connecting a microphone, after which our module can work as a Bluetooth headset for talking on the phone.
In addition, there are a number of options that I did not use, but someone may find them useful:
- possibility of connecting indicators LEDs;
- built-in lithium battery charger;
- connection of volume control buttons, “next track”, “previous track”, “pause” buttons.
Next, I select a suitable microphone from the failed headset. I chose a microphone already installed on a small board. I think that in this version it will be even more convenient to attach it.
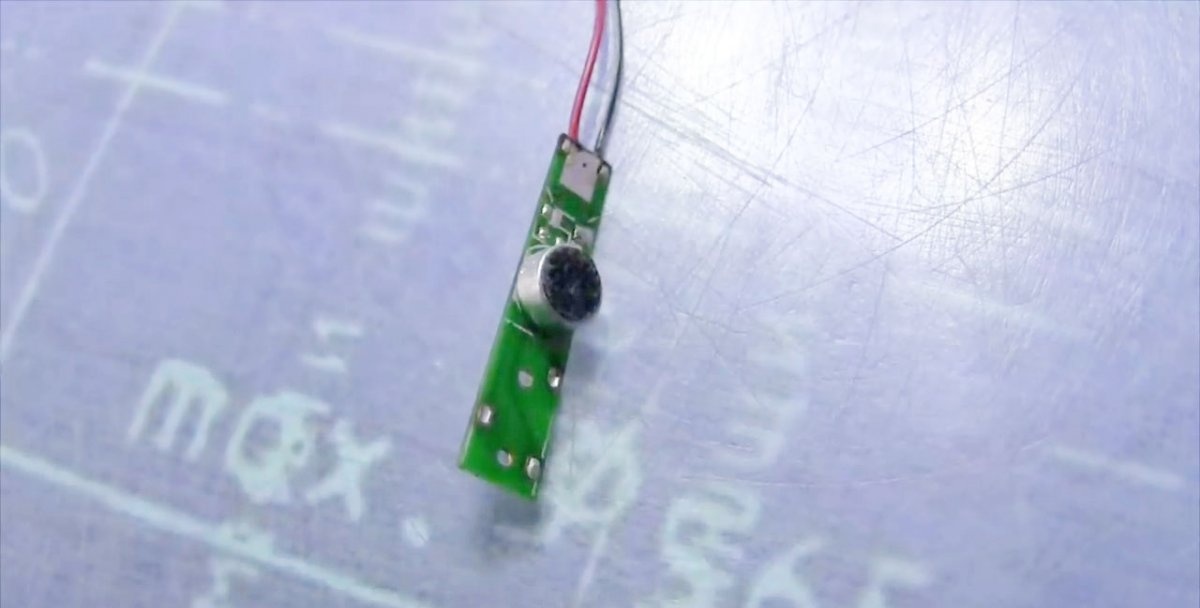
I glued the microphone board into the end of the front panel of the radio.
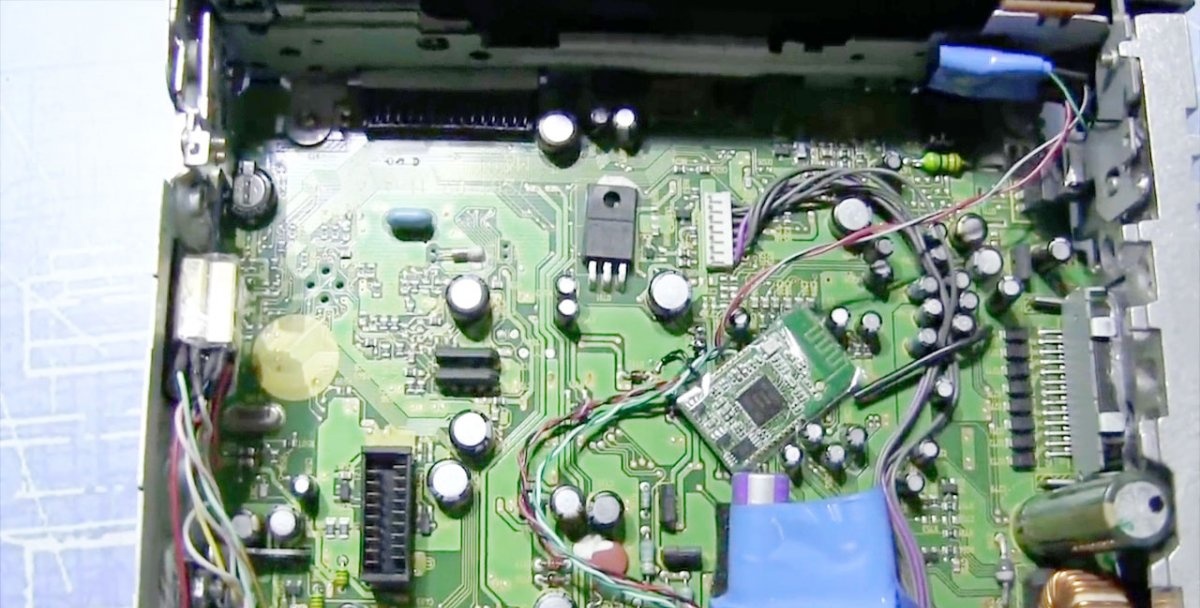
To install the stabilizer and Bluetooth module, I found free space on the radio board and used double-sided tape.
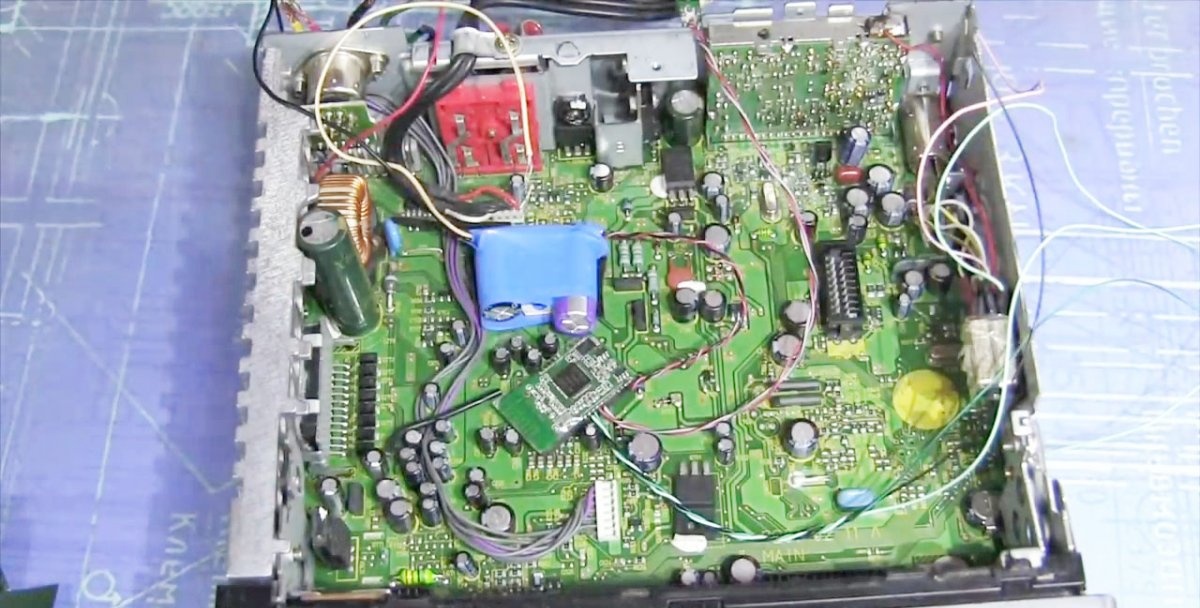
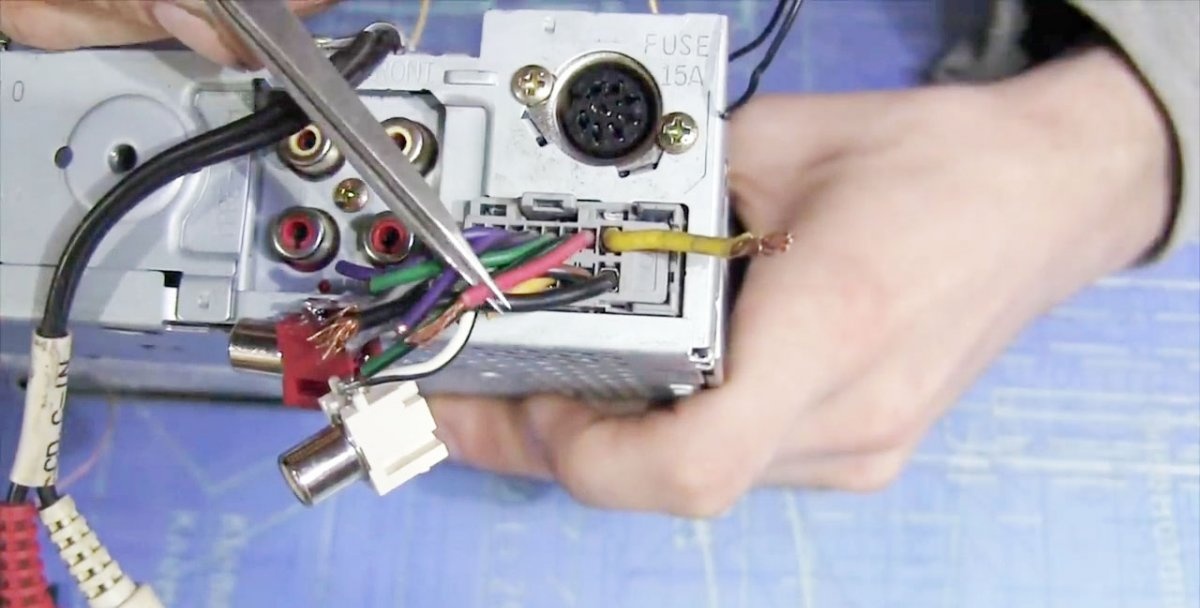
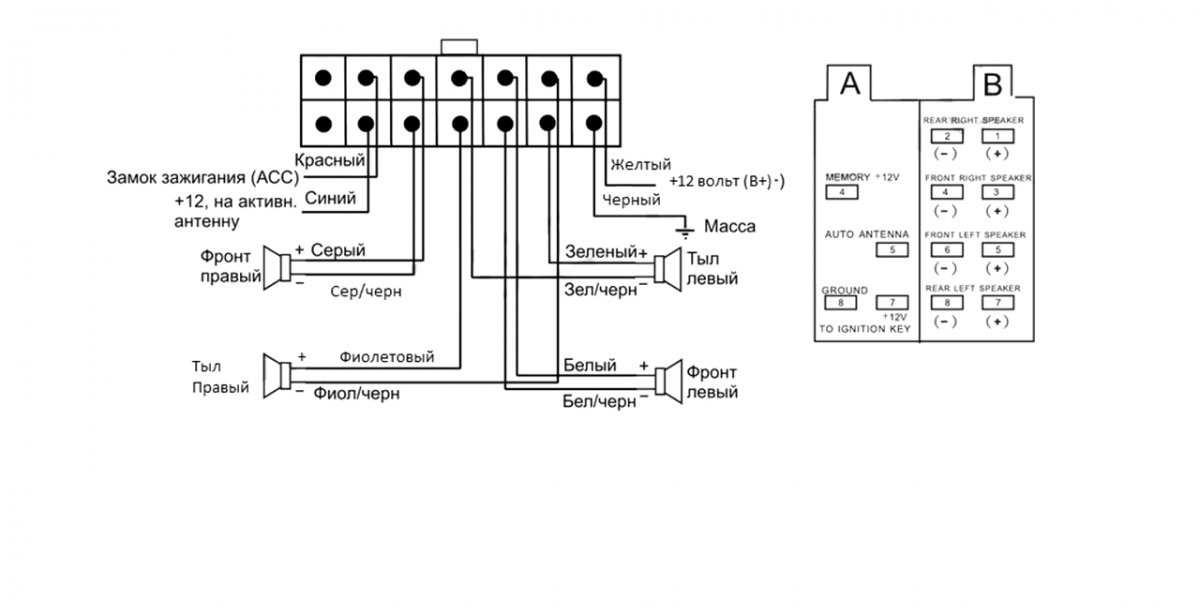
I wrapped the stub with electrical tape so as not to accidentally short-circuit anything. There is no risk of overheating due to the large power reserve. All that remains is to connect the stabilizer to the power supply. Everything is clear with the ground, it is on the hull as always. Now let's look at the plus. If you simply connect to the plus of the radio, you will get constantly working Bluetooth in all modes when the battery is connected to the car. The radio requires this to save various settings and clocks. For our Bluetooth module, this is also acceptable in principle, but it is completely irrational. Therefore, we find the red wire from the ignition switch, the voltage on which appears only when the key is inserted, and connect the plus of the stub to it.
That is, we insert the key into the ignition and our Bluetooth starts together with the radio. Well, we figured out the connection.
In my version of the upgrade, it is necessary to somehow provide an AUX output, because this radio did not initially have it. I solved this problem as follows. I simply connected the AUX connector to a 10-centimeter wire behind the rear panel of the radio.For those who had the AUX mode present initially, this “collective farm” will not be needed.
To check the system, switch the radio to AUX mode. In my version, this is radio mode plus an additional switch. We use the system as follows: if we need AUX, we don’t play anything via Bluetooth, and vice versa, if we need Bluetooth, we don’t use AUX.
Well, that's all. All that remains is to install the radio in the car and enjoy the new function.
Conclusion
Links you may need: