This was my first handmade guitar. Therefore, it does not look very good, and the sound is not the best, but this gives it its charm. The guitar works, that is, you can play it (or learn to play it, like me), and this is the main thing. Besides, making this electric guitar was a great experience and the next instrument was much better.
I advise you to immediately stock up on all the accessories in order to bring the guitar to working condition right away, and not suffer later with a half-finished instrument.
You will need:
- Pickups.
- Frets.
- Pegs.
- Strings.
- Preferably a nut and bridge, but I also have them homemade.
I started with the deck. Of course, it would be nice to make some kind of musical wood (maple, spruce, alder, etc.) from a single board. I made it from three pieces of 10 mm plywood. They are all even different sizes. I sawed the largest piece of plywood in the shape of an arrow. There are a huge number of soundboard stencils for electric guitars on the Internet, but you can use your imagination and come up with something of your own.
Let's leave the body alone for now. Let's take care of the neck.I cut it out of maple boards. The markup is as follows:
- Length - 650 mm;
- Width - 50 mm;
- Width at the top sill – 45 mm;
The tree, by the way, is very suitable. The next step is to insert the anchor or anchor bolt. The truss rod is a screw that is screwed into the end of the neck (where the headstock is). It prevents the neck from bending when the strings are tensioned. But I thought that for this particular guitar, an truss rod is not needed. Plus, trussless electric guitars actually exist. Also, the neck will do without an overlay. From the front side (where the frets will be) we process the neck with a file and sanding belt, giving it a rounded shape.
Now, on the back side, the neck also needs to be given an arched shape. Do as I do, i.e. It's better not to cut it with a knife. It is better to process it using a plane, because... it's much easier to control than a knife, which can cut too deep and ruin the entire neck. Next, we process it using a sanding belt, i.e. sandpaper, gradually increasing the grit. Not the entire neck needs to be treated this way. Leave 100 mm at the beginning of the neck, where it will be attached to the soundboard.
Let's return to the body again. Now you need to mark where the bar will be attached. After that, I made a cutout in the top and middle plywood for the neck using a drill and a hacksaw. I placed the neck the way it would be in the finished guitar and began to count the scale. Scale is the distance from the bridge (lower saddle) to the nut. We mark where both will be.
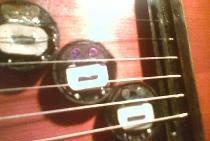
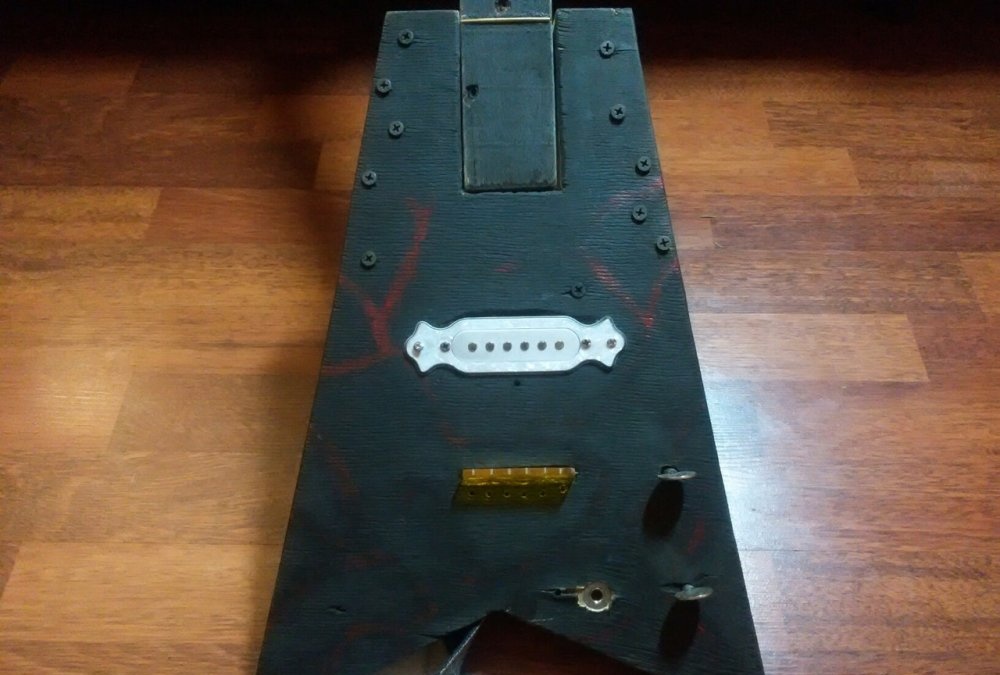
Next, we mark where the sensor will be. Drilling and milling work is now underway. Those. we make grooves for the pickup and bridge. Mine turned out to be through, due to the insufficient thickness of the plywood. Next, I fastened all 3 plywood pieces with the most reliable known fastenings - black self-tapping screws. If the screw is black, the metal will play better. I didn’t think about resonance and all that stuff at all then. The smallest one will hold the bar securely, right? I immediately drilled 4 holes in it and marked these holes on the neck.
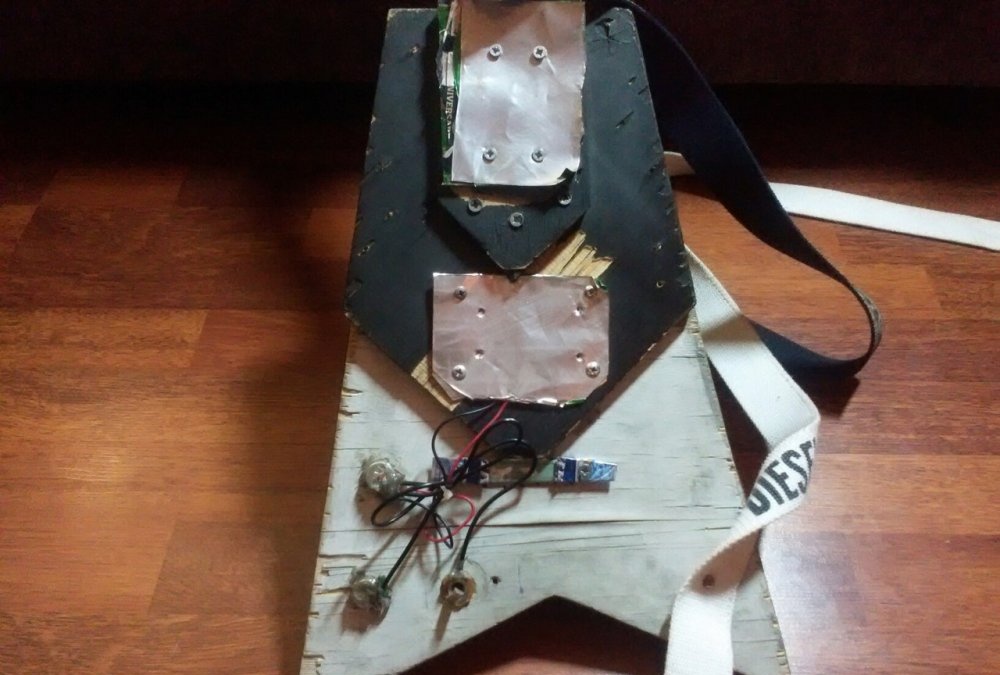
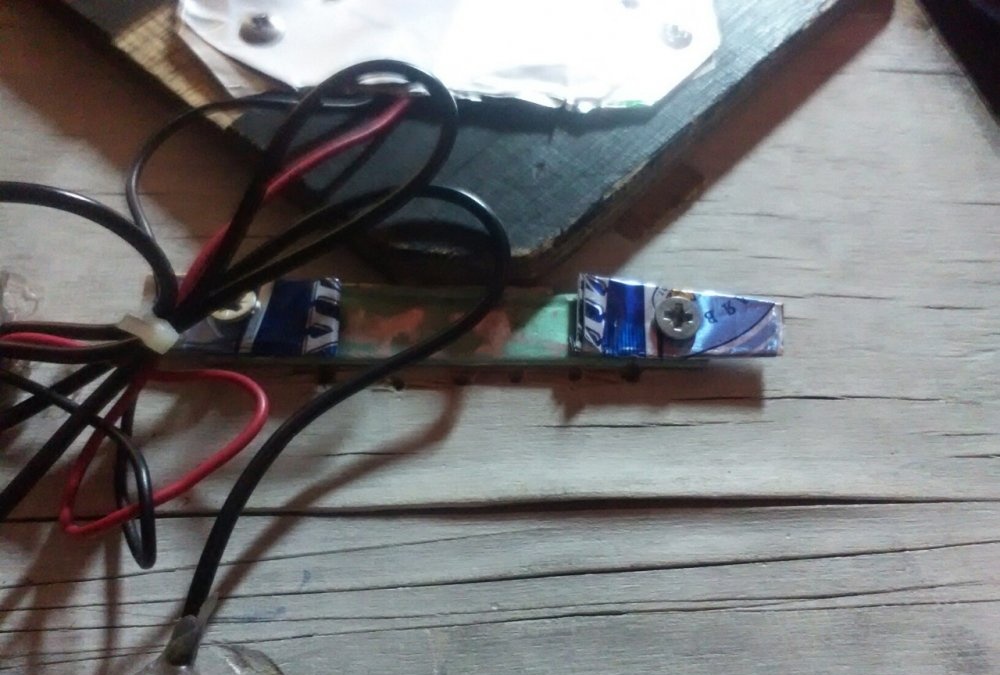
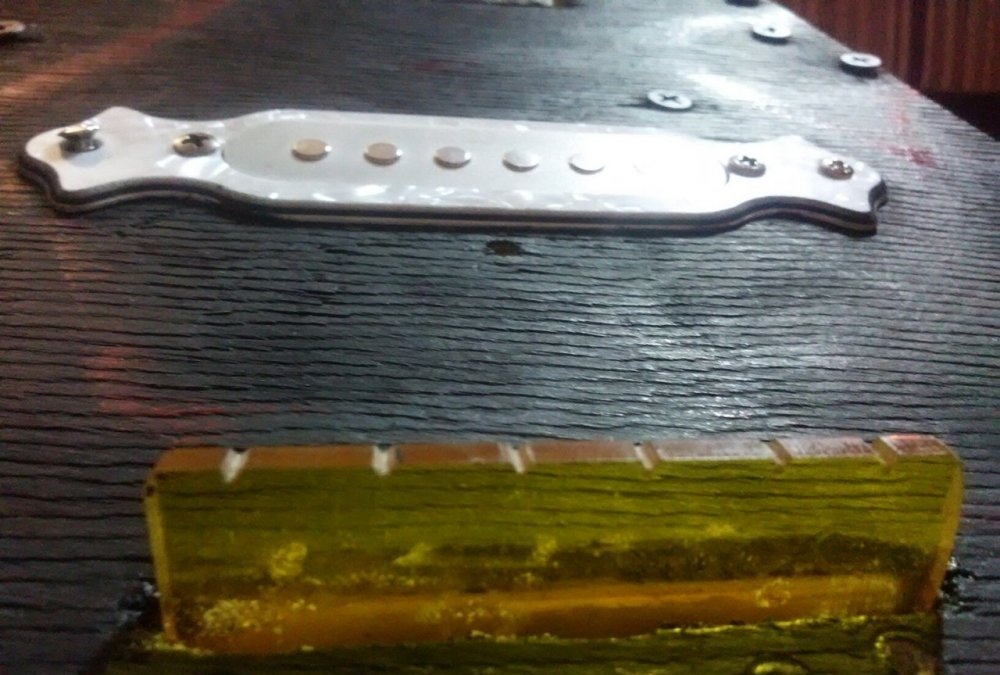
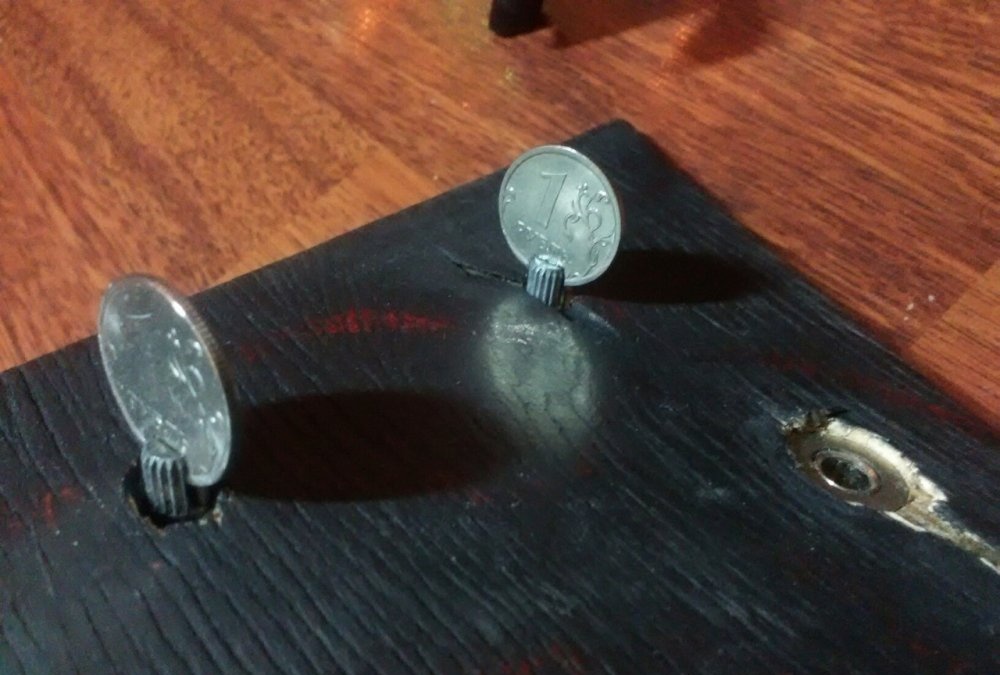
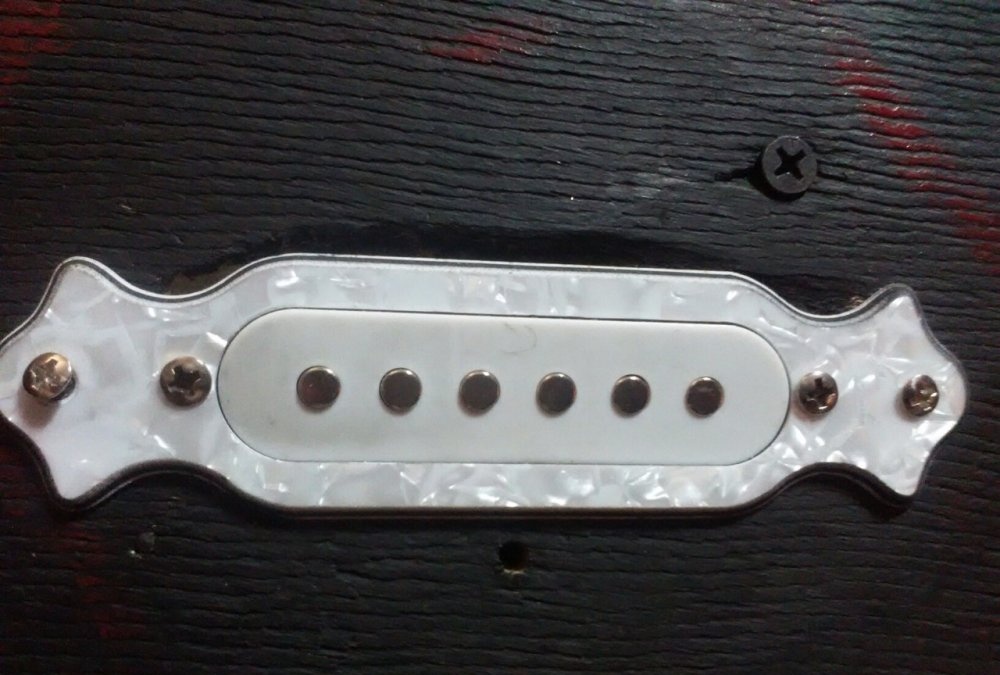
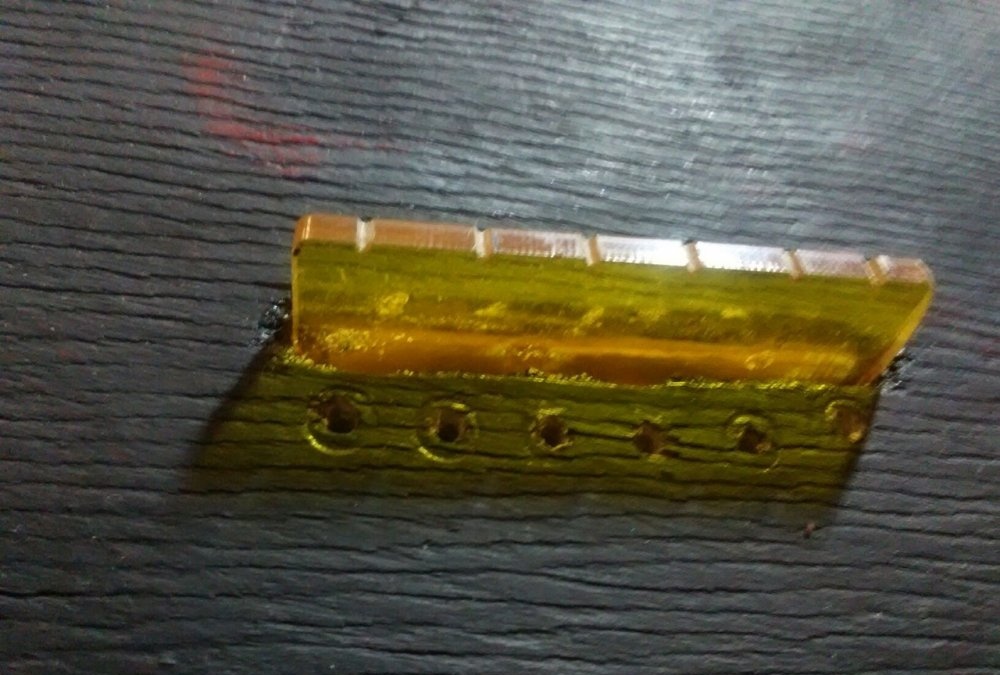
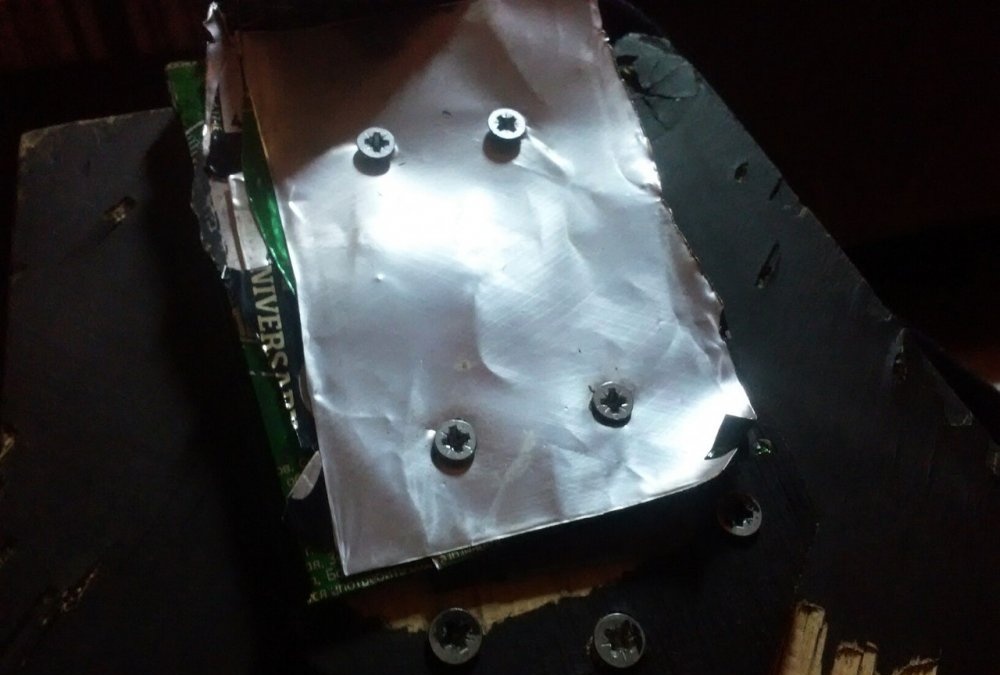
Next, a bridge is installed in the deck. It would be nice if there was one, but if not, plexiglass or any material softer than strings will roll. Since the hole for it is through, I had to screw an iron plate from the back to prevent the bridge from flying out. Next we insert the pickup. A plate made of aluminum cans is also screwed onto the back of the deck for it. A white plate is attached to the body with two outer screws; it also covers the too large hole. The other two screws secure the pickup itself to this plate. You can even adjust the height of the sensor. Using a needle file, we make small cutouts for the strings on the bridge. Each string should be above its own magnet. I didn't have the required drill bit for two potentiometers. Only for the spinners themselves. We insert them into the deck, and we will spin them using coins. So even better. I secured the potentiometers using hot glue known as hot snot.

We will attach the strings like an adult - through the body. I drilled six holes in the soundboard for the strings.
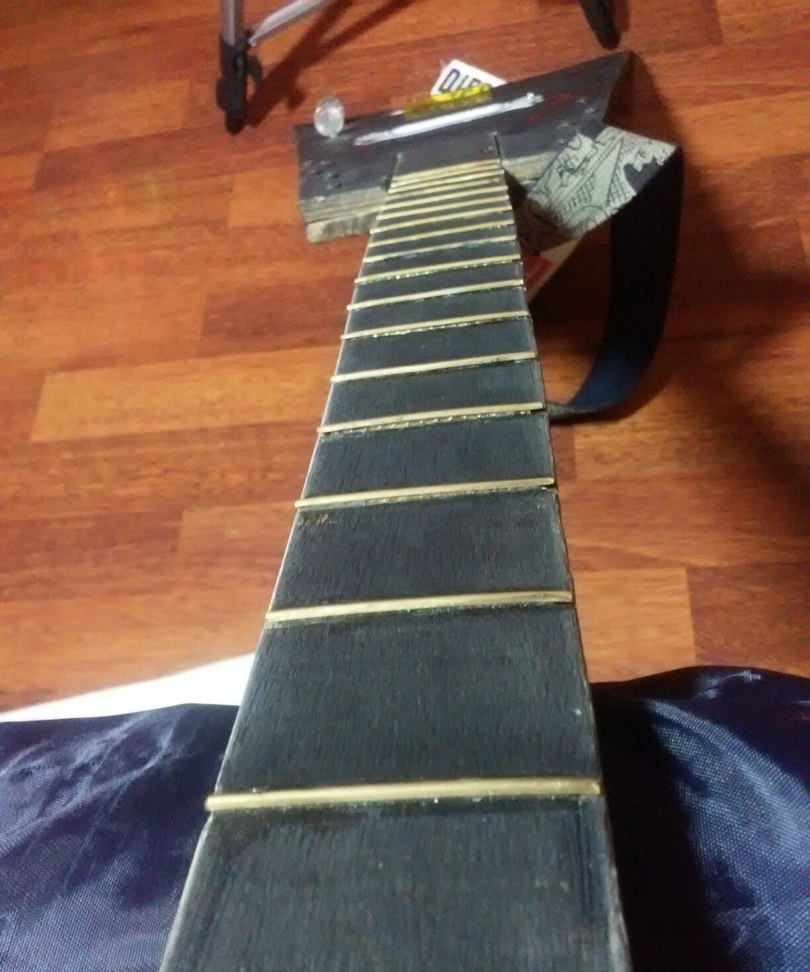
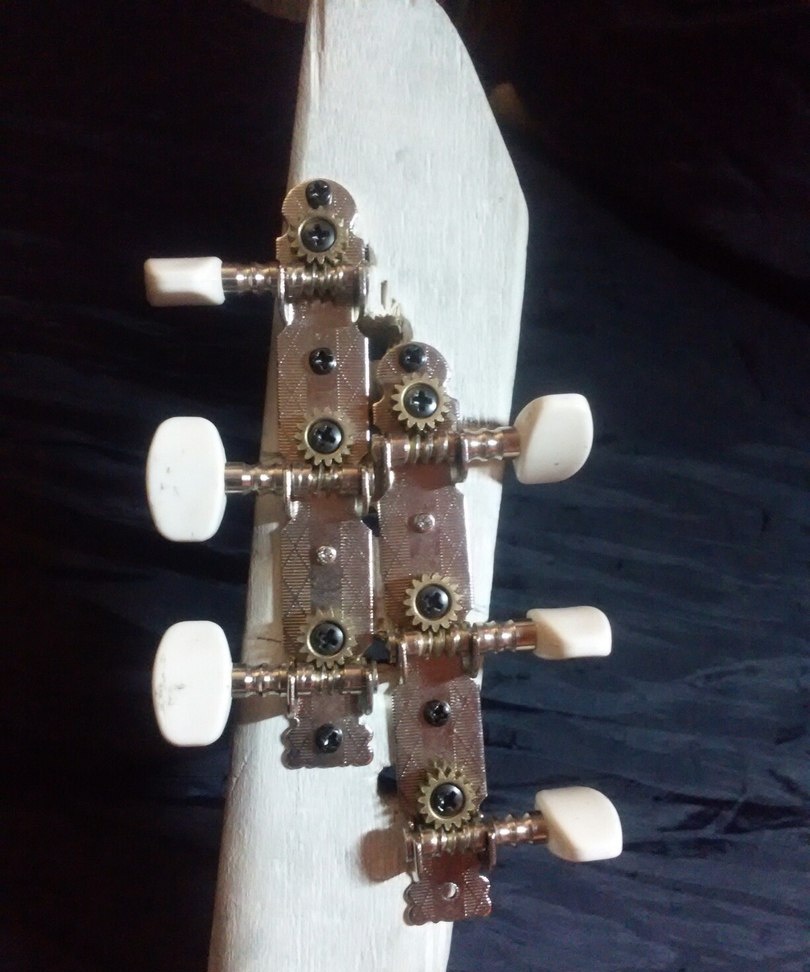
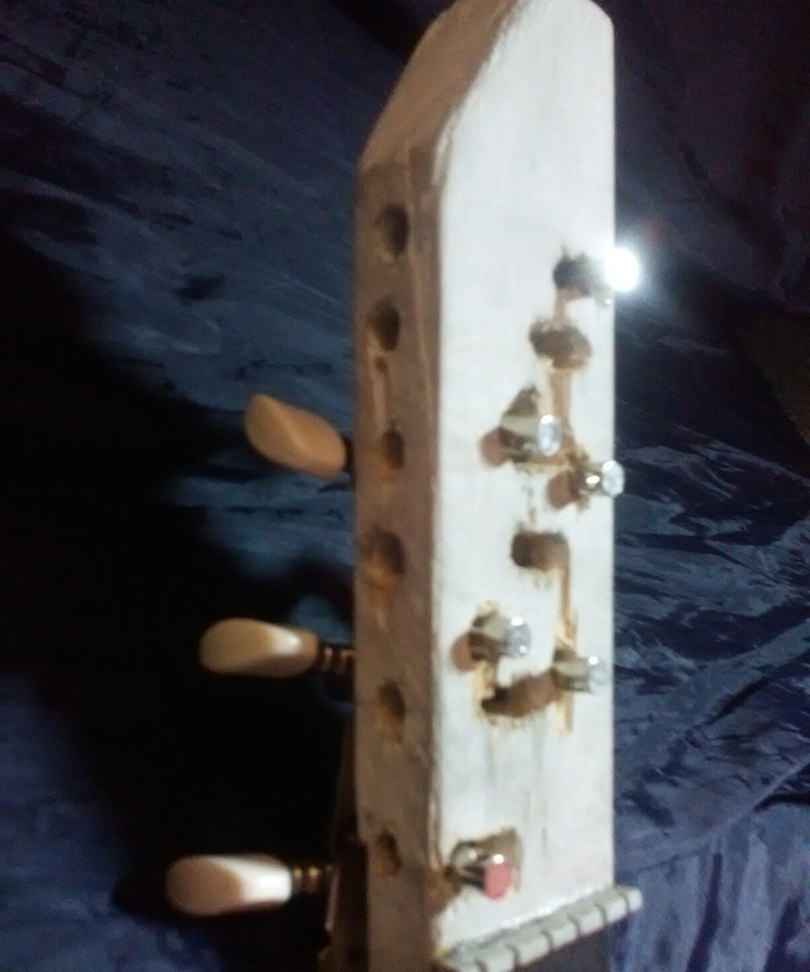
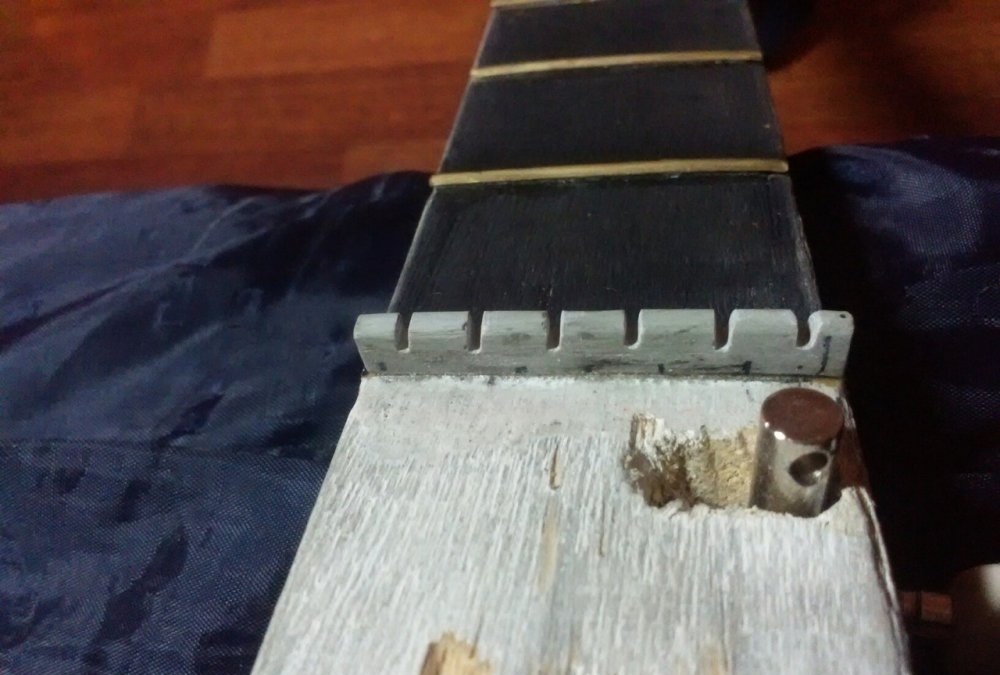
Now let's get back to the fretboard. You need to mark where the frets will be. You can do this in different ways, for example, find the required template on the Internet, which is what I recommend. We make cuts for the frets themselves using a hand jigsaw. If the cut doesn’t fit, you need to widen it, if it doesn’t hold, then you’ll have to glue it in, which is what I did. It would also be desirable to have an upper threshold, but I made it from cold welding. But this is far from the best option.Next, drill holes for the pegs and install them. I didn't like the screws that came with these pegs, they were too small. I screwed in more. These pegs, by the way, are for a classical guitar; I bought them because they were the cheapest (about 90 rubles).
The guitar can now be painted. Since this is plywood and an ordinary board, I painted it with simple acrylic paint. You can paint it with stain, the result will also not be bad. Next, ideally varnish.
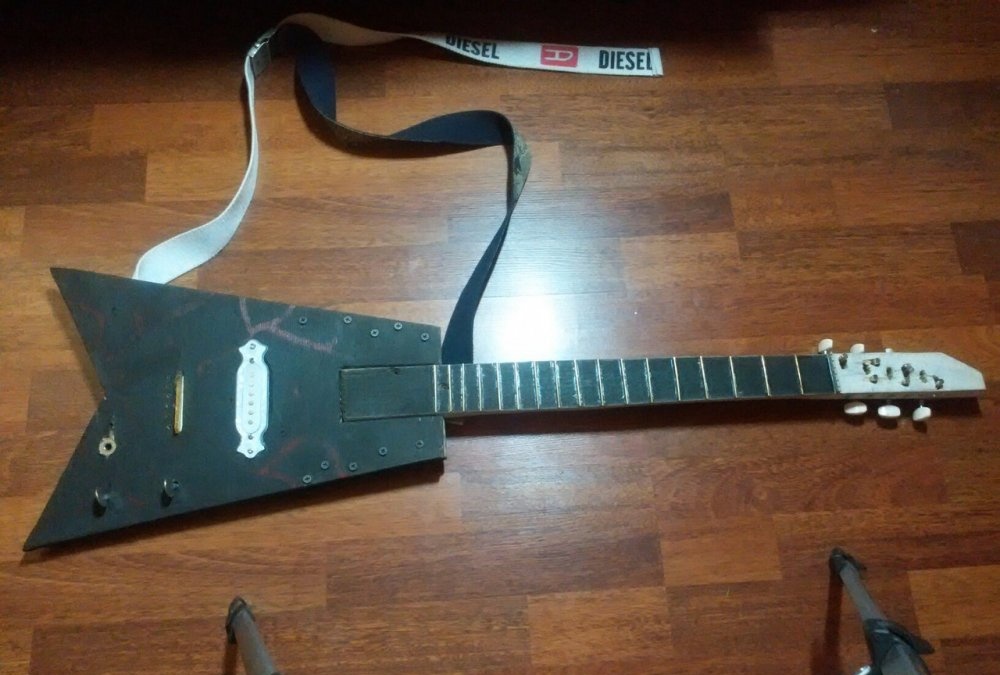
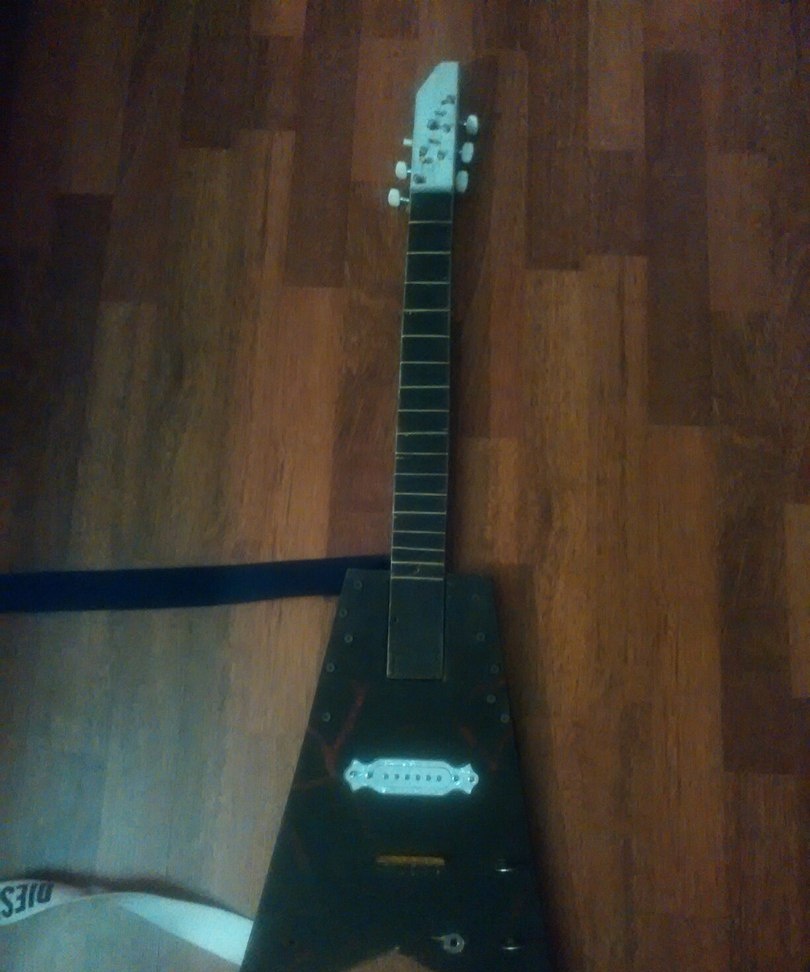
Now you can assemble the guitar. We will screw the neck with four self-tapping screws through a unique platform. It is made from several aluminum cans and a rubber gasket. All that remains is to install the strings. Oh yes, I almost forgot about the exclusive belt from the belt. More precisely, from two denim belts. Attached with two self-tapping screws. They can even adjust the height.
This tool, saturated with hatred and pain, even works. Although it was done for beauty. You can play any kind of garbage, but devilishly expensive guitars are not for us.
The advantage of this guitar is that it is homemade. You have a better understanding of how this musical instrument works. It's a good experience. The first electric guitar most likely won’t turn out to be very cool, but you remember all your mistakes and next time you won’t make the same mistakes.
P.S. The guitar is very suitable for playing grunge or punk rock, or even heavy metal.
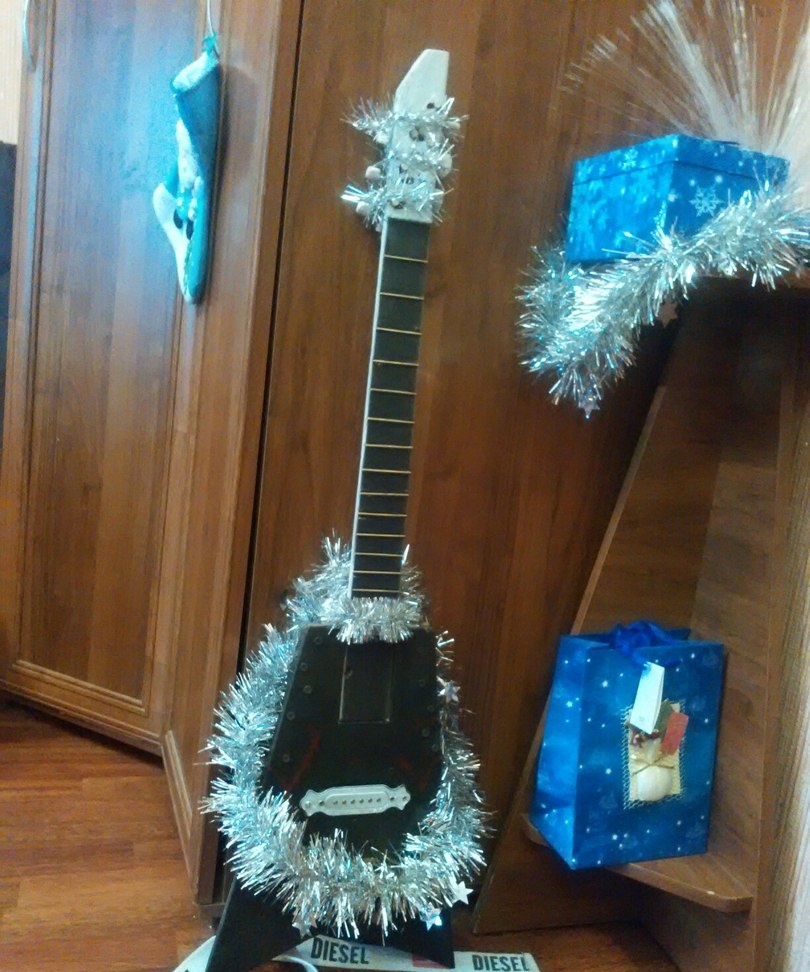
P.S.S. For the New Year you can save on a Christmas tree; you will always be happy with this guitar.