Will be needed
- Boards. Some were from a pallet, some were just lying around at the dacha.
- Wood glue. Any wood glue will do.
- Rivets.
- Sheet of iron.
This is the most basic thing, you will need a few more small things, but more on that later.
Making a shield
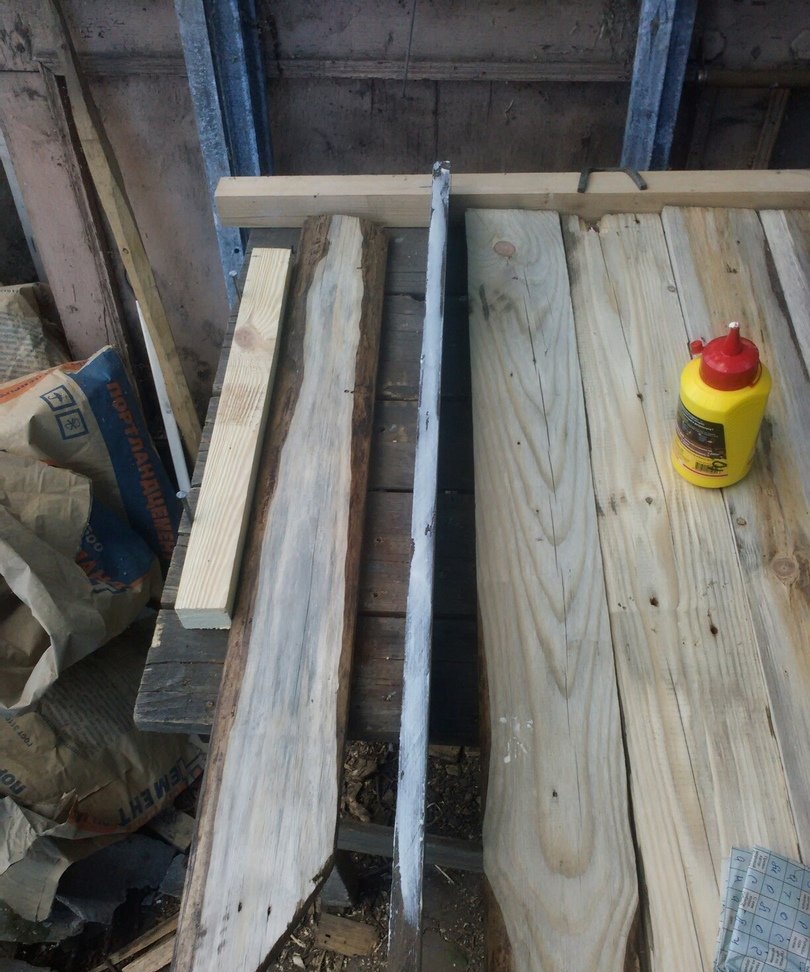
We are not looking for simple ways, so we will make a shield not from plywood or furniture board (a shield from a shield, cool), but from boards. These are:
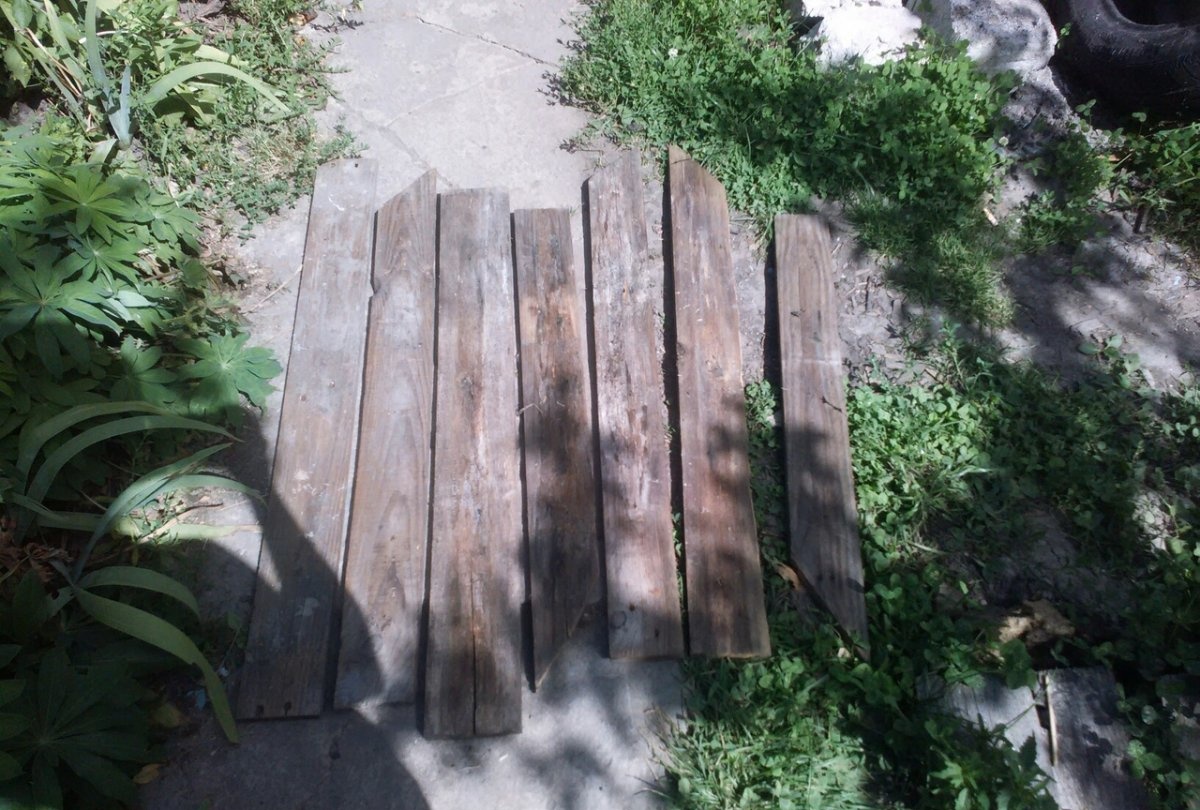
And you ask me how to make something cool out of a bunch of these old boards? But no way! First you need to plan all the blanks.
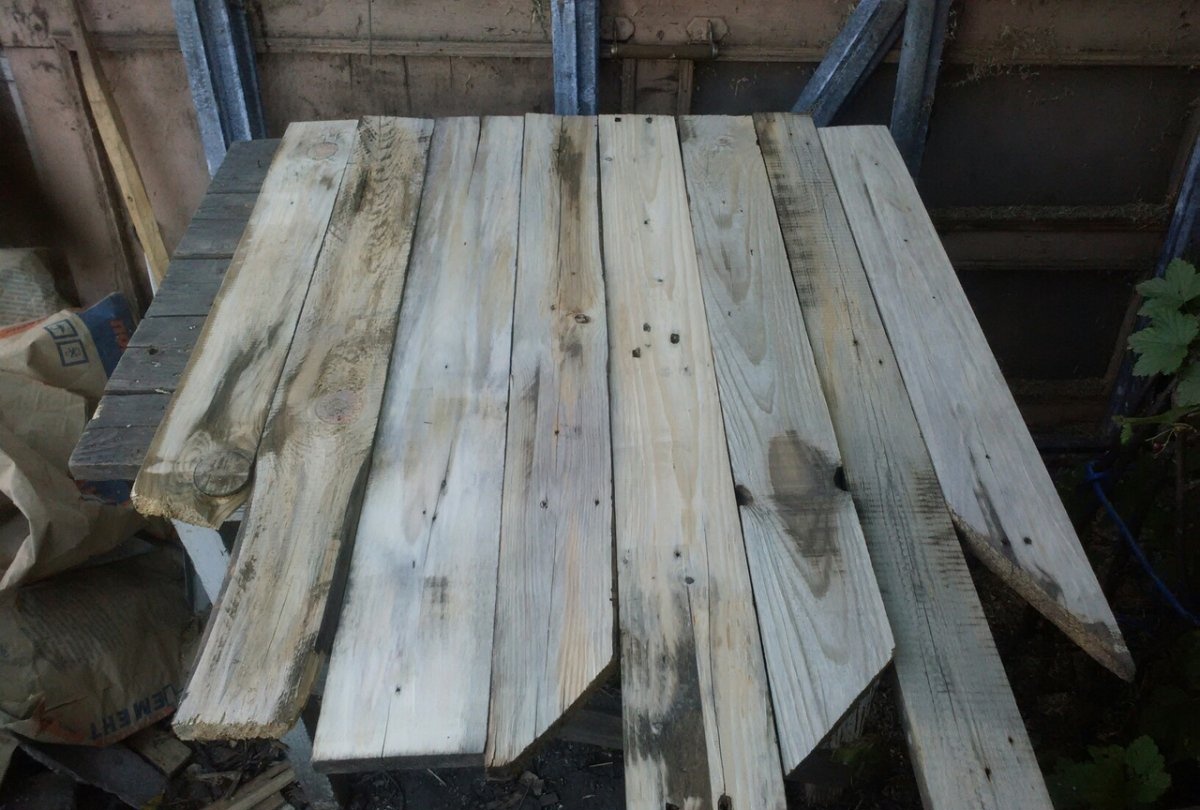
In the process, I replaced some of the original boards. Light wear and tear on the wood gives it a special charm, but outright rot is unnecessary. If you buy an edged board (you can have one long one, and then cut it into the required parts), then you won’t have to plan it much, but if you go the difficult route and take old boards, you’ll have to adjust the ends.What I mean is that all the blanks should fit together well. We need this for the next stage - gluing. Oh yes. All boards must be no more than 10 mm thick. The shield should be light, a historical Viking shield could be 8 mm in the middle, and 5 mm towards the edges. The shield shouldn’t have been enough for more than 1 battle, only the umbon is tenacious, but more on that later.
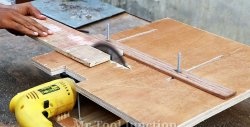
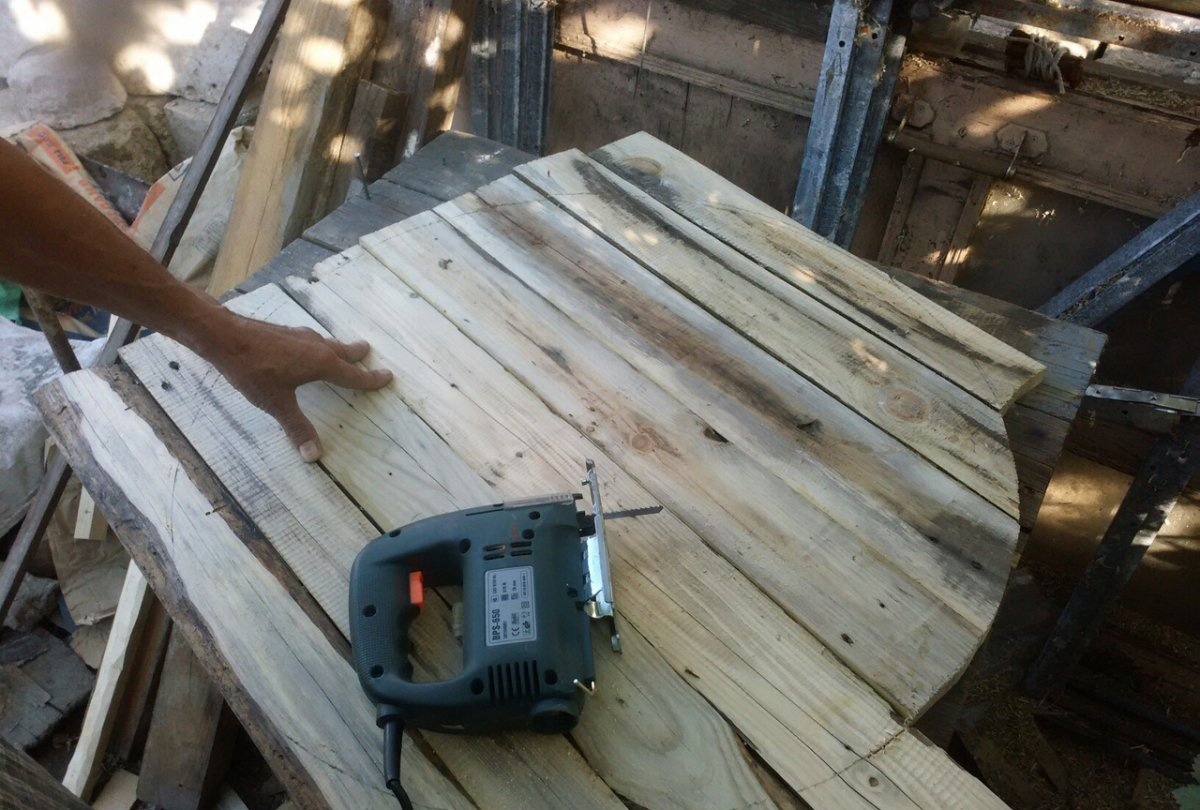
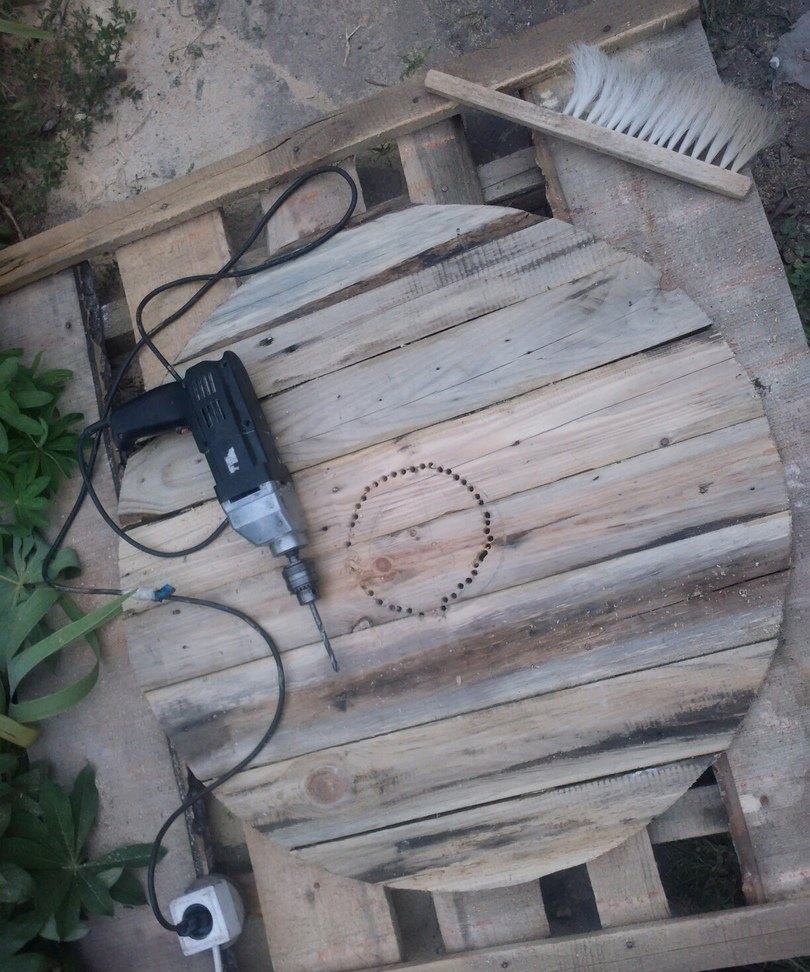
I glued all the boards on a workbench, with stops in the form of bars attached to three sides. I glued the ends together with Moment wood glue. Very good glue, by the way, I use it for both the soundboard of an electric guitar and furniture glued it up, and the shield. All ends were glued and joined in turn. Then a third stop was attached to the workbench, which clamped all the boards, and two more boards were placed on top, and gypsum blocks on them. This is so that the gluing does not fail. I left the glue to dry for about a day.
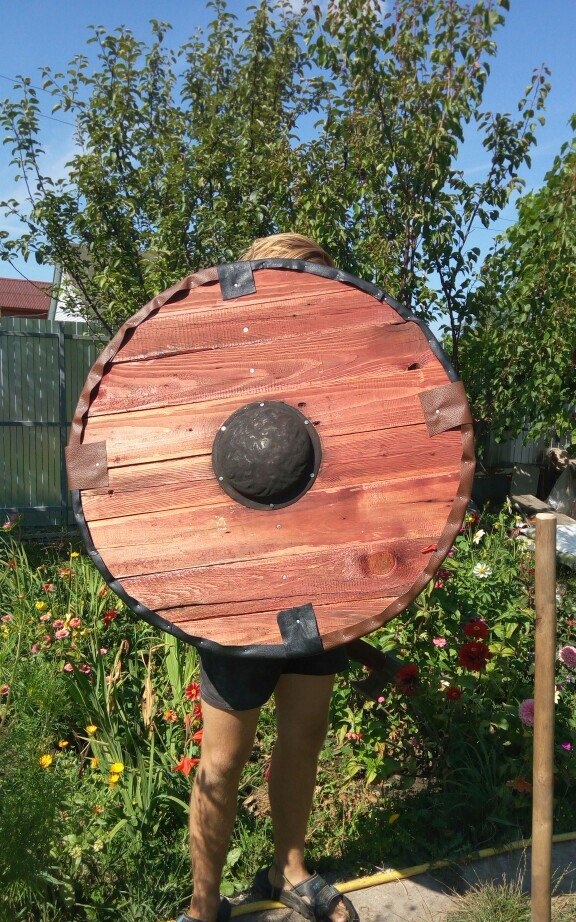
Afterwards a circle with a diameter of 74 cm was drawn. Not the largest or smallest, in general, I chose this size specifically for myself.
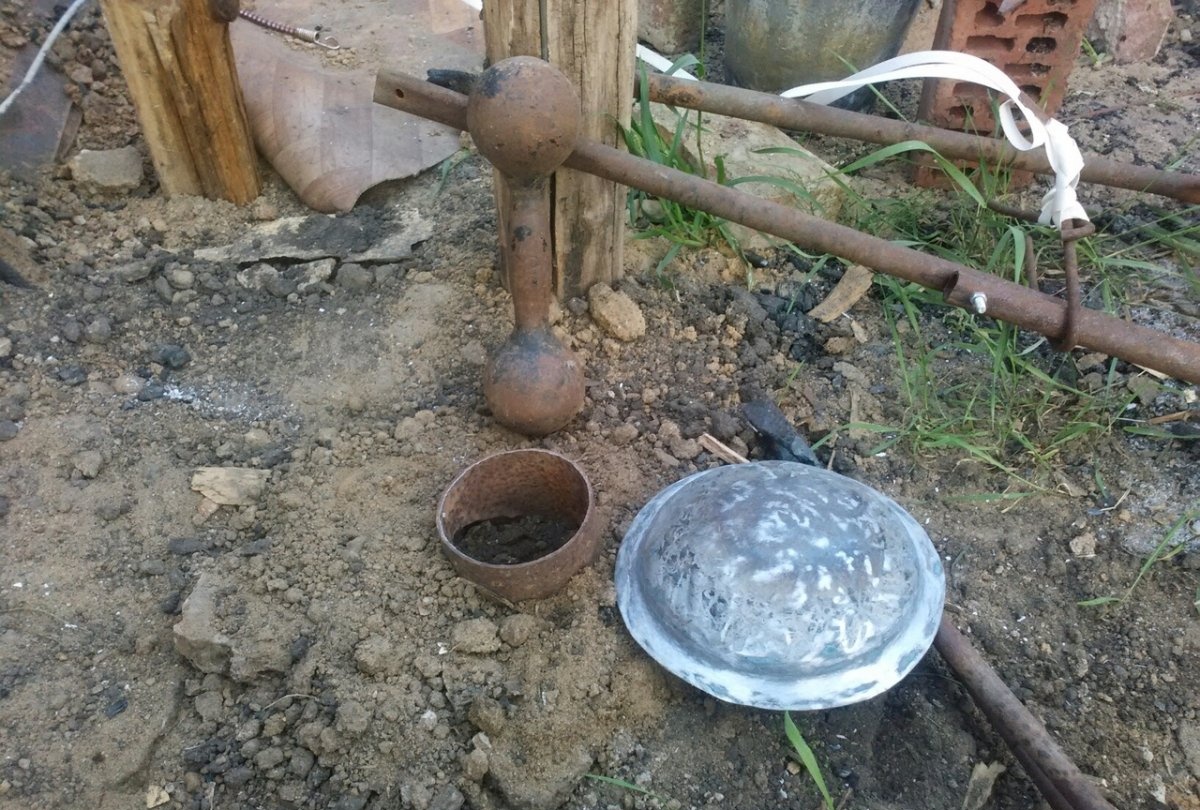
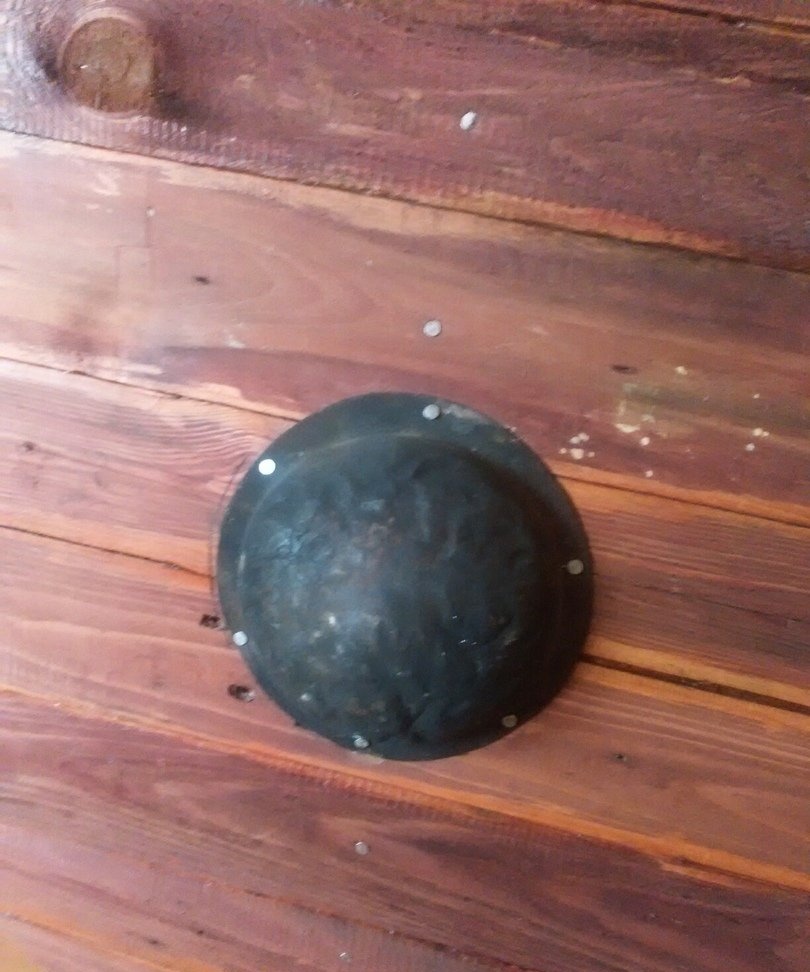
Next, I started making the umbon. In general, it should be made of approximately 4 mm steel, but here I decided to take the path of least resistance. I found an iron plate a little more than one mm thick and began to bend it into a hemisphere.
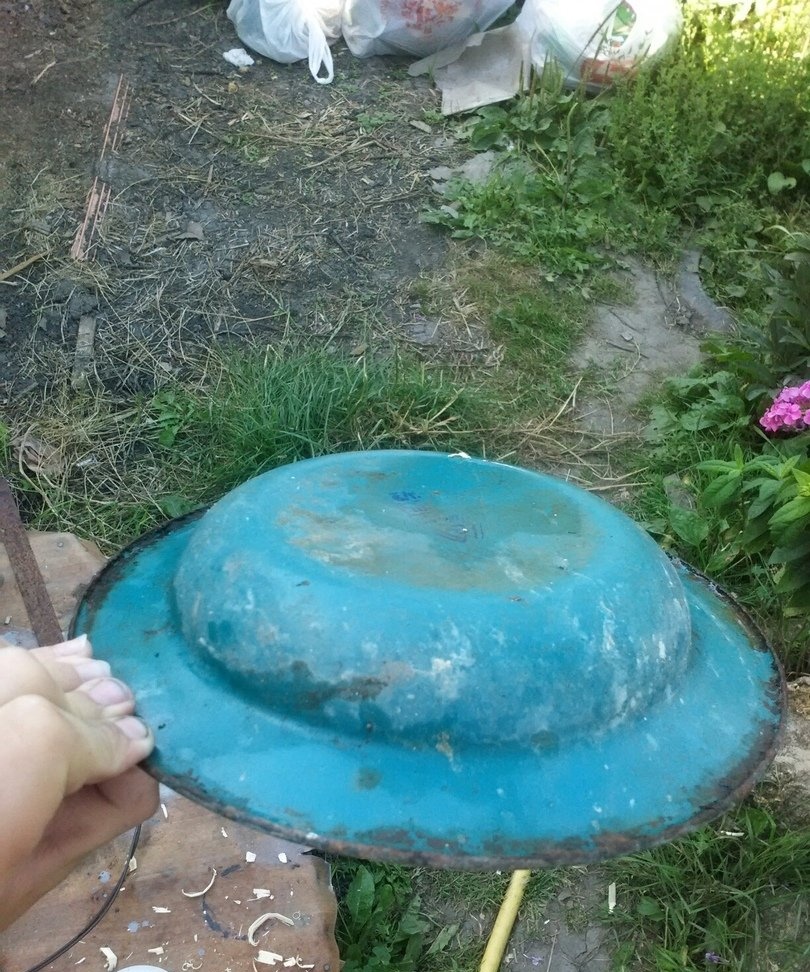
To do this, I dug a pipe into the ground, put a plate on top, constantly heated it with a burner and beat it with an old dumbbell.
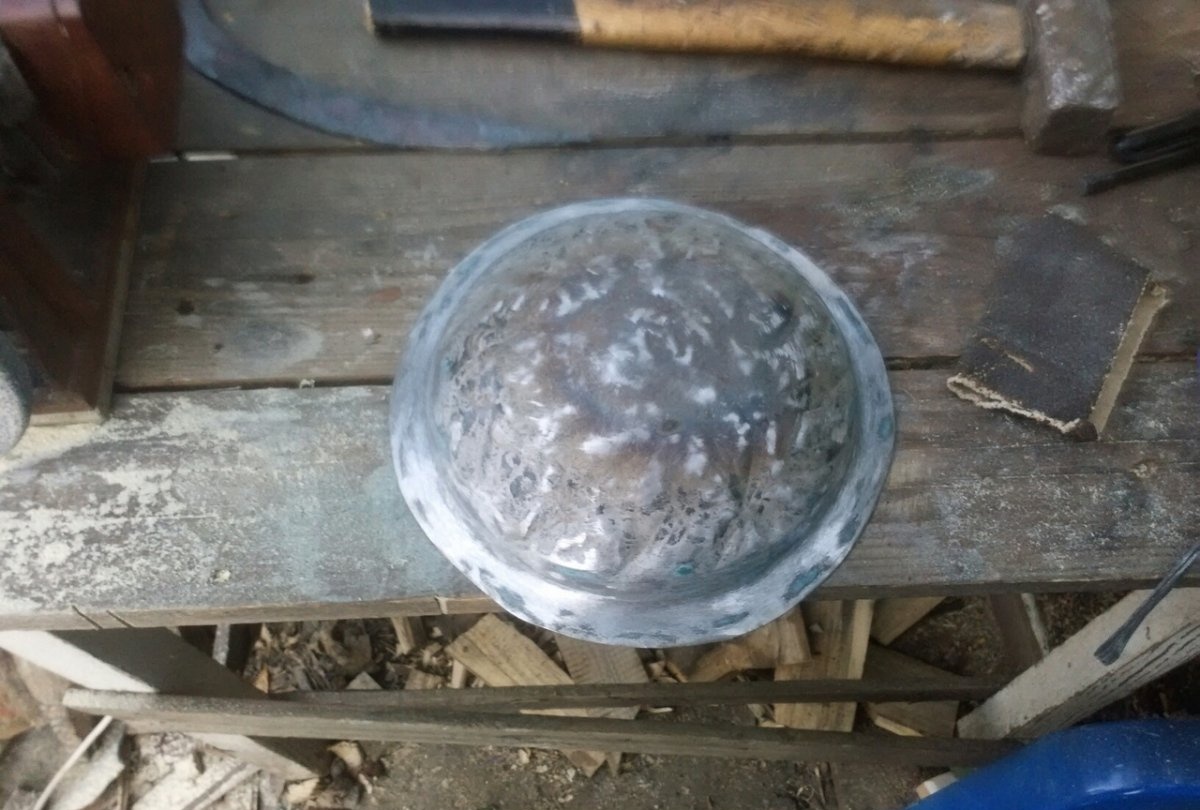
Afterwards, holes were drilled along the edges of the umbon, and I also cleaned it of old paint and smoked it over a fire. Also, leather was glued to the inside of the umbon.
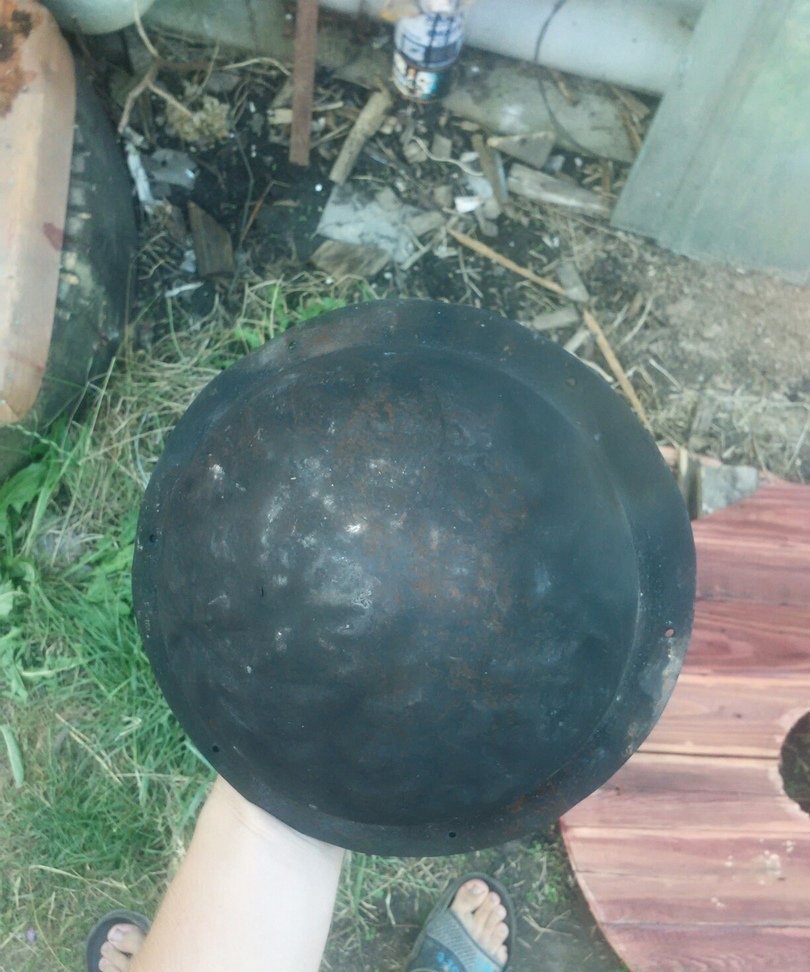
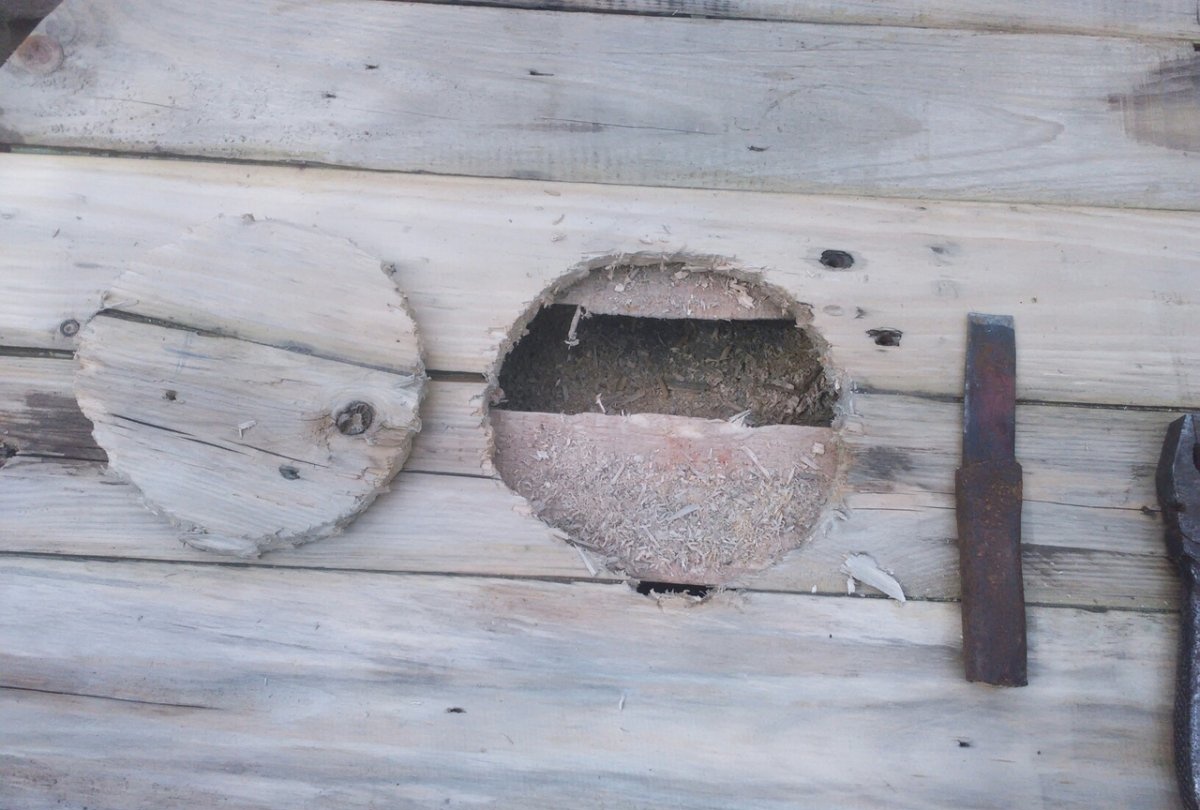
Now we mark a hole for the umbon in the center of the shield and carry out drilling and chisel work.That is, we drill along the edges of the markings, and then we knock out the circle with a chisel, those places that were not drilled. We also drill the umbo itself and the shield along the edges of the hole for the rivets.
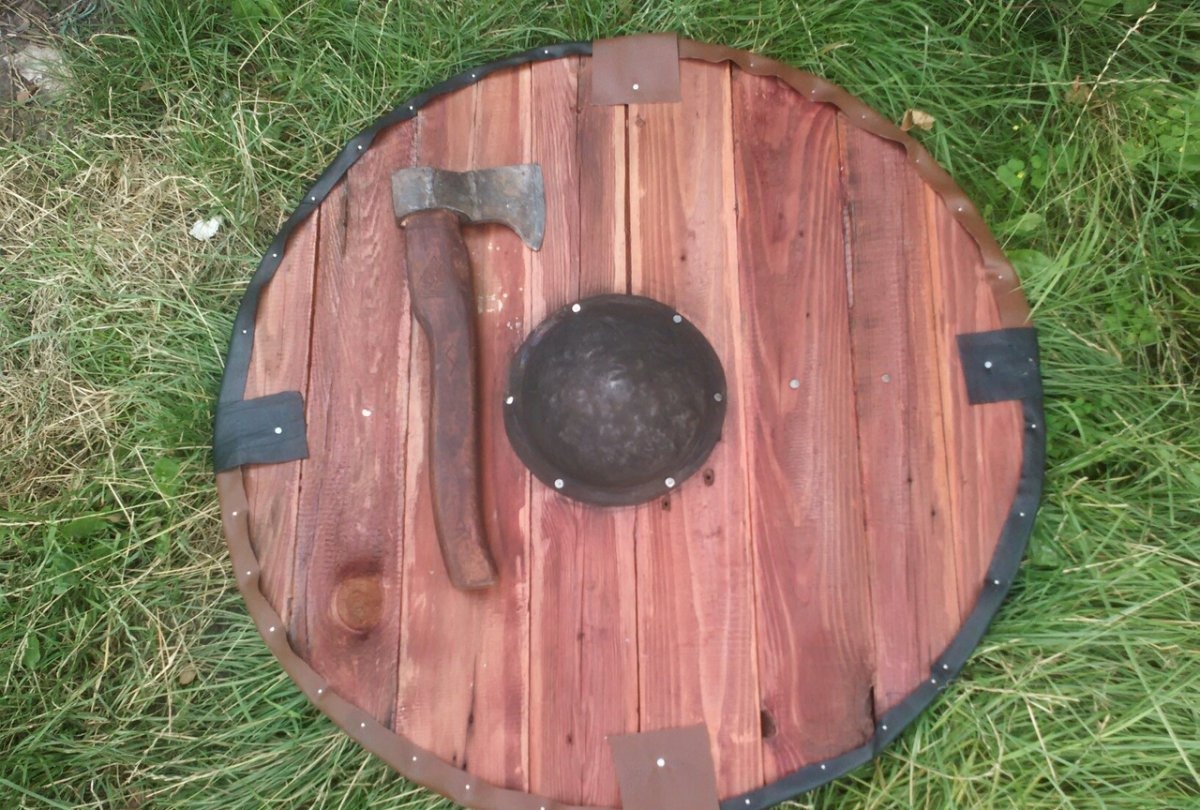
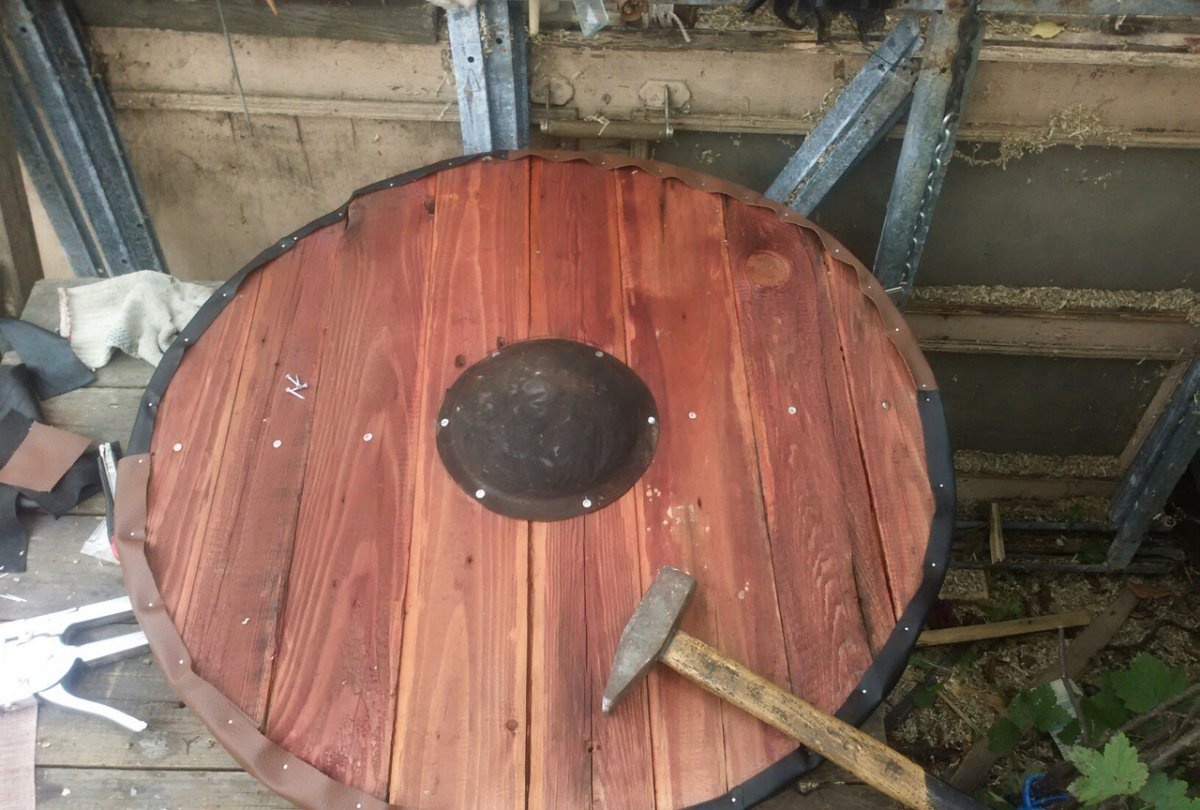
We attach the umbo to the shield with rivets. And we paint the shield with stain. I used a mixture of mahogany and mocha. It turned out quite interesting. In different lighting and different angles, the color is sometimes darkly saturated, sometimes dull and light.
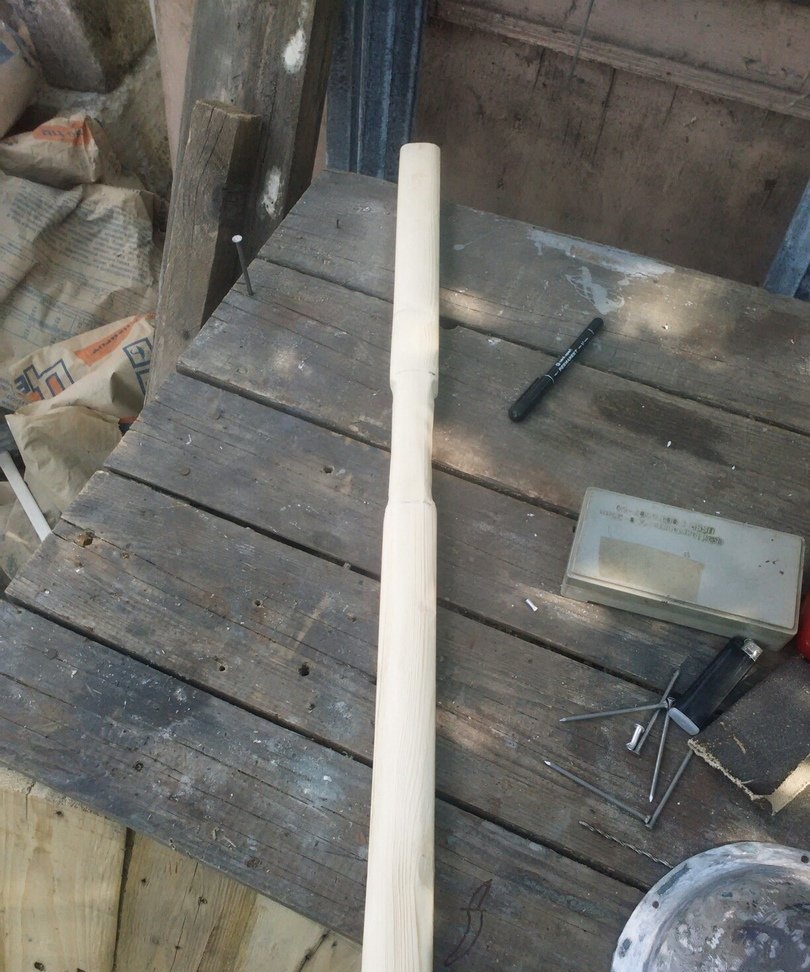
Next I made the handle from a pine block. Why pine? Because it was lying around, why else?!
The handle is also attached to the shield with rivets and to each board to strengthen the shield.
Next I found black and brown leather, which was cut into strips and nailed to the shield with small nails. On the reverse side, I had to additionally attach all the leather with a large stapler, because the nails were too short. Go to the store and buy carnations of the right length? No, not our option.

This completes the production of the shield. And yes, we tried to hit it with an ax and, lo and behold, it survived! It’s better not to repeat this, even if you make a shield and are not sure of it.
There is a rune ax, there is a shield, all that remains is to make a longship and go on a campaign!