I was tired of paying rent for a storage unit and I wanted to get my garage in order, so I decided it was time to make some shelving. At first I thought about purchasing them, but after calculating how much they would cost, I got the idea to make them myself.
Shelving design
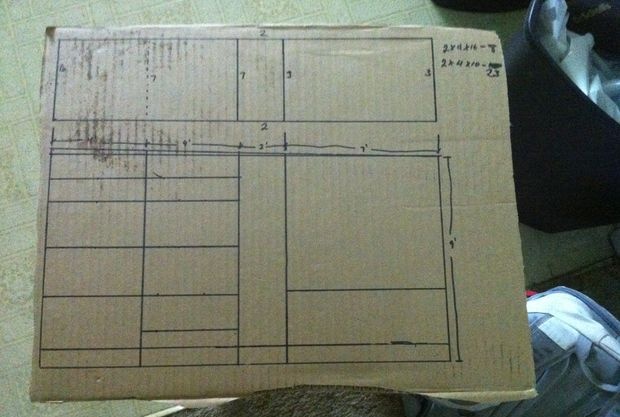

In between working on two projects, I tried my best to come up with the most functional design. About two weeks later I had an idea. I started by measuring the garage, calculating how many shelves I needed and how to divide the space between them. My garage is 5.5m long, but given local lumber size standards, the decision was made to make a 5m rack. The distance from floor to ceiling was 2.75 m. The closest board length to this measurement was 2.45 m. Naturally, I didn't want to leave a 30 cm gap between the top of the rack and the ceiling, so I will use a 3 meter board , cutting it to the required length. While deciding on the height of the shelves, I thought about the main purpose: storage drawers to keep things more organized.My drawers are 42cm high but I wanted to leave some space at the top so the shelf height was chosen at 45cm.
I also need to store some equipment (for climbing, diving, hiking), and I wanted to place it on a rack. To avoid piling one thing on top of another, I decided to make one shelf 30 cm high.
At the moment, like most homeowners, I have accumulated a lot of different things (rakes, shovels, snowboard, wetsuit). I also needed to find a place for all this. So I needed a compartment where I could hang hooks and hang everything there or just hide it.
At this point, my tool collection had grown from a small red box to three boxes and one tool bag. I wanted to make a workbench for them so I could work in the garage where it was dry and warm. Ideally it should be 1.5 m wide.
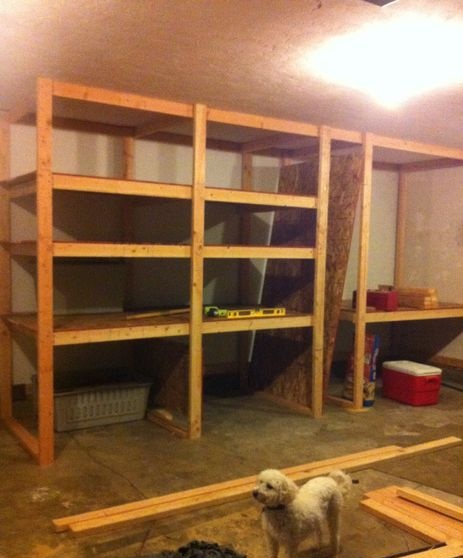
I also have a dog who loves to chew everything. My little friend also needs a small place where he can hide and stay warm. The entire lower left part of the rack was assigned to him.
What you need for a wooden shelving unit
After I made the drawing, I needed to calculate how much lumber I would need.
I counted:
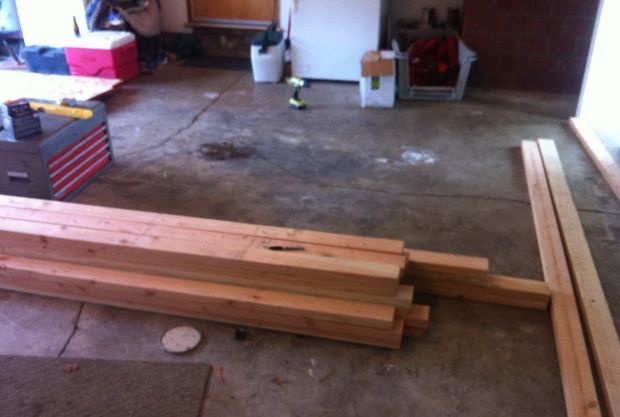
- 8 boards 5 x 10 x 500 cm.
- 23 boards 5 x 10 x 300 cm.
- 6 sheets of plywood 1.2 x 2.4 m.
- Screws.
Let's start making the rack

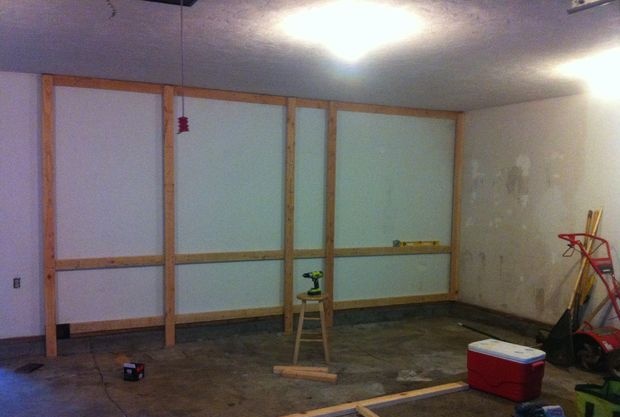
A couple of months ago I leveled the walls because the previous owners did a good job of making them look terrible. After puttying and painting, they began to look pretty good. When I started working, I realized that I hadn't thought through everything enough about where or how I wanted things to be placed. I had good thoughts, but overall I was poorly prepared.The plan was to secure the shelving beams to support beams in the wall. In general, I did not know how to easily determine their location. Luckily, one of my neighbors had a special electronic device that he shared with me for one day. First, we screwed three 500 cm beams: one under the ceiling, another a meter from the floor and the third at the very bottom. After that, we took 300 cm of boards and cut them to the height of the ceiling. We cut them at one time so that they would definitely come out the same length.
Making the outer frame
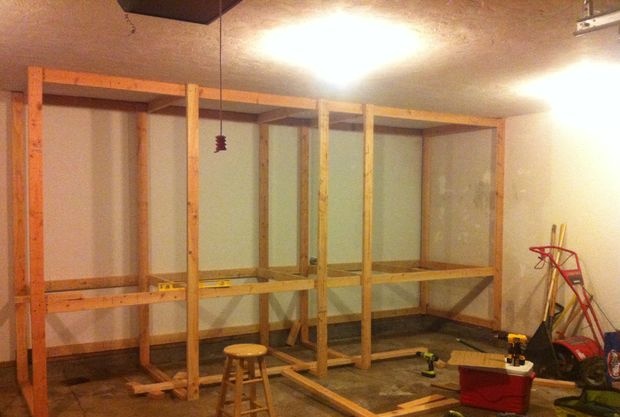
After securing the inner frame, we began making the outer frame. Since its structure was the same, we used the inner one as a template.
Once the outer frame was complete, we pulled it out to find that the ceiling was sagging a bit and was resting against it. Using a hammer, the frame was positioned in the right place, where we secured it to the ceiling. Next, the lower part was installed using a level so that the racks stood vertically.
Fastening the shelves

After the frame was level and vertical, we secured it securely in the ceiling, floor and in the middle.
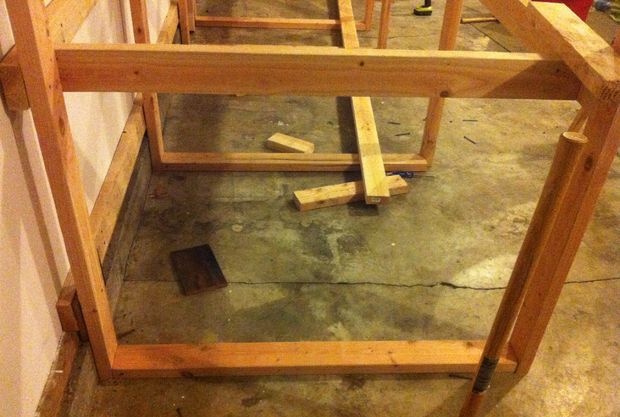
Now the difficult part of the work remains - turning my project into reality. I had to give up 30 cm of the shelf, since when attaching the beams, at least 10 cm of height is lost for each.
After installing the shelf brackets, notches were made in the boards near the walls so that the plywood would fit snugly and nothing could fall behind the shelf.
Addition

Now that everything was assembled, I didn't want to spend any more money and didn't buy the doors I originally planned to install. The idea is that you can install doors with horizontal fastening on beams. And when the garage is open, nosy neighbors will not see my collection of things.
Original article in English