In order to make dreams come true, you don’t need to be a genius. The simplest set of tools and plywood will help you make an excellent two-story garage with an elevated lift. Any boy will be interested in such a toy, as well as the process of its creation, in which he can fully participate.
Having sifted through a lot of information on how to build a toy garage, there is nothing except building an ordinary house with a roof. Therefore, as experience shows, the best garage is the one that is built and designed independently. Having thought through all the details and made a drawing, we got a really interesting garage model, and the work took no more than three hours.
To make a toy garage you will need the following components:
• sheet of plywood (0.3 cm);
• PVA glue;
• jigsaw;
• natfil;
• sandpaper;
• ruler;
• pencil.
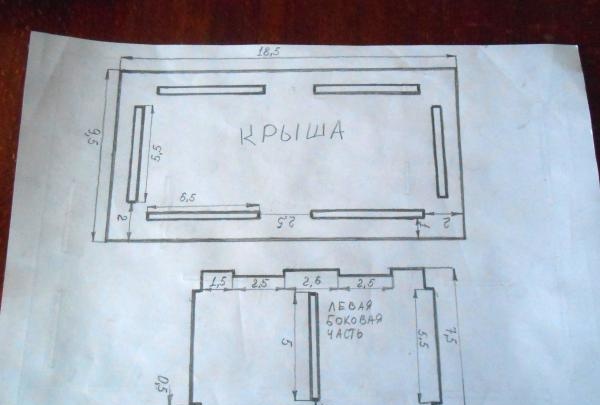
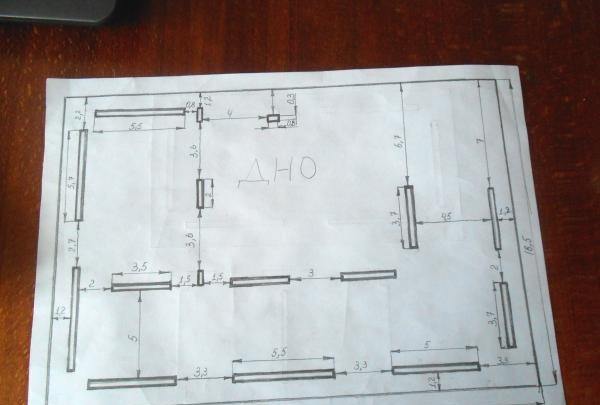
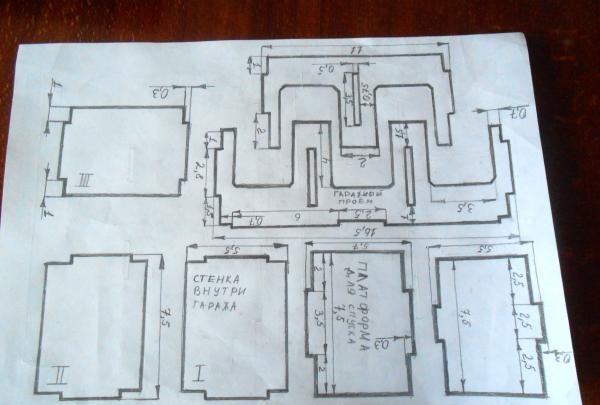
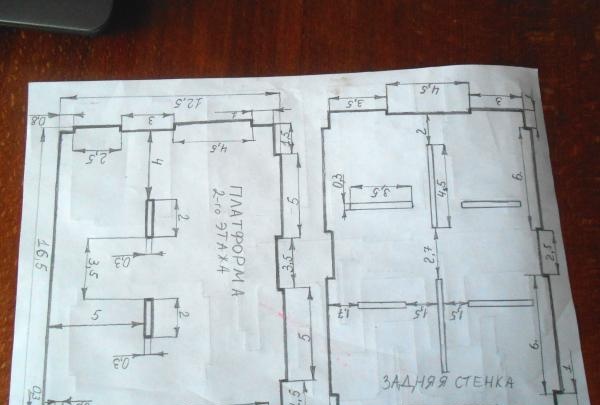
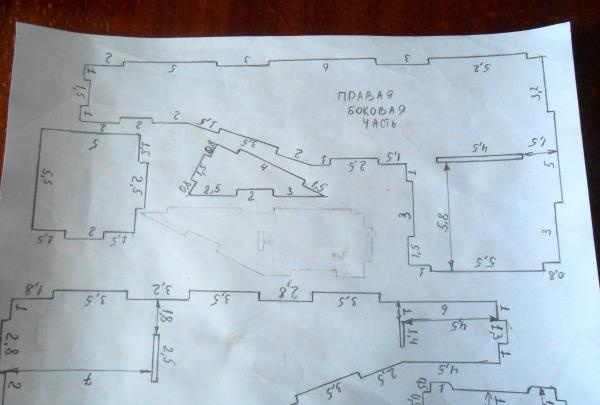
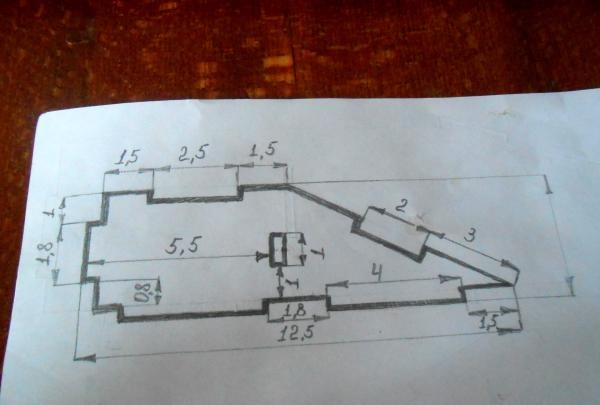
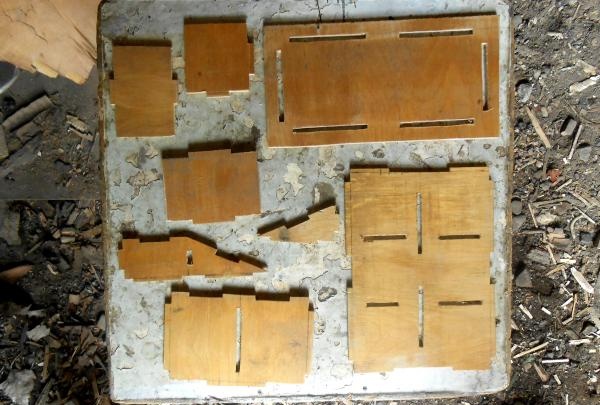
Let us conditionally divide all the work into three stages: constructing a drawing, cutting out parts from plywood, and assembling the finished structure. In order not to describe for a long time what's what, I propose to print out the drawing I proposed, which shows all the dimensions, as well as the number of parts. Looking at the drawings, it may seem that the work ahead is complicated, but in fact everything is as simple as shelling pears, and you will be convinced of this after you start assembling the garage.
The first stage is transferring the drawing onto plywood
Armed with a ruler and pencil, you need to transfer the existing drawing of the parts to the working surface - plywood. To do this, having measured the length and width indicated in the drawing, you need to build a similar one on plywood. There is no need to place the parts too close to each other, because in order to save material, an incident may occur - when cutting, the plywood may break in the most inappropriate place. After all the parts are ready, you can proceed to the second stage - cutting them out.
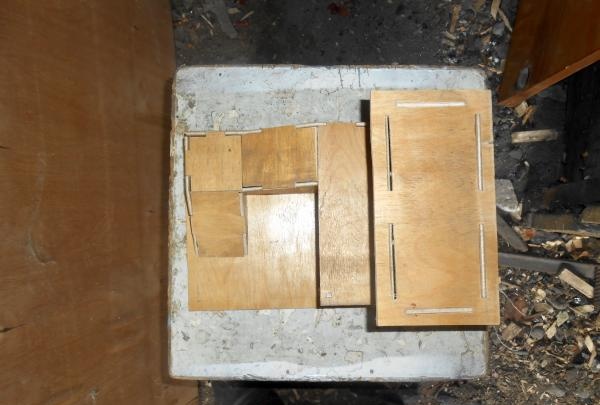
The second stage is cutting out parts
In order to cut out exactly all the available parts, you need to use a jigsaw for wood. If you have an electric jigsaw, this procedure will generally take a few minutes. If such a miracle of technology is not at hand, an ordinary jigsaw will do the job. It is worth noting that before starting work, the plywood should rest at room temperature and low humidity so that the edges do not crumble and the cutting is softer. First you need to cut out the largest parts: the bottom, roof and sides. After this, you can move on to smaller parts, cutting them out with care.
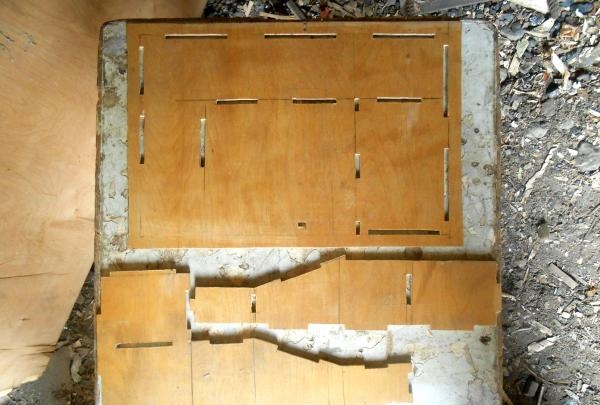
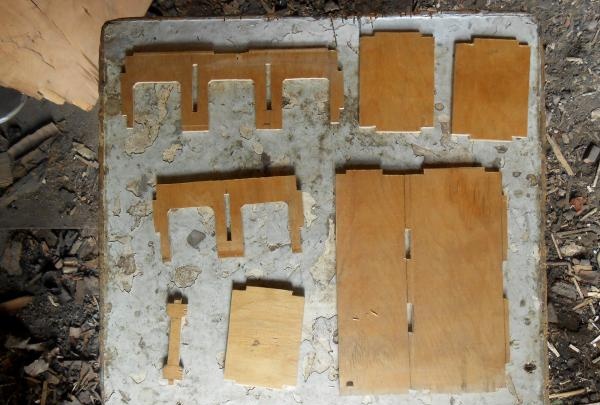
First of all, the parts are cut out, and then holes are made in them, which will be needed for joints and connecting all the parts.

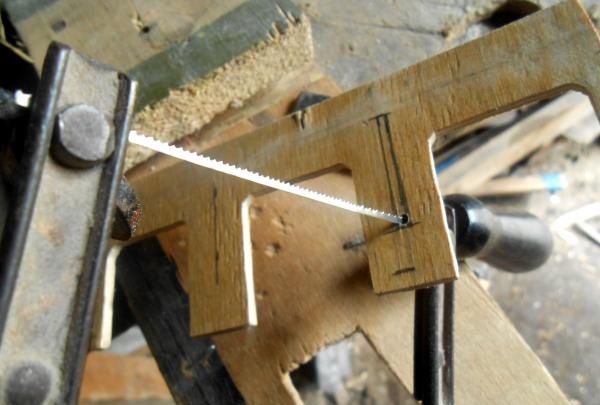
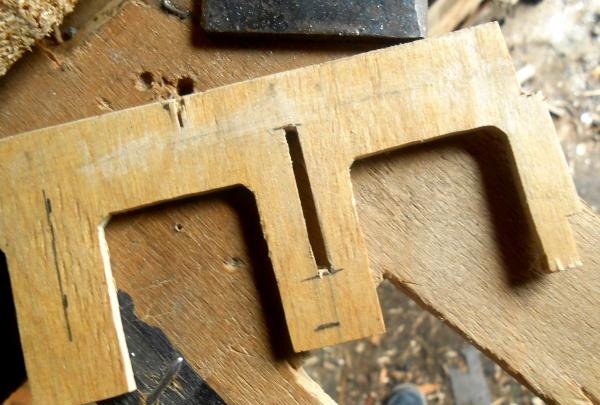
After all the parts are ready, you need to process their edges. To do this, we fix each part in a vice and trim the edges with file.

This procedure is very important, since the child should not get hurt or get a splinter from the raw edges of the material while playing.
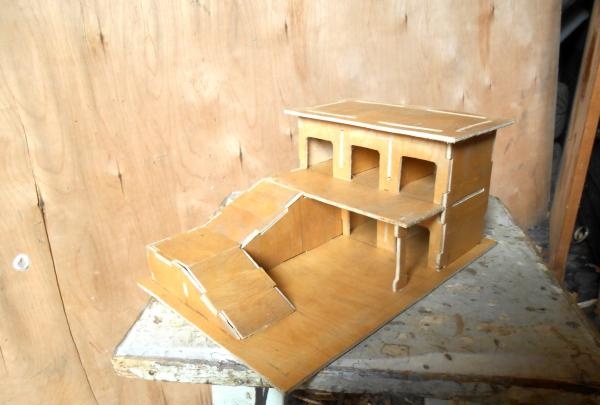
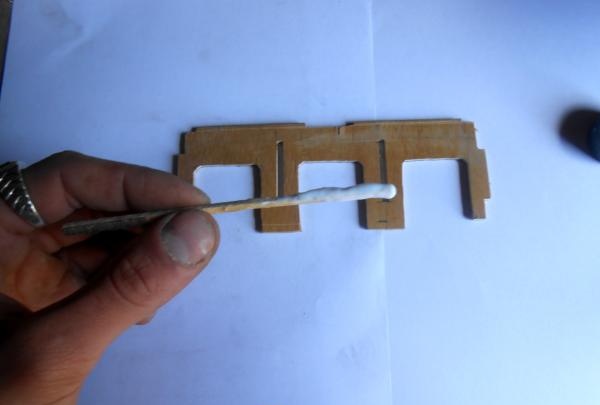
The third stage - assembling the garage
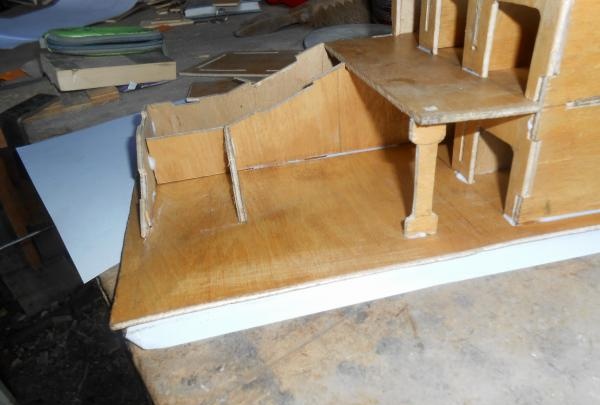
We will carry out the work sequentially, and if there are any “misunderstandings” in the explanation, then you can refer to the photograph, where you can clearly see what’s what.
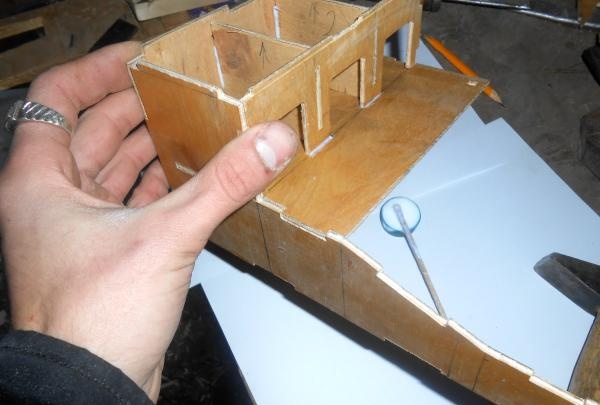
1. We will need parts such as the front of the second floor and the platform. We take PVA glue and coat the gaps so that we can glue the parts together after connecting them first.
2. After this, we install partitions that serve as walls that separate the garage for individual cars.
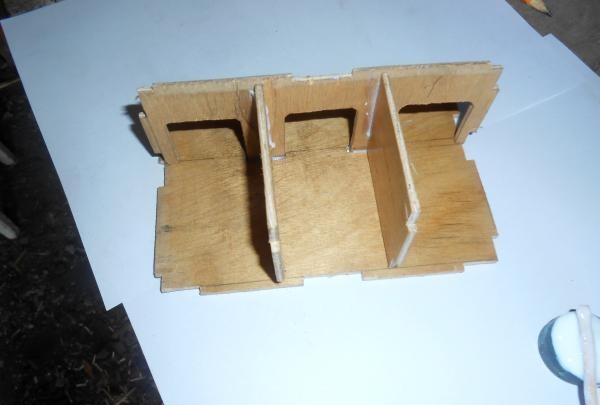
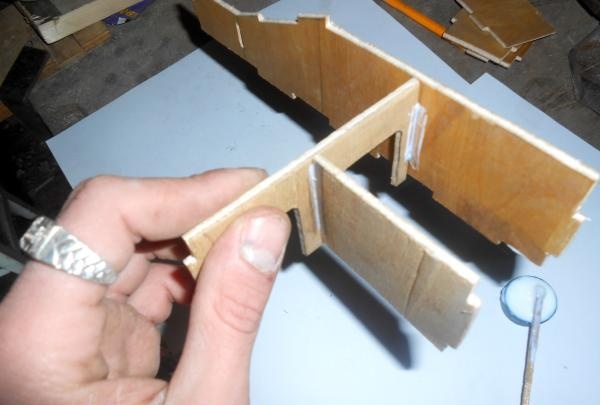
3. Next, take the right side piece and glue it to the lower front wall of the garage. After which you can combine the two previous parts, resulting in a body.
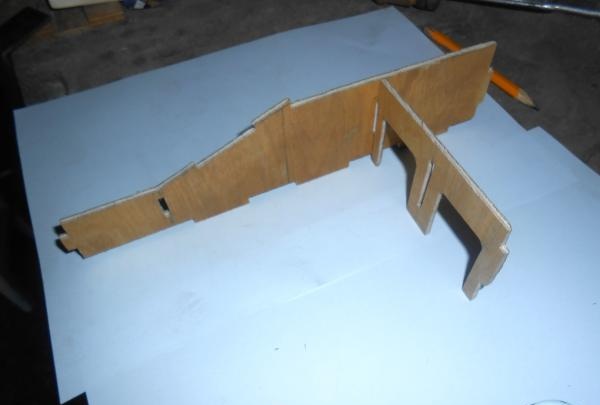
4. When the first floor is completely assembled, having installed all the parts, you need to start lifting. To do this, we install the same part in parallel to the right side part, closing them on top with partitions, not forgetting to coat them well with glue.
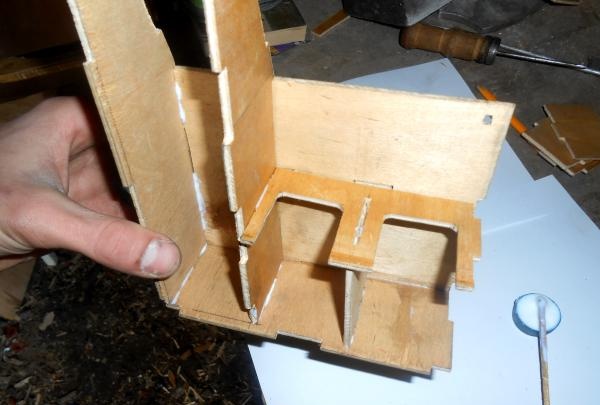
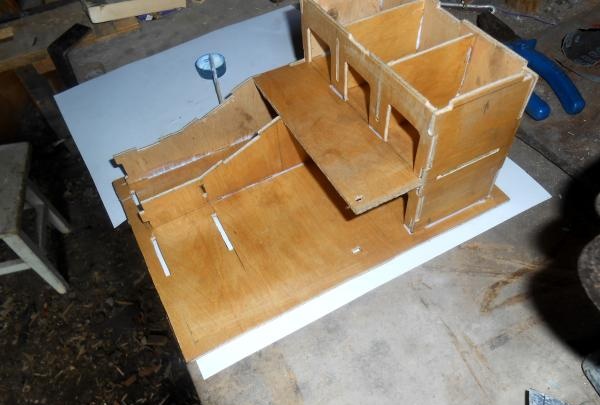
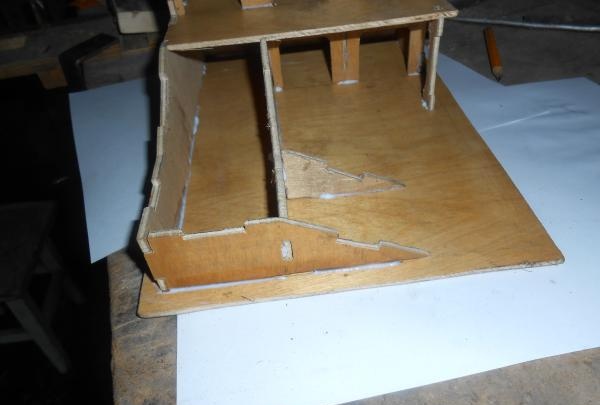
The final stage is gluing the roof and the lowest bridge
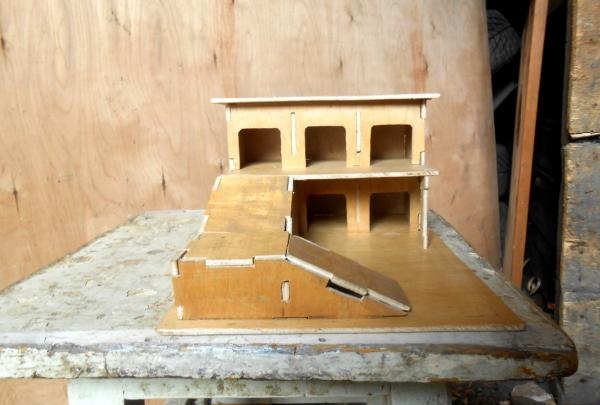


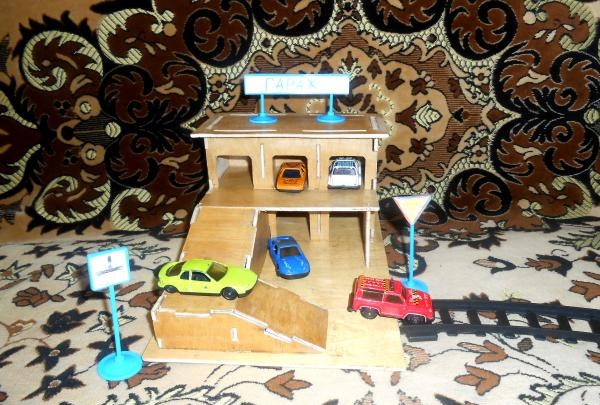
If the description seems complicated, the photographs will suggest a way out of the situation, showing in more detail what to attach where. When the glue has dried well, you can give your child a garage to play in. Such a toy will please absolutely any boy, and will help parents teach their child order. this is what happens in the end.