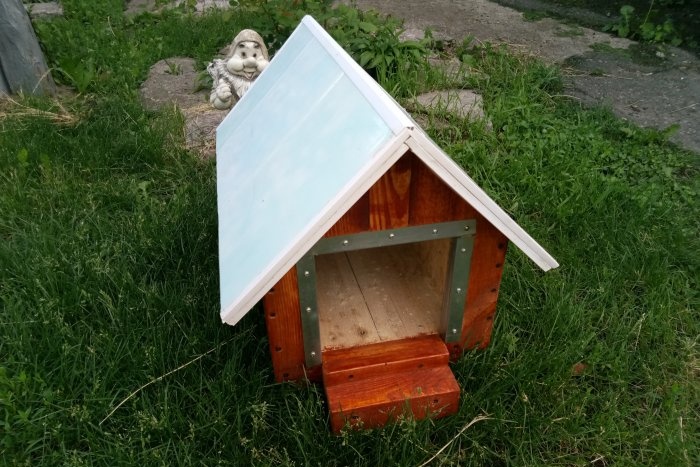
To make a dog house with your own hands, you need to correctly calculate the dimensions, as well as prepare a minimum of tools and materials. The described project is designed for those who do not have “cool” carpentry equipment and serious skills in working with wood.
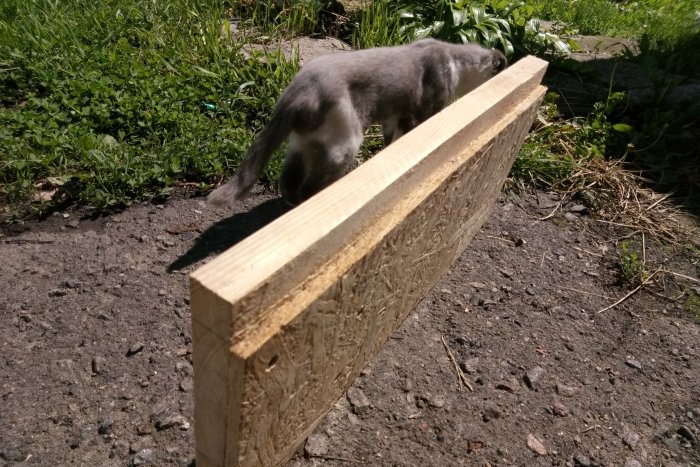
The article describes in detail how to choose the size of a home in which your dog will not be cramped and not cold in winter. The dog house shown in the photos was not insulated and did not have a curtain installed to protect the entrance from snow. There is a little theory about this at the end, which will be easy to put into practice.
Materials
Naturally, the required amount of materials directly depends on the size of your pet. This particular kennel was made for a very small yard dog, and the following materials were used to make it (construction waste and trim scraps):
- Bar 50x50 mm – 2.50 m.
- Edged board 25x150 mm – 4 m.
- OSB 7 mm – approximately 2 sq.m.
- Ruberoid – 1 sq.m.
- Plastic panels - about 2 m.
- Wood screws 35 mm – about 100 pieces.
- Wood screws 80 mm – 10 pieces.
- Galvanized U-shaped profile – 60 cm.
- Glue.
The board can be taken with a thickness of 20 mm. If there is no OSB, then MDF and chipboard of approximately the same thickness will do. Ruberoid acts as waterproofing. If not available, use any other waterproof material. The roof is made of plastic panels because there was nothing else suitable at hand. You can use soft tiles, corrugated sheets, etc.
Fewer self-tapping screws may be needed, but this way the design is as rigid as possible. Plus, they're cheap. A galvanized profile is needed to strengthen the edges at the entrance to the booth. This is especially necessary in cases where the dog is kept on a chain. Glue was only used to secure the plastic profiles. If desired, you can glue all the joints of the wood (and save significantly on screws).
Tools
The key advantage of this project is simplicity. To implement it, you do not need expensive specific tools that the average home craftsman does not have. To make a dog house with your own hands you will need the following:
- A hacksaw for wood (you can use a jigsaw or a circular saw).
- Screwdriver (optional).
- Electric drill (no way without it).
- Carpenter's square.
- Roulette.
- A simple pencil or marker.
- Clamps (optional).
- Wood drill bit with a diameter of 2.5 mm.
- Bit for screwing in self-tapping screws.
- Stationery knife (convenient for cutting plastic panels)
- Construction stapler.
- Sanding tool (orbital, oscillating or belt sander).
In the absence of what is listed in the last paragraph, you can go in other ways. The simplest of them is a disc-shaped attachment for sanding wheels for a drill (everyone has one).
Naturally, if you have a circular saw, surface planer, jointer and other carpentry tools at your disposal, working with them will speed up significantly.
Dog house dimensions
Despite the abundance of illustrated explanations on the Internet, guessing the size of the future booth is not so easy. Most examples use the following principle:
- The length of the booth should correspond to the distance from the dog’s nose to tailbone.
- The width of the housing is equal to the height from the paws to the withers.
- The height corresponds to the height of the dog up to the top of the head.
- The entrance height is similar.
- The width of the entrance is equal to the transverse size of the chest plus a couple of centimeters.
In principle, you can safely be guided by these principles. But there are a number of nuances. Firstly, the dog does not need such a high entrance. Therefore, feel free to reduce it by a few centimeters. The same thing applies to the entrance width. Secondly, it is better to take the length of the booth taking into account the length of the tail. It is also recommended to increase the width of the kennel slightly. This is especially true for those dogs who are planning offspring.
There is also a second side to the coin. You shouldn’t overestimate the size of a dog’s home, since there will be no heating system there, and the pet will have to keep warm on its own in the winter. Excess volume will make this task more difficult. The entrance, even if it is made exactly according to the size of the dog, is better to be closed during the winter. There are a couple of ideas on this below.
In the end, if you overdo it with the size of the booth, the work will become more difficult, and much more materials will be needed.
Step-by-step assembly of a booth with your own hands
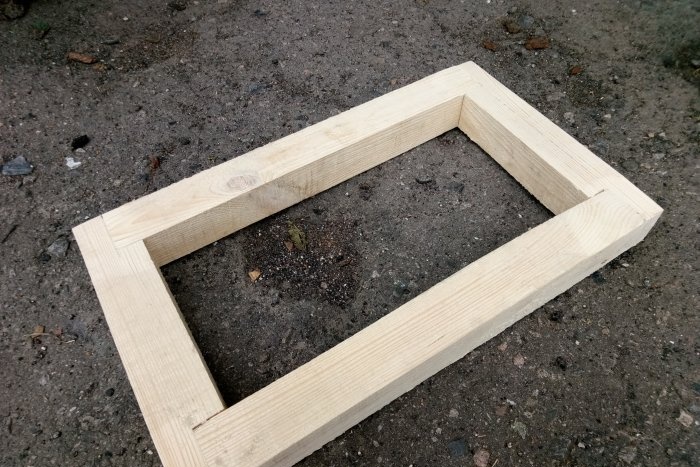
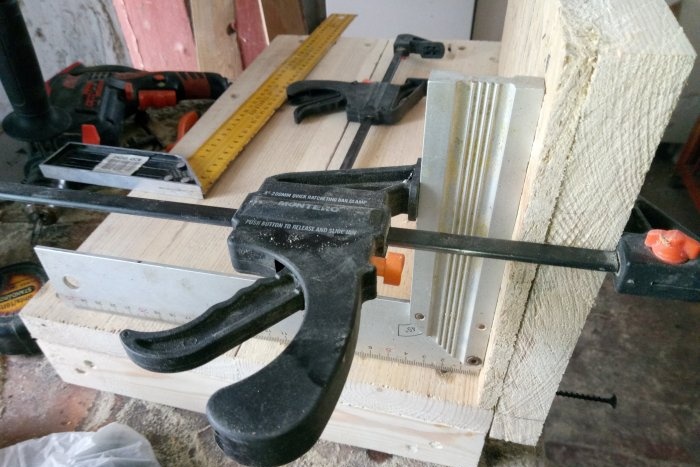
Start "construction“need from the bottom – the bottom. A frame is made from timber to fit the external dimensions of the booth, on which a board is laid. All parts are fastened with self-tapping screws.Here and further, you should remember that holes are pre-drilled for all self-tapping screws. This technique will make assembly easier and also reduce the risk of splitting lumber to zero. The accuracy of the work, by the way, also increases significantly only due to drilling.
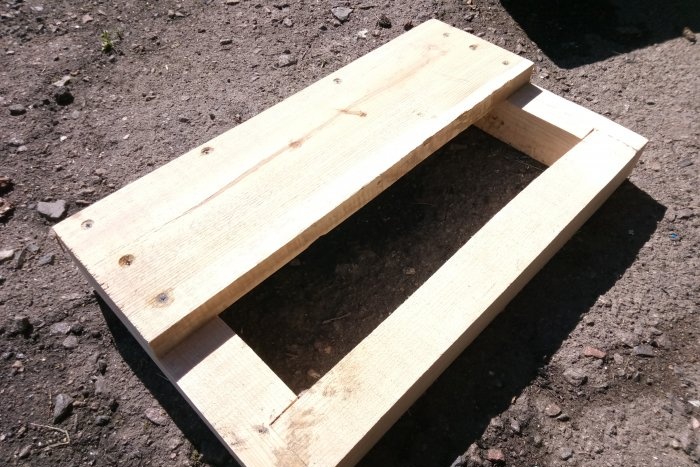
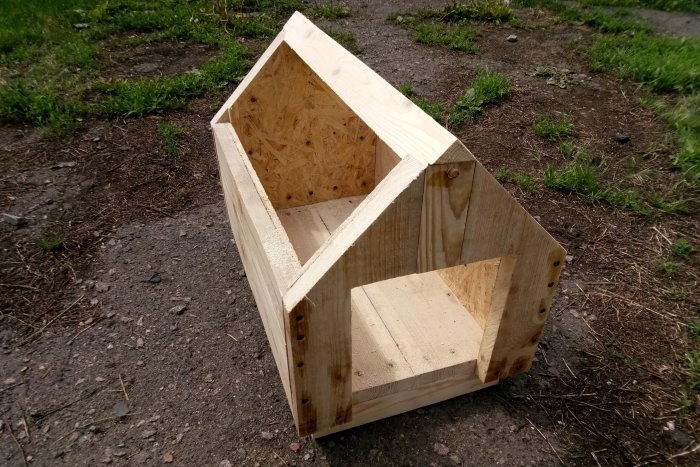
Next, the side panels are made. They are needed because the booth will not have a frame. It is not needed, since the product is small, and excess bars will only steal the free space inside. For the panels you will need boards and sheet material (OSB in the photo). This cake allows you to obtain the required strength without a frame. In addition, OSB will cover the joints between the boards, which, during long-term use on the street, will inevitably turn into cracks. The side panels are attached to the bottom boards with self-tapping screws. The technique is the same - drill, then screw in. We ensure the verticality of the panels using a carpenter's square and clamps.
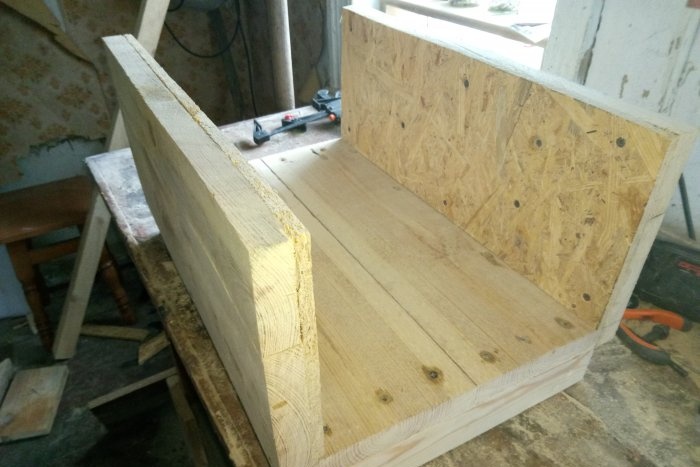
The next element is the back panel. It is made similarly to the previous ones from boards and OSB. The photo shows how to leave spaces free from the slab for docking. The fastening technology is the same.
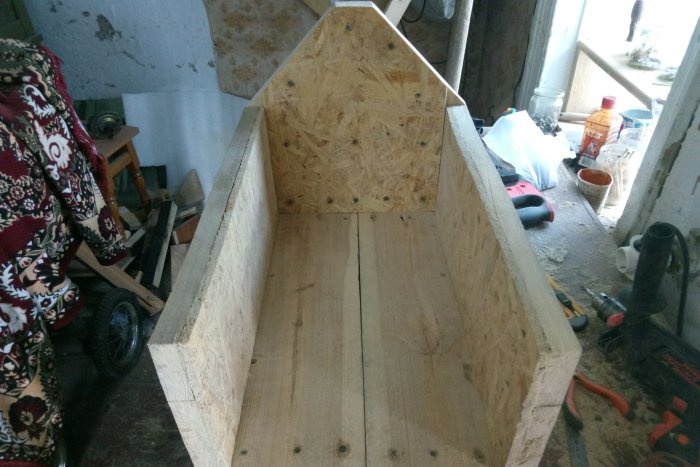
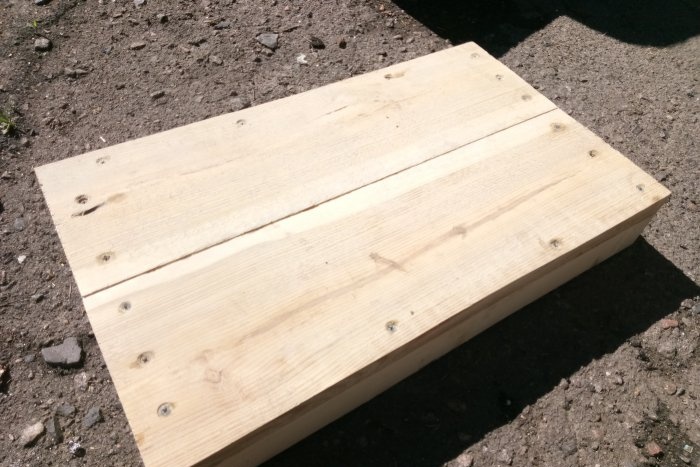
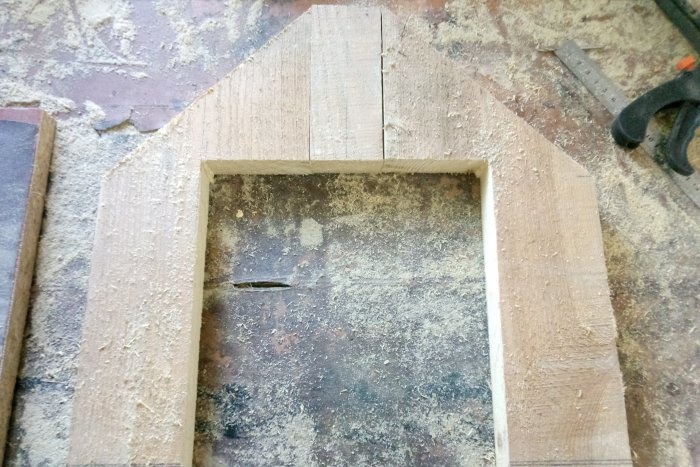
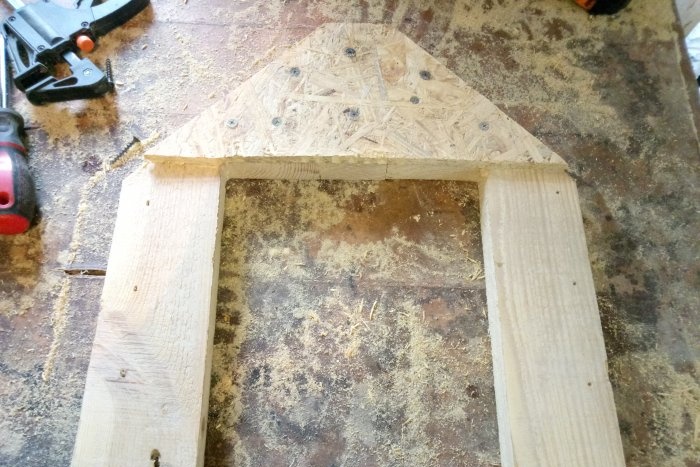
The front panel is a little more complicated. If you have an electric jigsaw, then it is better to duplicate this part by analogy with the back panel, and then cut out the entrance. If you don't have a jigsaw, you'll have to cut it right away. Again, the entire panel will be held together by the OSB. We install. We make sure that the structure is already strong and rigid.
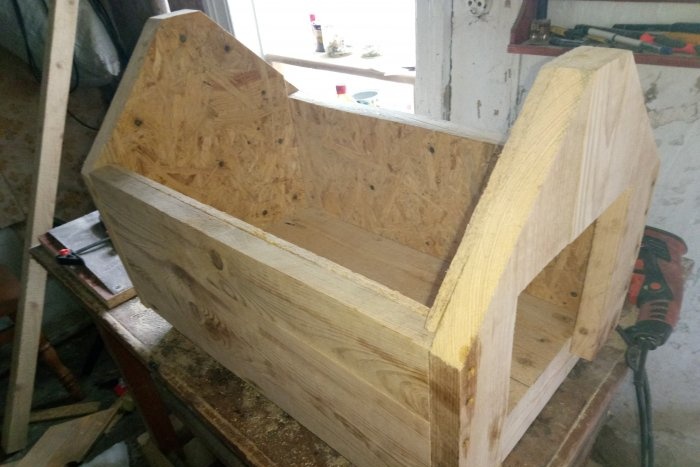
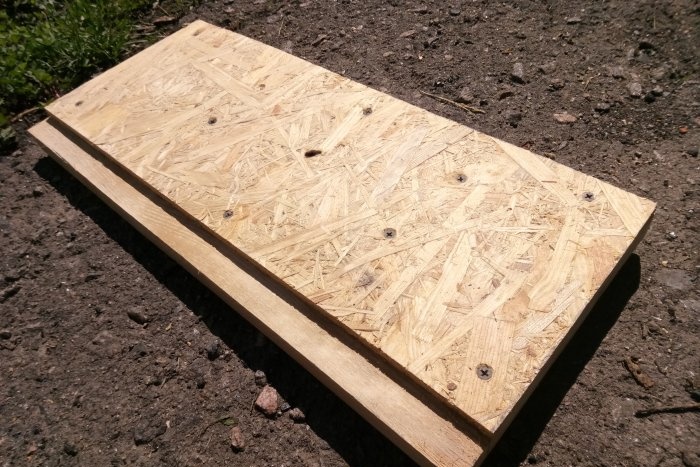
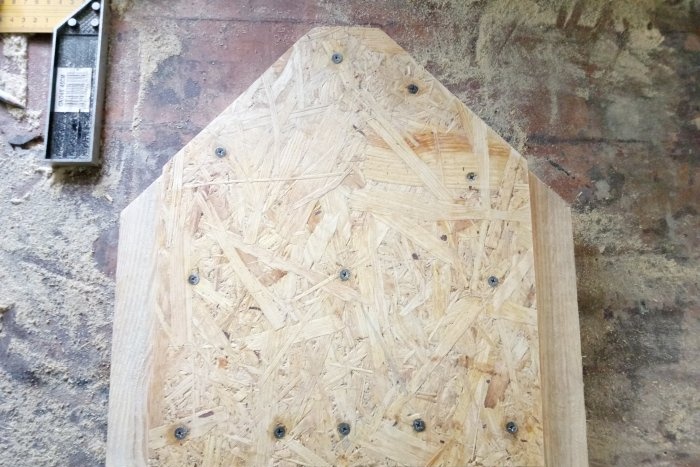
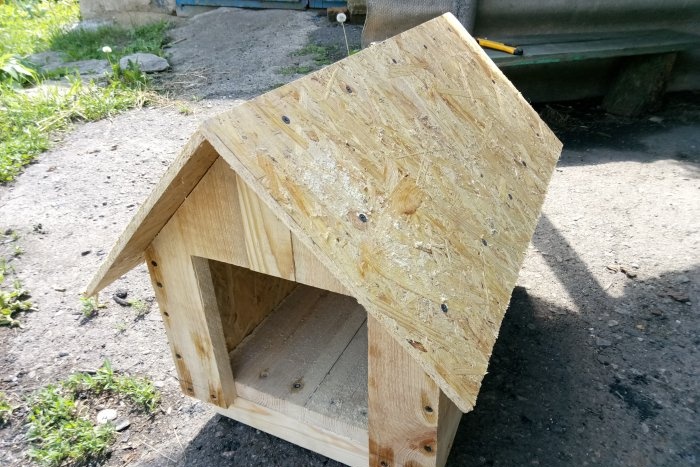
To fasten the roofing material in the ridge part, it is necessary to cut and secure the block, as shown in the photo. Next, the OSB substrates are cut out. They are attached to the ridge beam, the ribs of the front and rear panels, as well as to the ends of the side walls. We calculate the dimensions of the substrate so that there are overlaps on all sides.This will slightly protect the “walls” of the home from precipitation.
It is advisable to lay waterproofing under the roofing material. This is especially true for those types of roofing that will have joints. In the example, ordinary modern roofing felt was used, mounted on staples using a stapler. You can glue it, grab it with furniture nails, and so on.
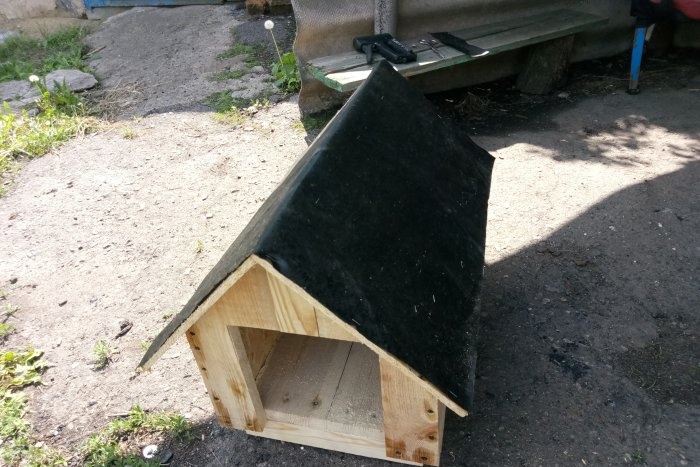
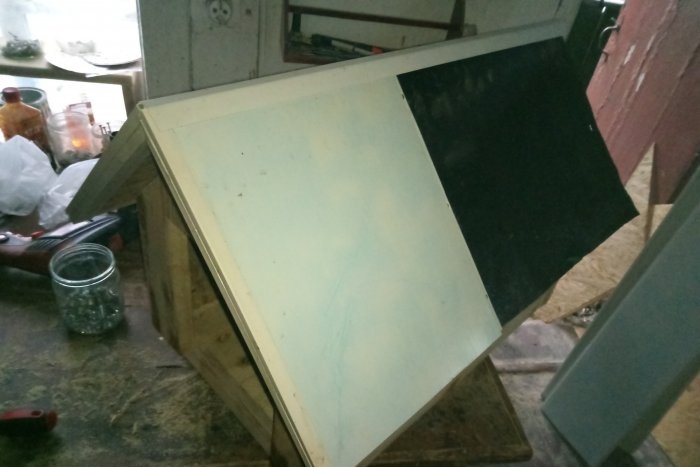
With roofing material, everything is individual. In this case, an internal corner for PVC panels was used to arrange the ridge. If there is an external one, it will be simpler and easier. A starting plastic profile was attached to the front and back along the slopes. Here it was glued with waterproof glue, although self-tapping screws could also be used. The last to be installed are the plastic panels. In the example, they were attached with self-tapping screws, and the joints were treated with waterproof glue. The latter is not particularly necessary, since the waterproofing is already there.
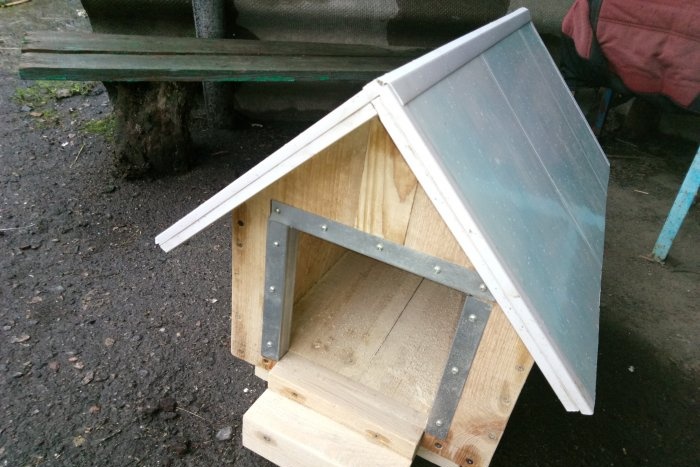
The finishing touches are strengthening the edge of the entrance and installing steps. In order to protect the edge from destruction, a galvanized starting profile was used (I think it's called UD). The steps are made of timber and mounted on self-tapping screws 80 mm long (it is necessary to drill, otherwise they will burst).
All external surfaces (wooden) must be protected from weather influences. Suitable stains followed by varnishing (as in the example), paint, and wood oil.
Insulation of the booth and protection of the entrance
If you need a warmer booth, you can use heat-insulating material, for example, foamed polyethylene (the one with foil). The bottom can be insulated with polystyrene foam. There was just a deep niche left there for these purposes. The walls and roof must be insulated in advance, during the manufacturing process of the panels.After assembly, in this case, getting inside will be problematic, although possible.
To protect the entrance from snow in winter, you can use technology that is often used in warehouses. It is made from longitudinal strips of flexible transparent plastic. These are sold in some construction supermarkets. They will not disturb the dog, but will significantly affect the thermal insulation characteristics of the home. As a last resort, you can use dense polyethylene, leather or its substitutes. Cut an old woman's handbag into shreds, and you will be happy (only the old one, and not the one used by your mother, wife, daughter or sister).