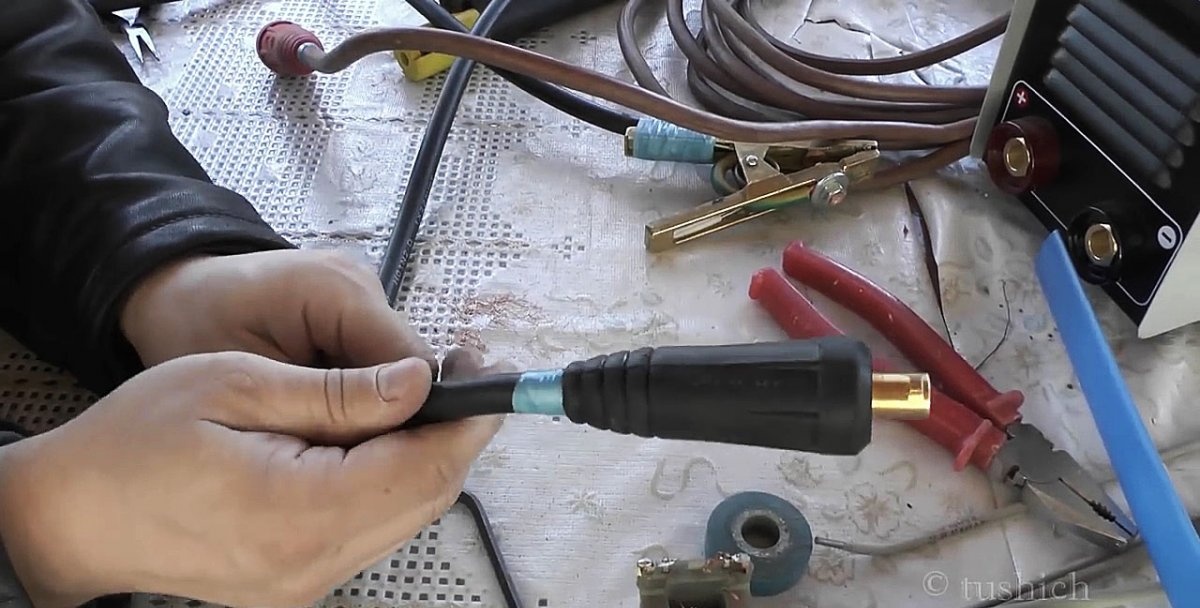
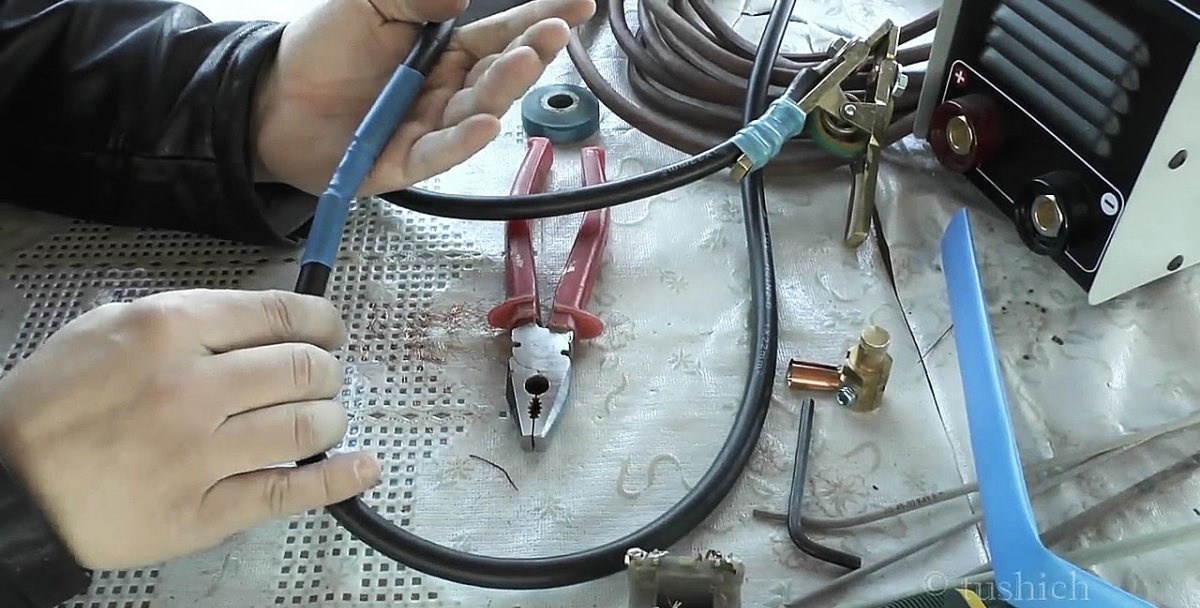
Owners of budget welding inverters are faced with the problem of excessively short wires. On my device they are only 180 cm, which limits the ease of use. I decided to replace the positive cable with a new solid piece, and splice the mass from 2 original sections. To connect them, I propose a reliable method without soldering or crimping.
Materials and tools
To complete the work you will need:
- hex wrench;
- thin copper wire;
- heat shrink tube for the cable diameter;
- insulating tape;
- pliers;
- gas soldering iron;
- metal scissors or cable cutter;
- assembly knife.
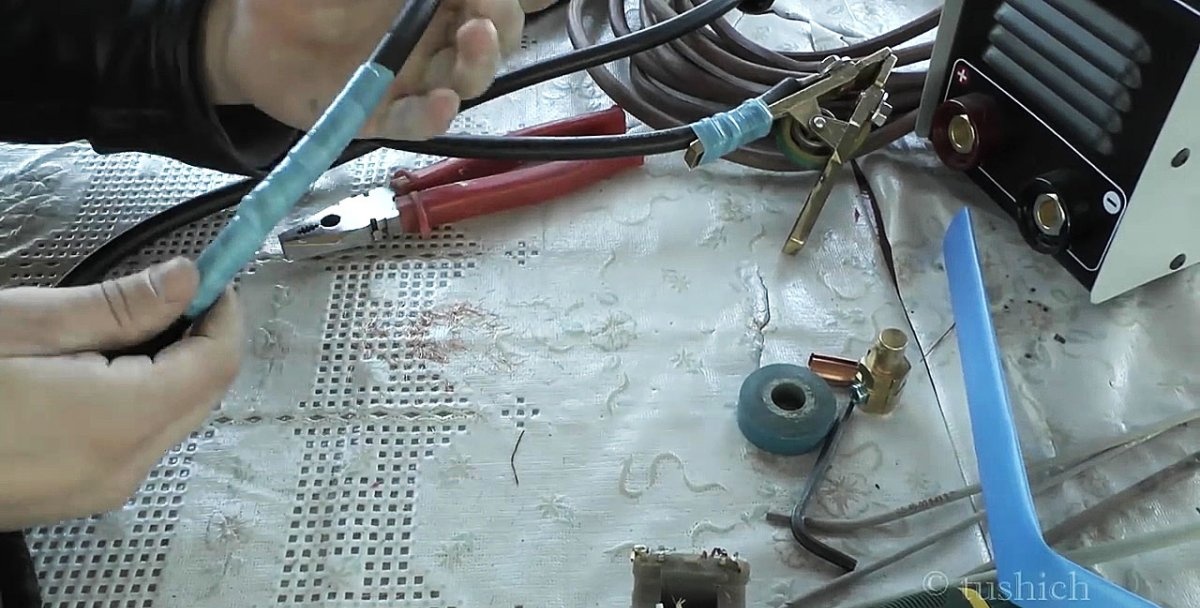
Cable splicing
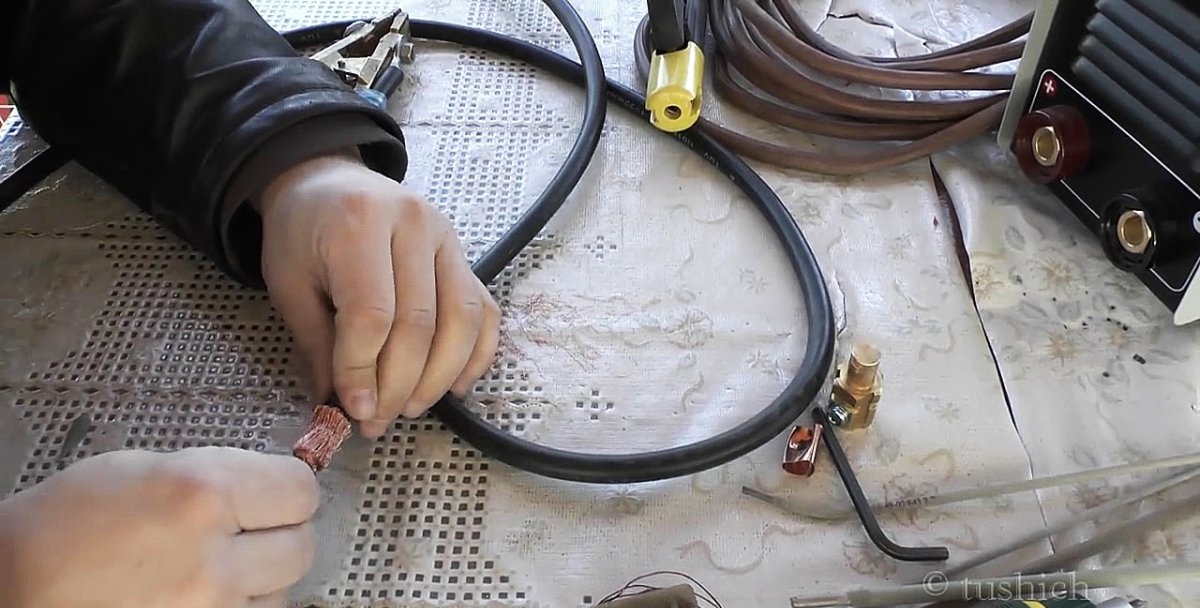
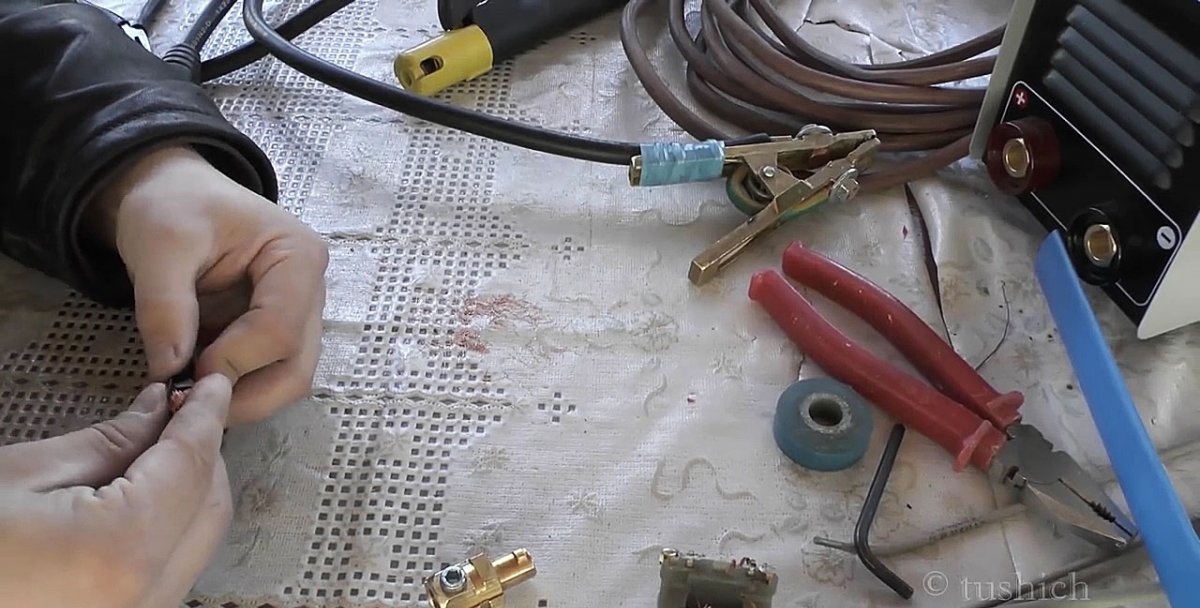
First you need to remove the cable end that connects to the inverter. To do this, it is inserted into the device, after which you need to forcefully pull the insulating cap towards you. Under load it comes out, revealing the tip. It is fixed with one bolt. You need to unscrew it with a hex key to release the cable. To prevent crushing, the bundle of cores is wrapped with a copper plate, which also needs to be removed by straightening it with pliers.
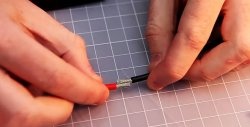
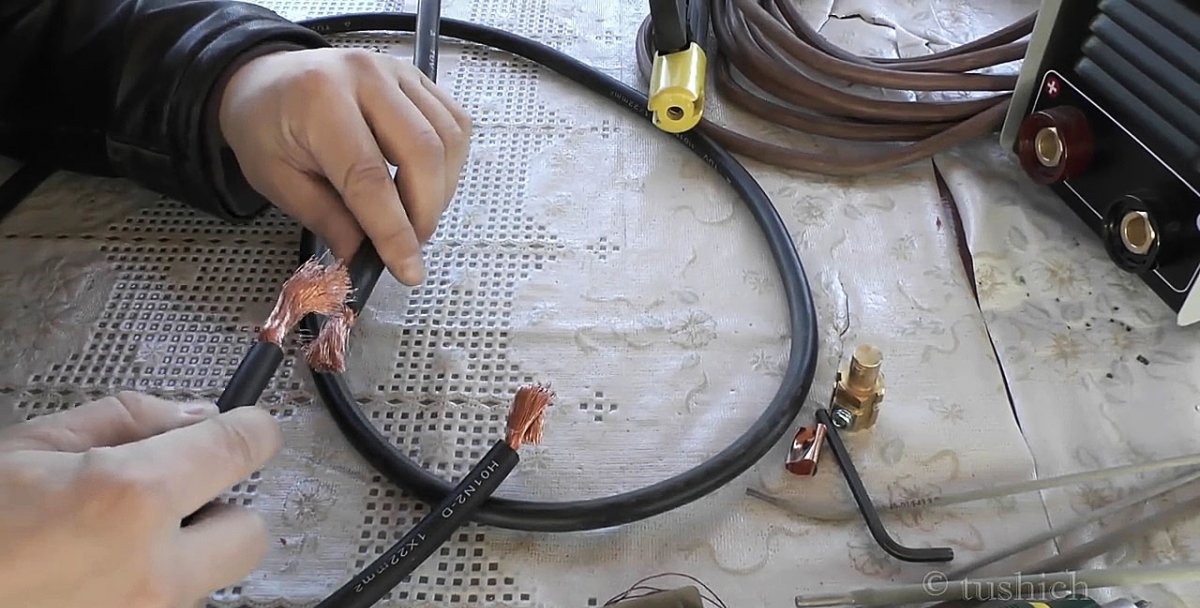
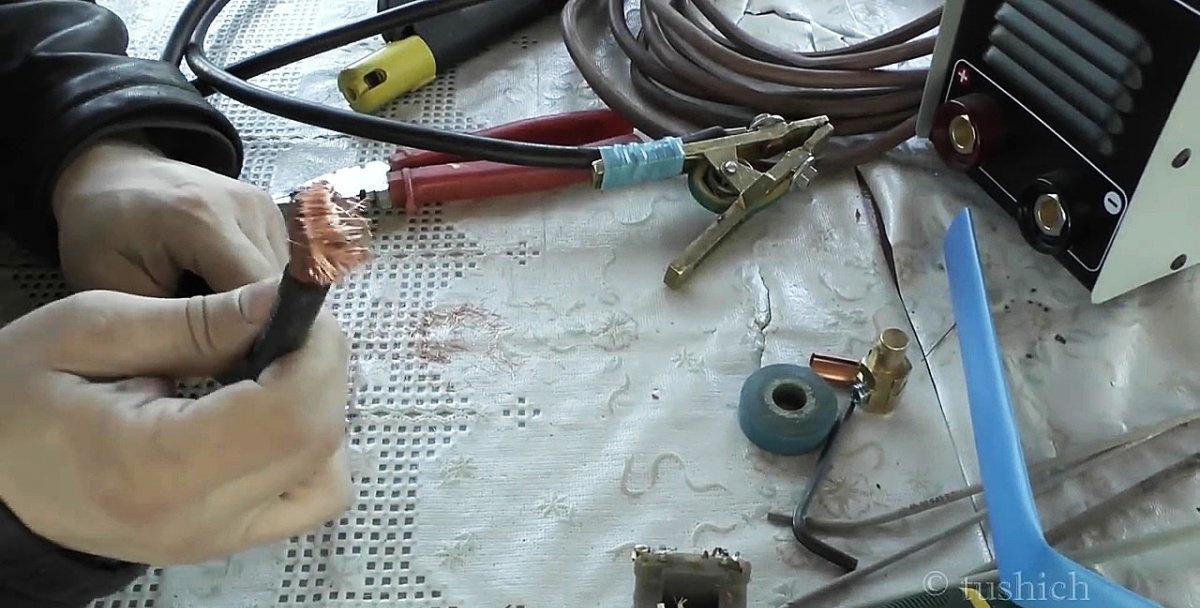
Next, you will need to prepare two free ends on the cable sections for splicing. Using a cable cutter or metal scissors, their ends are trimmed to make straight ends.
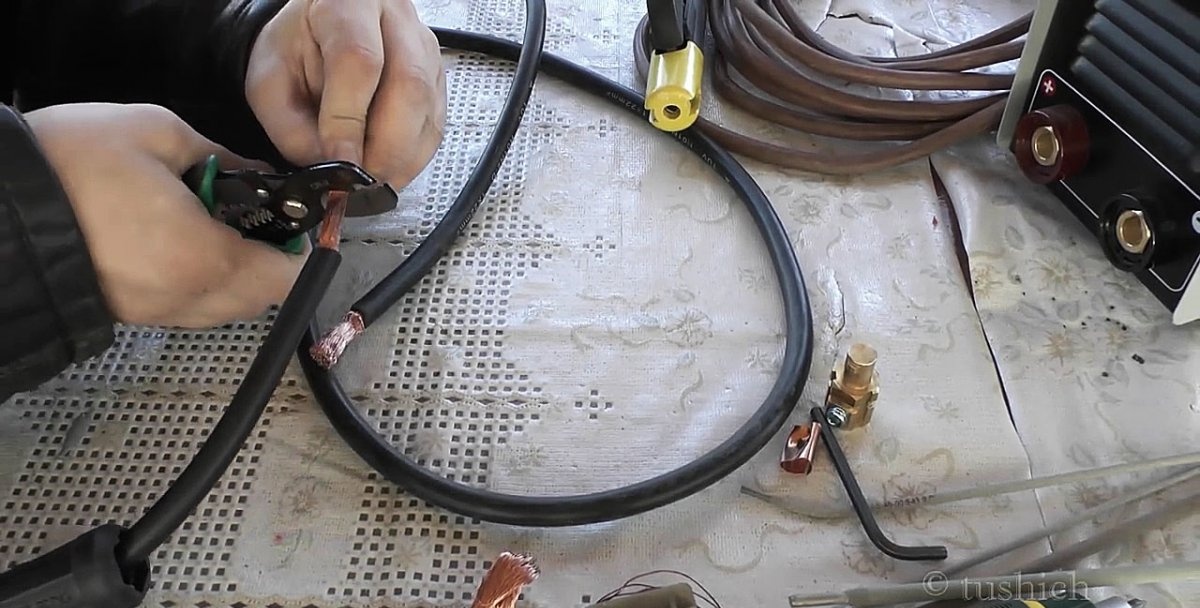
The length of bare wires on both cables must be the same. Depending on the situation, you will need to remove a little of the excess insulation on one of them using a utility knife, or simply trim the second wire a little more. The optimal length of beams for splicing is about 3 cm.
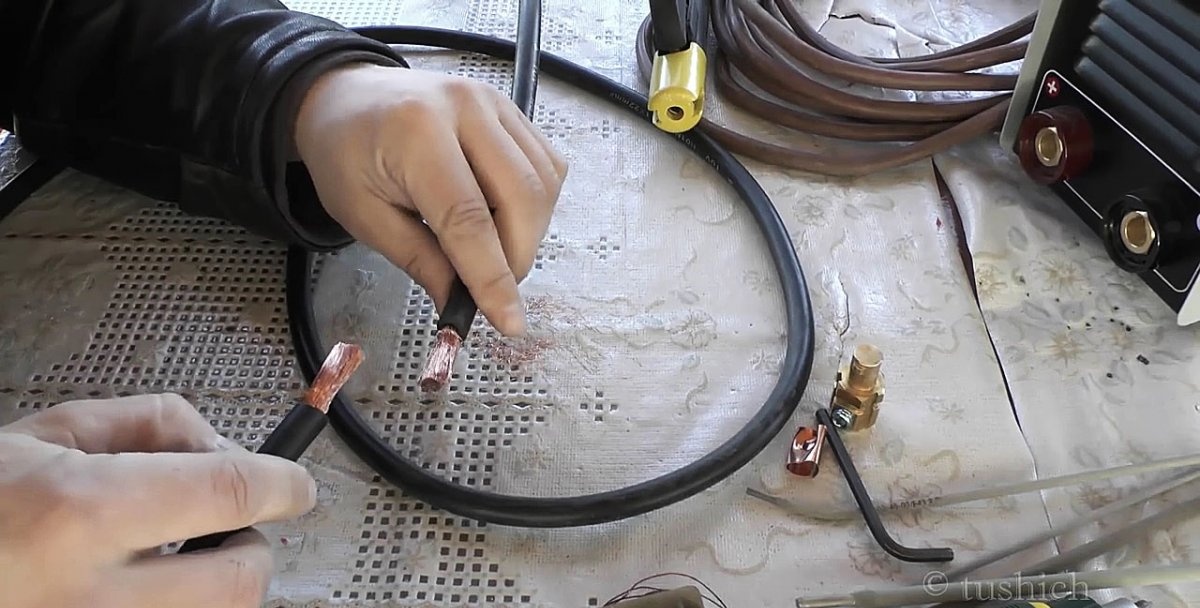
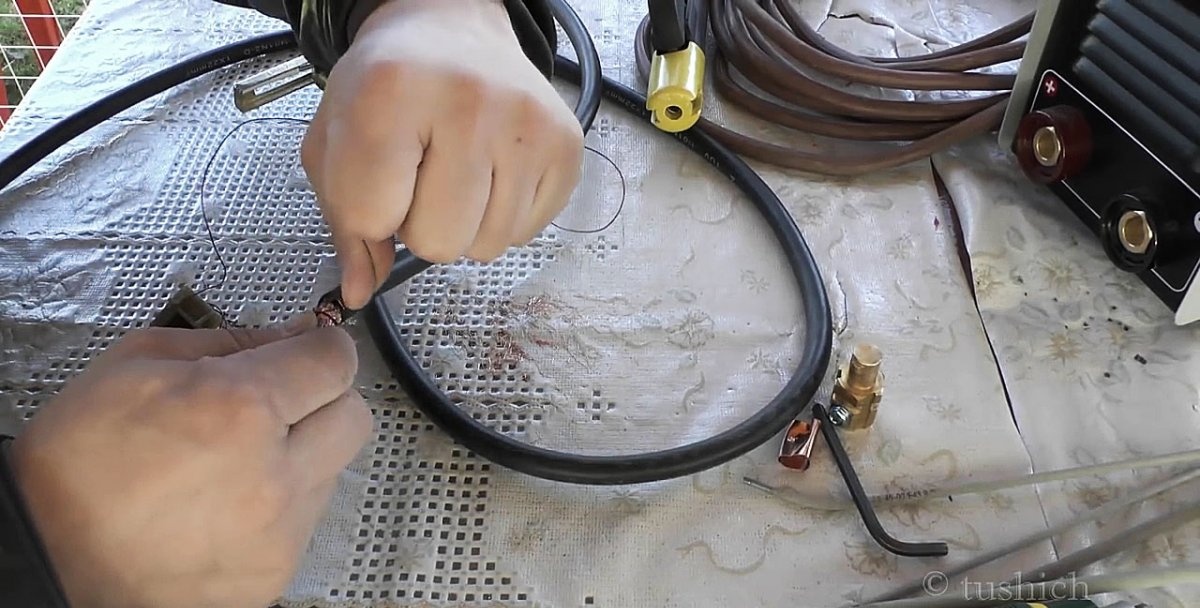
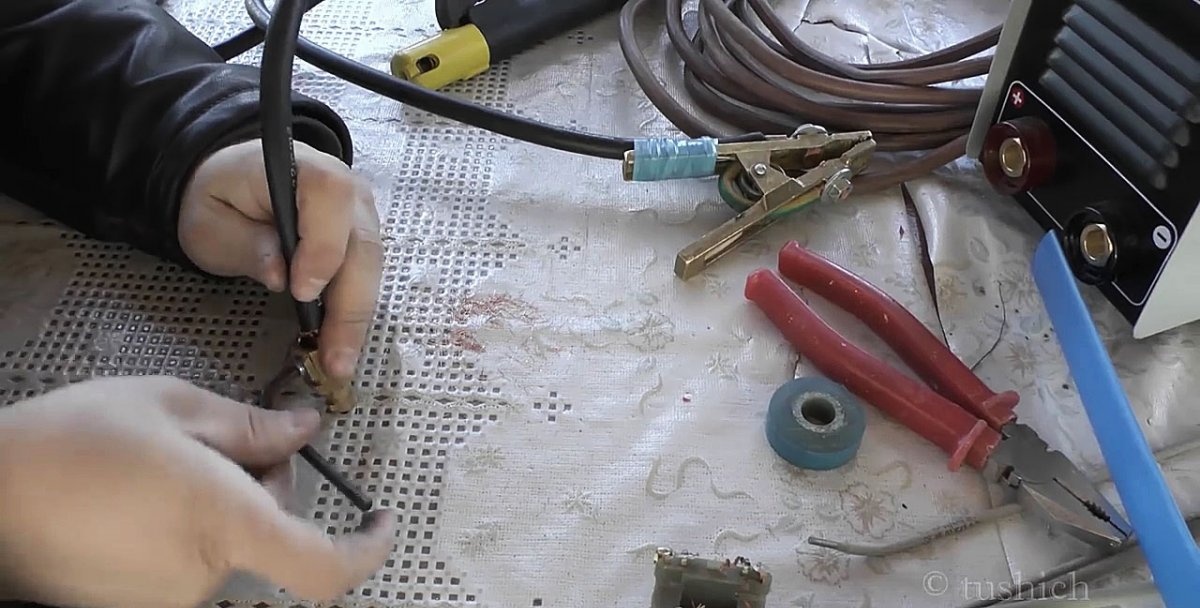
I place the ends of the prepared bundles of cores of two cables next to each other and push them towards each other with massaging movements. The copper strands move apart to allow splicing. As they move, the copper wires fluff up, so you need to control them with your fingers, returning them to their place so that they do not refract.
After the veins reach a few millimeters before the insulation begins, they need to be compressed with your fingers. There is no need to tighten anything. In this method, twisting is not used.
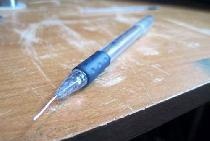
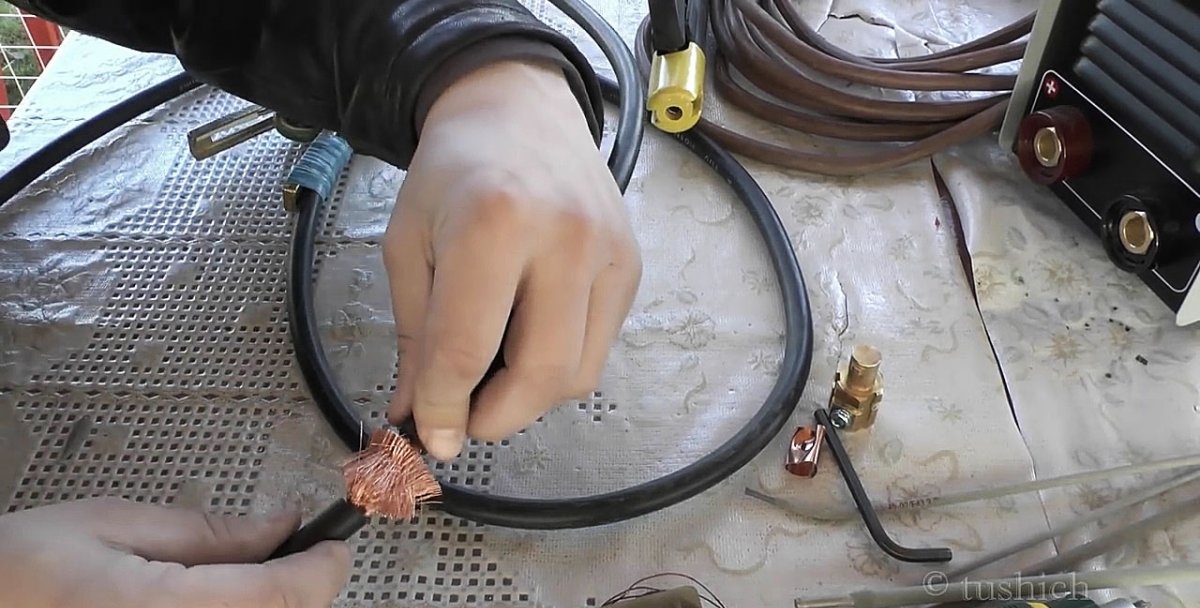
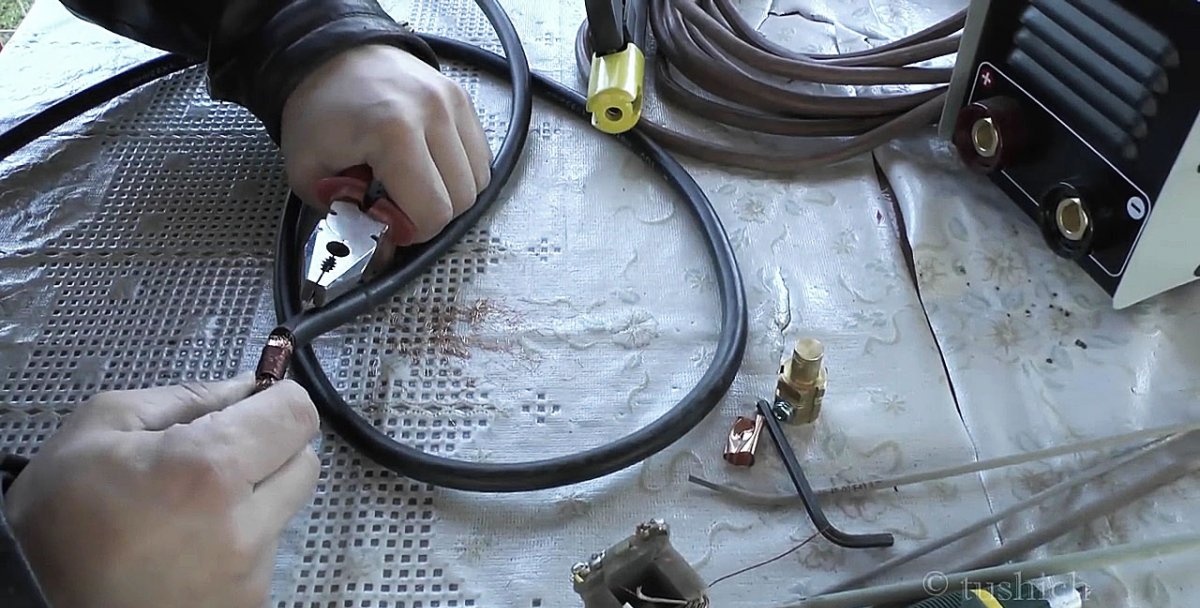
To fix the splice I take a copper wire. It can be removed from any old electric motor or transformer. It has a transparent dielectric coating, but it won't hurt. Under no circumstances should aluminum be used as it oxidizes with copper. Steel will not work either, due to poor flexibility.
To securely tighten the wire, I use a fisherman's knot, which secures the hooks to the fishing line. To do this, a long loop is formed at its end. The wire is simply folded in half with a short tail of about 8 cm. It is applied to the spliced cable with a centimeter overlap on the insulation. After which the long end begins to wind from its short tip towards the turn of the loop.
For greater reliability, you need to wind coil to coil.The wire must be stretched to achieve a tight connection. Having covered the entire length of the cable splice with turns, the wire is cut. You need to leave a tail of about 10 cm.

The resulting end is inserted into the loop ring. After this, the loop is tightened over the short edge, which is located on the other side where the turns were started. You need to pull until the long end goes under the winding.
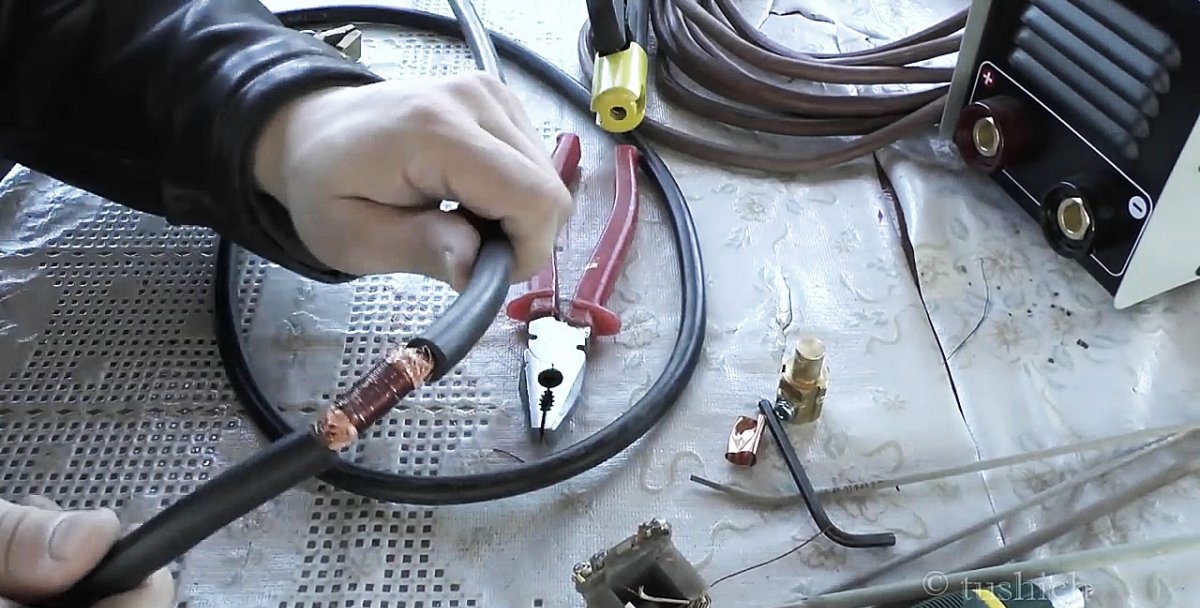
All that remains is to isolate the finished connection. To do this, I first tightened it with heat-shrink tubing, after which I decided to add electrical tape. It turned out it would be better to do the opposite.
Tip installation
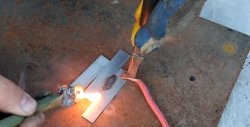
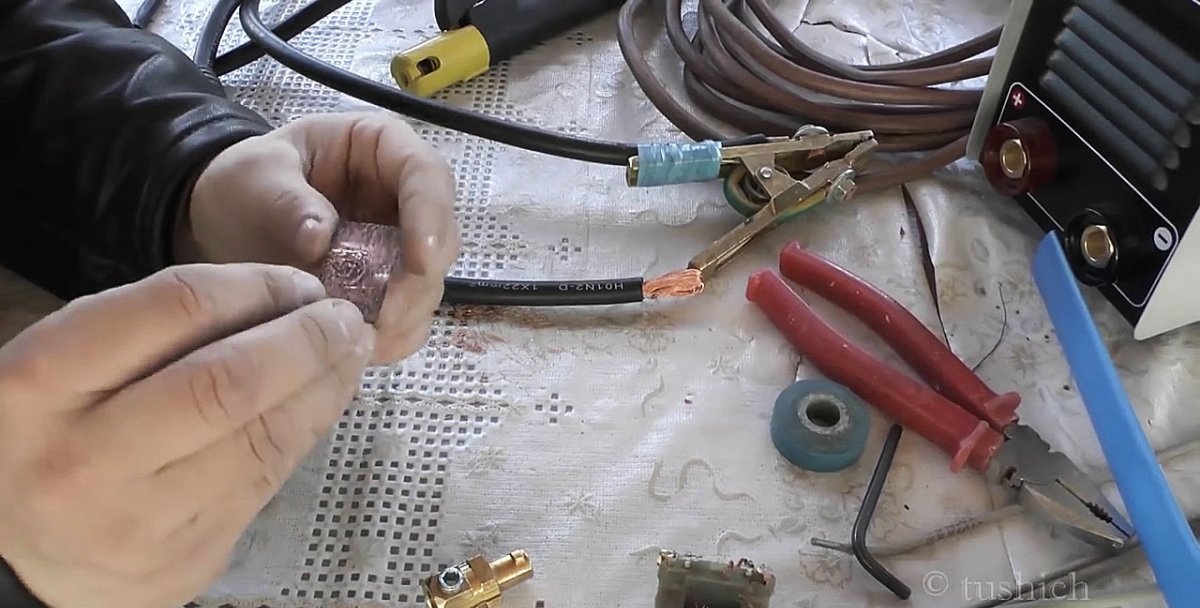
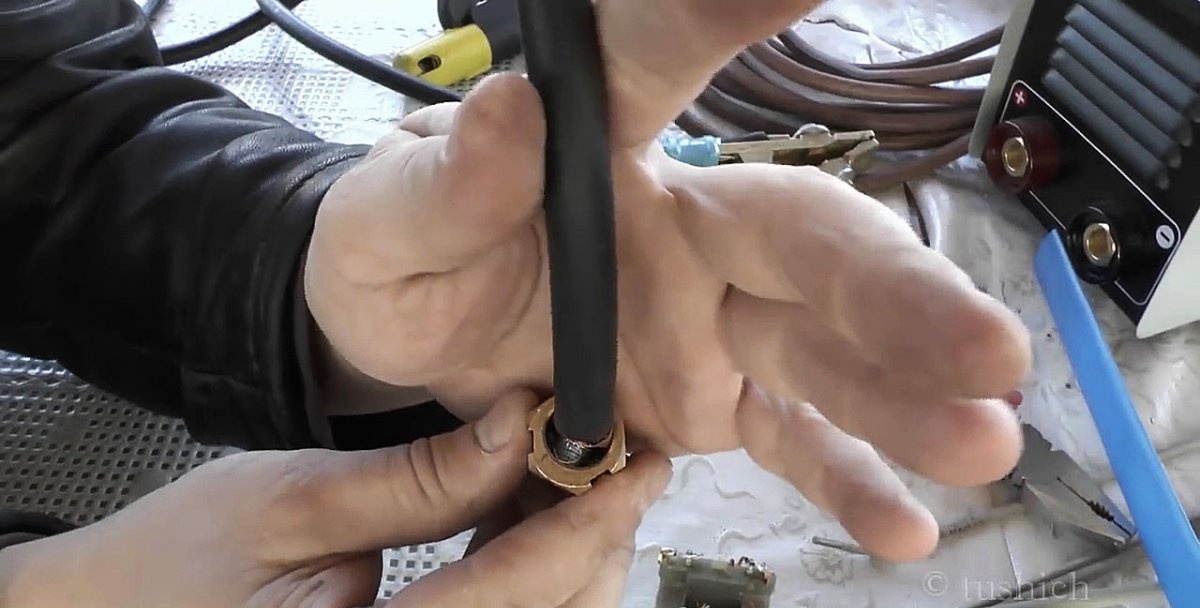
All that remains is to install the cable end. You must first align the plate that holds the cores in the bundle. It is leveled with pliers. After that, I heat it up red-hot with a gas soldering iron and throw it into the water. The same principle applies as when hardening steel, but this makes copper soft rather than hard. The softened plate is easily wrapped around a bundle of cores.
Next, I install the tip on it, tighten the bolt with a key and return the insulating cap to its place. If it does not want to sit tightly, then you can wrap a little electrical tape on the cable to make it thicker.
This method of splicing cables is practically eternal, and does not require expensive, rarely used tools, such as a powerful soldering iron or a crimping press for sleeves. The connection turns out to be quite flexible, which is what is required of it.