Do it yourself
Life hacks, master classes, useful tips, recipes.
home » Electronics » DIY electronics » Battery charger from laptop power supply
Battery charger from laptop power supply

The network has repeatedly posted options for using a laptop adapter as a charger for car and other batteries, using a car lamp as a load resistor.
You can, of course, do this, but it’s much more convenient to use a not particularly complicated modification and charge the batteries without any lamps. To do this, you don’t even need to be an advanced radio technician, but just be able to use a soldering iron and a multimeter.

We will need:


  • the power supply itself,
  • 25-40 watt soldering iron with a thin tip,
  • variable resistor 18-22 kOhm,
  • multimeter,
  • several resistors with a resistance of 10; 1; 2; 3 kOhm.,
  • thin soft wire.

Attentiveness and some patience will not be superfluous.

Making a charger from a laptop power supply


In our “computerized” times, few people don’t have an ancient laptop lying around, maybe not working for a long time. If not from you, then from friends. By the way, the older the product, the easier it is.
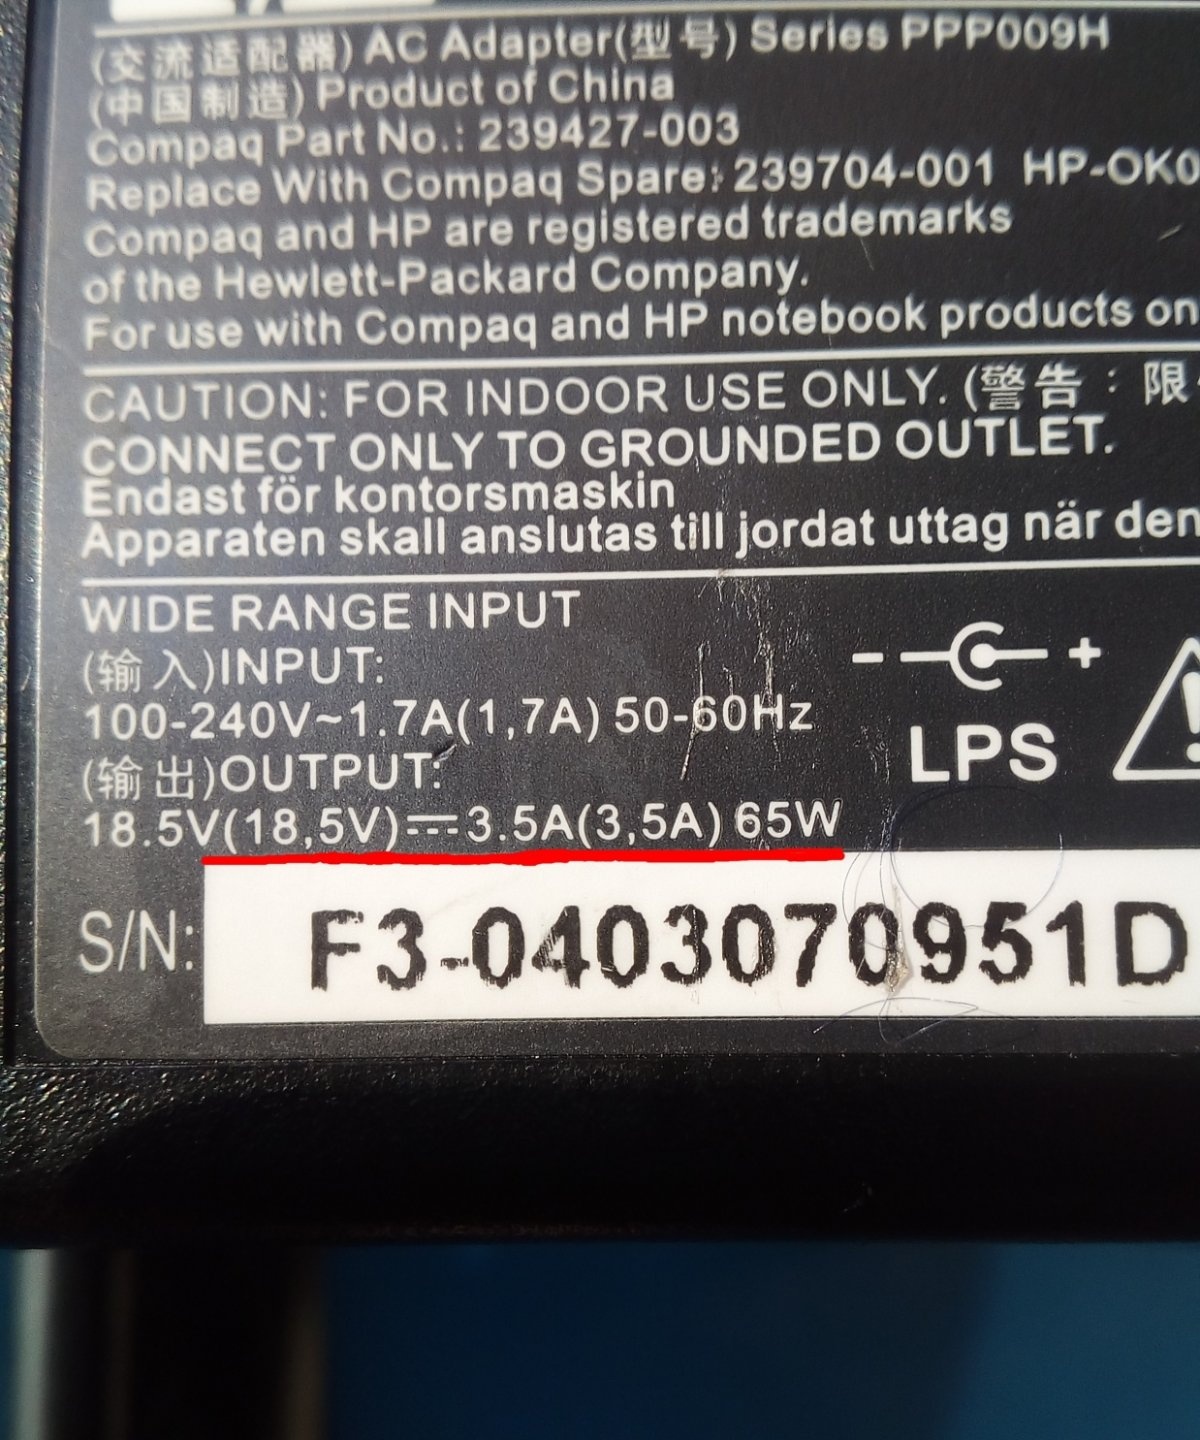
We take the power supply (adapter) from it and look for a sticker or inscription on it directly on the case.The one with an output current of 3.5 - 4.5 Amps is suitable for us.
Battery charger from laptop power supply

Using a flat-head screwdriver, disassemble the body along the glue line.
CAREFULLY! The body is glued together very tightly. It’s not worth breaking, and getting hurt from a broken screwdriver is not advisable.
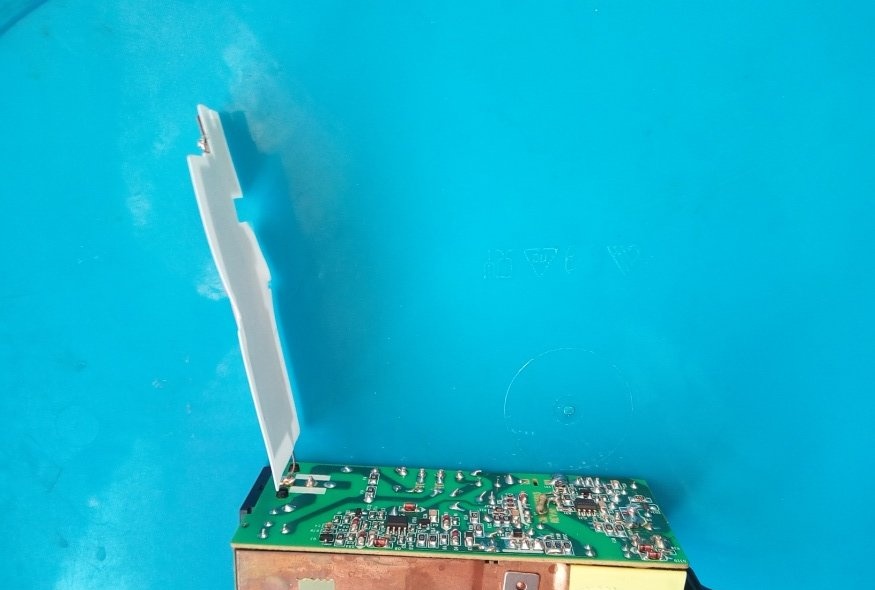
You'll get something like this:
Battery charger from laptop power supply

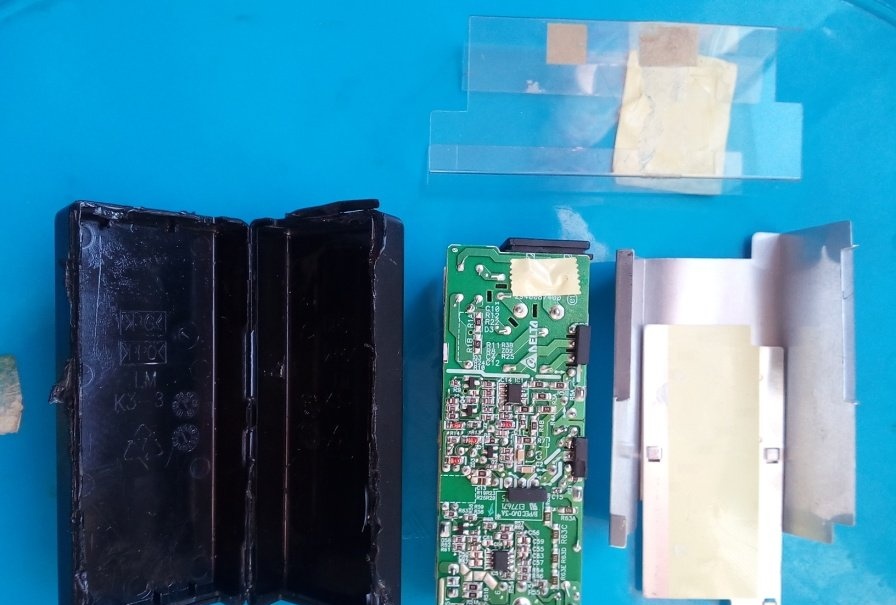
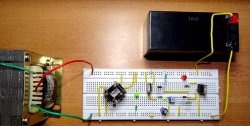
We release the power supply board from the screen.
Battery charger from laptop power supply

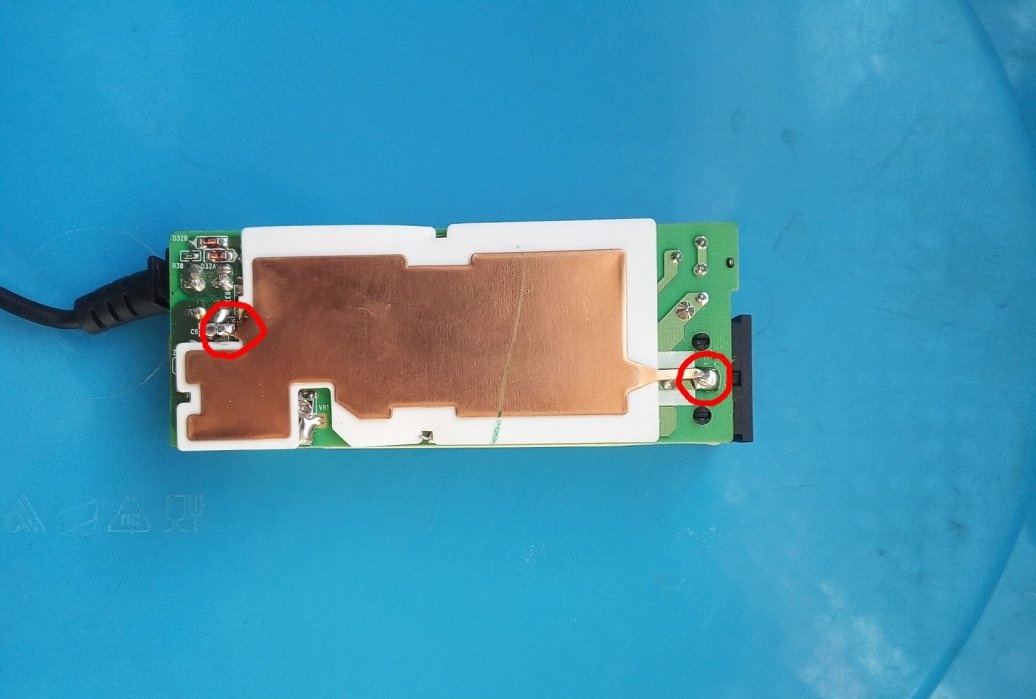
Unsoldered, if necessary... marked in red on this board.
Battery charger from laptop power supply

Next, we look on the board for the place where the output wire is soldered; it is located on the opposite side of the network connector.
Not far from this place, as a rule, there is a small “eight-legged” chip.
Battery charger from laptop power supply

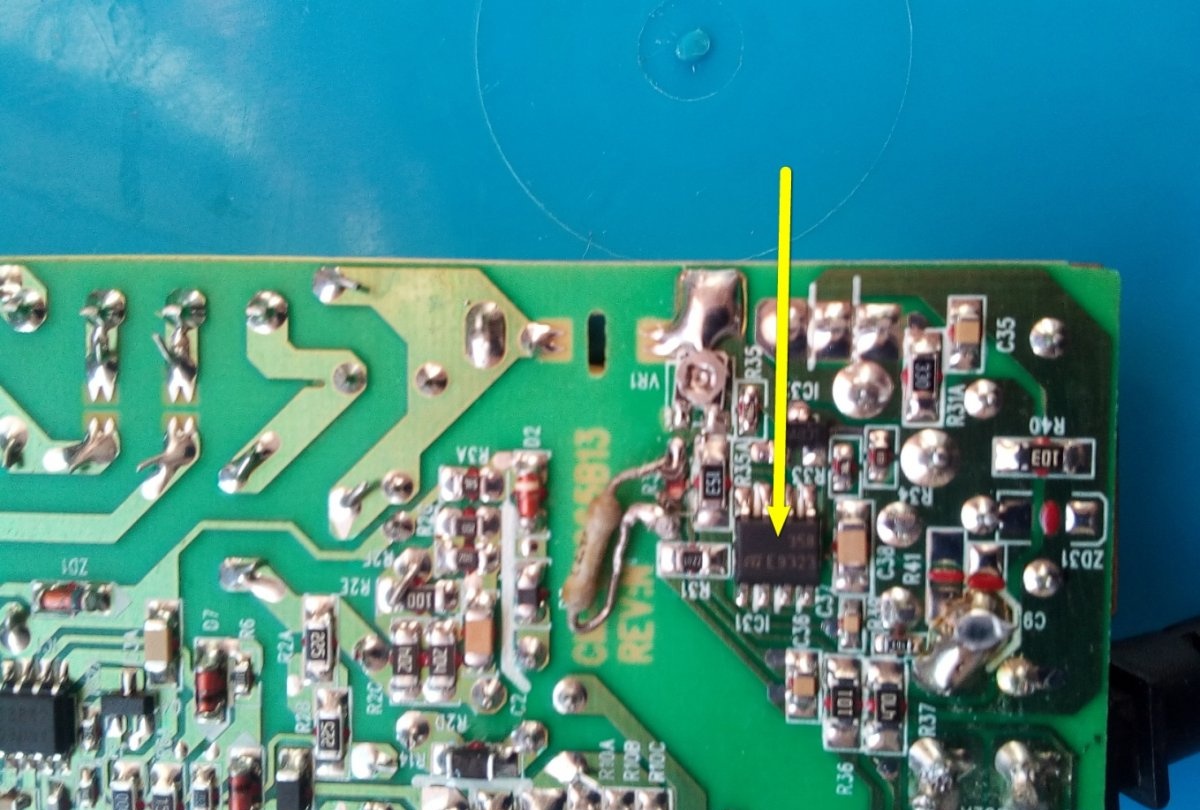
We find its foot No. 6 and carefully trace it along the path to the nearest SMD resistor.
Battery charger from laptop power supply

In principle, it is not necessary to know its denomination. We don't need it anyway and will be deleted.
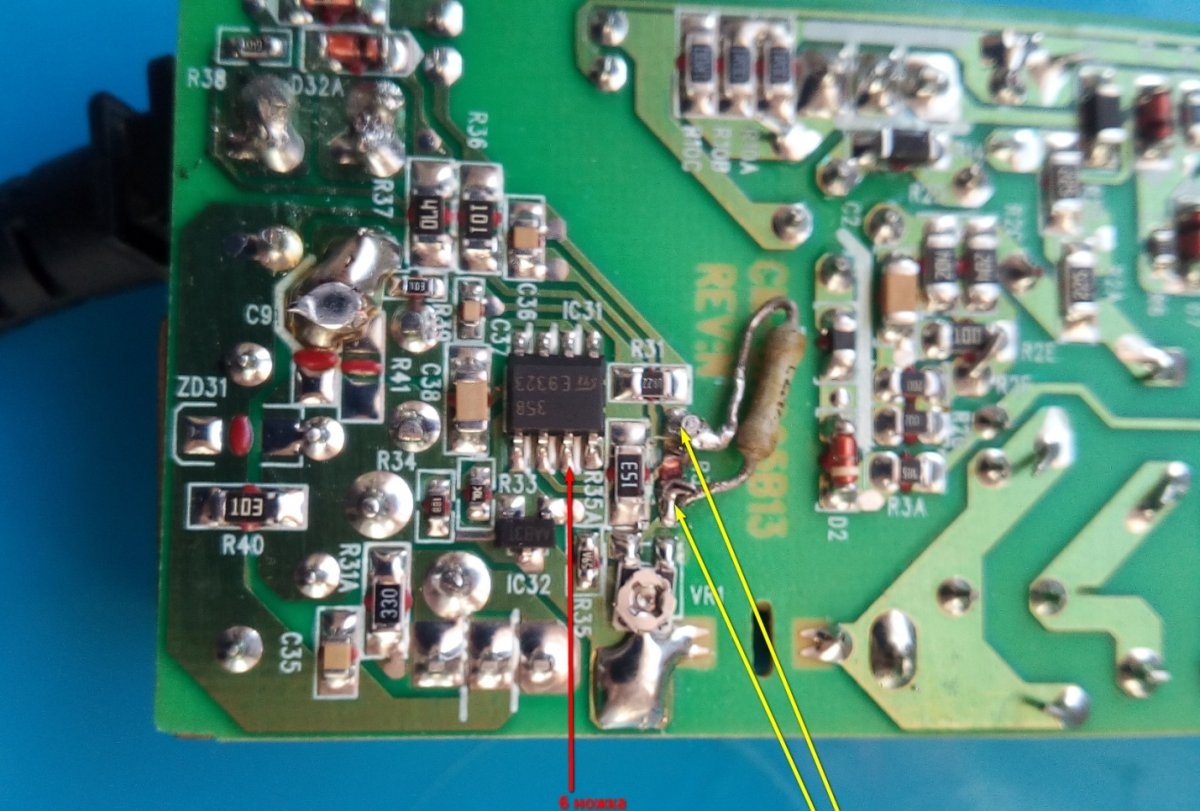
Next, we take a variable resistor with a resistance of 18-20 kOhm.
Having carefully soldered the SMD resistor, in its place we solder a variable resistor using thin soft wiring.
Battery charger from laptop power supply

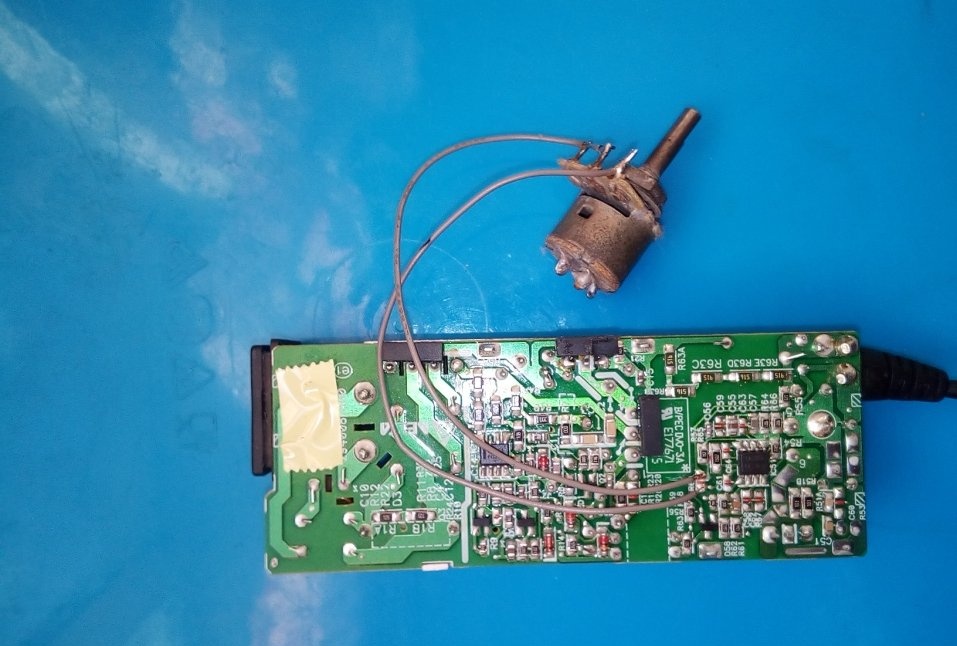
We put its engine in the middle position.
After all these manipulations, connect the network cable, plug it into the socket, and do not forget to be CAREFUL. Still, it’s close to 220 Volts. He fights... if you don't respect him.
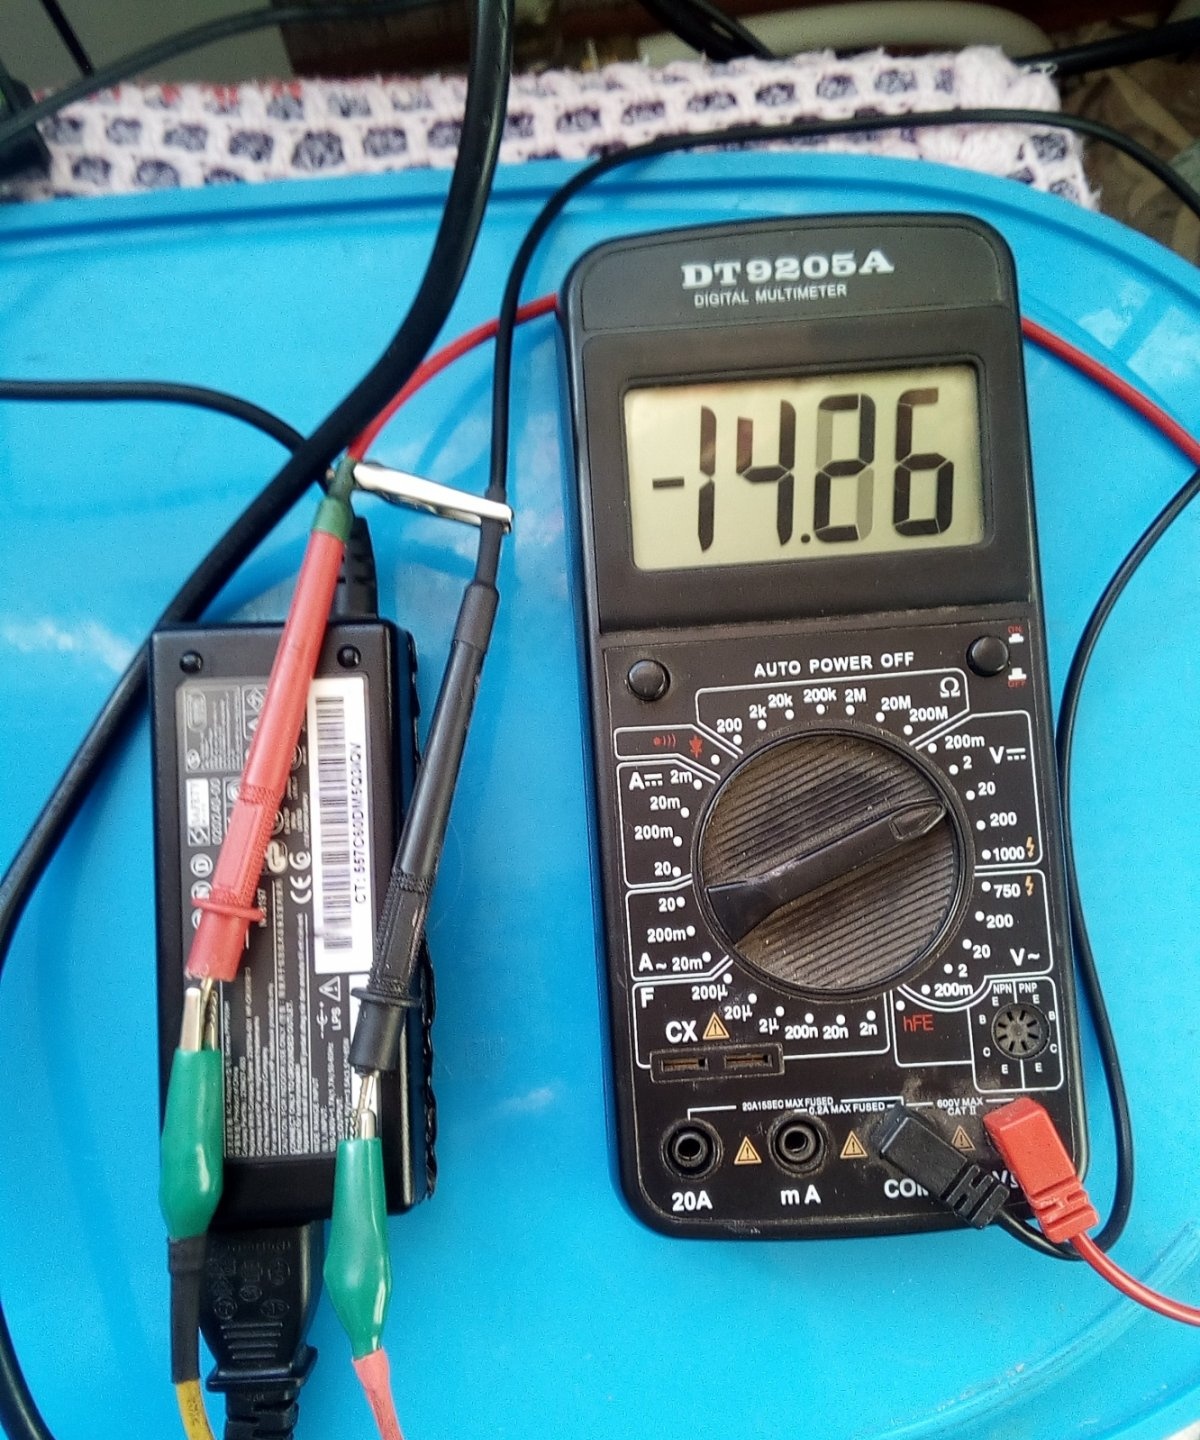
Probes multimeter, included in the “constant” measurement, we connect to the low-voltage connector of the unit (the one that should be inserted into the laptop).
Slowly rotate the resistor slider and get it on the display multimeter readings are 14 or so volts. We don't touch the engine anymore.
We turn everything off from the network, carefully, so as not to stain the parts adjacent to the soldering area with solder and not to disturb the set position of the “variable”, and unsolder the wiring from the board.
We measure the resistance of the variable resistor in the position you fixed.
It may be different for different blocks.From the resistors you have, we select by connecting in series the value shown multimeter.
For example – 10+3 or +5 kOhm.
We put the resistor soldered in this way in place so that there is no contact with other parts. If necessary, we isolate or lead wires outside the board.
We check the voltage again to ensure the quality of the soldering.
If everything is fine, we assemble the block by gluing its halves with “Chinese snot” (hot glue) or a hot soldering iron.
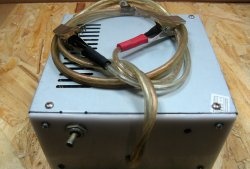
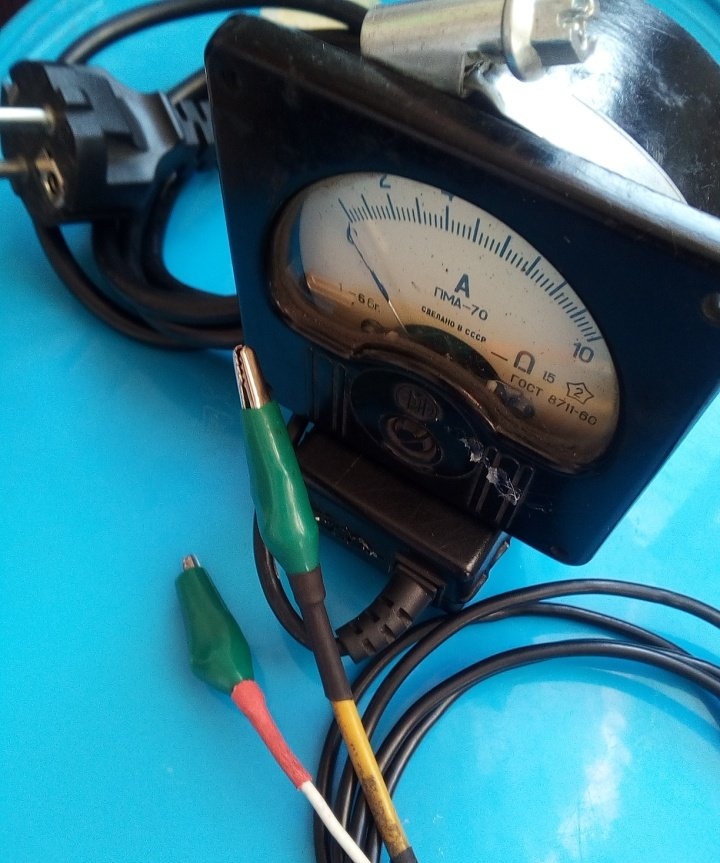
I got it like this:
Battery charger from laptop power supply

True, for better control, I also installed an ammeter (which I had).
Secure it to the body with a regular clamp.
Battery charger from laptop power supply

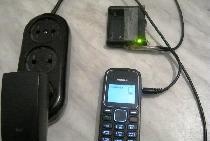
This is what the charging process looks like.
Battery charger from laptop power supply

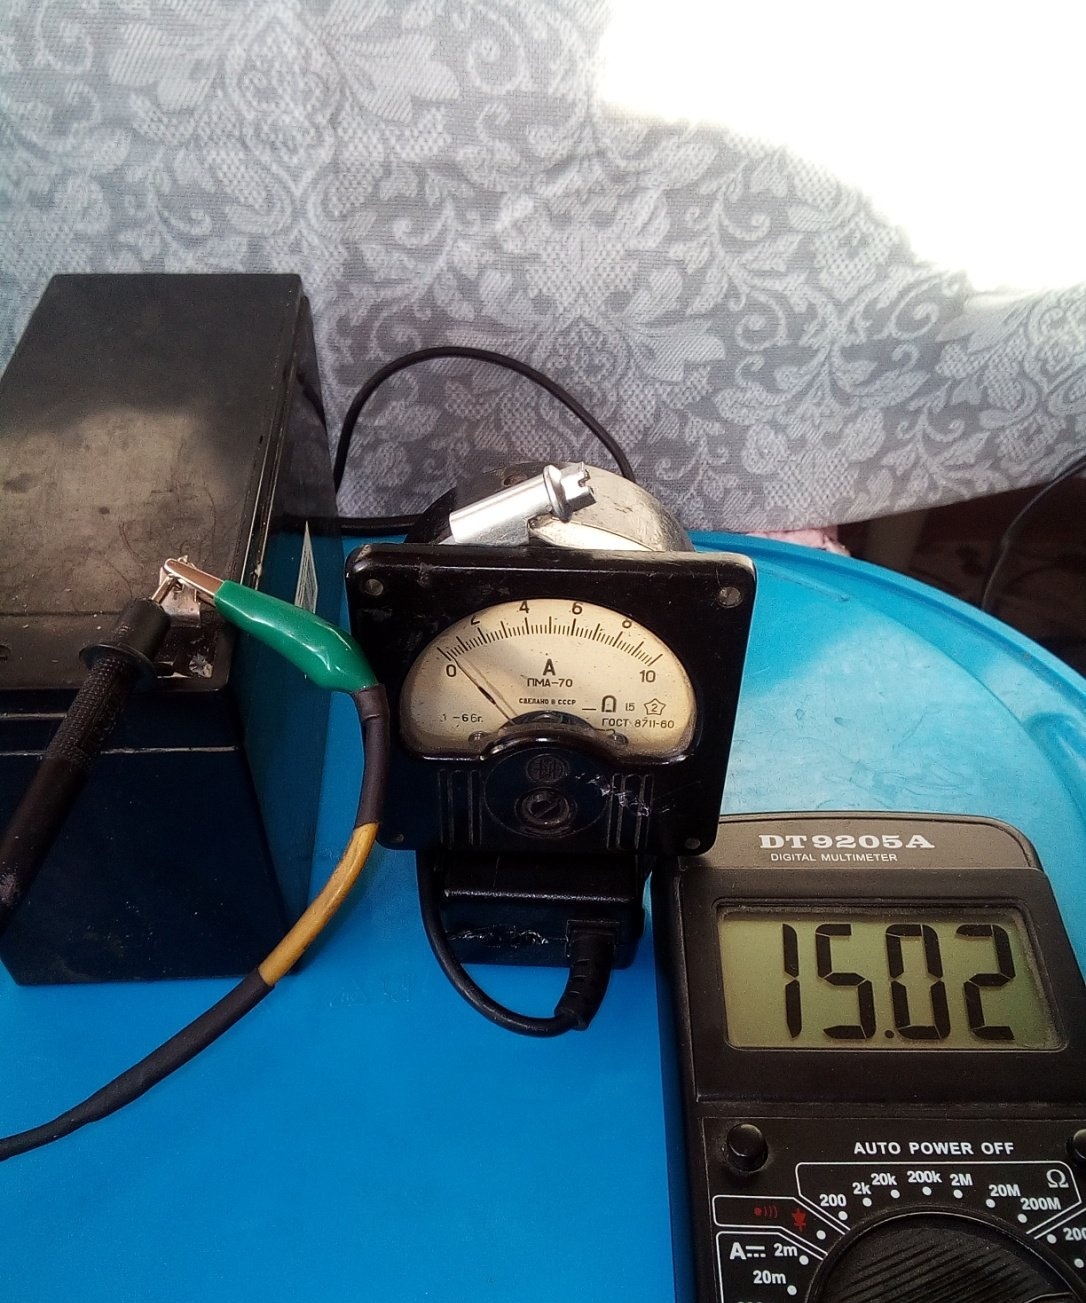
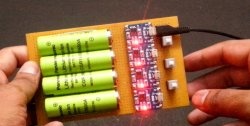
Such voltage and amperage are solely because the battery that I use for the paralyte is fully charged.
We tried charging the battery from the car. Copes without problems.
Why recharge? Because the charging current of a heavily discharged battery will obviously be more than three and a half amperes, which means that the unit will simply go into protection, as if from a short circuit, which, by the way, it is not afraid of.
I hope the information was useful.
come back
Comment
  • bowtiesmilelaughingblushsmileyrelaxed relaxedsmirk
    heart_eyeskissing_heartkissing_closed_eyesflushedrelievedsatisfiedgrin
    winkstuck_out_tongue_winking_eyestuck_out_tongue_closed_eyesgrinningkissingstuck_out_tonguesleeping
    worriedfrowninganguishedopen_mouthgrimacingconfusedhushed
    expressionlessunamusedsweat_smilesweatdisappointed_relievedwearypassive
    disappointedconfoundedfearfulcold_sweatperseverecrysob
    joyastonishedscreamtired_faceangryragetriumph
    sleepyyummasksunglassesdizzy_faceimpsmiling_imp
    neutral_faceno_mouthinnocent
3+three=
Comments (30)
  1. Igor Ryzhev
    #1 Igor Ryzhev Guests 9 February 2019 19:32
    6
    what kind of microcircuit is it? What 14 volts? Batteries are charged by current, not voltage. Why not leave variable resistance? This is only to boost the battery.
    1. Vladimir Lukyanov
      #2 Vladimir Lukyanov Guests 11 February 2019 23:19
      2
      This is a so-called microcircuit. the power driver, you can leave it variable and adjust the output voltage according to the voltage, the author gave advice on how to convert from 19V to 14V.
  2. Goncharov Alexander Yurievich
    #3 Goncharov Alexander Yurievich Guests 9 February 2019 20:11
    0
    I've seen a lot of advice on remaking power supplies, but this is the first time to talk about such a delicate thing in such a simple and accessible way. Many thanks to the author! I couldn't find fault with anything. It would be useful to add the name of the microcircuit; I’m sure there are variants of blocks on the market with a different pinout of the microcircuit. Thank you.
    1. KiteBlack
      #4 KiteBlack Guests March 7, 2019 03:53
      4
      First, familiarize yourself with the battery charging modes, and only then admire them. And don’t even try to repeat it - you’ll destroy both the battery and the power supply. If you google it, batteries (all without exception) are charged with CURRENT, and of a certain magnitude. For lead ones it is 0.1C. Those. A battery with a capacity of 60Ah is recommended to be charged with a current of 6A. There is also a voltage stabilizer here, and with protection against short circuits and overloads (if you are lucky, then when connected to a discharged battery it will simply go into protection; if you are unlucky, the key transistor will fly out with a whistle). Before sharing “smart thoughts,” it would not hurt the author to go, at least for a couple of days, to the “crazy legs circle”...
  3. Semyon
    #5 Semyon Guests 9 February 2019 23:15
    1
    I shouldn't have installed an ammeter.It was necessary to install an aperagemeter.
    1. Vladimir Lukyanov
      #6 Vladimir Lukyanov Guests 11 February 2019 23:24
      0
      Learn materiel
      Ammeter (from ampere + μετρέω “I measure”) is a device for measuring current in amperes.
  4. Guest Vladimir
    #7 Guest Vladimir Guests February 10, 2019 01:26
    7
    I would leave a variable resistor, and by adjusting the output voltage it would be possible to limit the charge current without the power supply going into protection,
  5. Guest Alexey
    #8 Guest Alexey Guests February 10, 2019 04:42
    2
    Hello, if you calculate the power of the unconverted one 20*3.5=70 Watt, now we protect the current of the converted one 70\14=5Amps, so it can handle a car) especially since most of the old chargers had a current of 4.5A, and this is already 6.5A after modification.
  6. Guest Mikhail
    #9 Guest Mikhail Guests February 10, 2019 08:43
    1
    That’s how many times I’ve seen “We take a variable resistor and twist and rotate, and then take readings from it...” - I screwed up so many times this way - for this method you only need a wire-wound resistor, or better yet an attenuator - this is the so-called , a step or discrete resistor, which can be assembled to the desired value from resistors of lower resistance. An attenuator is preferable, and using it to select the desired parameter of the device under test, and in one step, automatically obtain the required parameter. Which can be used in the required design.
  7. also a doctor
    #10 also a doctor Guests 10 February 2019 13:56
    1
    The population has much more old system units with power supplies. Are there any such power supply outputs with the required voltage?
    1. Guest Mikhail
      #11 Guest Mikhail Guests 11 February 2019 11:28
      0
      No. There are high-ampere 12, 5 and 3.3. volta You can recharge, but you won’t be able to fully charge. Without modification, you can power screwdrivers with 12 V. You can also use 14 V, but the speed will obviously be lower.
      1. Vladimir Lukyanov
        #12 Vladimir Lukyanov Guests 11 February 2019 23:21
        0
        What are you saying?)
        How are high-amp outputs implemented?)
        Power circuit + transformers, which is controlled by a driver exactly like here (by the way, they are essentially identical).
        And in computer power supplies, this method is also perfectly used by setting the voltage by changing the resistor value. It’s just that there’s a 16-legged mikruh, but it’s not a problem to find a datasheet on them
  8. Sergey S.
    #13 Sergey S. Guests 10 February 2019 16:44
    0
    I made many different makeshift chargers. For those in the picture, I suggest without disassembling the block.
    There are two incandescent light bulbs in series with battery 2, the first one took 26 volts 20 watts, charge current
    400-500 ma. the second at the end of the charge 26 volts 5 watts, current 80-100 mA.
    Monitor only the voltage, no more than 15 volts on the battery.
  9. Gregory
    #14 Gregory Guests February 11, 2019 07:37
    1
    The power supply from a Samsung laptop 14 volts without modifications gives a current of 3 A to the battery-55
    1. Vladimir Lukyanov
      #15 Vladimir Lukyanov Guests 11 February 2019 23:23
      4
      The article shows how to convert the 19th century into the 14th century. Why the comment about the 14 volt unit?)
  10. Guest Victor
    #16 Guest Victor Guests 11 February 2019 18:32
    0
    ... Yes, everything turned out fine and works... Only he breaks his hands... Infection...

Obtaining DNA at home

T-Shirt Update | Do it yourself

Cut potatoes into spirals with a regular knife

Decoupage boards with Paris | Do it yourself

«Do it yourself - with your own hands» - a site of interesting homemade products made from scrap materials and items at home. Step-by-step master classes with photos and descriptions, technologies, life hacks - everything a real master or just a craftsman needs for needlework. Crafts of any complexity, a large selection of directions and ideas for creativity.

We recommend reading

Washing machine error codes