Materials and tools:
- moisture-resistant plywood 20 mm;
- set of wood crowns;
- ruler;
- pencil;
- wood screws;
- bolts and nuts (for pressing into daisies).
Making a conductor
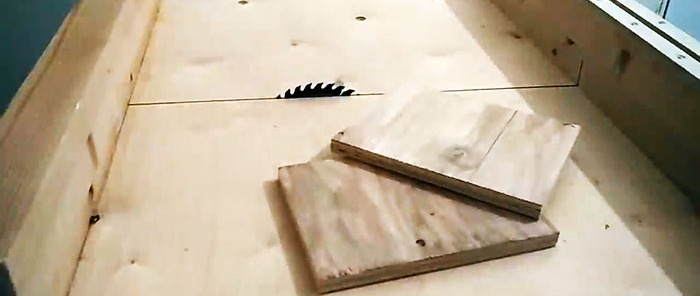
The jig consists of two identical rectangular pieces of plywood folded together. They are fastened at the corners with 4 self-tapping screws. The size of the segments is selected depending on the diameter of the daisies needed. In most cases, 25x35 cm is sufficient.
It is necessary to drill into the center of the twisted sections with a 64 mm crown (a different diameter is possible).The first plywood is drilled completely, the second one needs to go deep into 20-50% of its thickness so that the centering drill goes through. On the reverse of the lower segment, you need to make a hole to a depth of 3-5 mm with the smallest crown from the set (19 or 22 mm). After this, you should select the wood inside the circle with a chisel and press the nut into place.

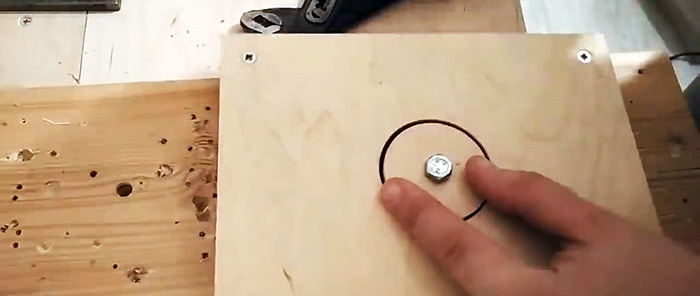

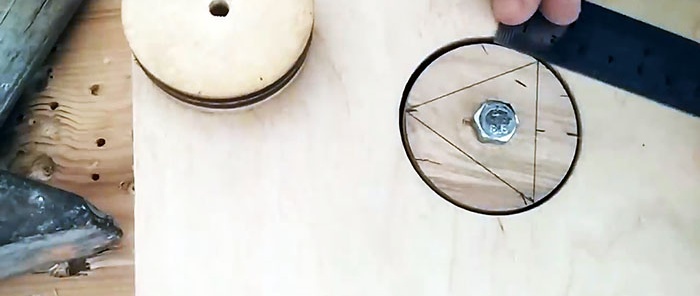
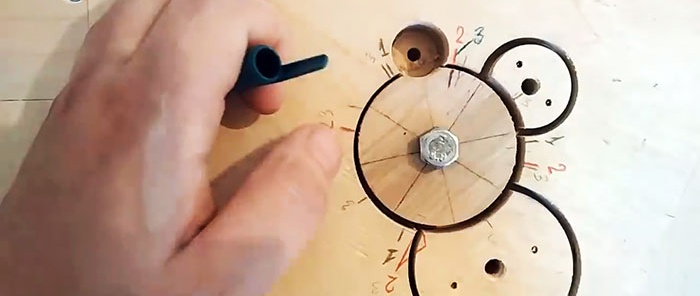
You need to draw an inscribed equilateral triangle on a washer drilled from the top plywood, then insert it into the jig and tighten it with a bolt.
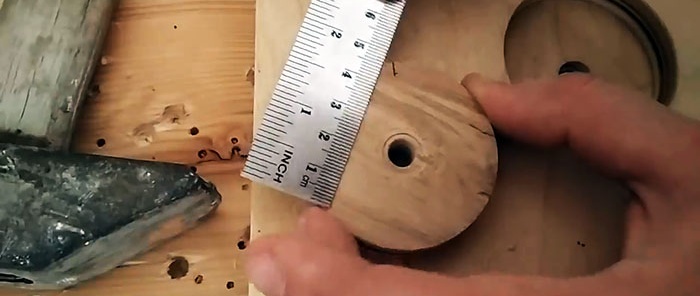
Another plywood washer, made with a 64 mm crown, needs to be partially applied to the one that is screwed into the jig. It should be positioned so as to symmetrically cover one of the vertices of the drawn triangle. After this, trace the top washer with a pencil.
Next, you need to remove the circle with the triangle and drill a 64 mm hole with a crown along the circle circled on the side. Only the first layer of plywood is drilled. This will result in overlapping holes. The trimmed disk that falls out as a result must be put back in place, aligned evenly with the trim, and screwed on the back side with two self-tapping screws.
Then the disk with the inscribed triangle is put in place. There is a semicircle on it from the previously circled washer, along which alignment is done. Next, the washer is tightened with a bolt and a hole is drilled in the side circle (with an insert screwed with self-tapping screws).

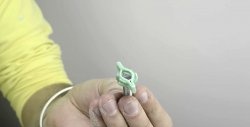
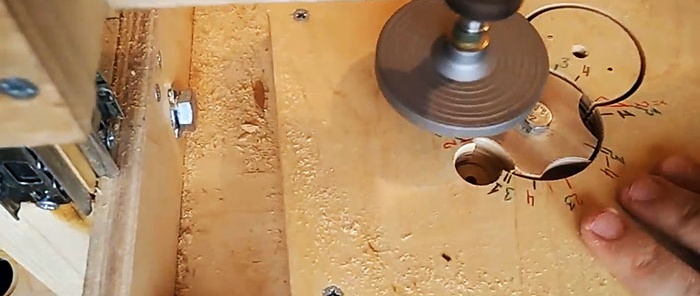
In this form, the jig can already be used for the manufacture of three-beam wing nuts. However, for convenience, you need to put 3 marks on it and sign them with the number “1”. They are made opposite the centers of the sides of the triangle.Then the disk is turned with the apex of the triangle to the adjacent insert with a cutout, aligned with the marks, and holes are drilled around the perimeter of the screwed-off cut-off washer with a core drill. As a result, the circle is cut off and receives 3 rays. In the future, you will no longer need to draw a triangle on other washers, but simply insert them into the jig, make lines along the marks, and then drill the rays along them.

To make a template for making a four-beam lamb in the jig, you need to take a new 64 mm washer and divide it into 4 identical sectors. Then make a central mark on each of them. Next, take a 38 or 32 mm plywood circle and pin it onto the jig so as not to cover the “1” marks. It should partially cover the disk with sectors, after which it must be outlined with a pencil. Next, a hole is also drilled with a crown through the first layer of plywood, and the insert that fell out is installed back and screwed with two self-tapping screws.
Then you need to install a 64 mm disk with drawn segments into the hole with a mustache nut. It is turned by one of the rays onto a small cut disk, after which you need to draw 4 marks on the conductor along the lines of the center of each segment. They are marked with the number “2”. For convenience, it is better to apply the marks of the new template with a pen of a different color. After this, it will be possible to draw marks on the new disk according to the jig markings, and then align the washer along them when drilling along a small cut circle.
To make an eight-pointed daisy, you need to take a 64 mm disk, mark it into 8 segments, and then install it in the jig. A small plywood washer is then used, cut with a 22 or 29mm hole saw.It is also applied to the side in a place free from marks in order to partially block the hole with the mustache nut. Then everything is done in a similar way: contouring and drilling. The insert that has fallen out can no longer be secured back with self-tapping screws, since the hole is small, and in the future it will be easy to hold the small crown at the beginning of drilling. After this, the disk is inserted into place, broken down into segments, and 8 marks are applied on it to the conductor, but already marked “3”. Then it will also be possible to drill the edges of the workpieces along them.
Using the hole for drilling a four-ray daisy, you can make another marking and drill a five-ray one. For it, 5 marks marked “4” are applied.
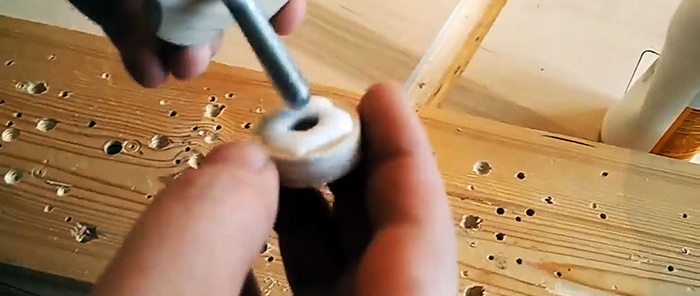
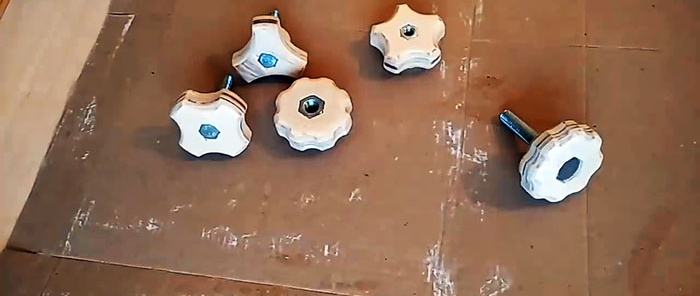
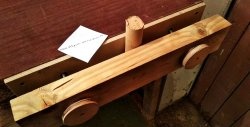
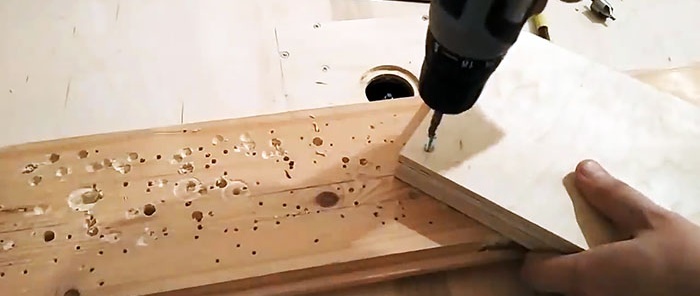
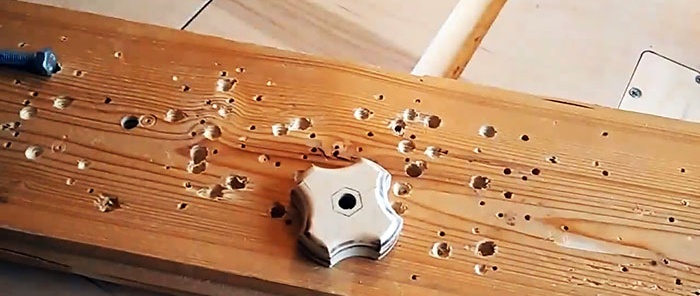
The wing blanks obtained using this jig are then drilled in the center with a drill 2-3 mm smaller than the diameter of the metal nut or bolt head. The depth of the expanded hole is made to the height of the nut or cap. Then, using a chisel, it is refined into a hexagonal shape. After this, a bolt or nut is pressed into it; for reliability, you can put them on glue.