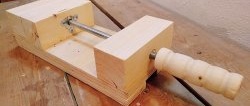
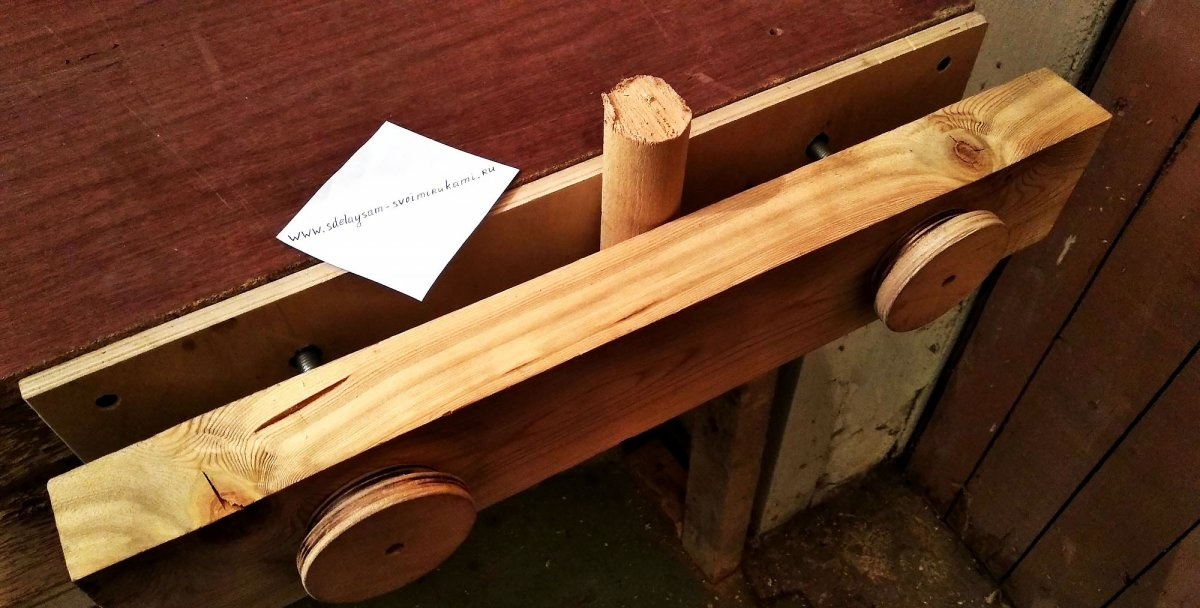
The design is based on a Moxon vice with two screws - a reliable, budget-friendly and easy-to-manufacture option. In addition, a handmade tool is twice as pleasant to use as a purchased one. Therefore, catch the instructions on how to make a carpenter's vice from wood with your own hands.
Will need
Necessary materials:
- 2 pieces of plywood 10 mm thick (the sponge on the workbench is 480 x 90 mm, the second no more than 250 x 80 for the handles),
- Beam 45x90 mm, length 480 mm;
- Drills of various diameters - 1, 4, 8, 10, 12 mm;
- Studs M10x250 - 2 pcs. (I would recommend using all M12 fasteners, but I couldn’t find any driving nuts of that diameter);
- Wood screws;
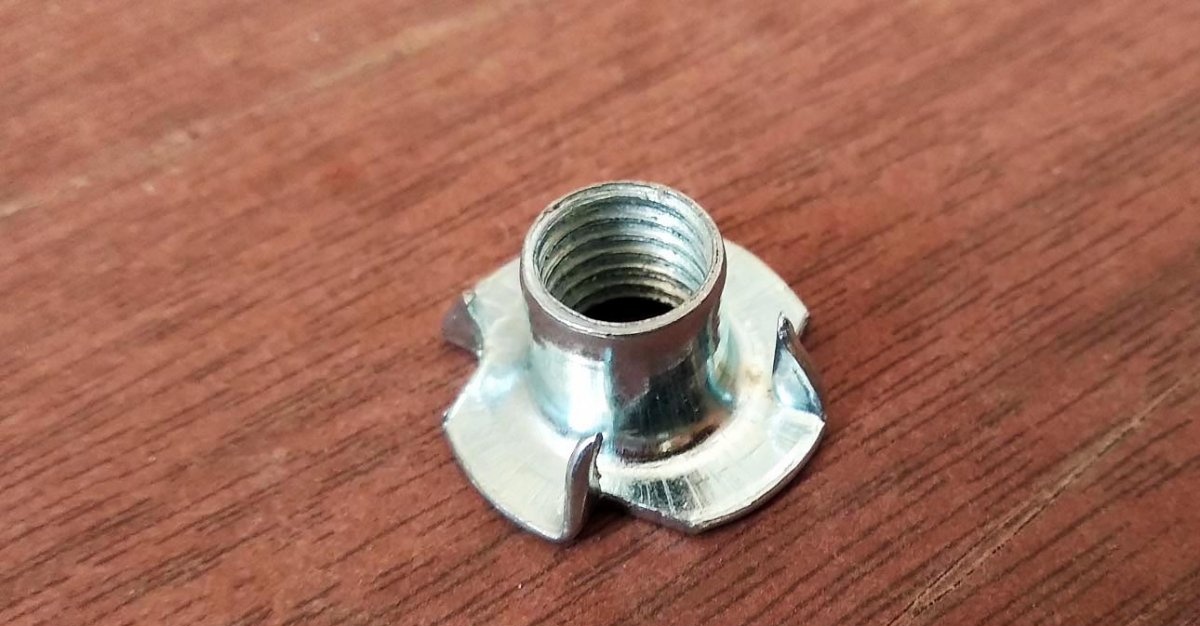
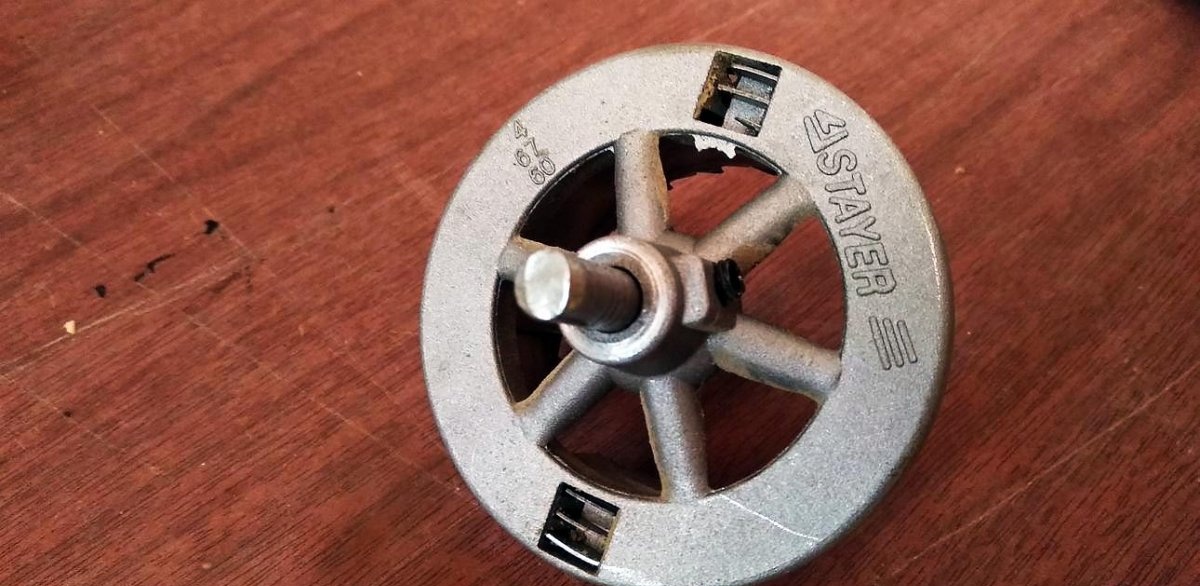
- Drive nuts M10 - 4 pcs.;
- Ring crowns for wood of various diameters;
- Forstner drill (for lack of availability, I used a 22 point drill bit);
- Wood glue;
- A short piece of steel wire with a diameter of 1 mm.
Required tools:
- Screwdriver;
- Clamp - 2 pcs.;
- Hammer;
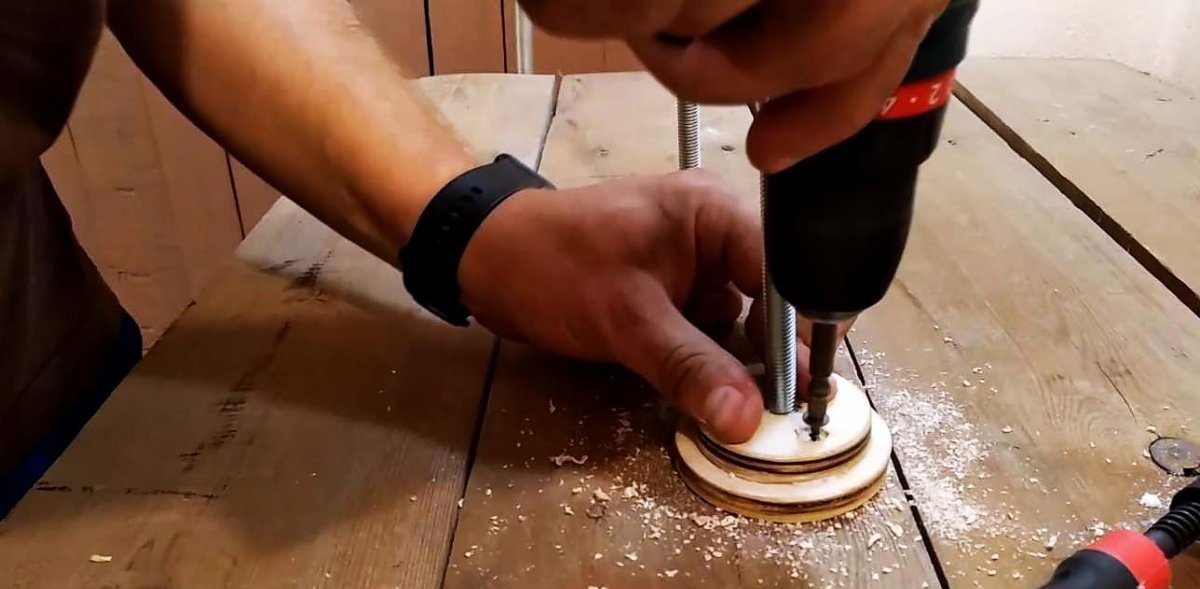
- Square;
- Pencil;
- Chisel (not needed if you use a Forstner drill);
- Wire cutters.
Step-by-step instructions for making a carpenter's vice:
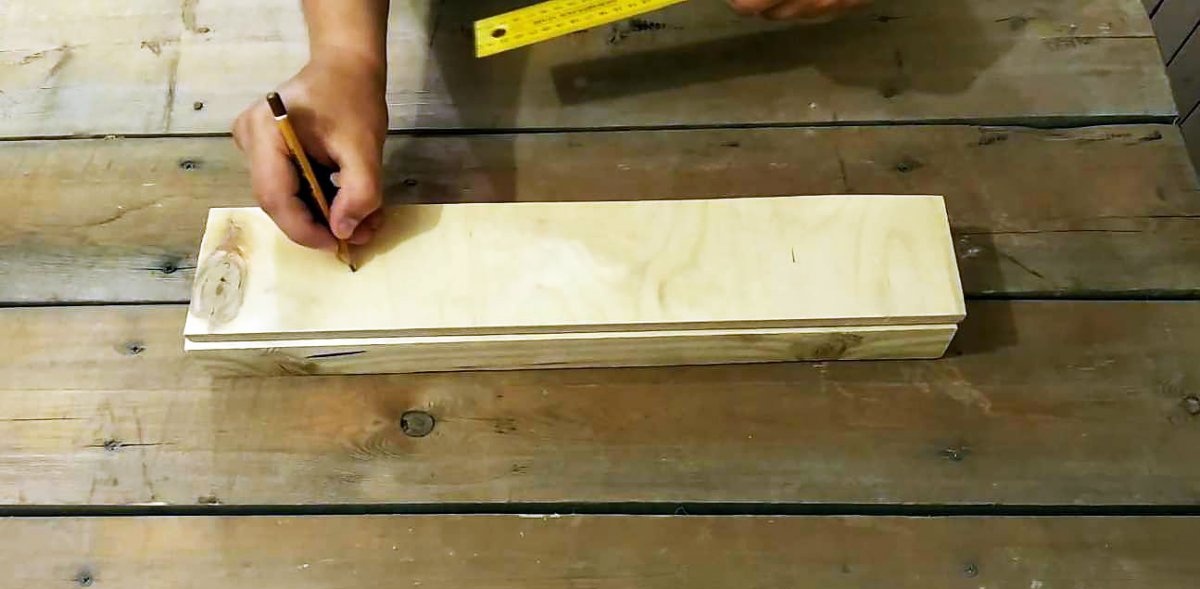
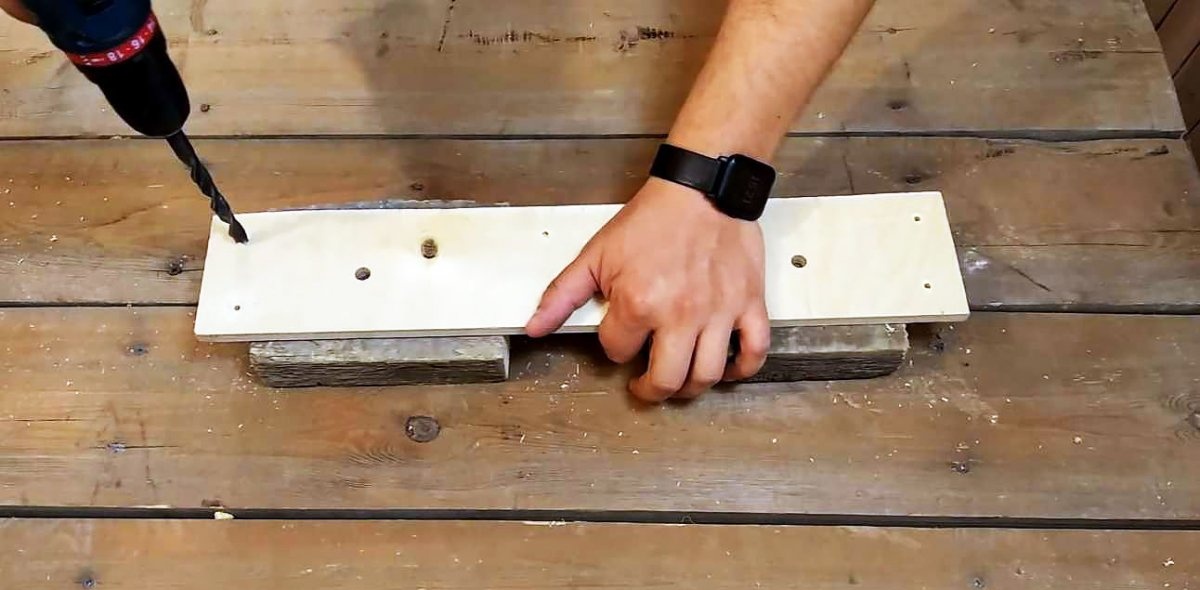
1. Measure 10 cm on both sides of the plywood, center and mark the points of future holes for screws.
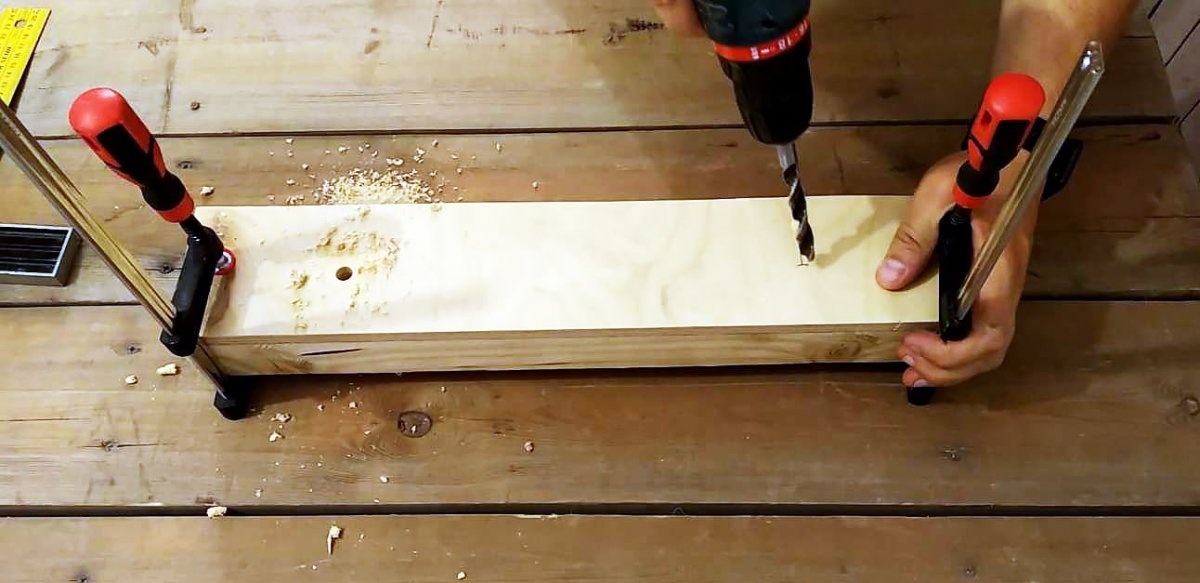
2. For convenience, we secure the plywood and timber together with a clamp.
3. Drill through the marked points a hole with a diameter of 12 mm. Use a drill depending on the diameter of your studs plus 2 mm.
4. Using a drill, we make 3-4 mm holes for self-tapping screws for further fastening the future fixed part of the vice to the workbench. We place the holes 2 at the edges and 2 in the middle, making a small indent from the edges.
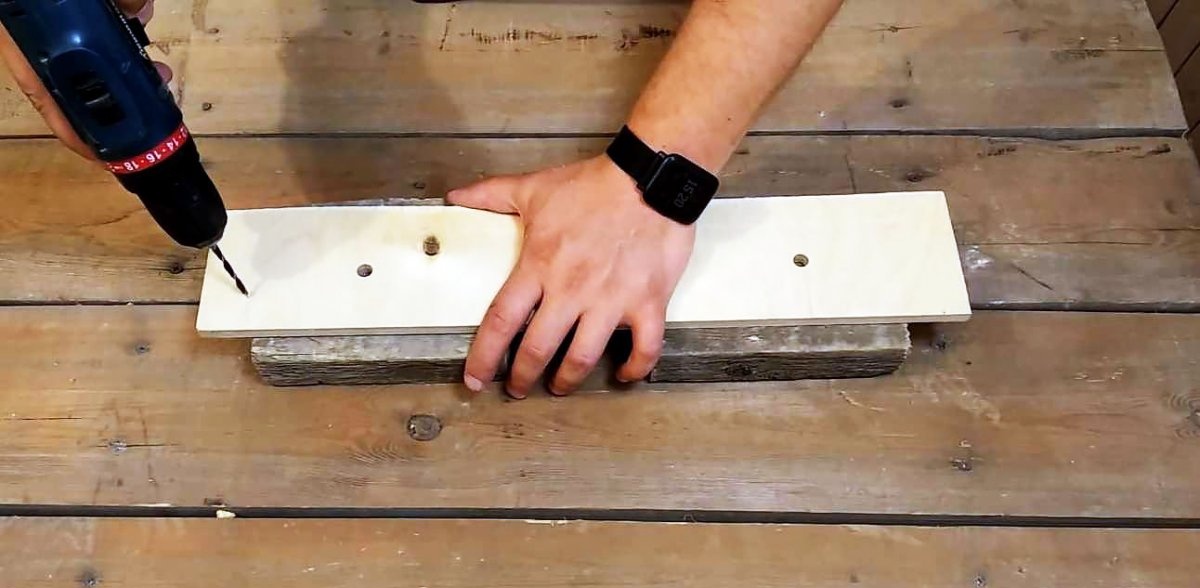
5. To ensure that the heads of the screws are hidden using a metal drill with a diameter of 12 mm, we make small indentations in the holes made.
6. Attach the plywood to the workbench using wood screws.
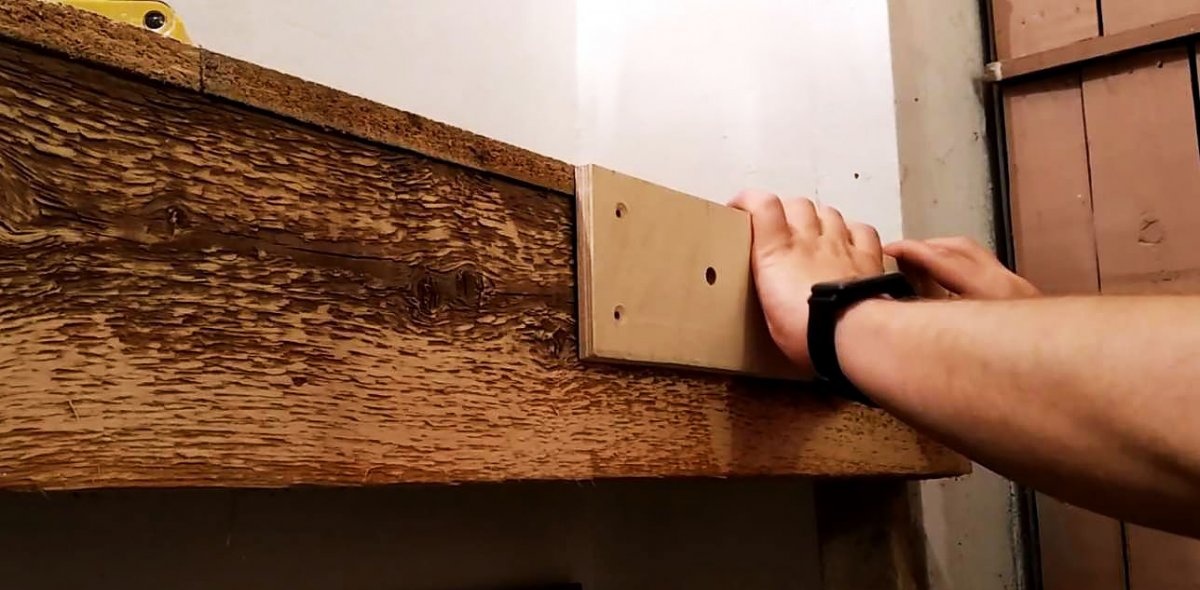

The stationary vise jaw is ready.
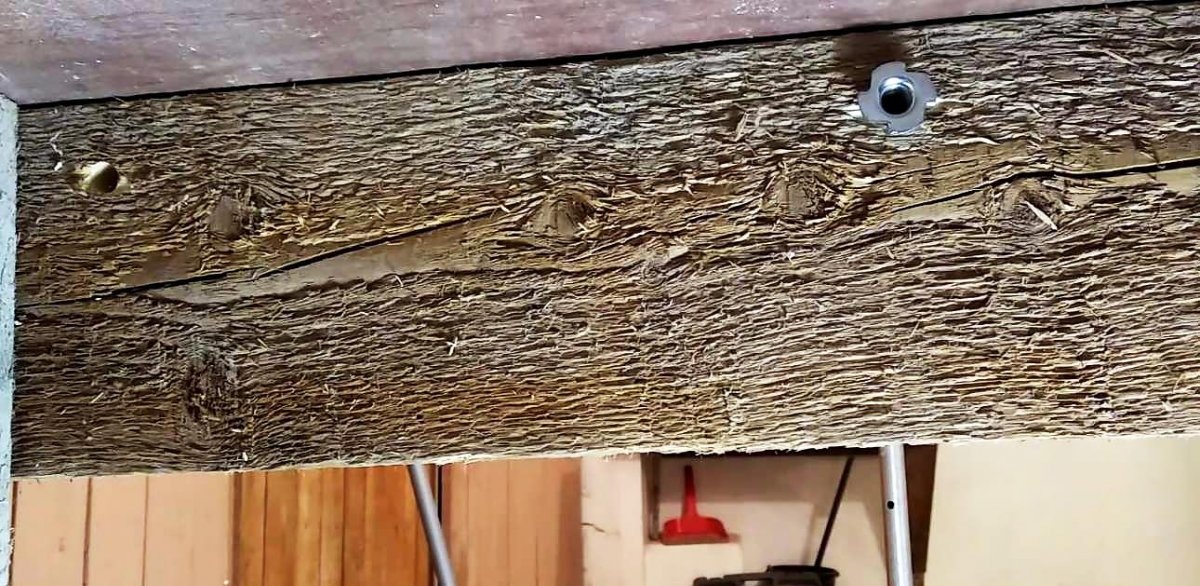
7. Next, using the holes for the studs (12 mm) in the plywood as a guide, we drill the workbench itself.
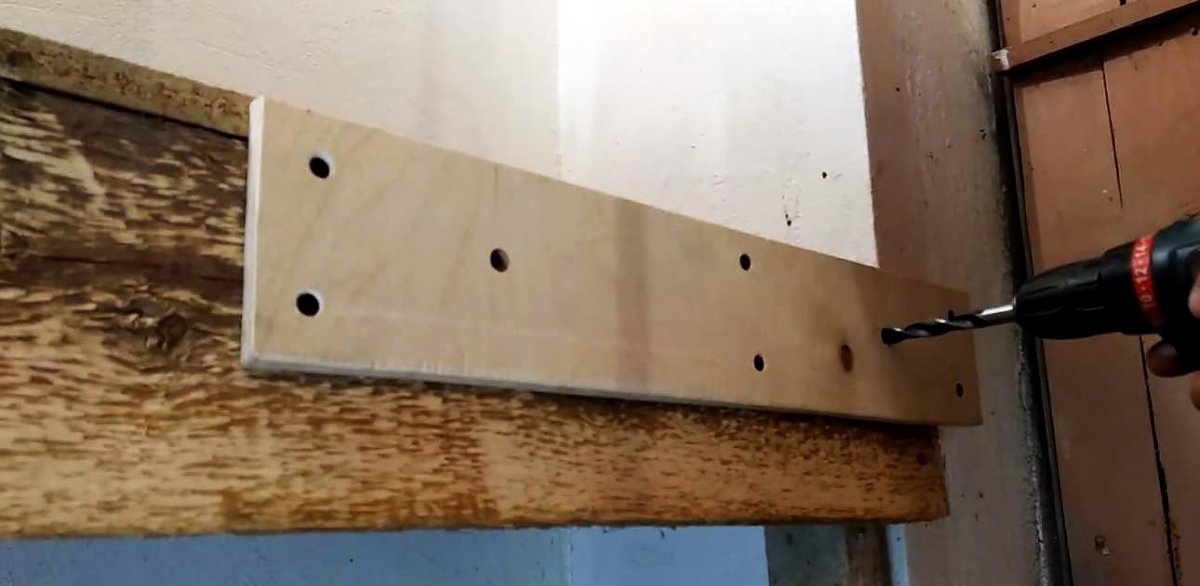
8. Take 2 M10 driving nuts (they are also called mortise nuts) and drive them into the workbench from the reverse side.
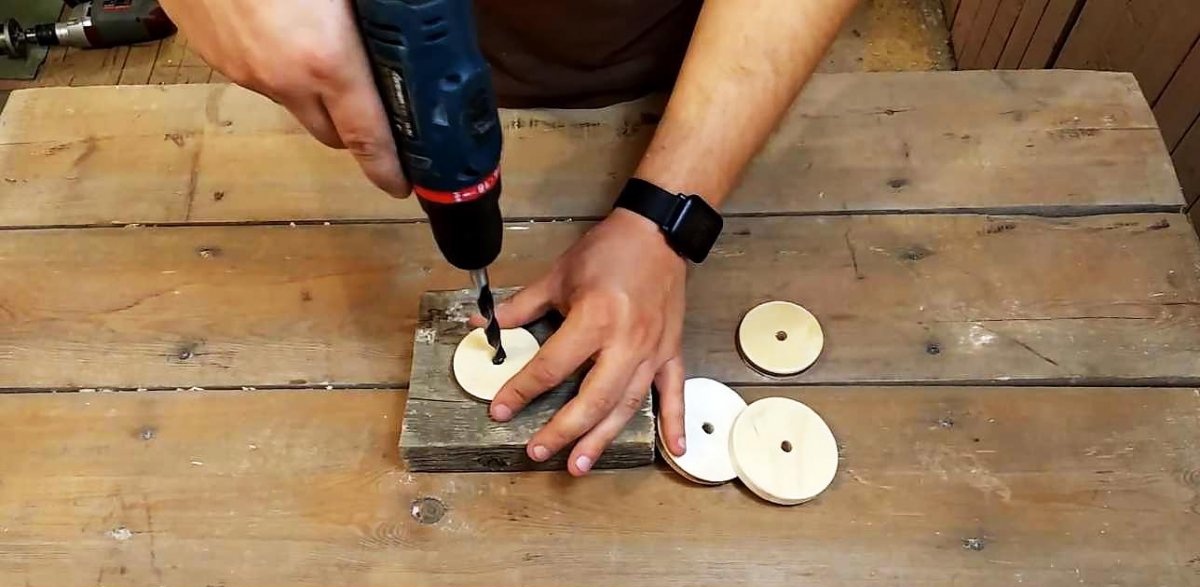
9. Take a small piece of plywood, mark and center the diameters of the future handles on it using wood bits.
Select the diameter of the handles to suit your hand - I chose 67 and 54 mm.
10. It is necessary to mark 2 large washers and 2 smaller ones with a diameter of 1.5-2 cm.
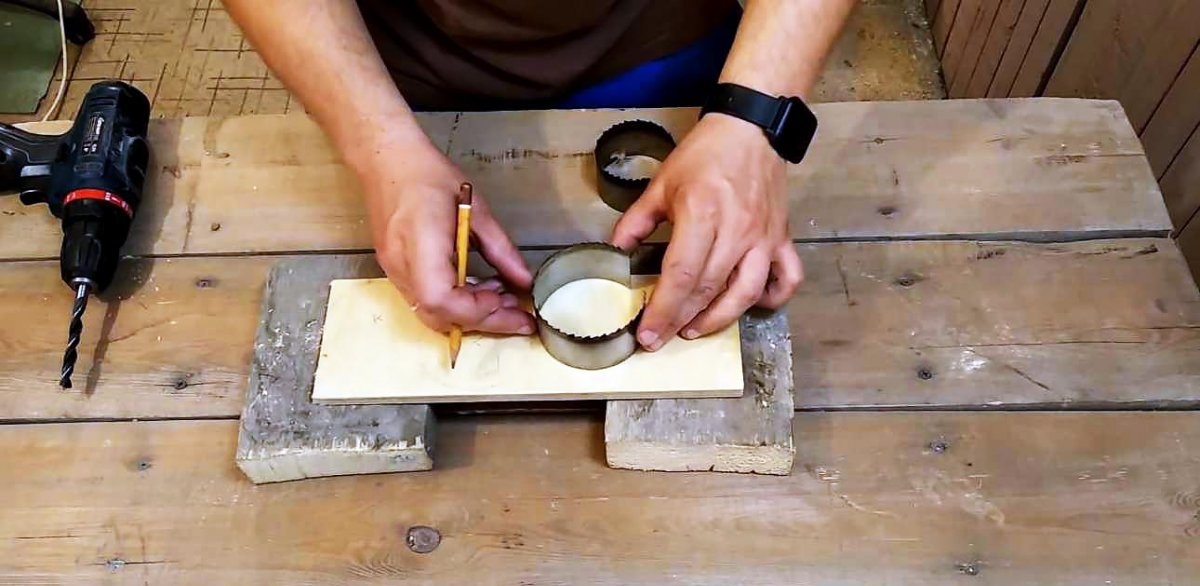
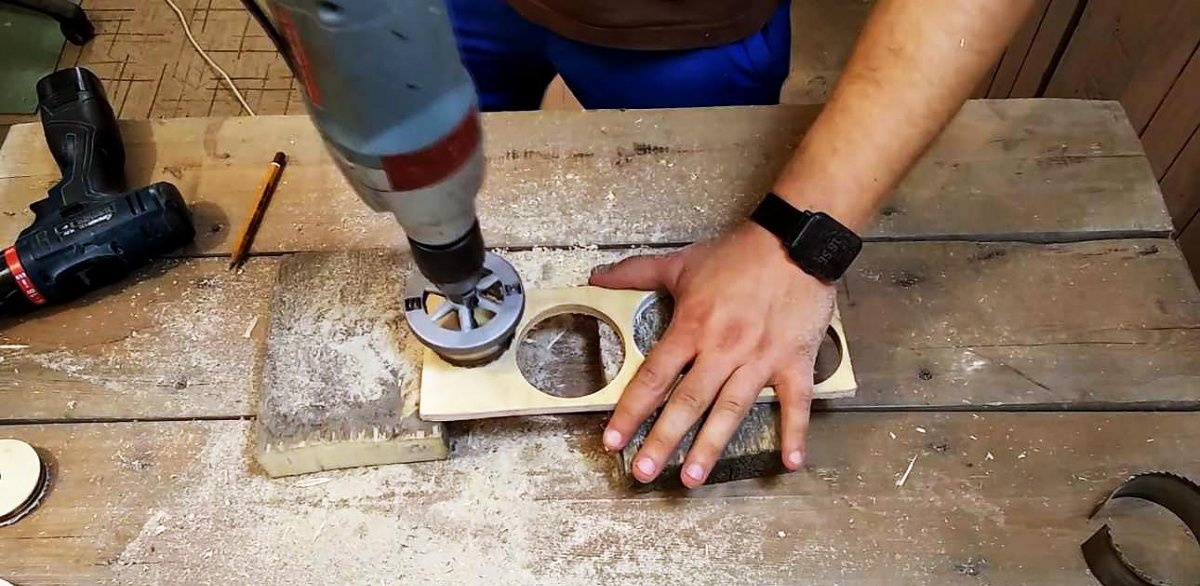
11. Drill a hole in the middle of each marked diameter, the diameter of which will coincide with the diameter of the guide drill in the crowns - in my case it is 8 mm. You can skip this step and immediately drill the hole with a standard central drill bit for ring bits.
12. Using crowns, cut out the washers and sand their edges with sandpaper.
13.Using a drill equal to the outer diameter of the cage nut (12 vv), we expand the holes in the small washers.
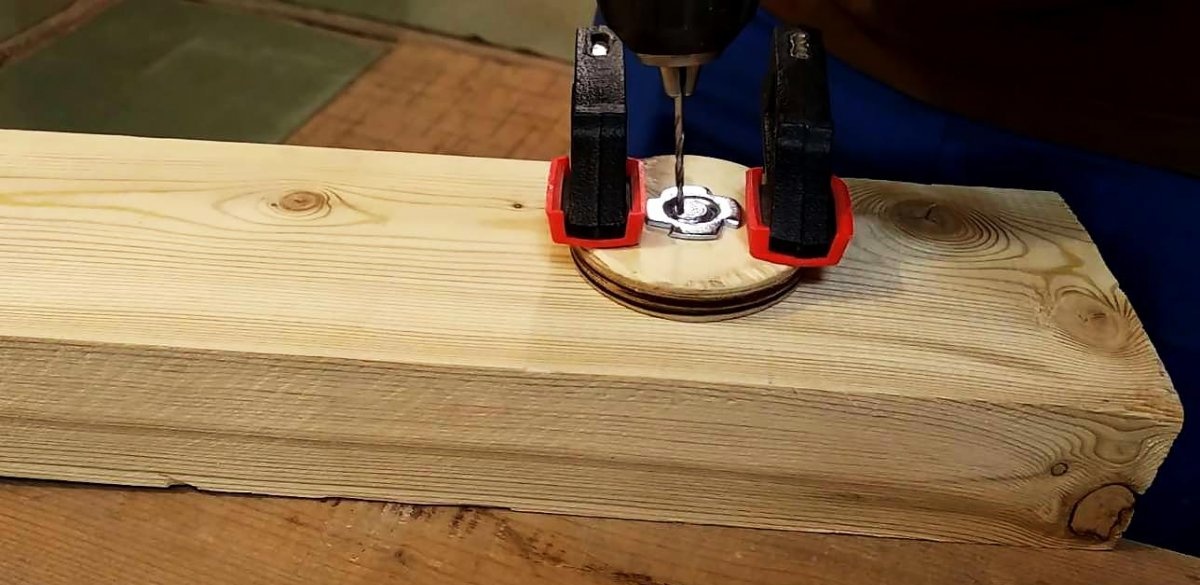
14. In the large washers, we drill small recesses with a 22 Forstner drill so that the caps of the driving nuts can be inserted there without gaps. In the absence of it, I had to make holes with a feather drill and work a little with a chisel.
15. We insert the mortise nuts and drive them into small washers.
16. Screw the studs flush with the nut head.
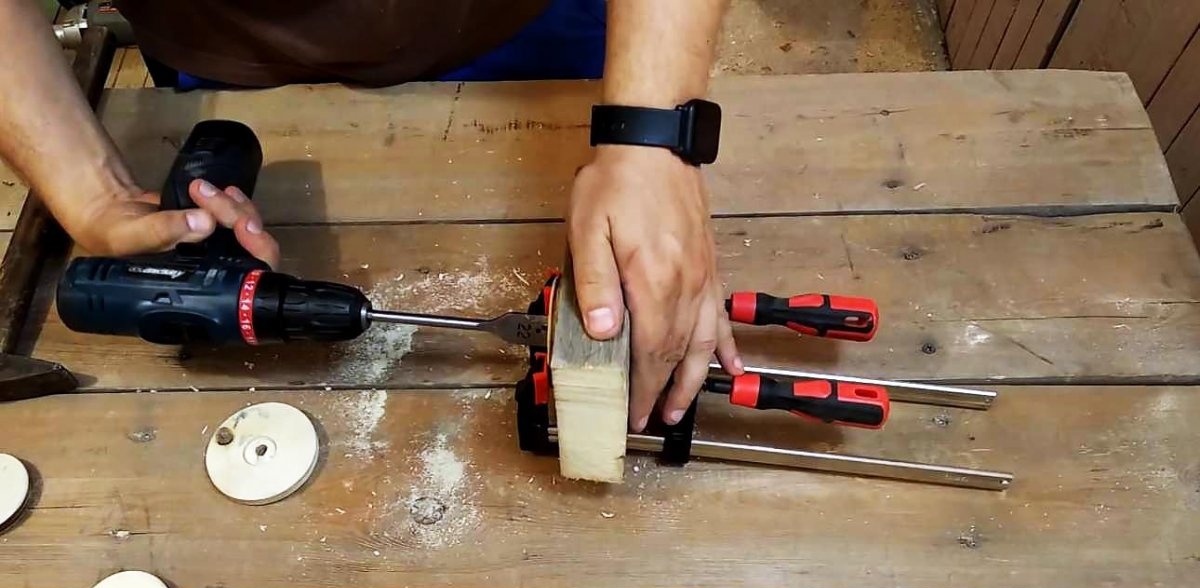
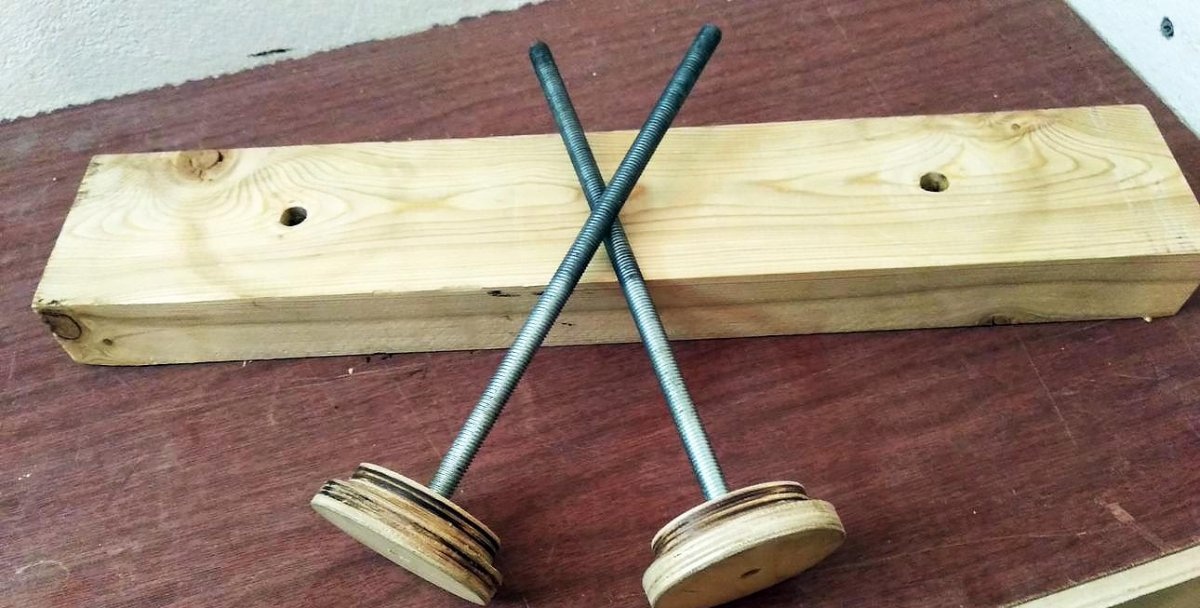
17. Now you need to lock the threaded connection. Attach both structures with a clamp to a convenient surface. I used a timber for future vices.
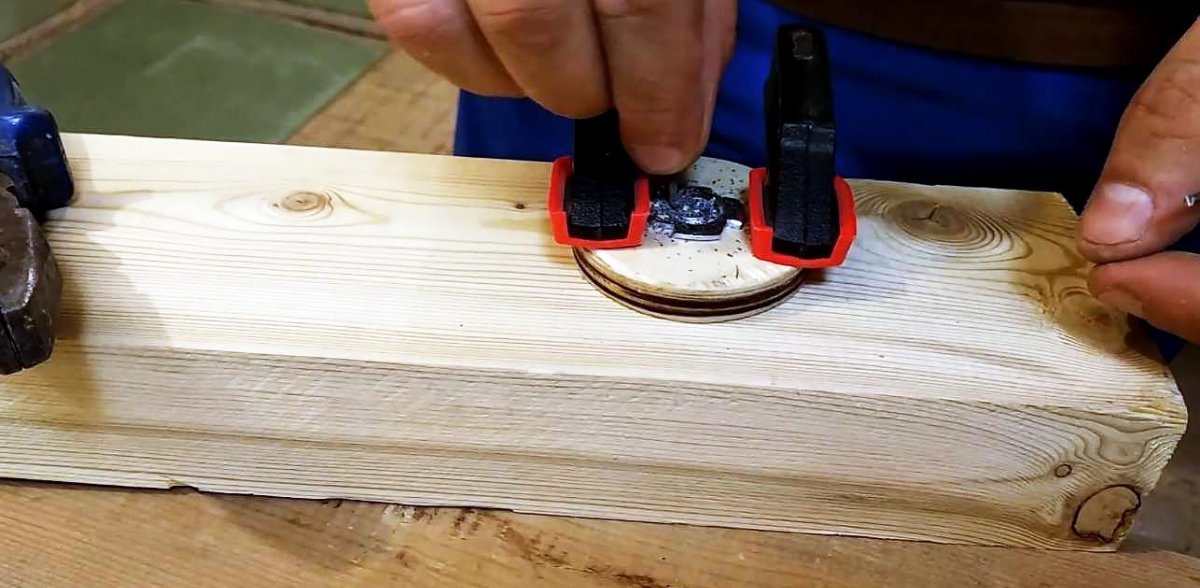
18. Using a 1mm metal drill, make holes in the caps of the cage nuts along the thread boundary. Drilling depth is no more than 1 cm.
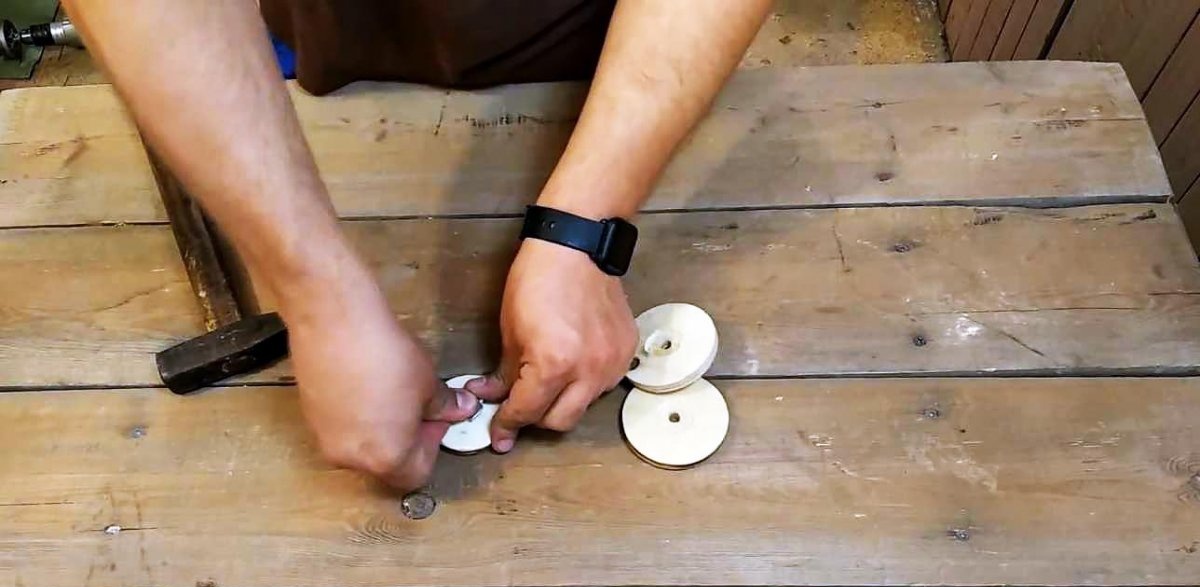
19. Cut pieces of steel wire of the same length and insert them into the drilled holes to secure the structure.
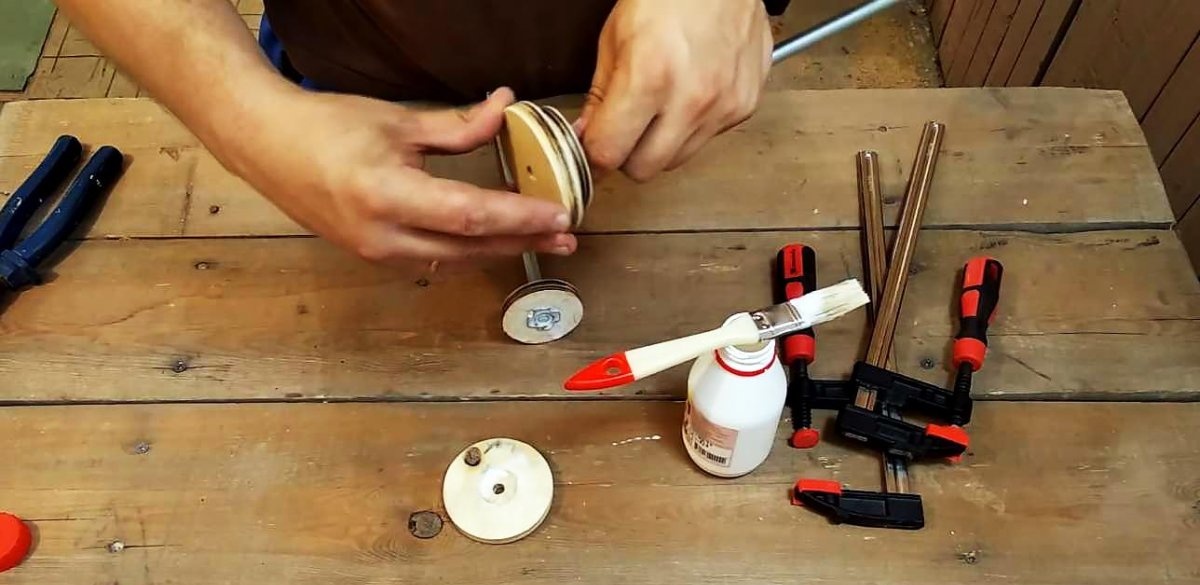
20. Lubricate the sides of the washers with wood glue and tightly fasten them together coaxially, securing them with a clamp until completely dry.
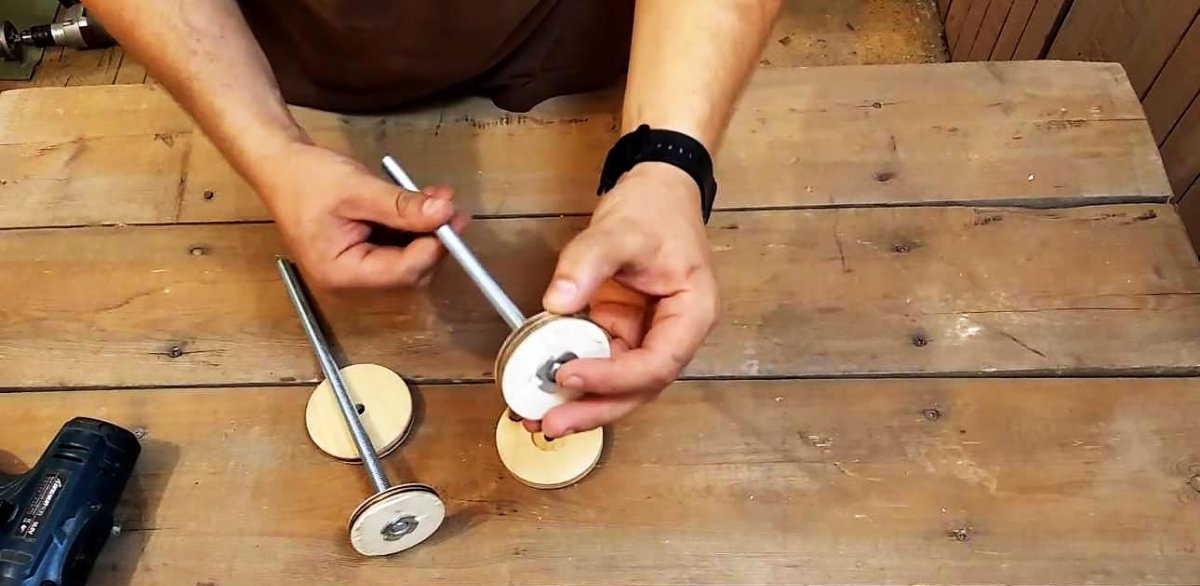
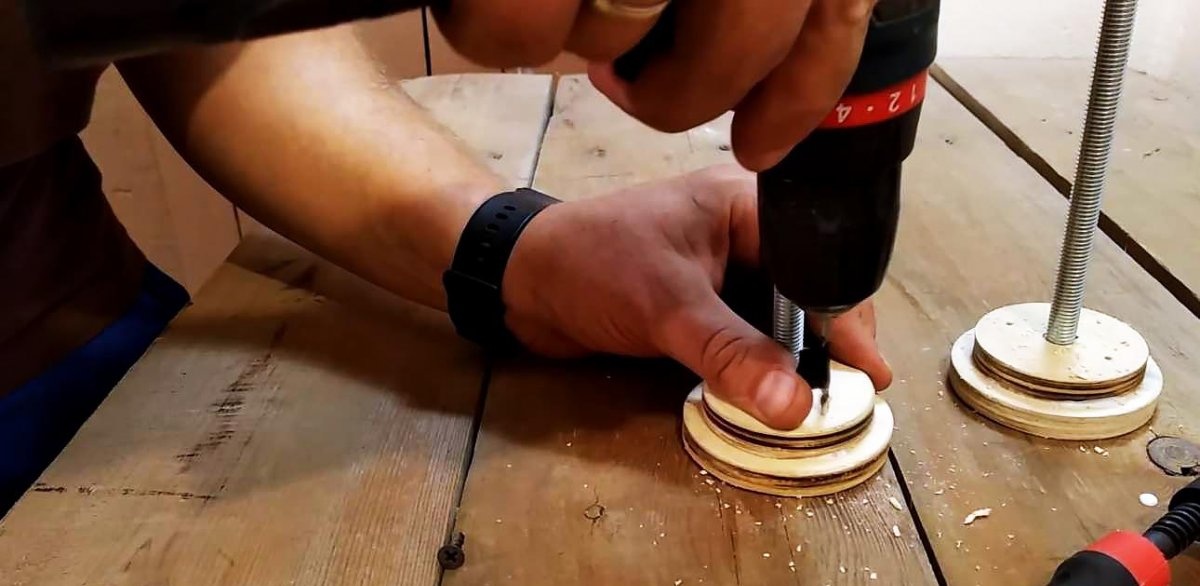
21. Using a 3-4 mm drill, make two holes on the inside of the handles on each side of the stud with a depth of no more than 10 mm.

22. Make hidden chamfers for the screw heads.
23. For reliability, secure the parts of the handle with wood screws.
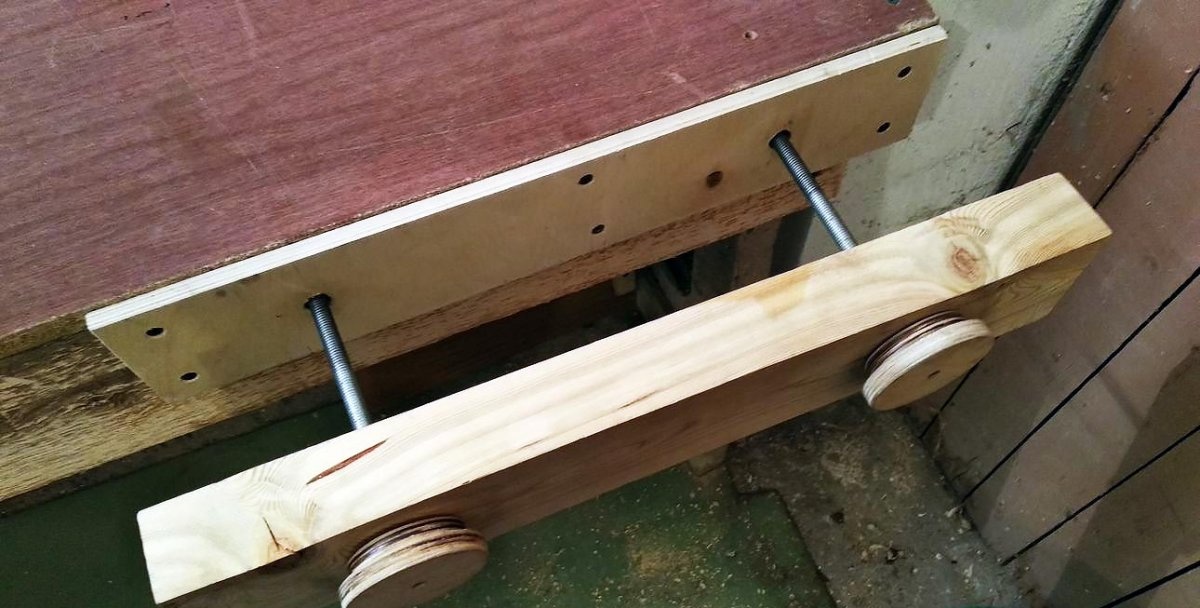
24. Insert the pins into the holes in the large block and screw them to the main part on the workbench.
25. The vice is ready.
Watch the video
For detailed instructions on how to make a vice for a workbench with your own hands, watch the video.