What you need
- To make a portable heat exchanger you need:
- aluminum pipe with a diameter of 25 mm and a length of 350 mm - 18 pcs.;
- galvanized sheet approximately 1 mm thick for making the body;
- riveter with rivets;
- drill or drilling machine and drill bits;
- sheet bender;
- a fan (preferably with speed control) and a power source for it.
- You will also need a hammer, chisel, core, measuring and marking tools.
The process of making a heat exchanger for a tent
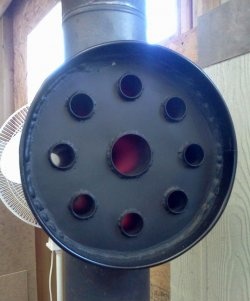
Front and back covers:
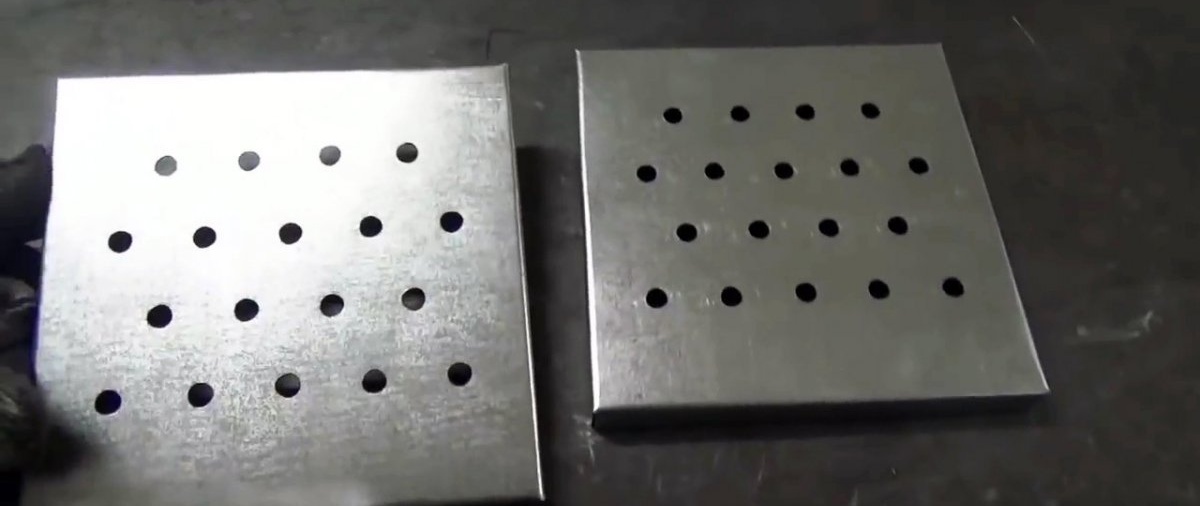
From a sheet of galvanized steel we cut out two squares measuring 250 × 250 mm.
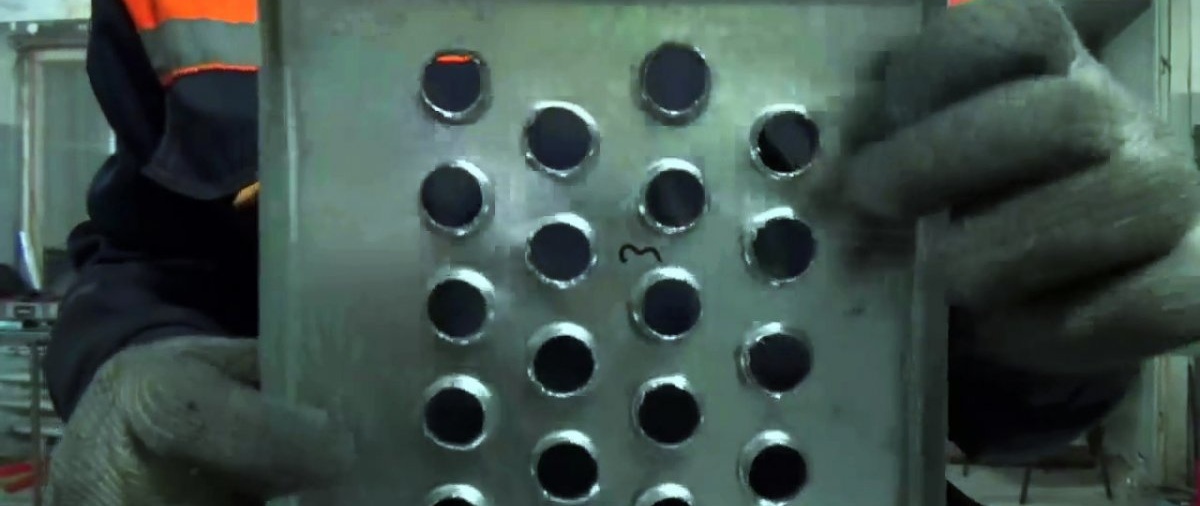
In the sheets we drill 4 rows of holes with a diameter of 10 mm in a checkerboard pattern. For a mirror arrangement of holes, they are made in two sheets at once.
Using a sheet bending machine, we bend the edges of the sheets at 25 mm to get low boxes.
Using a thick core or a round piece sharpened to a cone and a pipe with a diameter of 25 mm, we expand the holes.
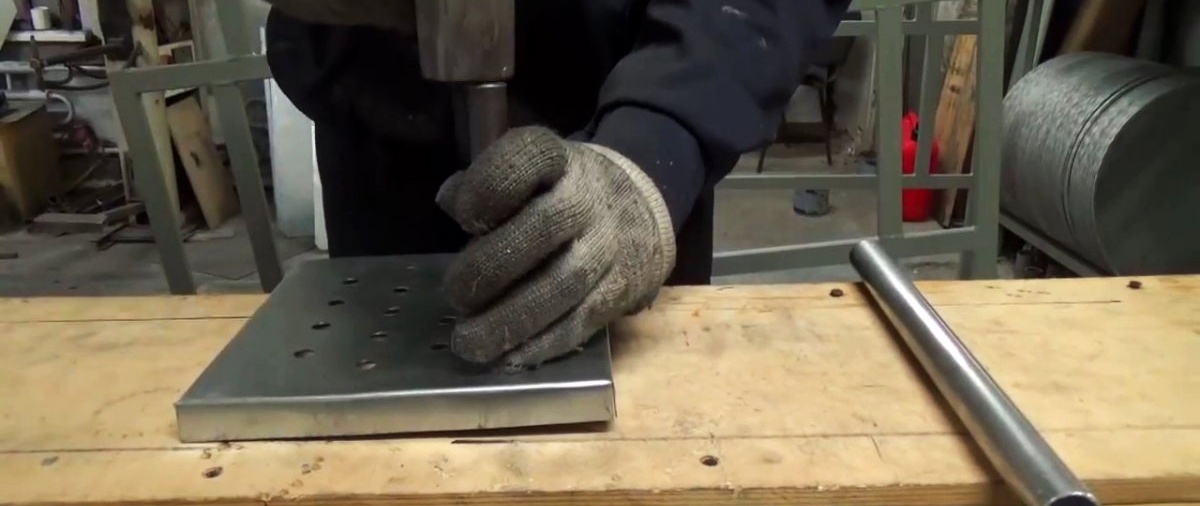
We hammer the core inside the box.
Pipes:
We cut aluminum pipes (18 pcs.) 350 mm each.

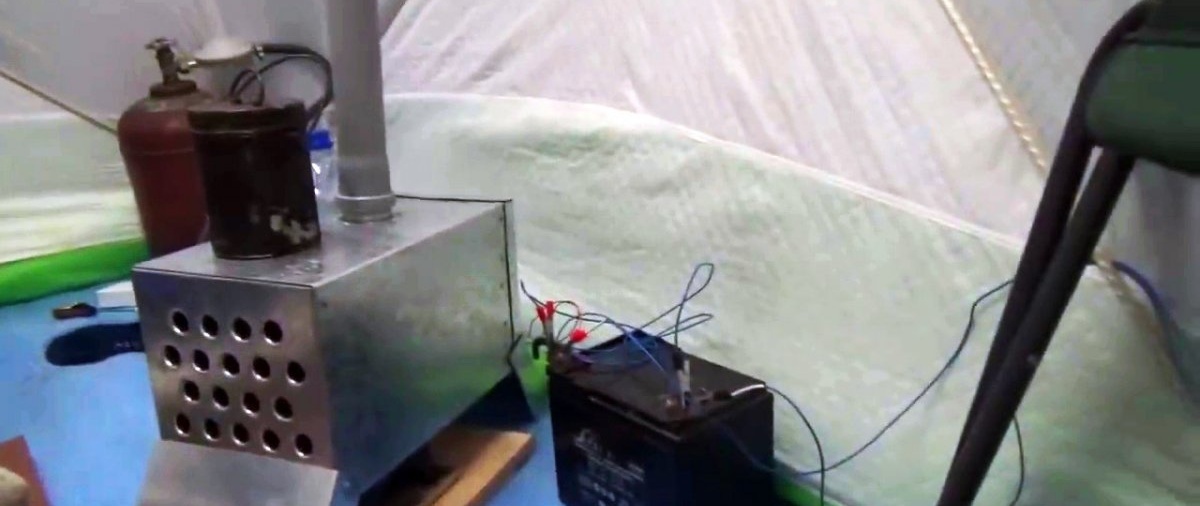
We make a pipe with a diameter of 50-60 mm from metal or purchase a ready-made one. It is advisable that a polypropylene pipe be put on it, which will serve as a chimney.
Using metal scissors, we make a dozen cuts 20 mm long and bend them outward using pliers, as shown in the figure.

Side walls and top:
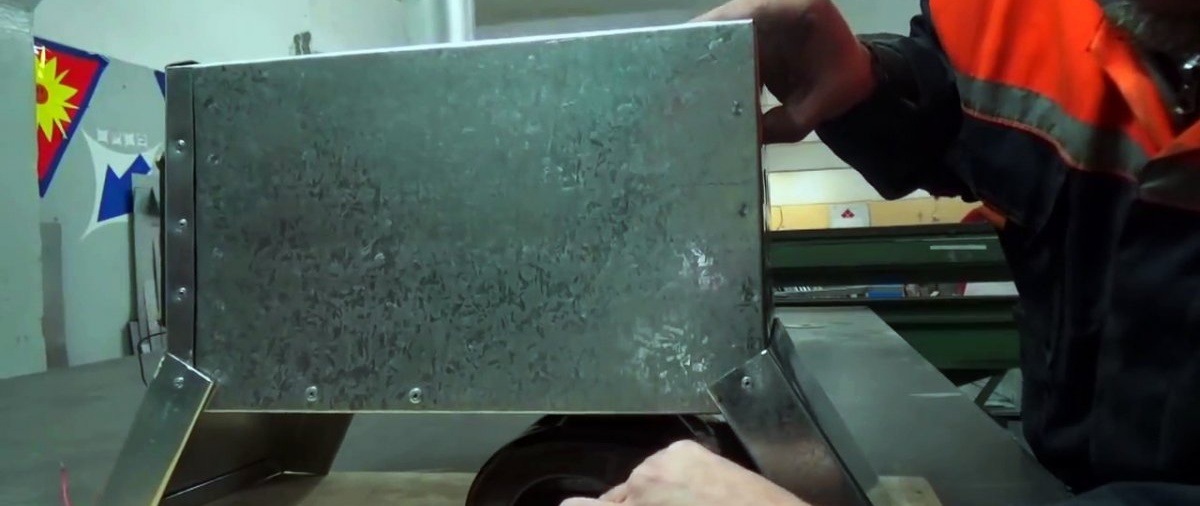
We cut out a solid sheet from the metal, from which we bend the side and top walls of the heat exchanger.

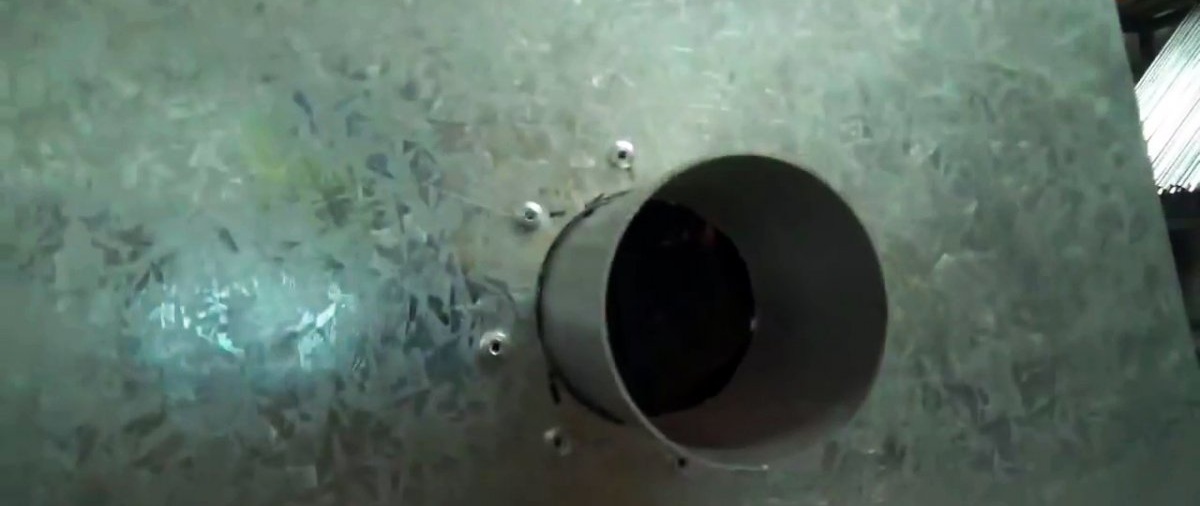
In the upper part we drill a hole corresponding to the diameter of the metal pipe for the chimney.
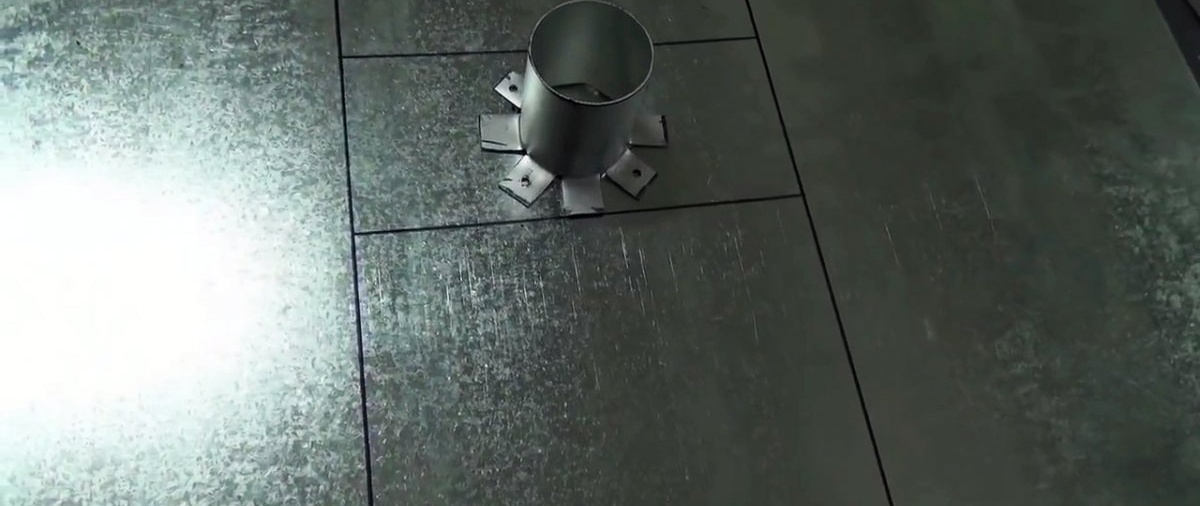
We drill small holes around the perimeter with a reserve, and then use a chisel to cut out a large one.
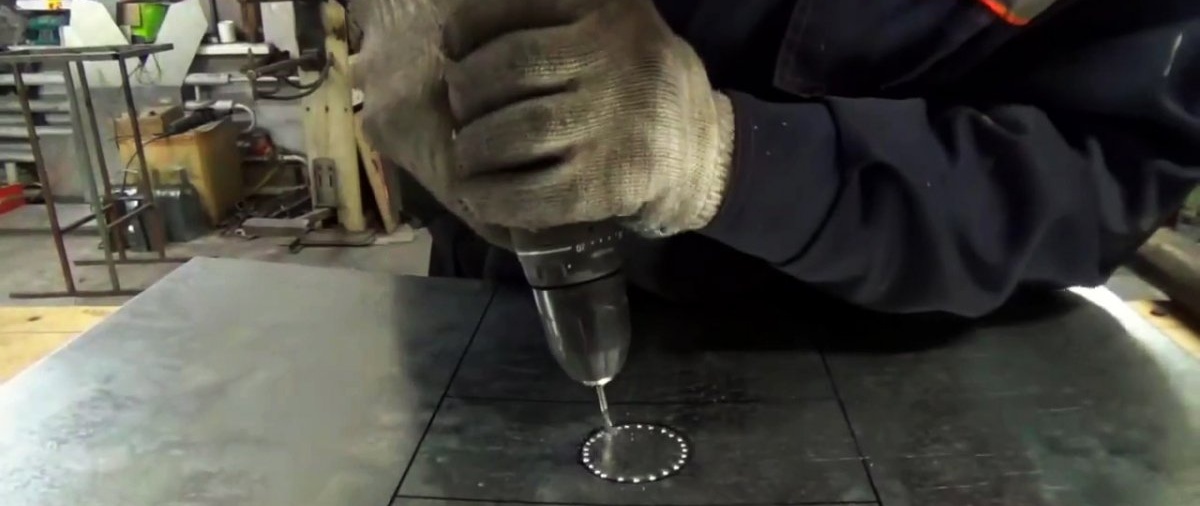
Using a file or drill, we adjust the size and geometry of the hole so that the pipe fits tightly into it. We remove hangnails.

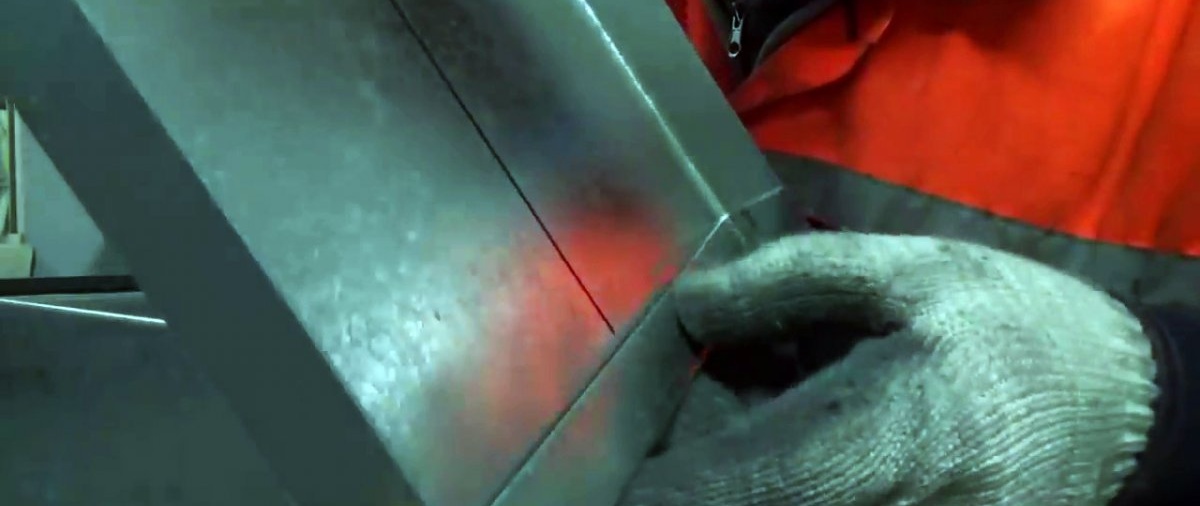
Using a sheet bender, we bend the heat exchanger body.

You can roll the sides to add rigidity to the structure. We drill holes in the pipe petals and the body and use rivets to connect them.
Assembly:
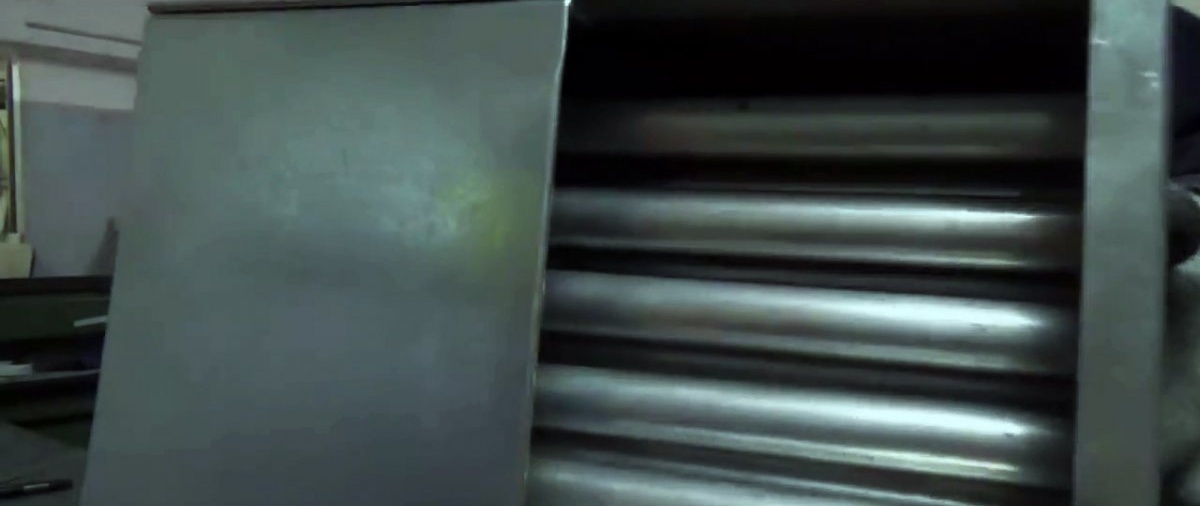
To simplify assembly, insert the bottom row of pipes and tighten the front and back walls using a pin or clamp.

We fasten all the elements of the assembled structure using resistance welding (you can use rivets).

To increase the reliability of fastening using a core, we further expand the holes on both sides of the heat exchanger.
Bottom:
We bend the lower part of the body from a galvanized sheet, rolling the part from the burner side or from both sides.
The part should occupy half the area of the bottom, under the other there will be a gas stove.
We make a valve for the pipe to reduce heat loss.

We bend the lid and make a hole for the fan, which will distribute warm air throughout the tent, and secure it.
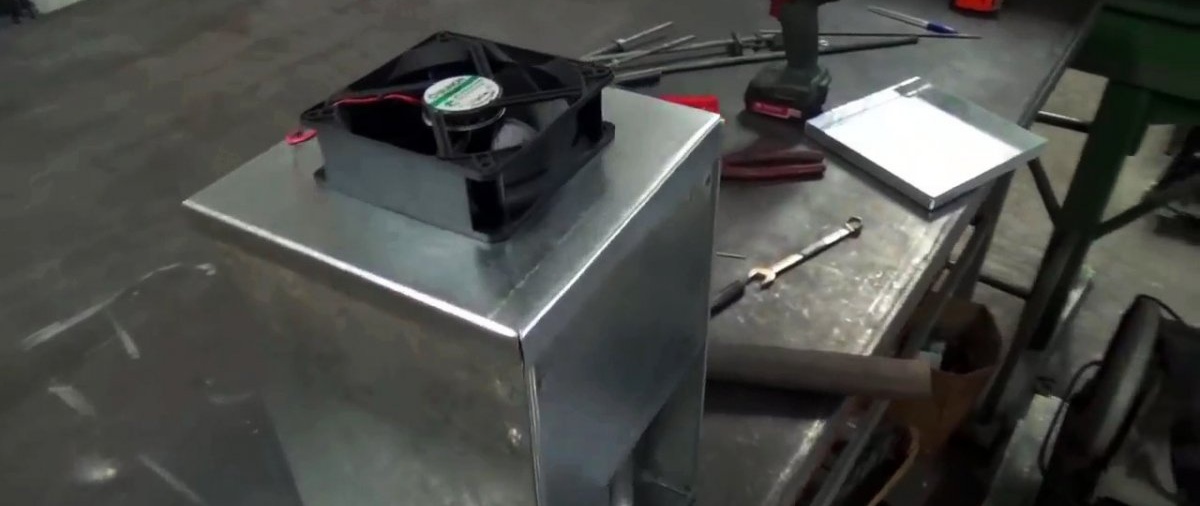
We secure the cover with the fan using rivets.

We make the legs so high that the fire of the gas stove is closer to the aluminum pipes.

We connect the power source to the fan, the gas cylinder to the burner in compliance with safety regulations, and put the plastic pipe on the metal one and take it out of the tent.
To reduce heat losses, you can organize an air intake for the burner from the outside - connect a second pipe from the street to the burner. Cold air, bypassing the warm room, will go into the chimney along with carbon monoxide.