A “long-lasting” flashlight is a necessary thing in any household. It will help during a power outage and will be a faithful assistant when working in places with poor lighting. Its design is simple and uncomplicated. It is built on common 18650 elements, and the body is glued together from PVC sewer pipe. There are no missing parts.
How to make a battery-powered emergency flashlight
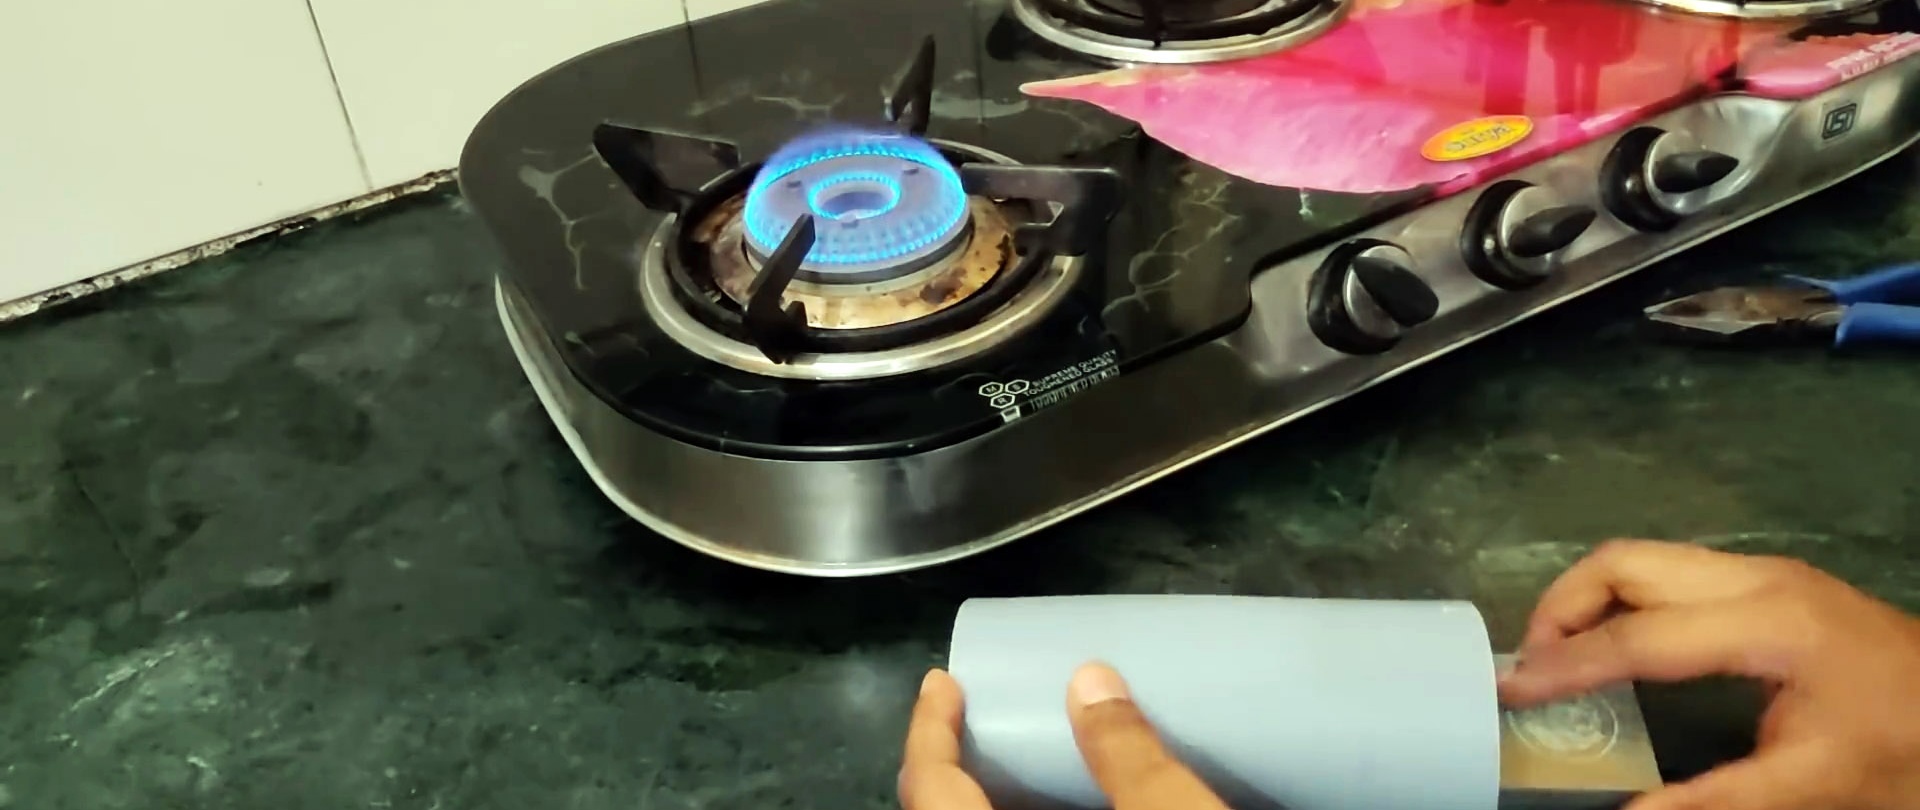
We cut a piece of PVC sewer pipe and heat it until it softens.
We form two sides by hand.
And a semicircle using another pipe with a smaller diameter.
The result is the body of the future lantern. We trim the uneven edges, cut out the corner where the handle will be.
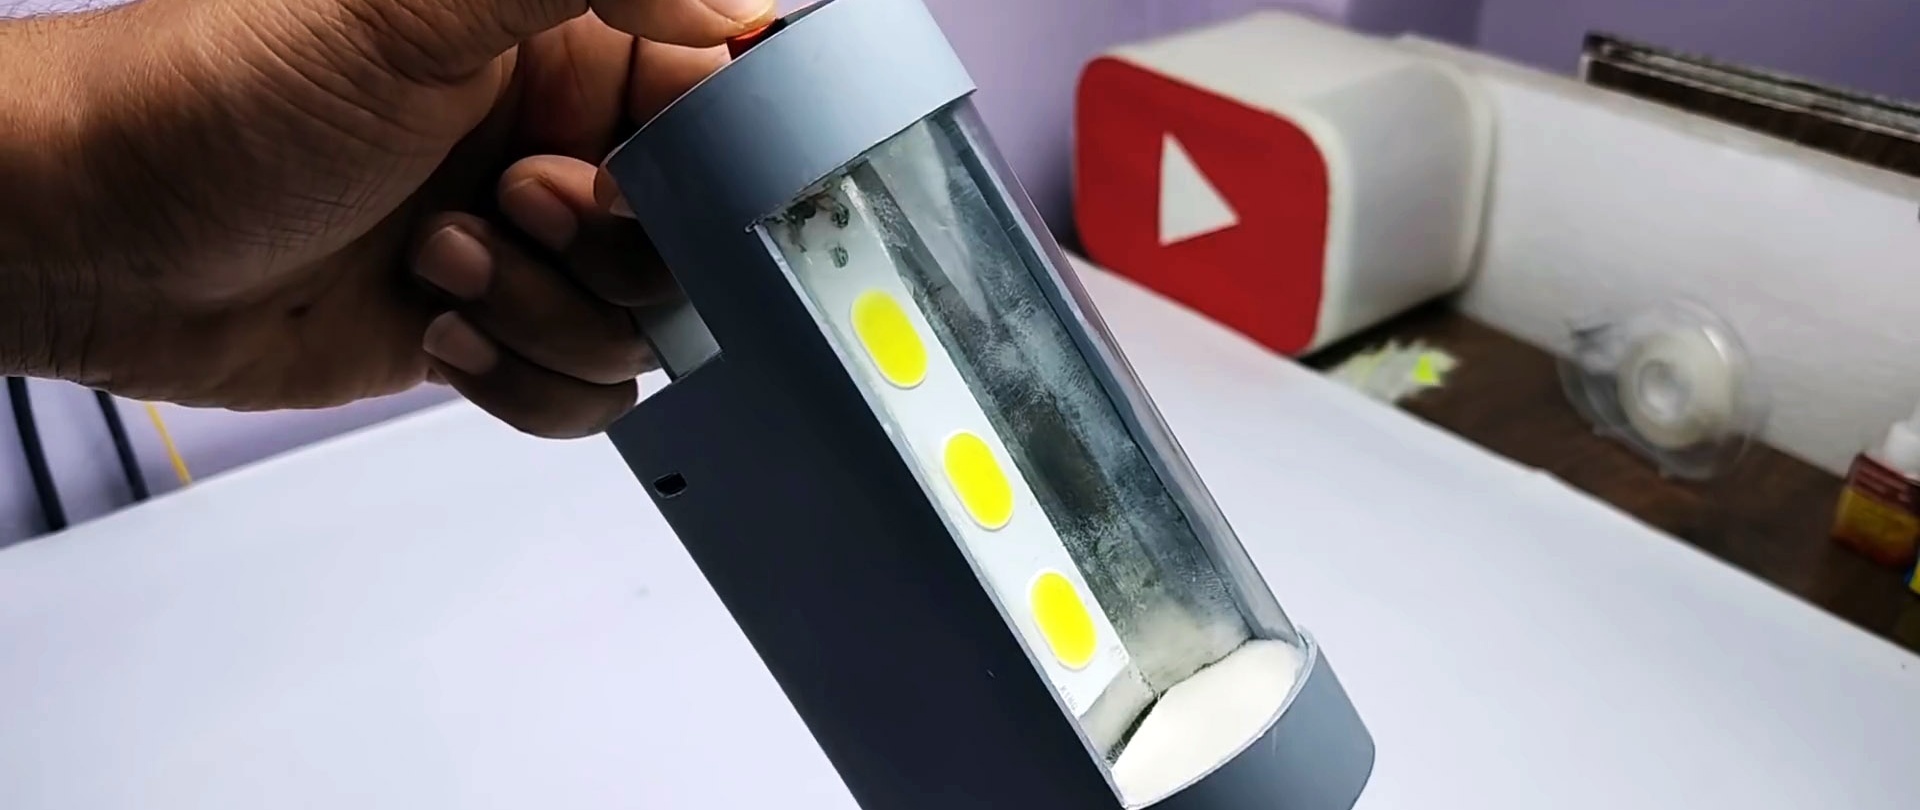
We cut out a window for the reflector.
We cut out the plugs from flat plastic.
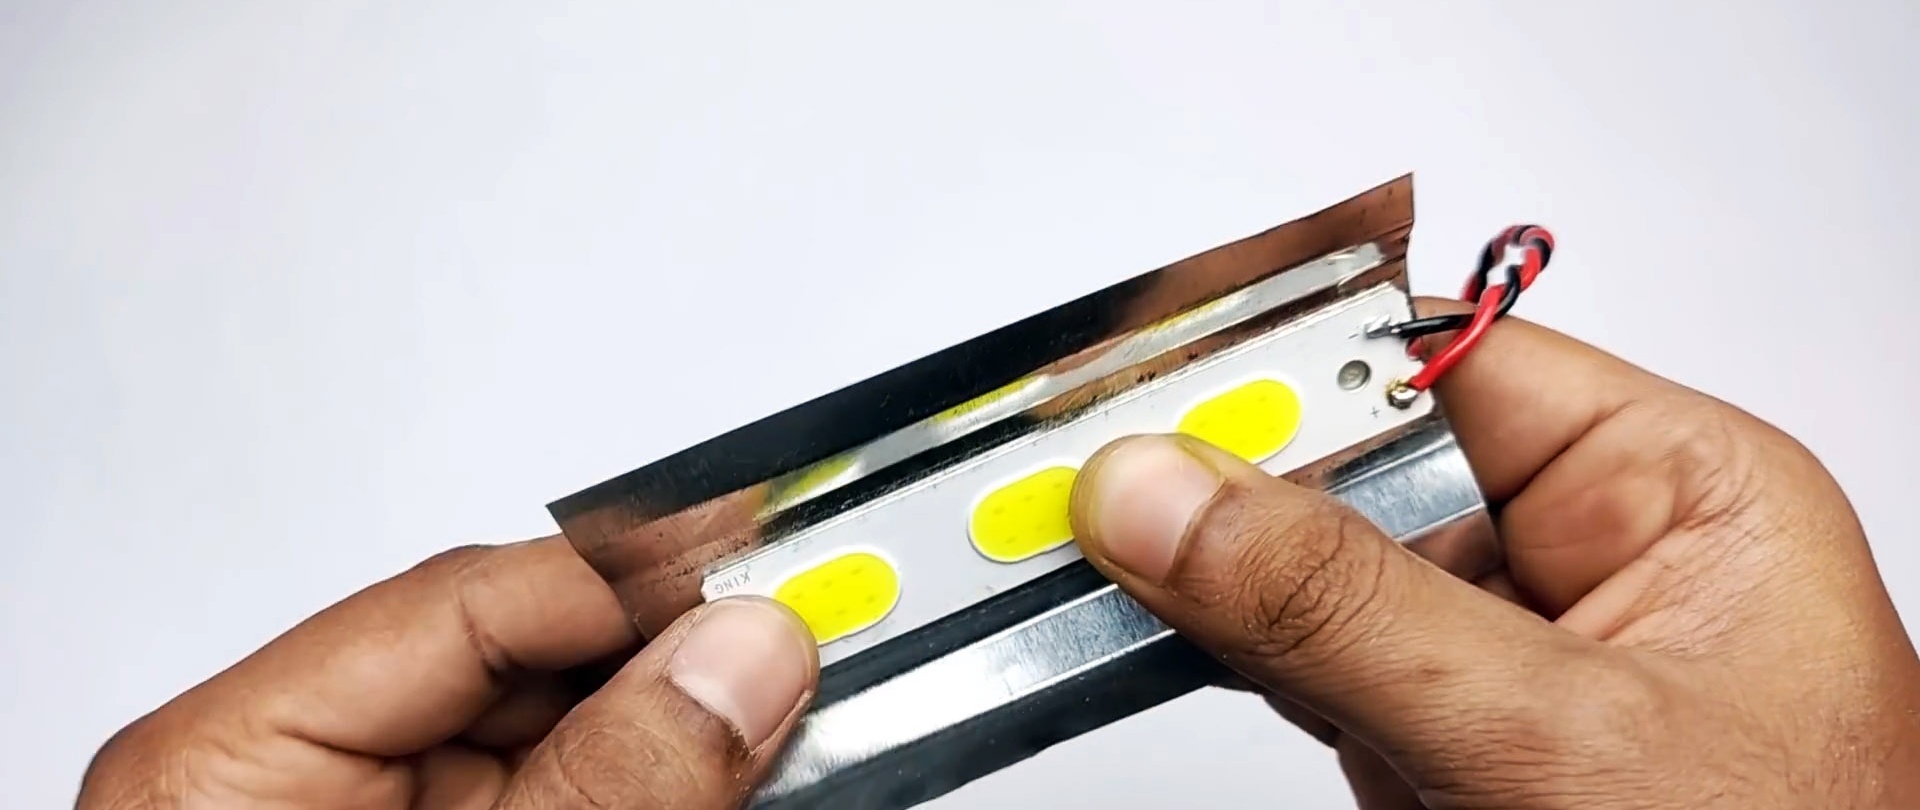
Take a piece of powerful 5 V LED strip.
We cut out a reflector from a galvanized tin can.Glue the LED strip to it.
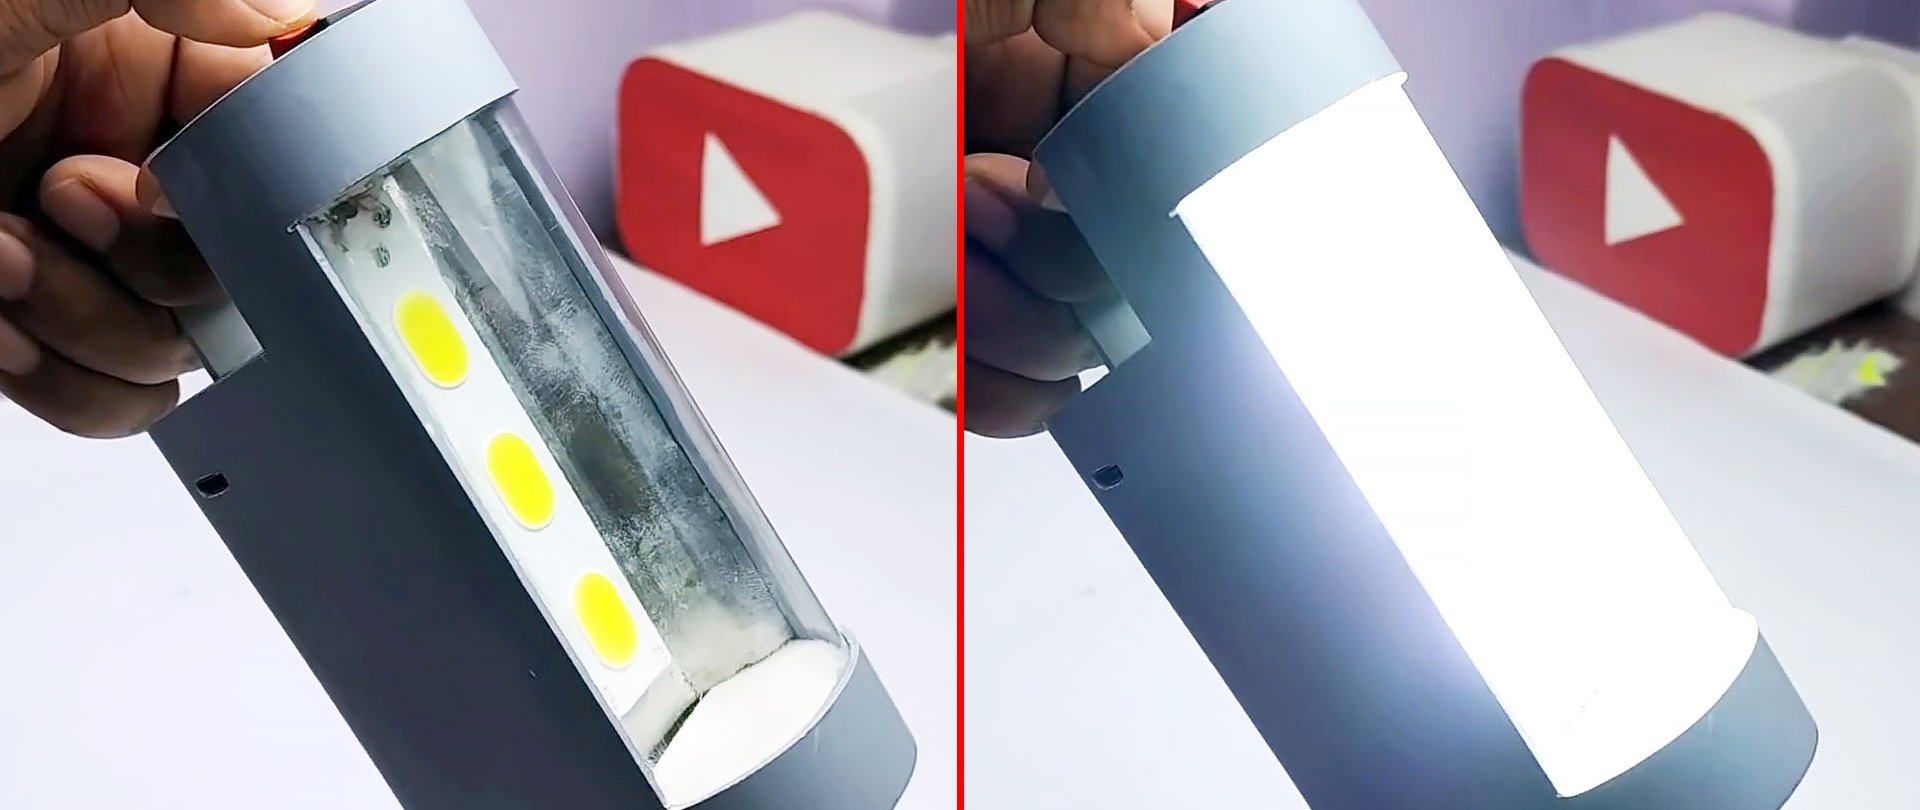
We cut glass from a transparent bottle and glue it into the body of the lantern.
We install the reflector and secure it with plugs.
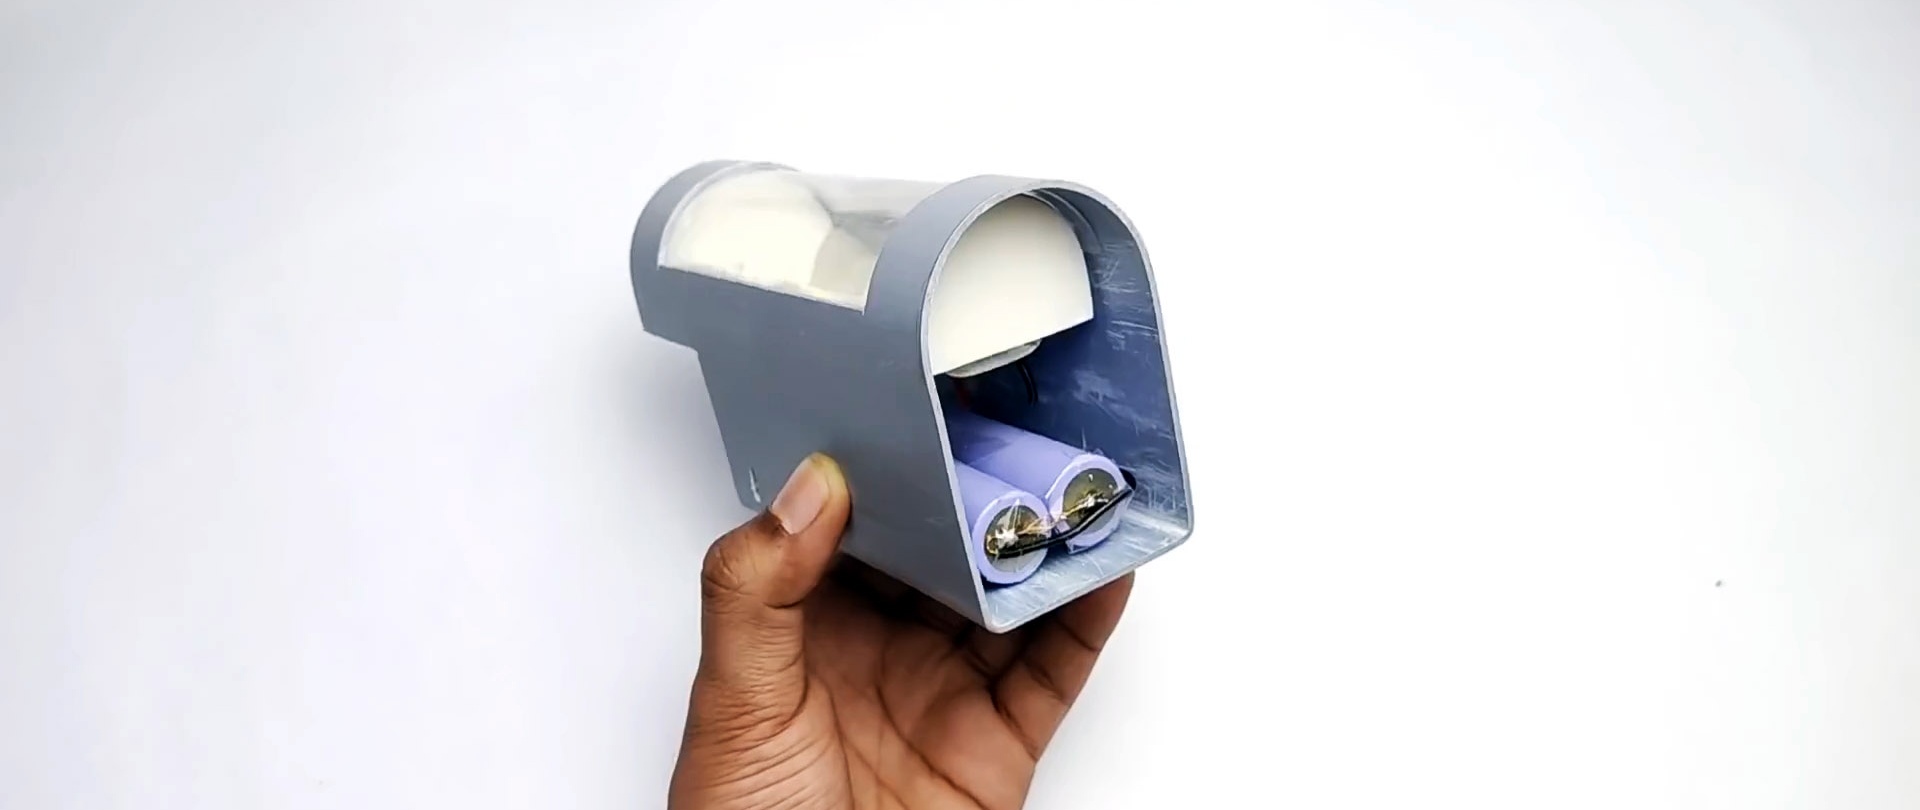
We solder a battery of 2 batteries connected in parallel to the charging module.
We glue the batteries into the case with double tape.
For the charging module, we make a cut in the housing for the charger connection socket. Fix the module with glue.
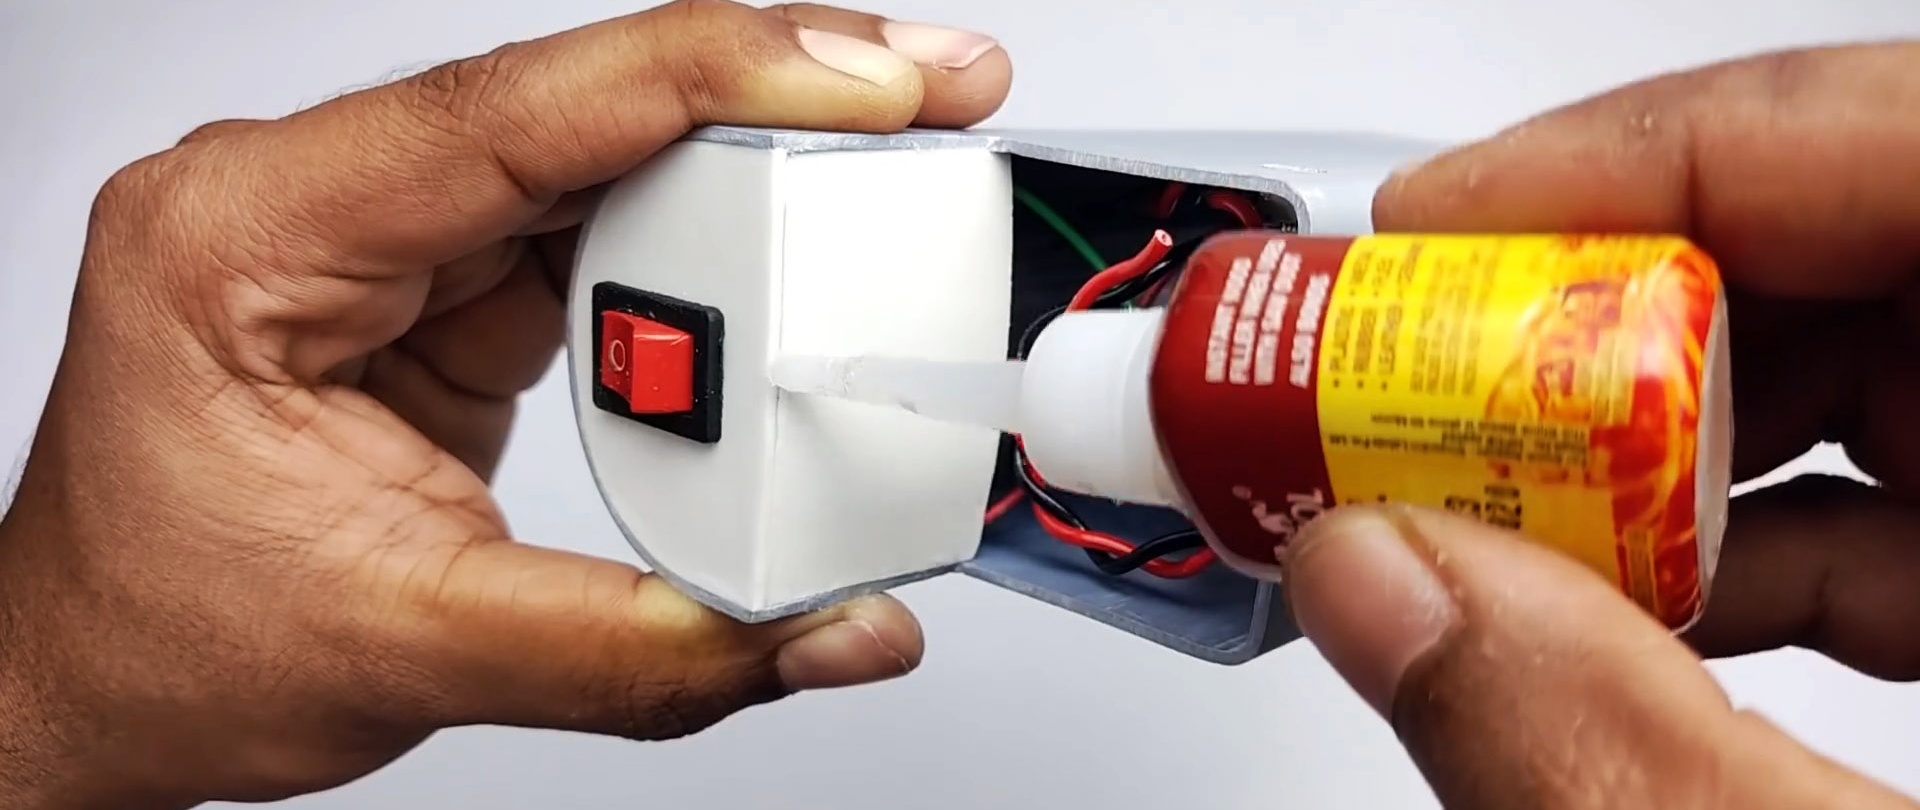
In the top plug we make a slot for the switch. We install the plug and solder the wires.
We close all places with plugs.
We make a handle from a piece of plastic and glue it with super glue.
We put the flashlight on charge.
Then we check the work.
It shines great. This glow is enough for 6-7 hours of continuous operation. There is still some left in the case, so if desired, the number of batteries can be doubled.