Do it yourself
Life hacks, master classes, useful tips, recipes.
home » Construction and repair » How to add sections to an aluminum radiator
Sometimes, in order to increase the thermal output of a heating radiator, it is necessary to add several sections or assemble it from two parts. You can do this work yourself if you are careful and follow the recommendations of specialists.
How to add sections to an aluminum radiator

Will need


To cope with this operation, we will need the following materials and tools:
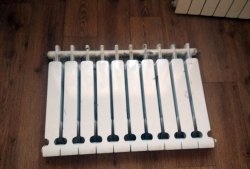
  • sections of aluminum radiators;
  • steel nipples for twisting sections;
  • paronite gaskets for the nipple;
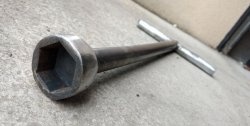
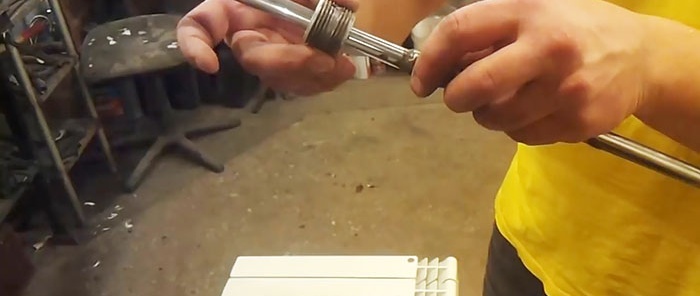
  • nipple wrench with working head and wrench;
  • knife;
  • grinding disc.

Since the internal diameter of the nipples, like all its dimensions, is standardized and equal to 25 mm, the working head of a do-it-yourself nipple wrench should have a length of 30-35 mm, a width of 23 mm and a thickness of about 6 mm.
How to add sections to an aluminum radiator

How to add sections to an aluminum radiator

How to add sections to an aluminum radiator

How to add sections to an aluminum radiator

Radiator section assembly process


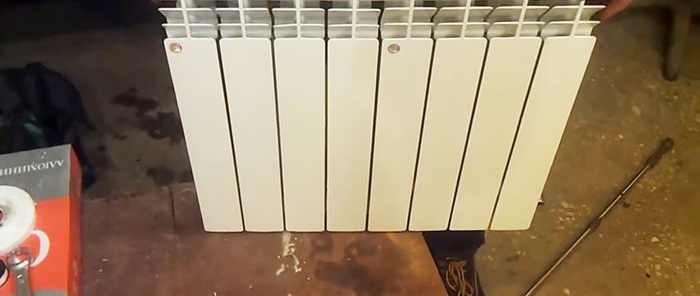
First of all, we prepare the curled surfaces of the sections. To do this, remove the paint from their ends: first scrape them off with a knife, then lightly sand them by hand with a sanding disc.
How to add sections to an aluminum radiator

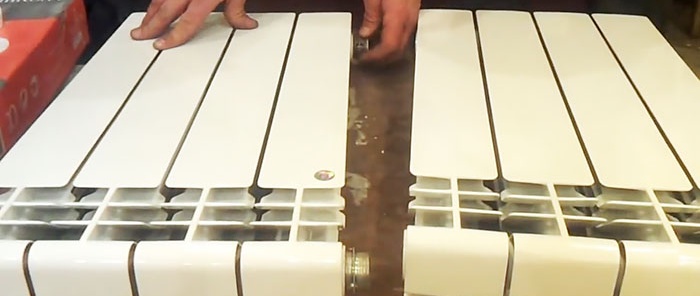
We lay the sections on a flat horizontal surface, connecting the parts to each other, taking into account that the left section will have a left-hand thread, and the right section will have a right-hand thread, which is repeated on the connecting nipple.
We put paronite gaskets (not paper!) on the connecting elements and twist them with one or two threads, for example, onto the left section with the left thread of the nipple at the top and bottom.
How to add sections to an aluminum radiator

How to add sections to an aluminum radiator

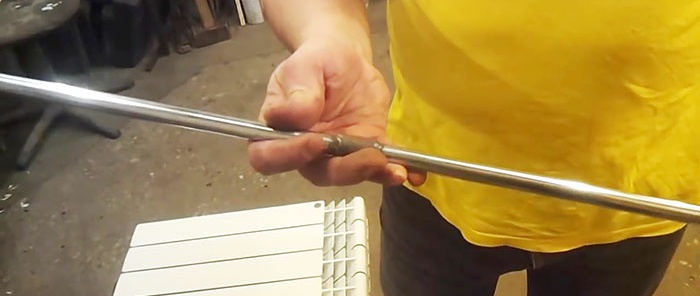
Then we move the right side of the radiator close to the free sides of the nipples and pass the nipple wrench through it until the working part of the tool enters the nipple, which is designed to connect the two sections, and grabs the oppositely placed protrusions inside the connecting element.
How to add sections to an aluminum radiator

How to add sections to an aluminum radiator

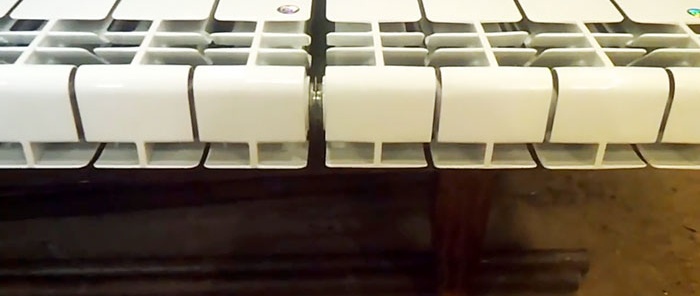
Alternately tighten the upper and lower nipples, making sure that both threaded connections are captured. If this does not work, then you need to start twisting again. The fact that the process is proceeding as expected is signaled by a gradual decrease in the gap between the sections.
How to add sections to an aluminum radiator

How to add sections to an aluminum radiator

How to add sections to an aluminum radiator

Before final tightening of the connection, it is necessary to adjust the gasket with your fingers so that it is positioned symmetrically relative to the nipple being tightened. For final tightening, use a wrench.
How to add sections to an aluminum radiator

How to add sections to an aluminum radiator

If we assembled the two parts correctly, then the gap between them will be exactly the same in width as between the other sections, and no one will guess that the battery is assembled from two halves or several sections have been added.
How to add sections to an aluminum radiator

Watch the video


come back
Comment
  • bowtiesmilelaughingblushsmileyrelaxed relaxedsmirk
    heart_eyeskissing_heartkissing_closed_eyesflushedrelievedsatisfiedgrin
    winkstuck_out_tongue_winking_eyestuck_out_tongue_closed_eyesgrinningkissingstuck_out_tonguesleeping
    worriedfrowninganguishedopen_mouthgrimacingconfusedhushed
    expressionlessunamusedsweat_smilesweatdisappointed_relievedwearypassive
    disappointedconfoundedfearfulcold_sweatperseverecrysob
    joyastonishedscreamtired_faceangryragetriumph
    sleepyyummasksunglassesdizzy_faceimpsmiling_imp
    neutral_faceno_mouthinnocent
4 minus one =
Comments (1)
  1. Guest Alexey
    #1 Guest Alexey Guests June 9, 2021 08:37
    0
    One unpleasant nuance when replacing sections of a bimetallic battery is that the thread cutting direction is not always the same for different manufacturers. As a result, the nipples do not tighten the sections. I got myself into trouble with this.

How to remove old silicone joints and apply new ones in the bathroom

How to remove a tightly seated crankshaft bearing

How to make a power bank from a laptop battery in 1 minute

How to convert a multimeter to a battery with your own hands

«Do it yourself - with your own hands» - a site of interesting homemade products made from scrap materials and items at home. Step-by-step master classes with photos and descriptions, technologies, life hacks - everything a real master or just a craftsman needs for needlework. Crafts of any complexity, a large selection of directions and ideas for creativity.

We recommend reading

Washing machine error codes