When making coffee tables and chairs on one leg, it becomes difficult to connect that very leg with the crosspiece. It should be very reliable, while looking neat. Even knowing how such a connection should be arranged, making it can be difficult if you don’t know a few tricks.
Required Tool:
- Drilling machine;
- Forstner drill;
- circular saw or hacksaw;
- milling cutter;
- molding cutter;
- marking thicknesser;
- pencil.
Connection process
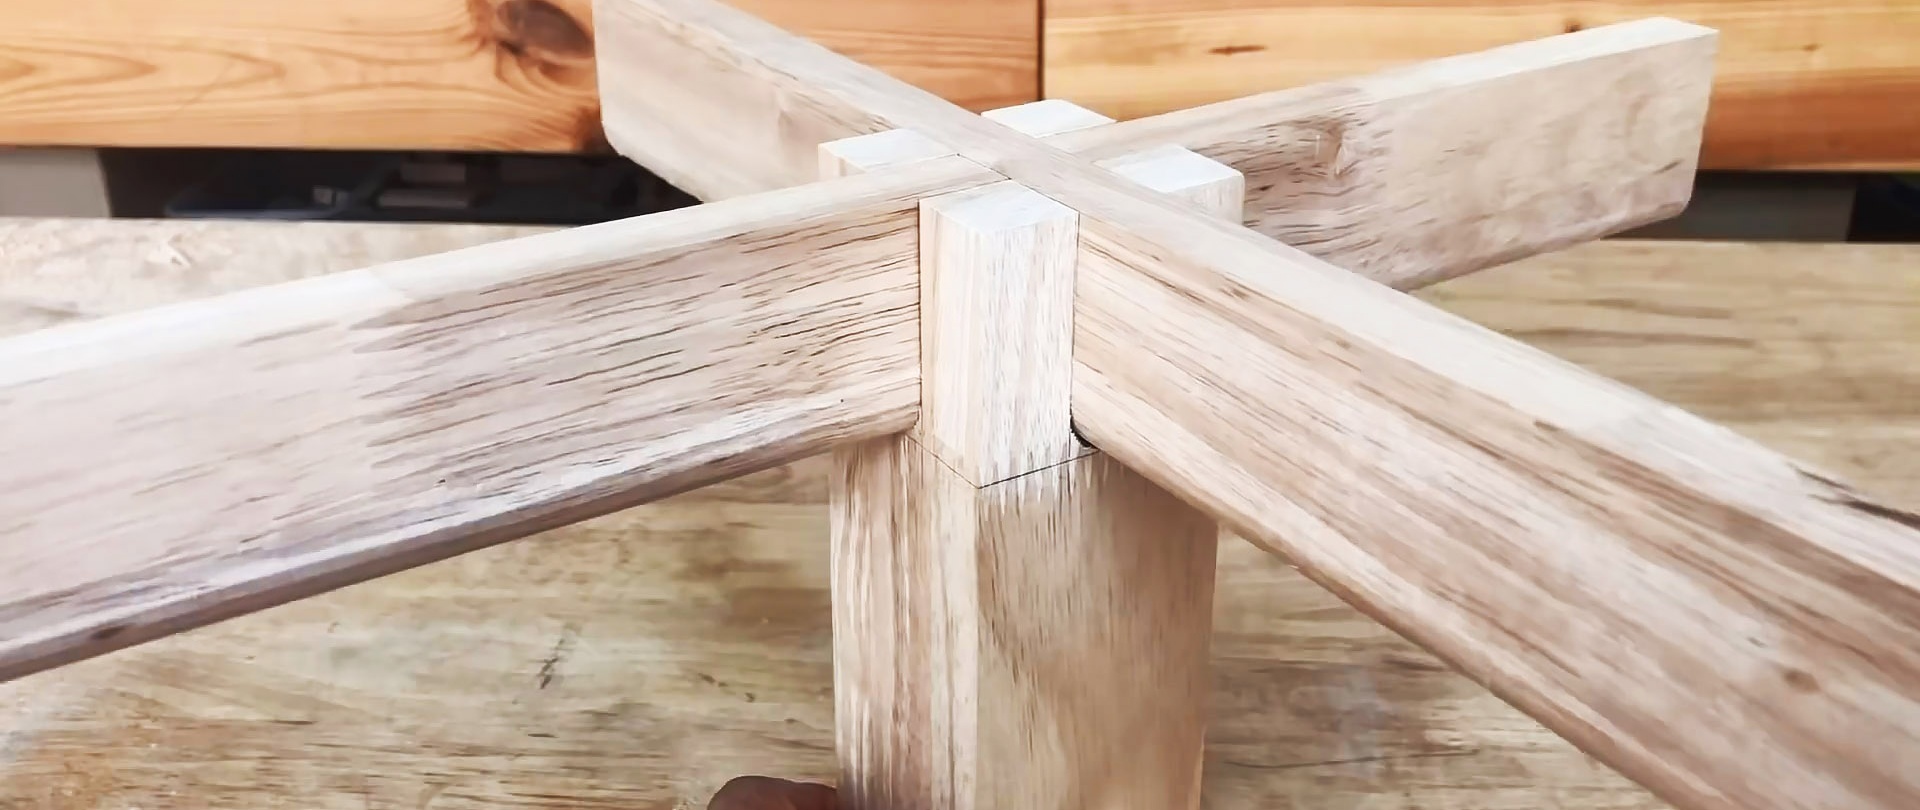
For this connection you will need a block for the leg, as well as 2 slats, which will be used to assemble the cross. The parts are trimmed and cut to size.

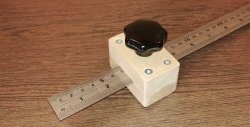
At the edge of the block, indented by the width of the slats, a transverse line is drawn around the circumference. Then, on each side from the edge to it, the center is marked with longitudinal notches.
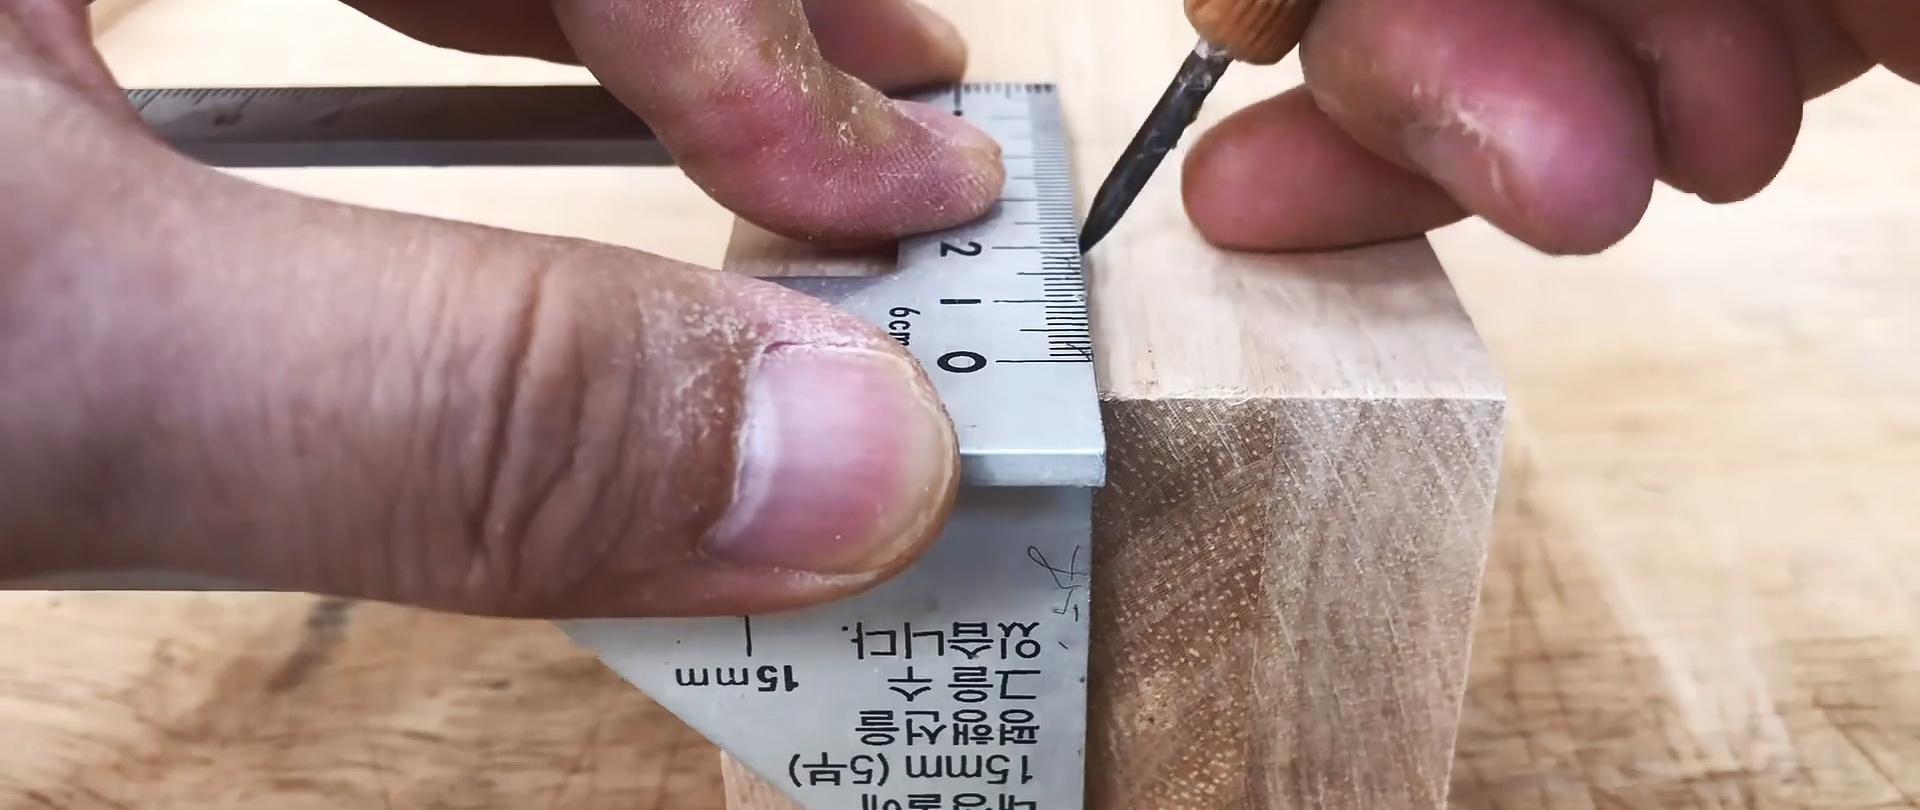
After this, using a marking thicknesser, you need to align the cross rail attached along the block to the center, and draw lines along its walls. This is done on each side. These marks will be needed for further cutting.

Then you will need to drill the block crosswise with a Forstner drill, the diameter of which corresponds to the width of the slats.You need to drill so that the edge of the hole reaches the transverse line.

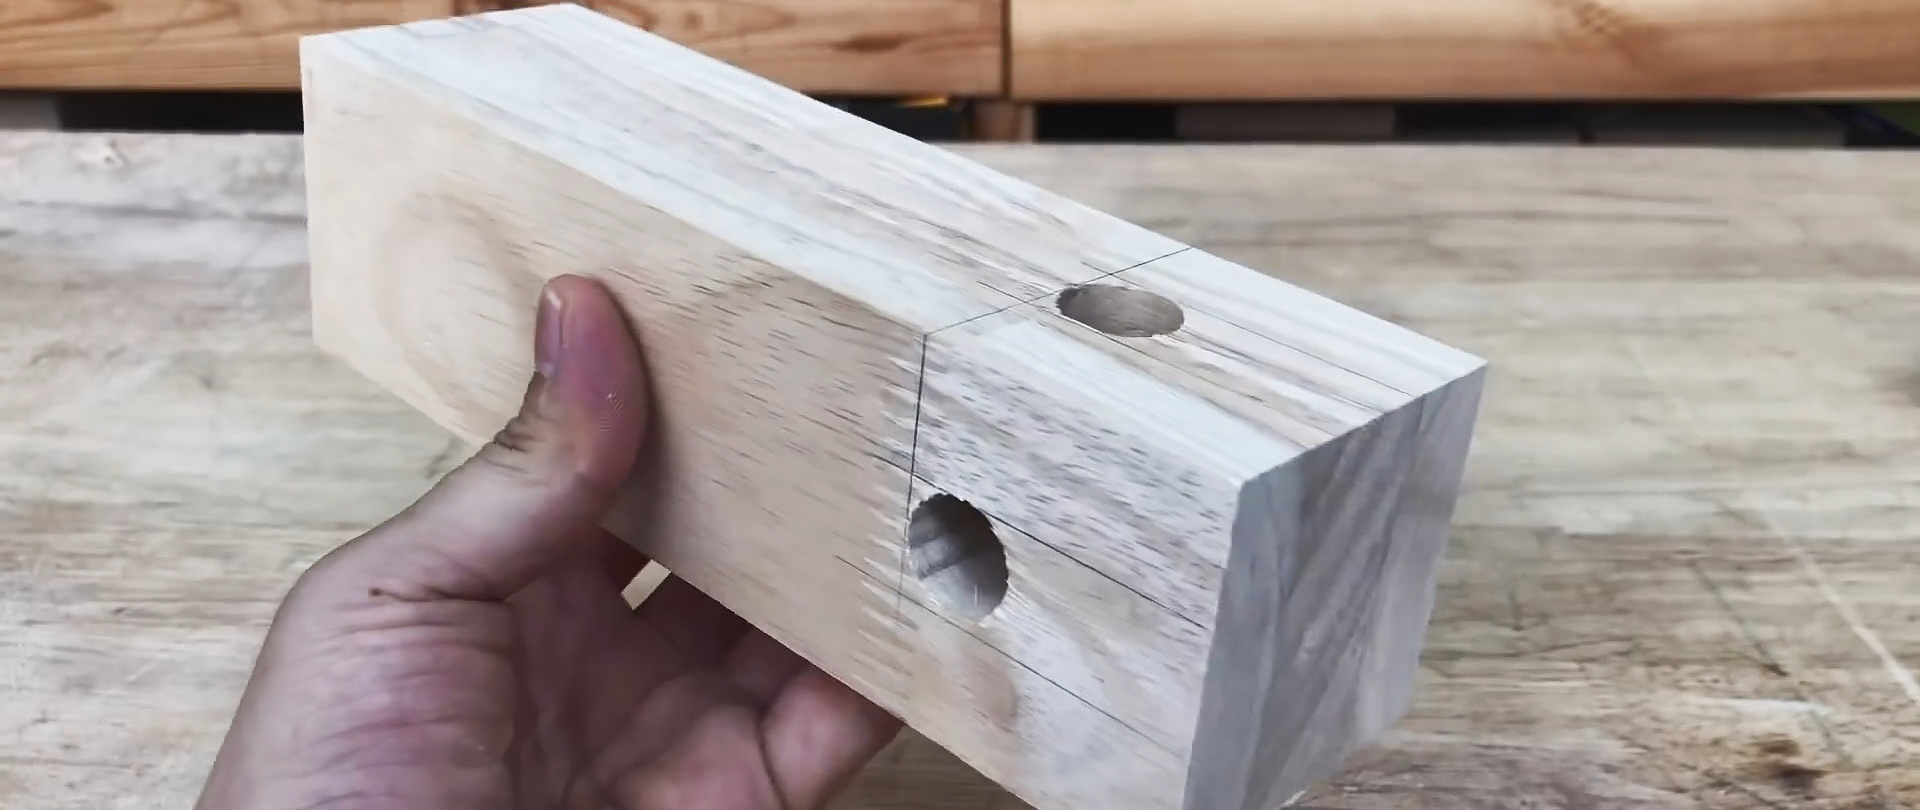
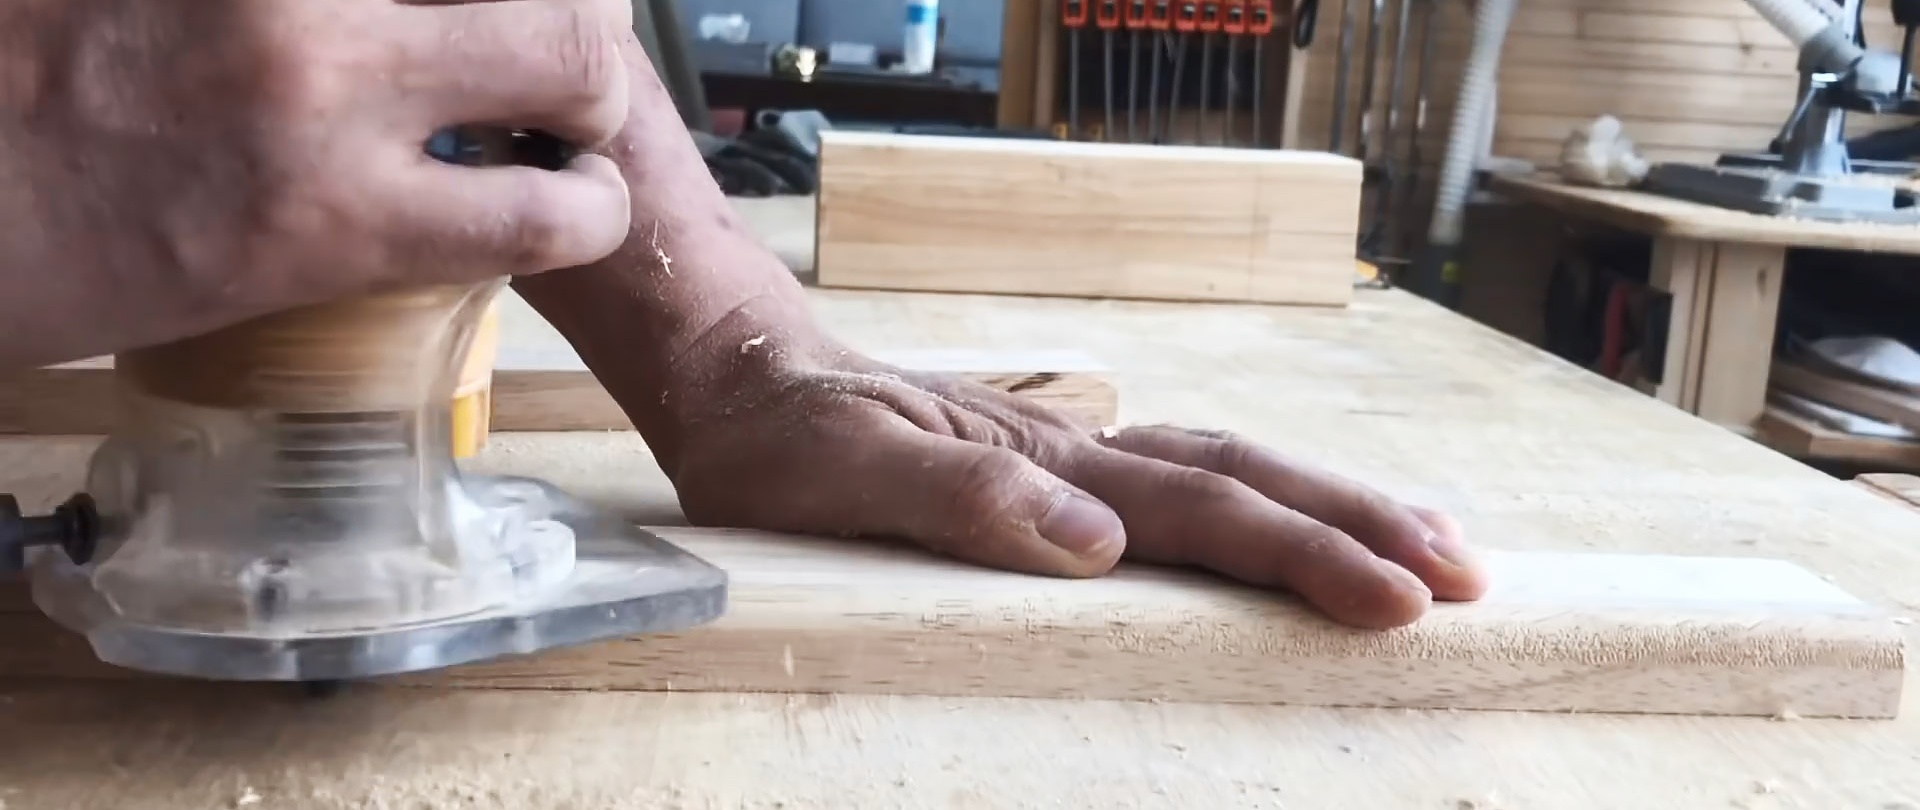
After this, you need to saw the block along the marks to remove the wood to the holes. This is done manually or with a circular saw. The result is grooves for the cross. They need to be sanded so that the rail fits in without effort.


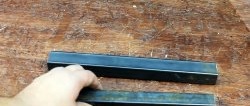
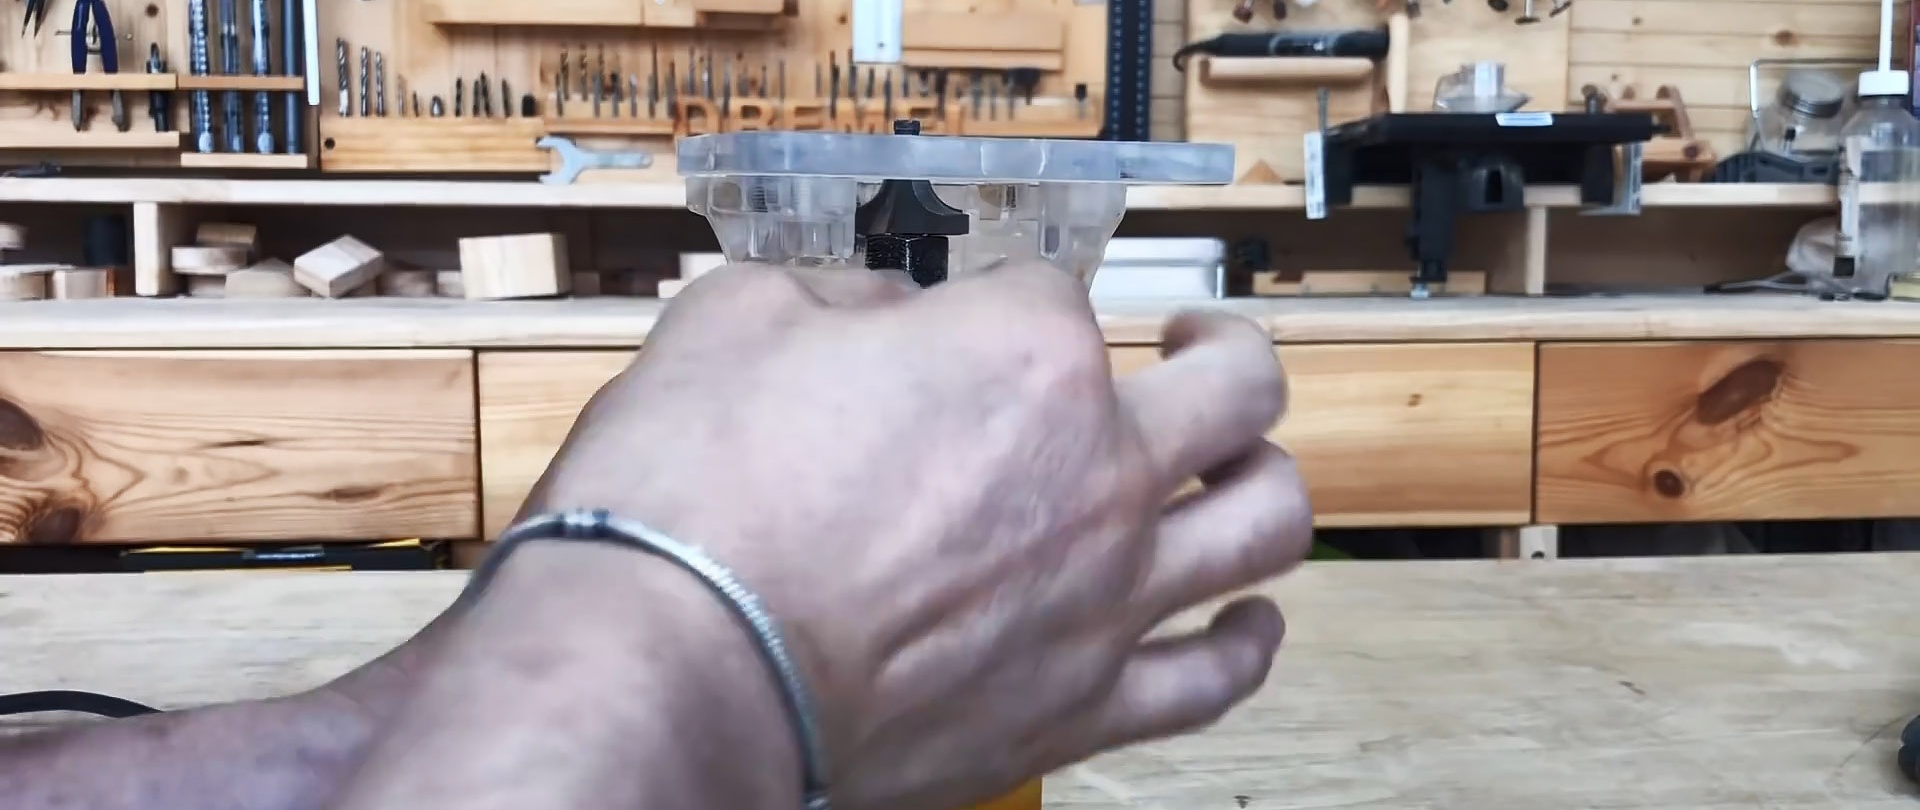
Using a moulder, you need to round the corners on one side of the slats.

It is necessary that the resulting rounding corresponds to the hole in the block from the Forstner drill.
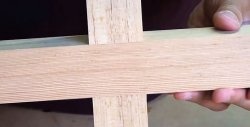
Then grooves are cut in the center of the slats to connect them crosswise into half the tree. It is convenient to do this circularly. Now they can be assembled crosswise into a bar. Here it is important not to confuse where to make the grooves on the slats, so that when connecting they are assembled with the rounded side to the rounded one.
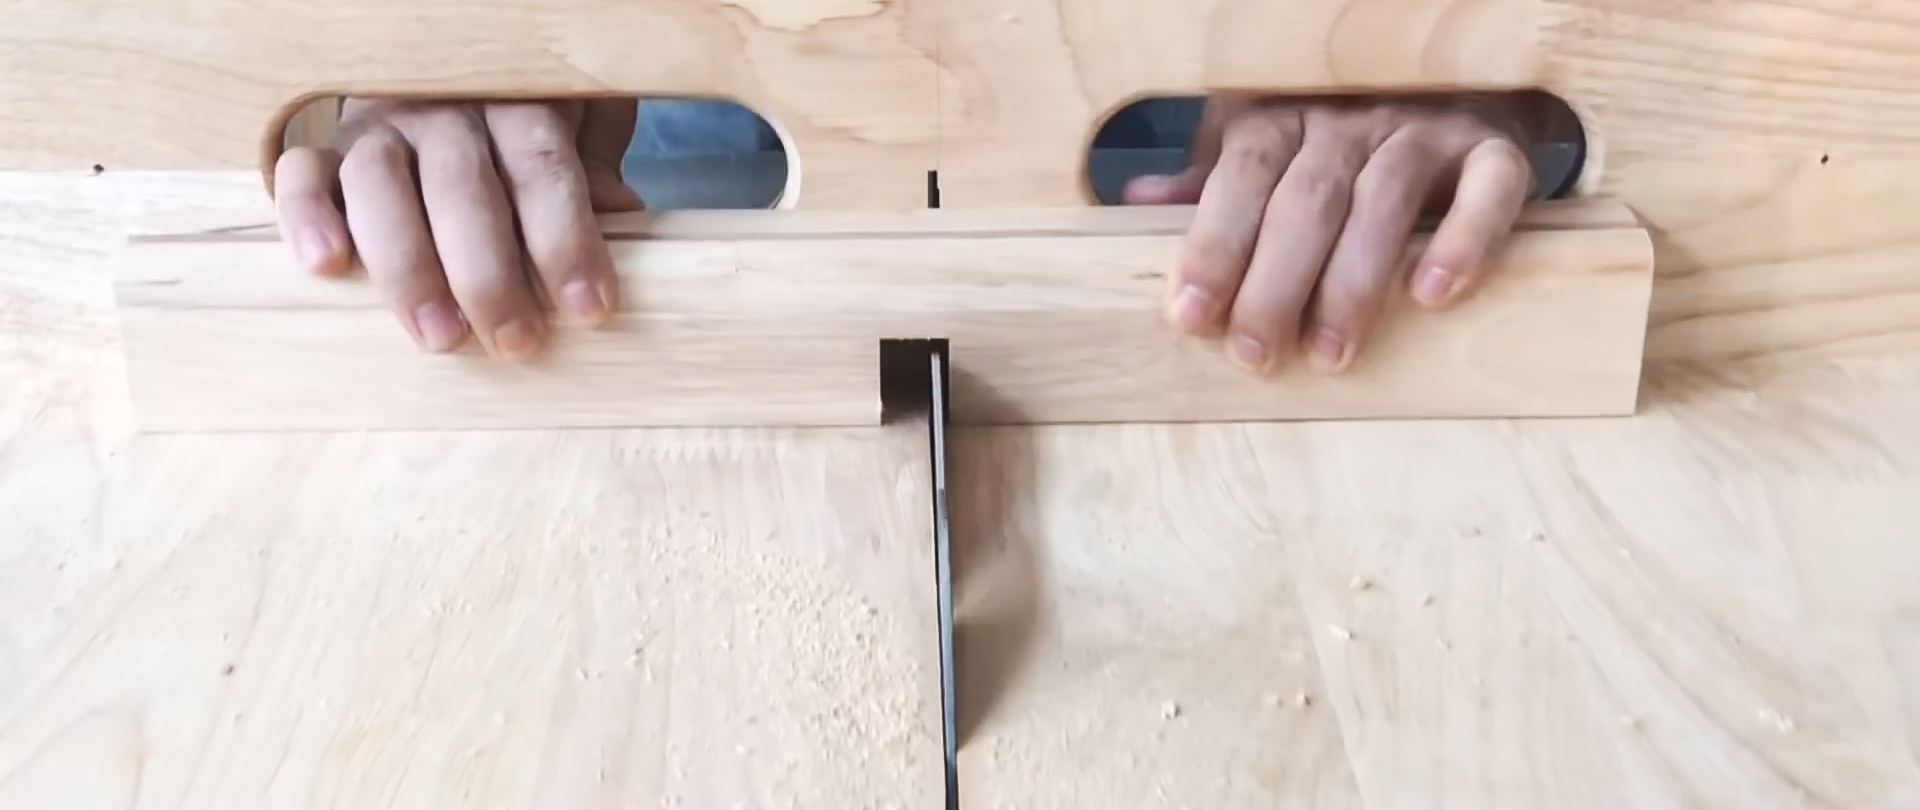

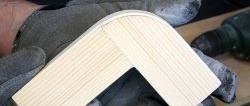
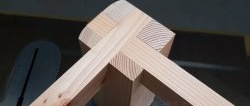
The result is a very beautiful, reliable connection. It is enough to lubricate the workpieces with glue, and it will not let you down.


It will be appropriate for the manufacture of tables, chairs, clothes hangers on the counter, decorative columns, etc.