Classic plaster mortar based on cement, sand and water is very difficult to work with. It cannot stay in thick layers, so it slips and has to be cut off frequently. It is difficult for a person without experience to plaster them, not to mention use them to create decorations. In fact, ideal for convenience, cement plaster can be mixed with your own hands, and you can make it as easy to work as gypsum plaster, you just need to include the right additives in the composition.
Materials:
- Cement M500;
- sand;
- water;
- polypropylene fiber 12 mm, 6 mm;
- liquid plasticizer for concrete type Sika BV 3M;
- Sika LATEX additive or equivalent.
The process of mixing cement plaster
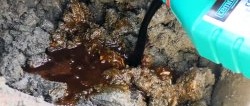
This composition is designed for mixing a whole 25 kg bag of cement at once. This solution has a long shelf life, so there is no point in preparing it in small portions; you will have time to produce it. Water is poured into a large basin. Its volume depends on the moisture content of the sand.You need to use the golden rule - the amount of water should be 40-60% of the mass of cement. Accordingly, if the sand is completely dry, then pour the maximum. It is best to initially fill the basin with a minimum of water, since it can then be added during the process. In this case, 15 liters are poured at once.
A large handful of 12 mm fiber and a small handful of 6 mm are added to the water.

Then fill in 100 ml of liquid plasticizer, in this case Sika BV 3M, as well as 100 ml of Sika LATEX.


After 10-15 minutes, the fiber will get wet, and a bag of cement is poured into the basin.

Then you need to knead it with a mixer, moving it from the edges in a circle to the middle. This will avoid lumps.

Washed river sand is added to cement mixed with water. Its ratio to cement is 1:3.5. It is best to add sand in 2 batches to ensure it is mixed without lumps. As you stir, you can add water if necessary.


At the end, you need to collect the solution from the walls of the basin, since it is poorly mixed there, and place it in the center. Then everything is mixed again. Now check the consistency and add more water if necessary. Be sure to distribute it evenly throughout the mass so that puddles do not separate at the top.

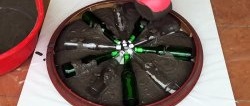
The solution prepared in this way holds its shape in a layer of up to 5 cm. It is elastic, movable, and easy to use. You can throw it on with a trowel or a ladle.