When working with wood, difficulties may arise with markings, damaged fasteners, etc. To solve them, you have to rack your brain. We offer 9 great solutions to common problems you may encounter.
1. How to hang the charging station evenly on the wall
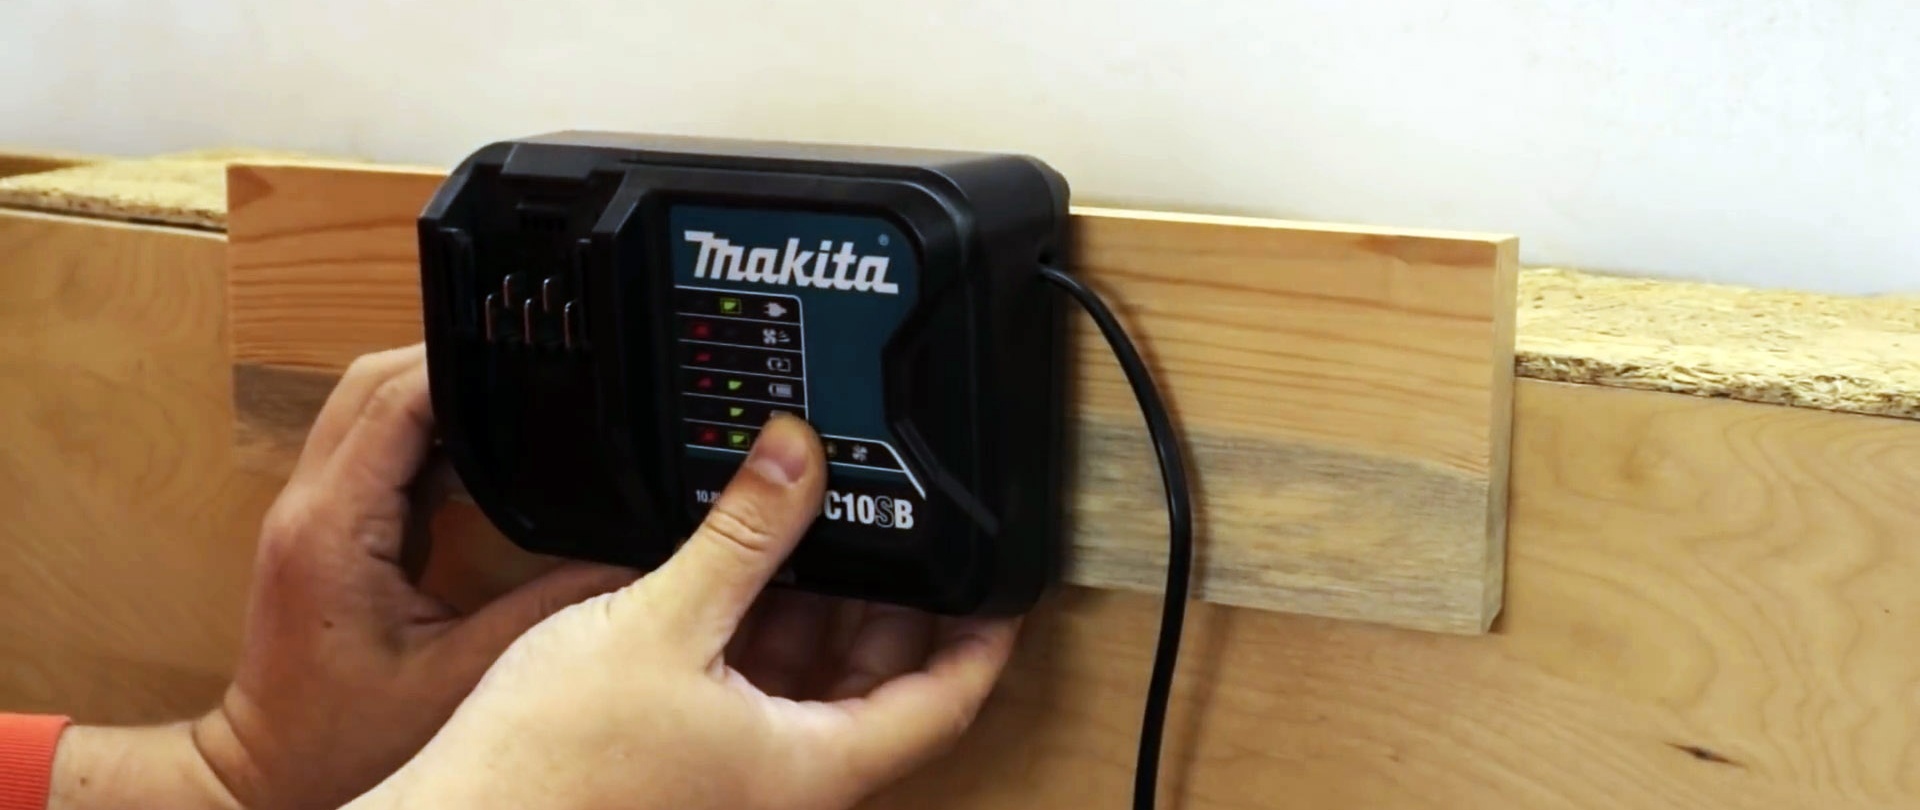
To hang a charger, modem or other device, you need to screw 2 screws into the wall at a certain distance from each other. In fact, it's not difficult at all. Simply apply masking tape to your device to cover the mounting holes. Then push it over them.
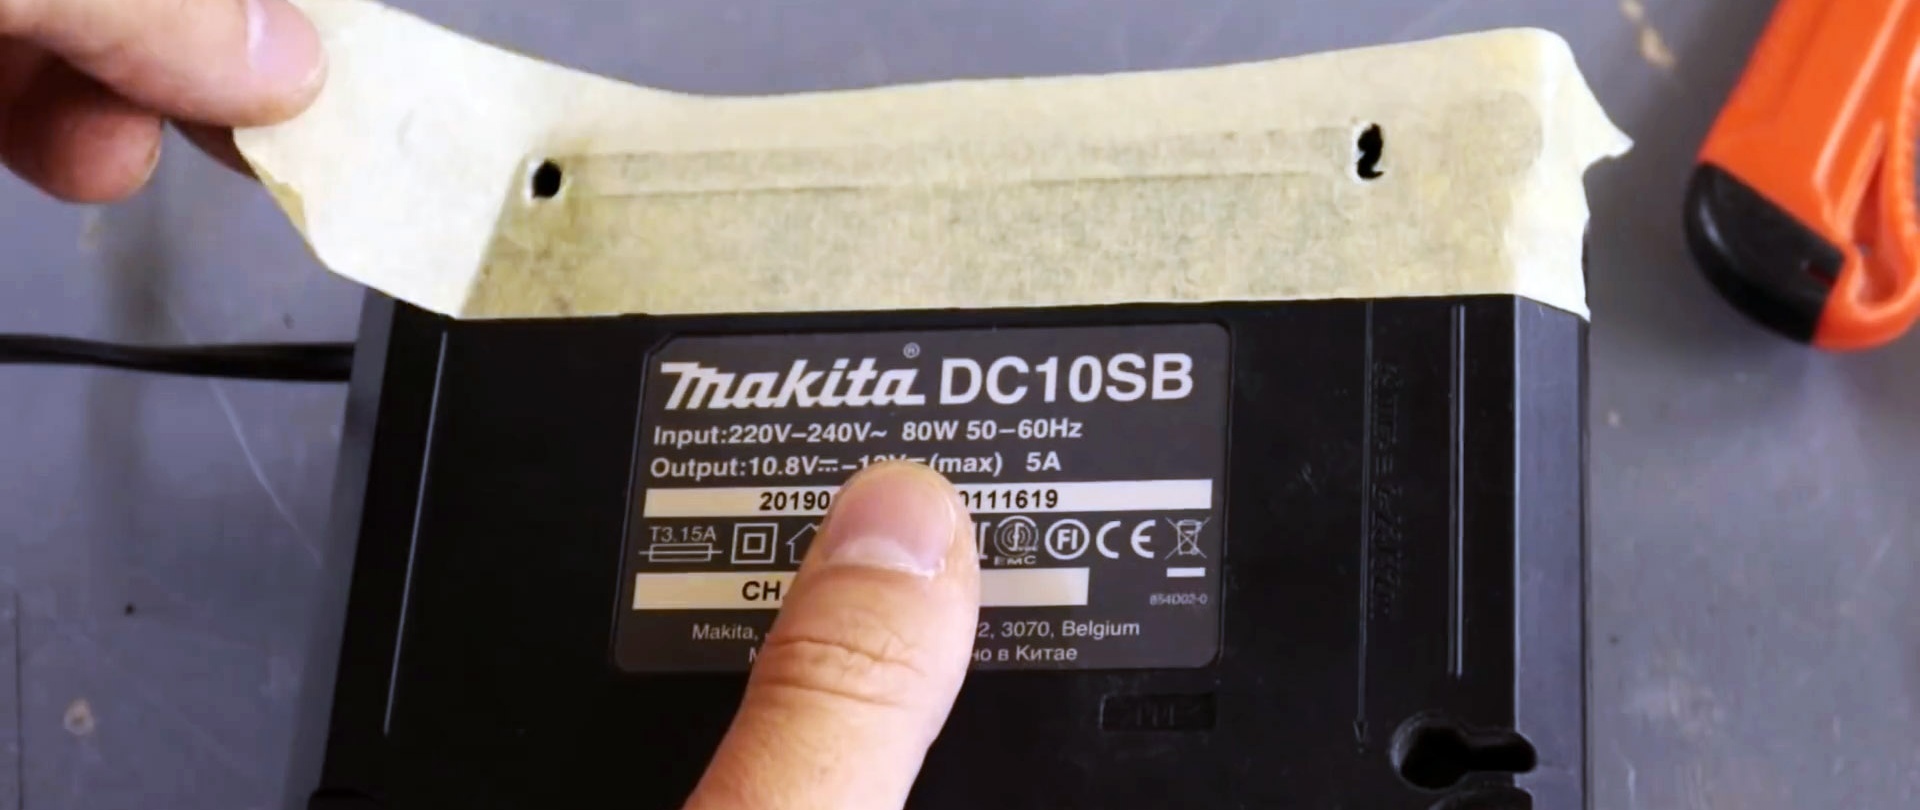
The tape is torn off and glued horizontally to the wall. It shows where the screws should be located. We tighten them, and now we can hang the required device.

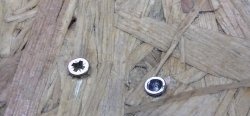
2. How to unscrew a self-tapping screw with a damaged head

Cheap self-tapping screws lick off the notches on the head. In this case, it is impossible to unscrew them. New splines can be cut with a drill fitted with a cutting disc. One notch is made, after which everything is perfectly unscrewed with a flat bat or screwdriver.


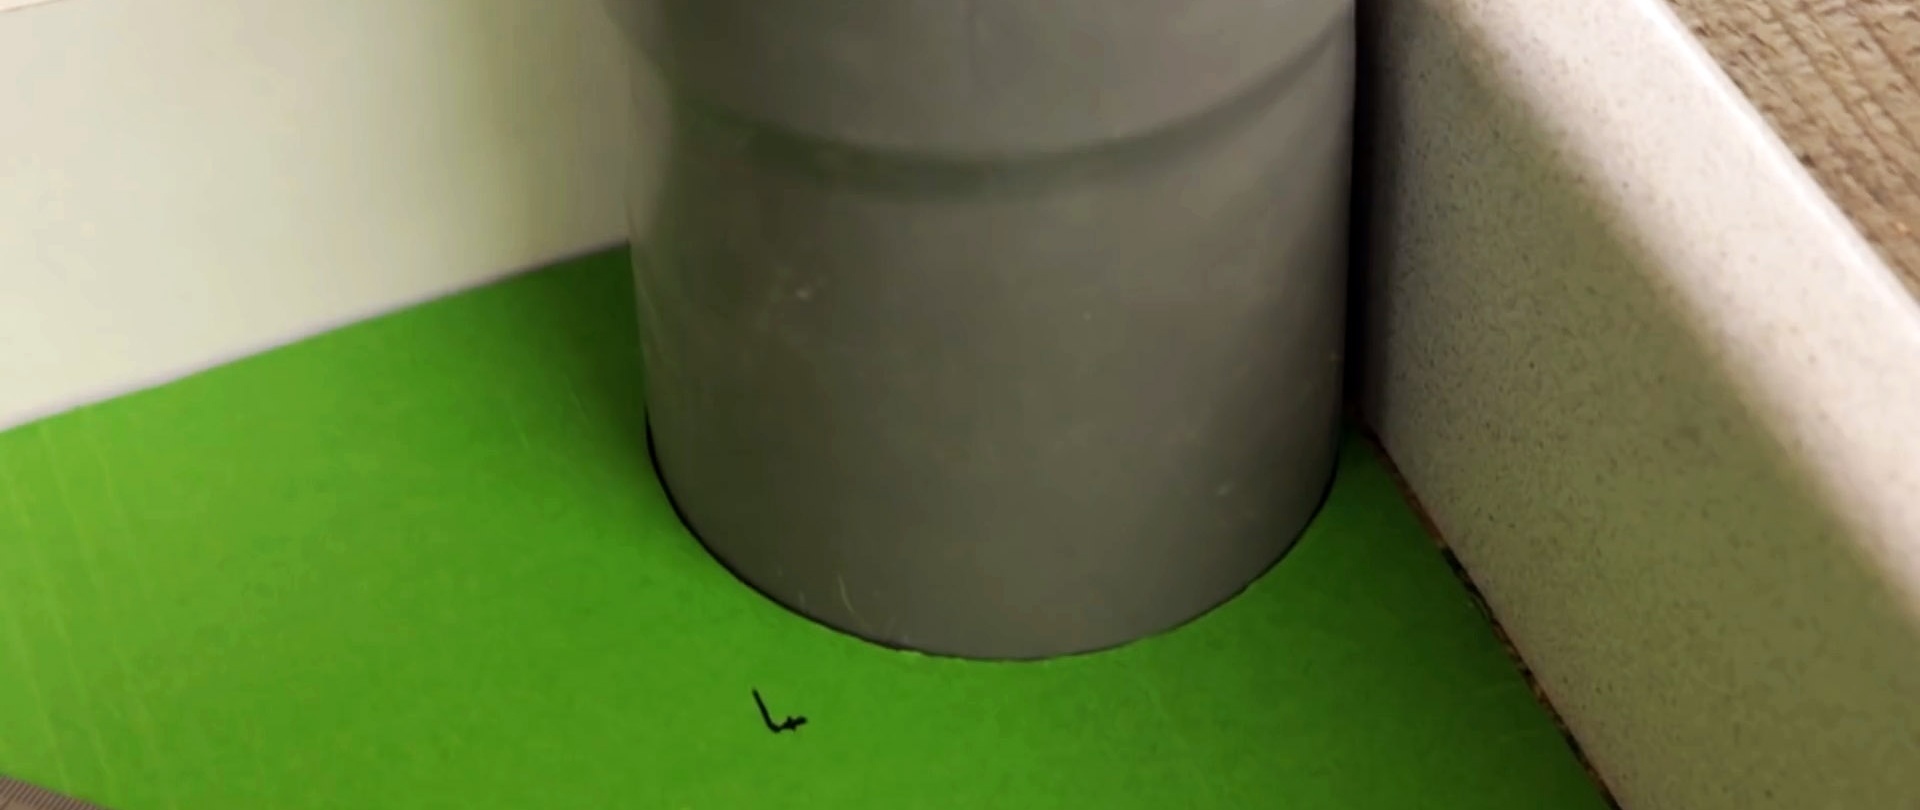
3. Marking for cutting the corner for the pipe
If you need to join the corner of the part close to the pipe, then you should make a cutting template.To do this, place the paper as close as possible. Then we apply a square on one side. Using his ruler, a mark is left on the paper, distant from the edge of the part at a distance by which it does not reach the stop of the square.
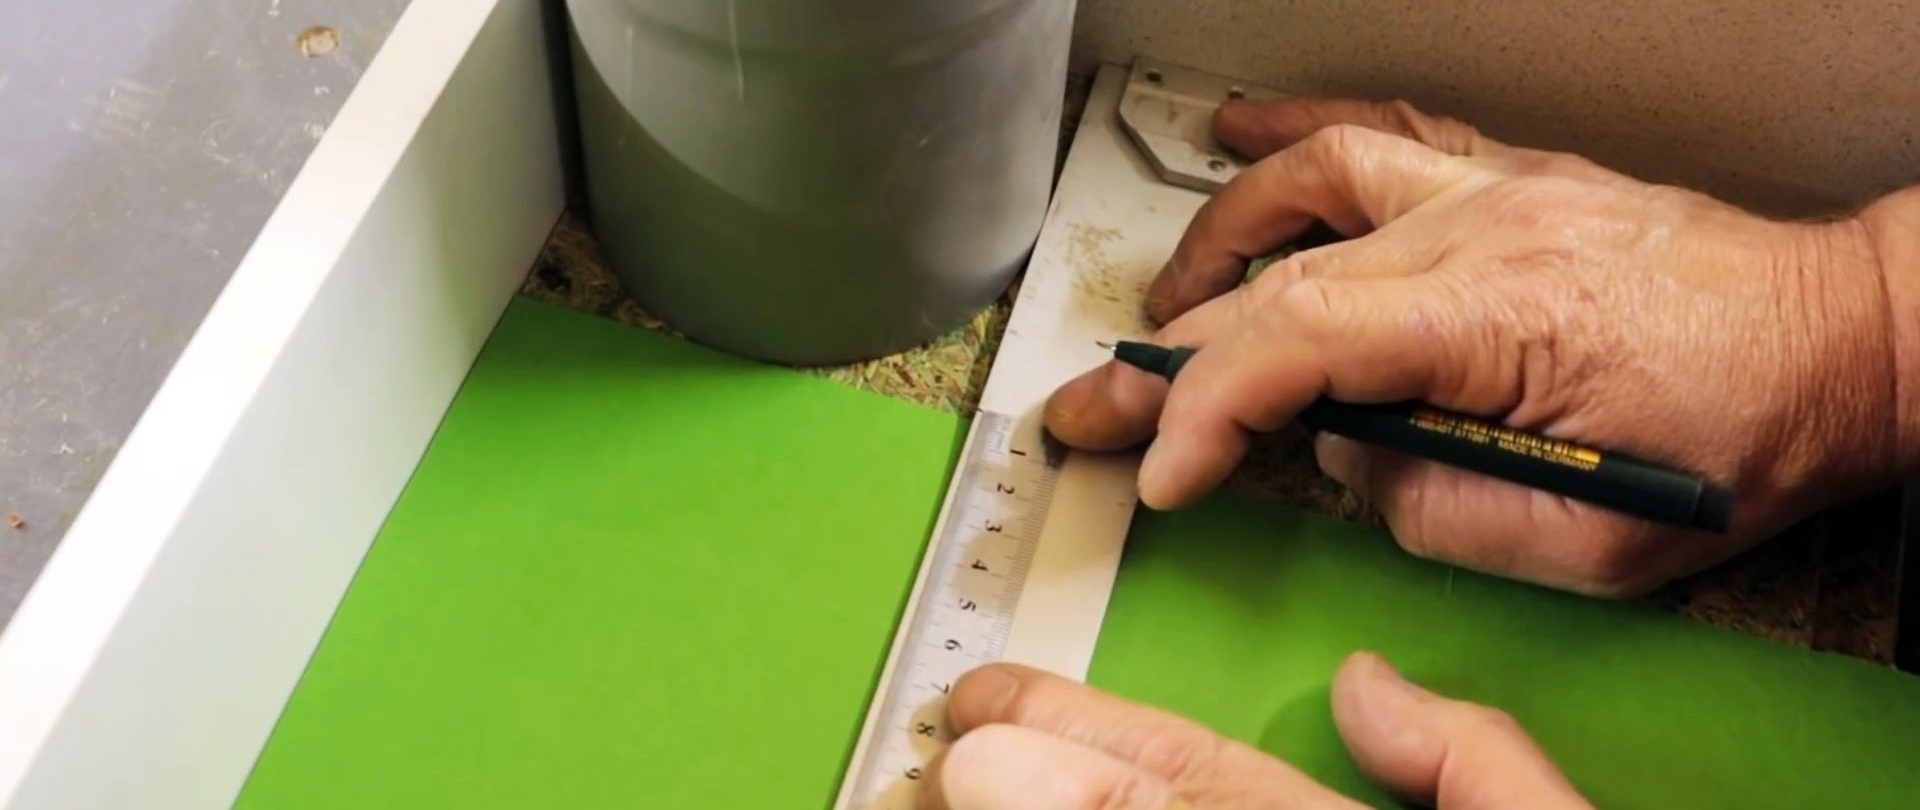

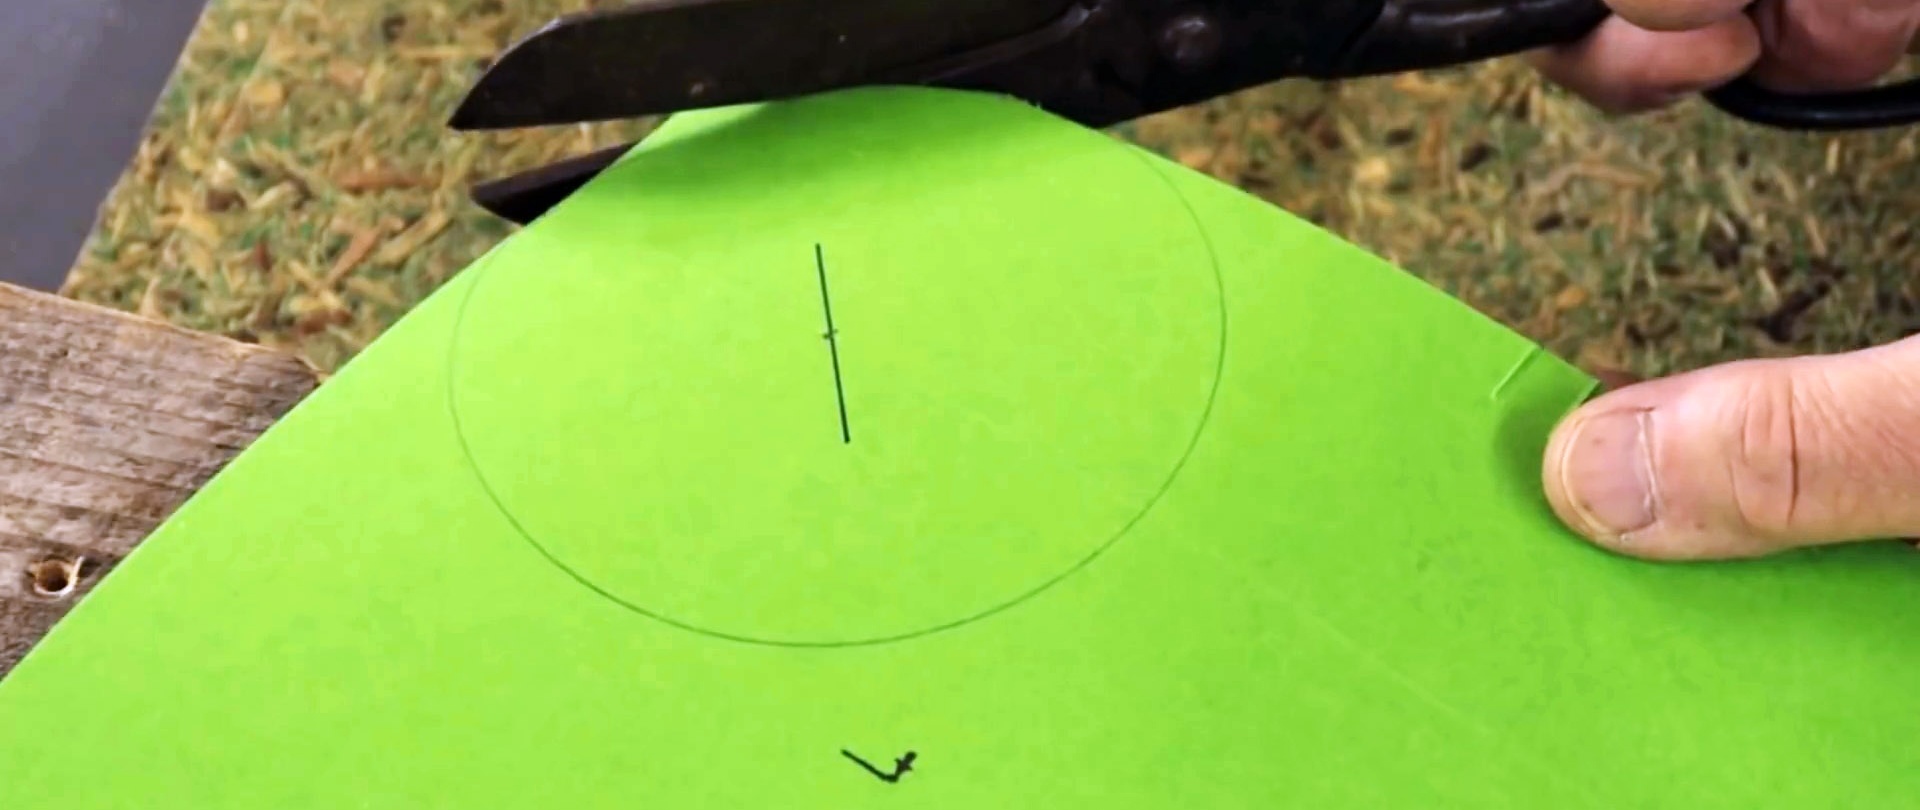
Then the paper is applied on the other side and done in the same way. A diagonal is drawn from the intersection of the marks to the corner of the sheet. We find its center, and with a compass we draw a circle with a diameter equal to the pipe, in this case 110 mm. Cut out the template and check. If everything is in order, then we prepare a part based on it.
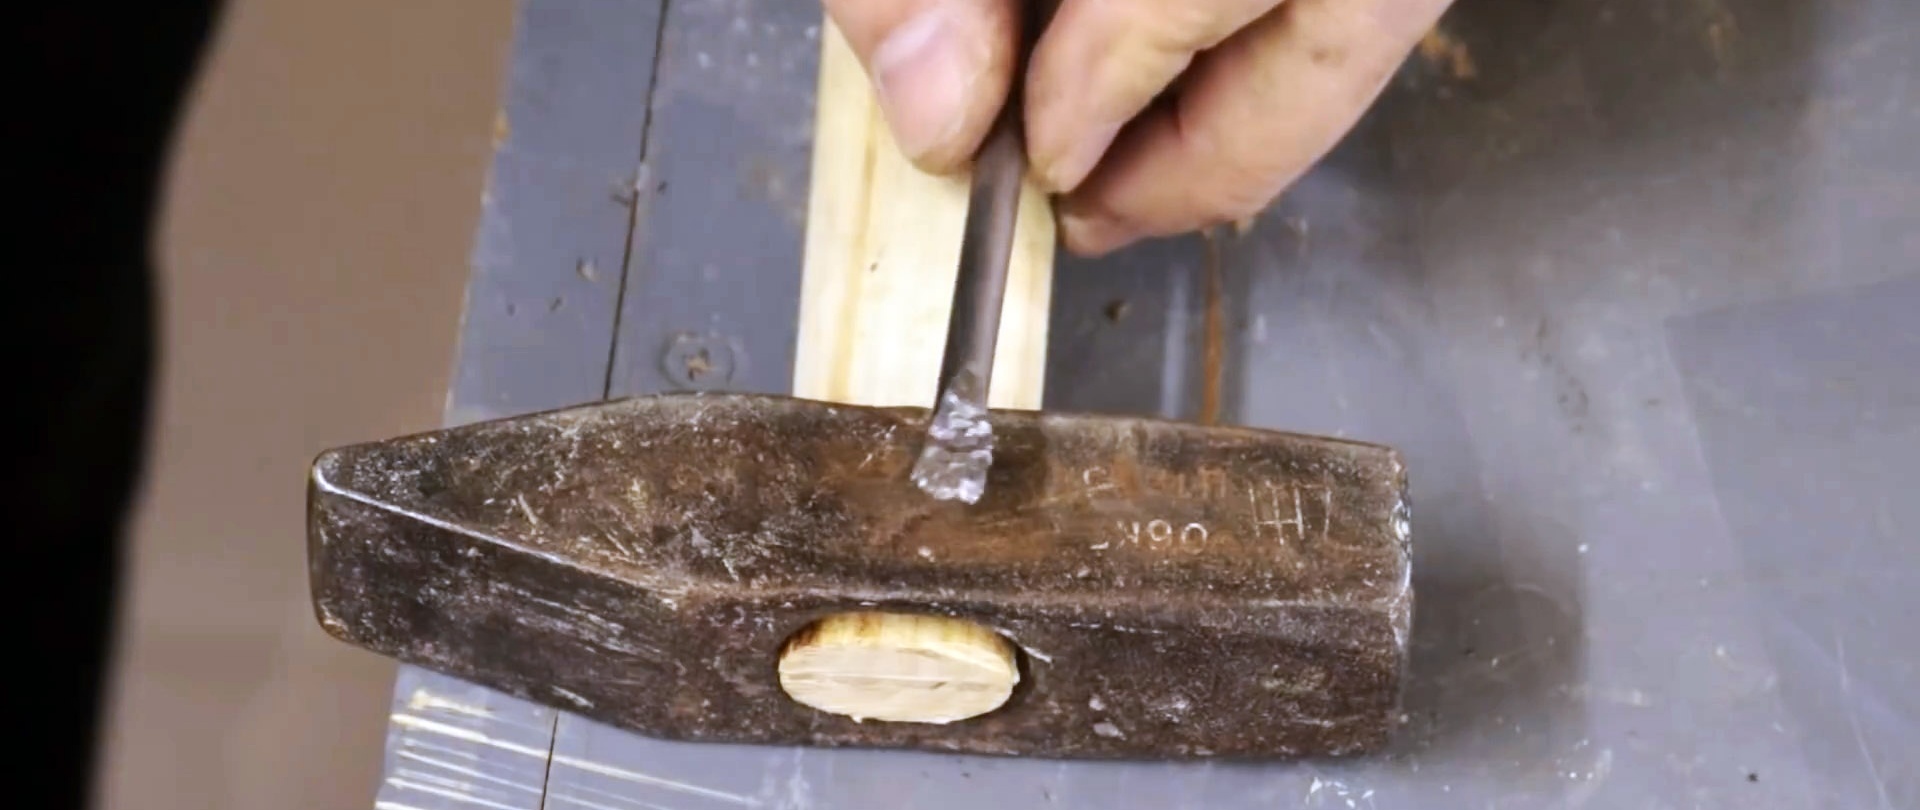
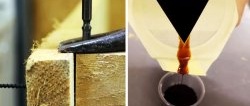
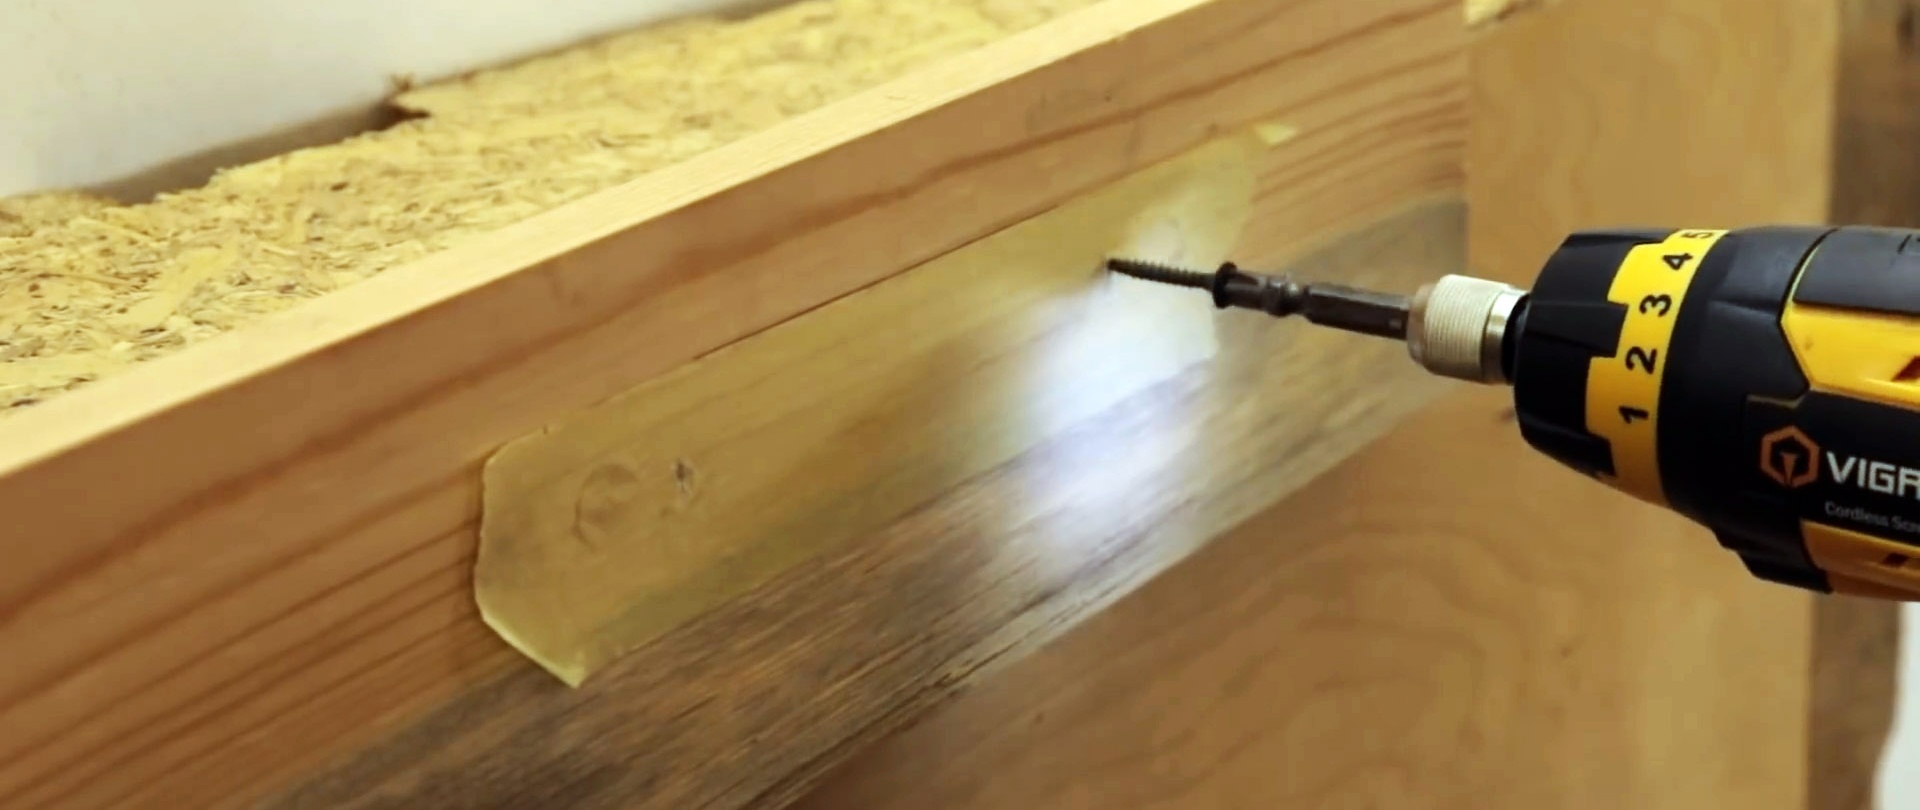
4. How to hide the screw head

If you do not want the head of the screw to be visible, then before screwing it in, drill a shallow hole along the diameter of the existing wooden dowel. Then you can screw the fasteners into it.
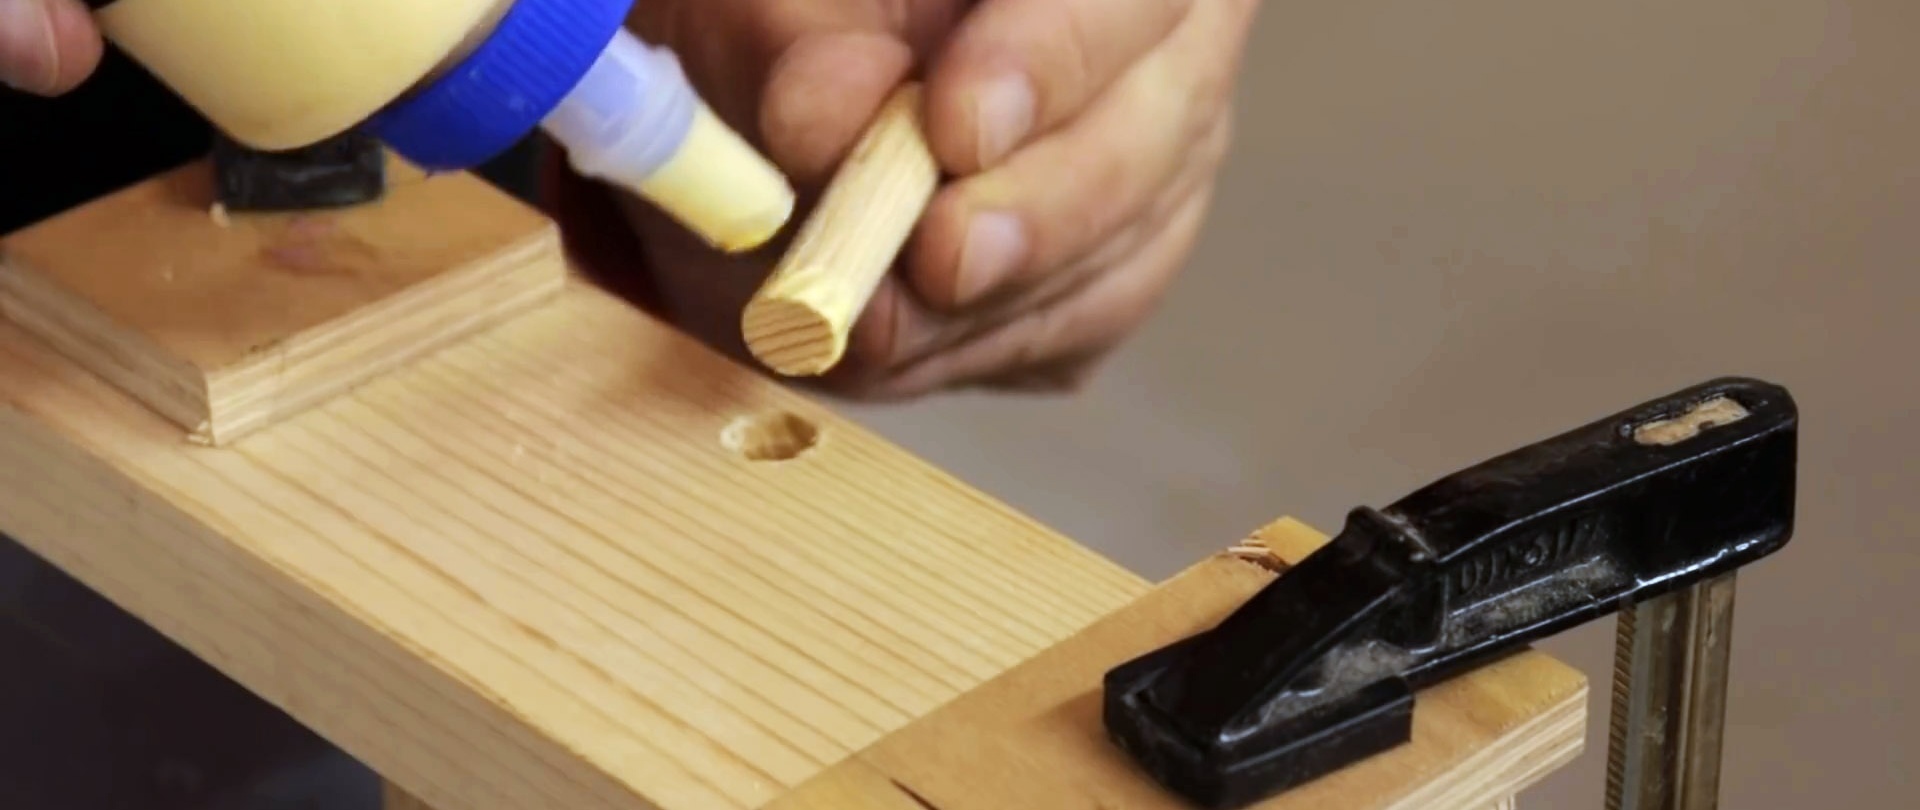
After that, pour glue into the hole and drive the dowel. All that remains is to cut off its protruding part and sand the surface. If the part is painted, the insert will not be visible.
5. Measuring the distance between internal corners with a tape measure

To accurately measure the distance between the internal corners, you do not need to bend the tape measure, as this will give a small error. Look at its body, its length should be written on it. This inscription can be identified by the arrows on both sides.
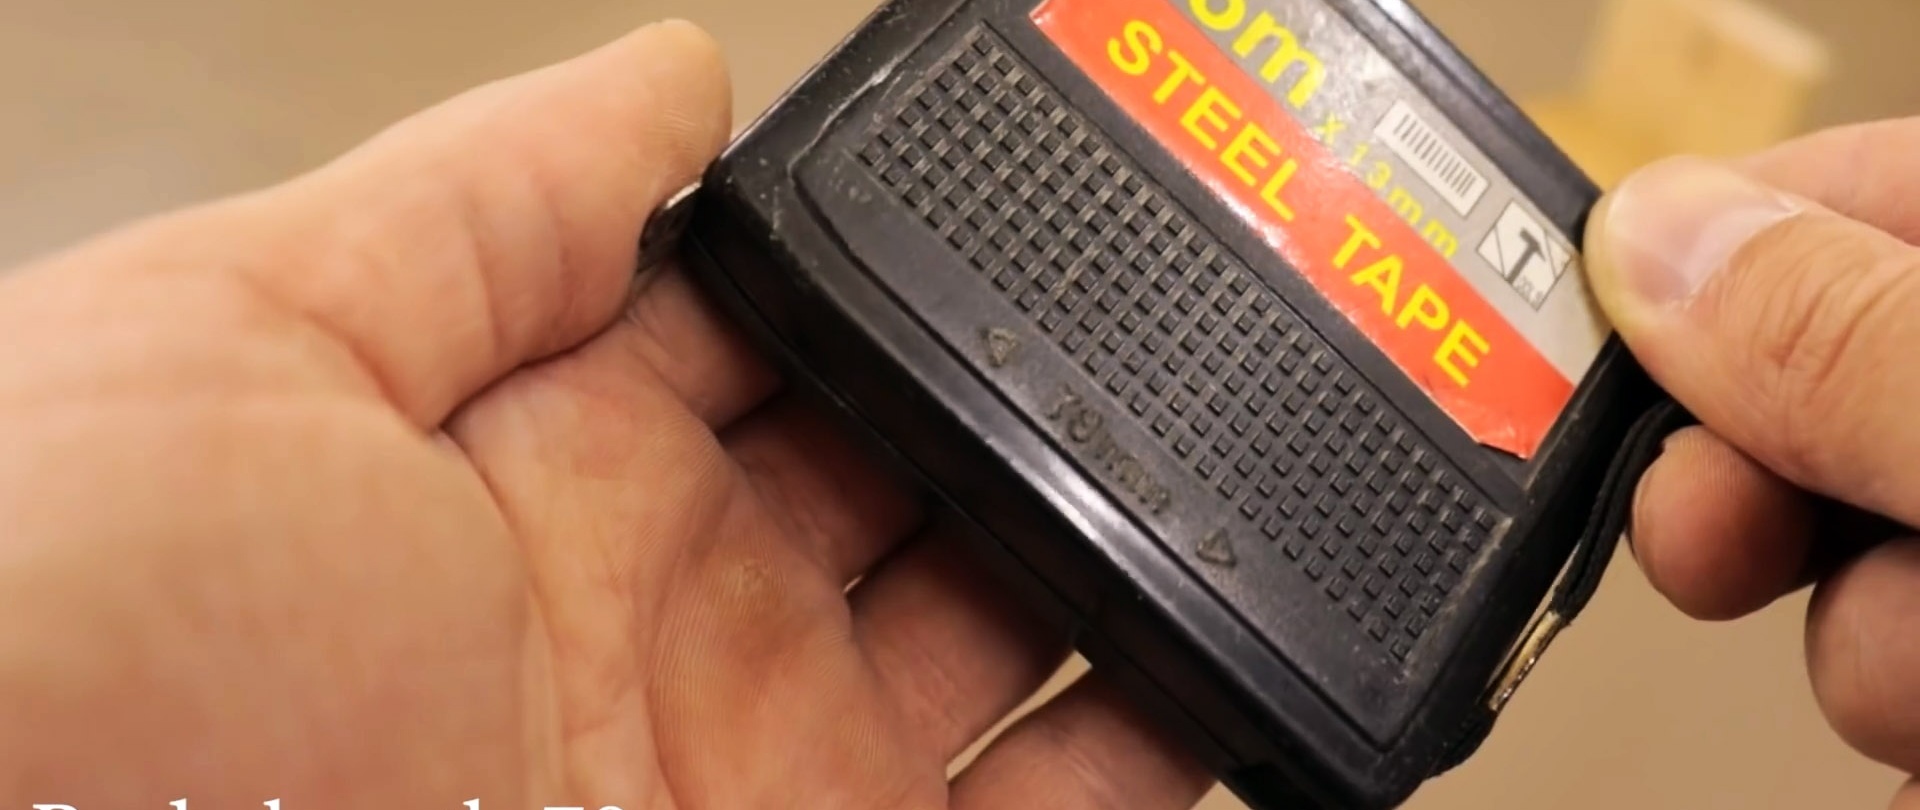
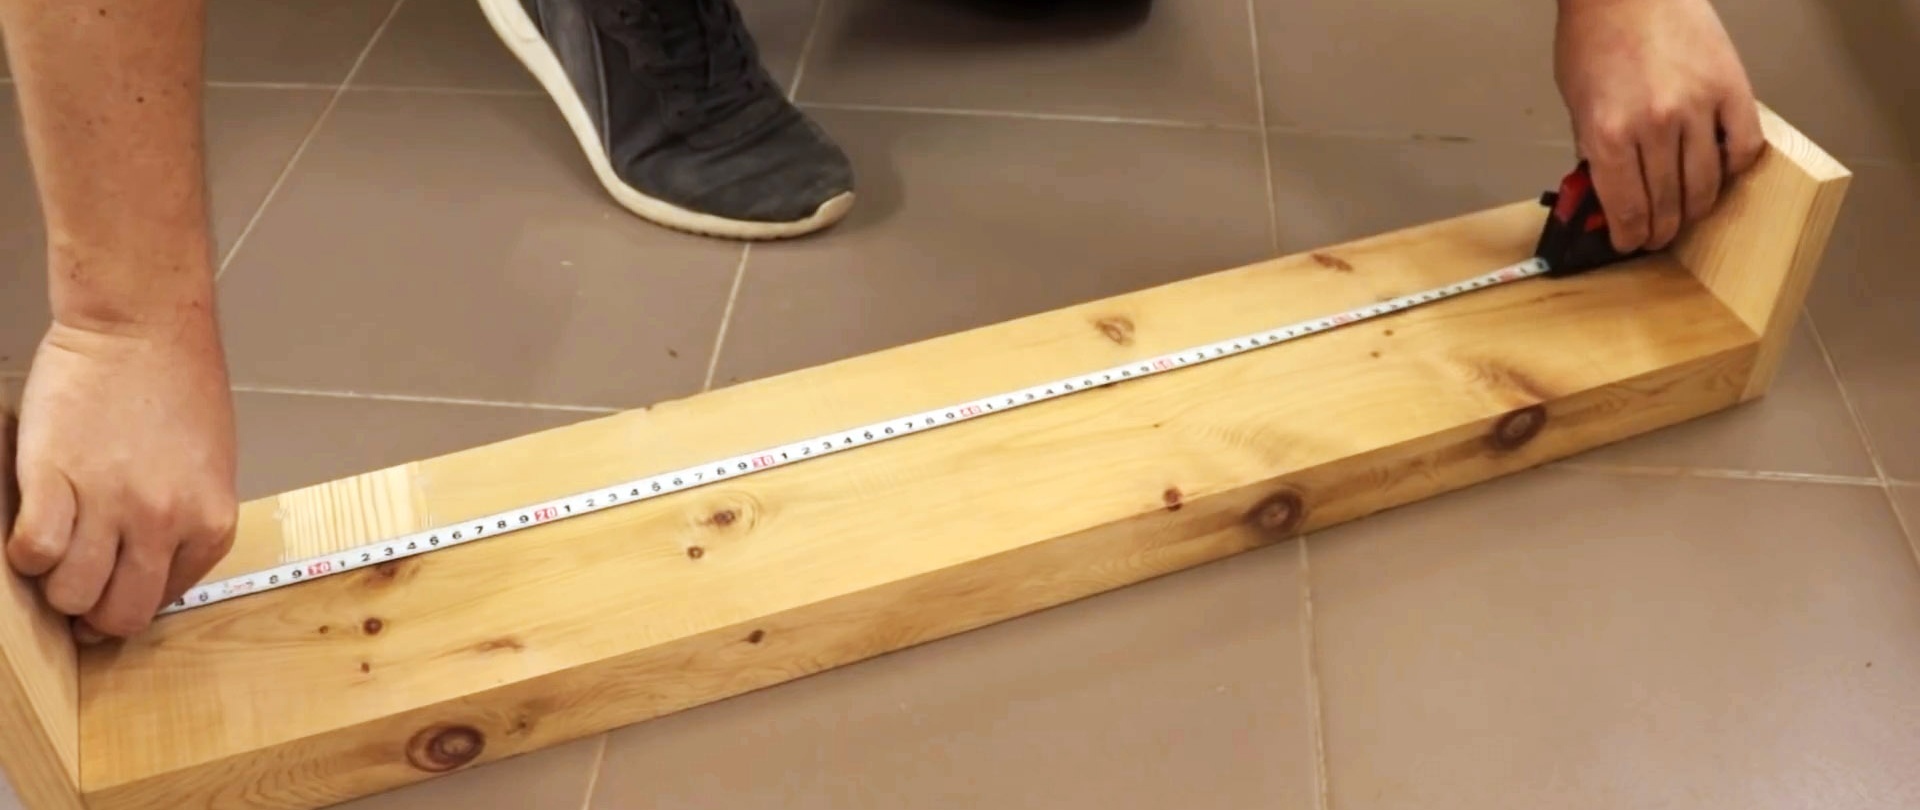
For an accurate measurement, you need to rest the body of the tape measure in one corner, and the beginning of the tape in the other. Then we add the length of the tape measure written on the body to the resulting value on the scale. This will be the exact distance.

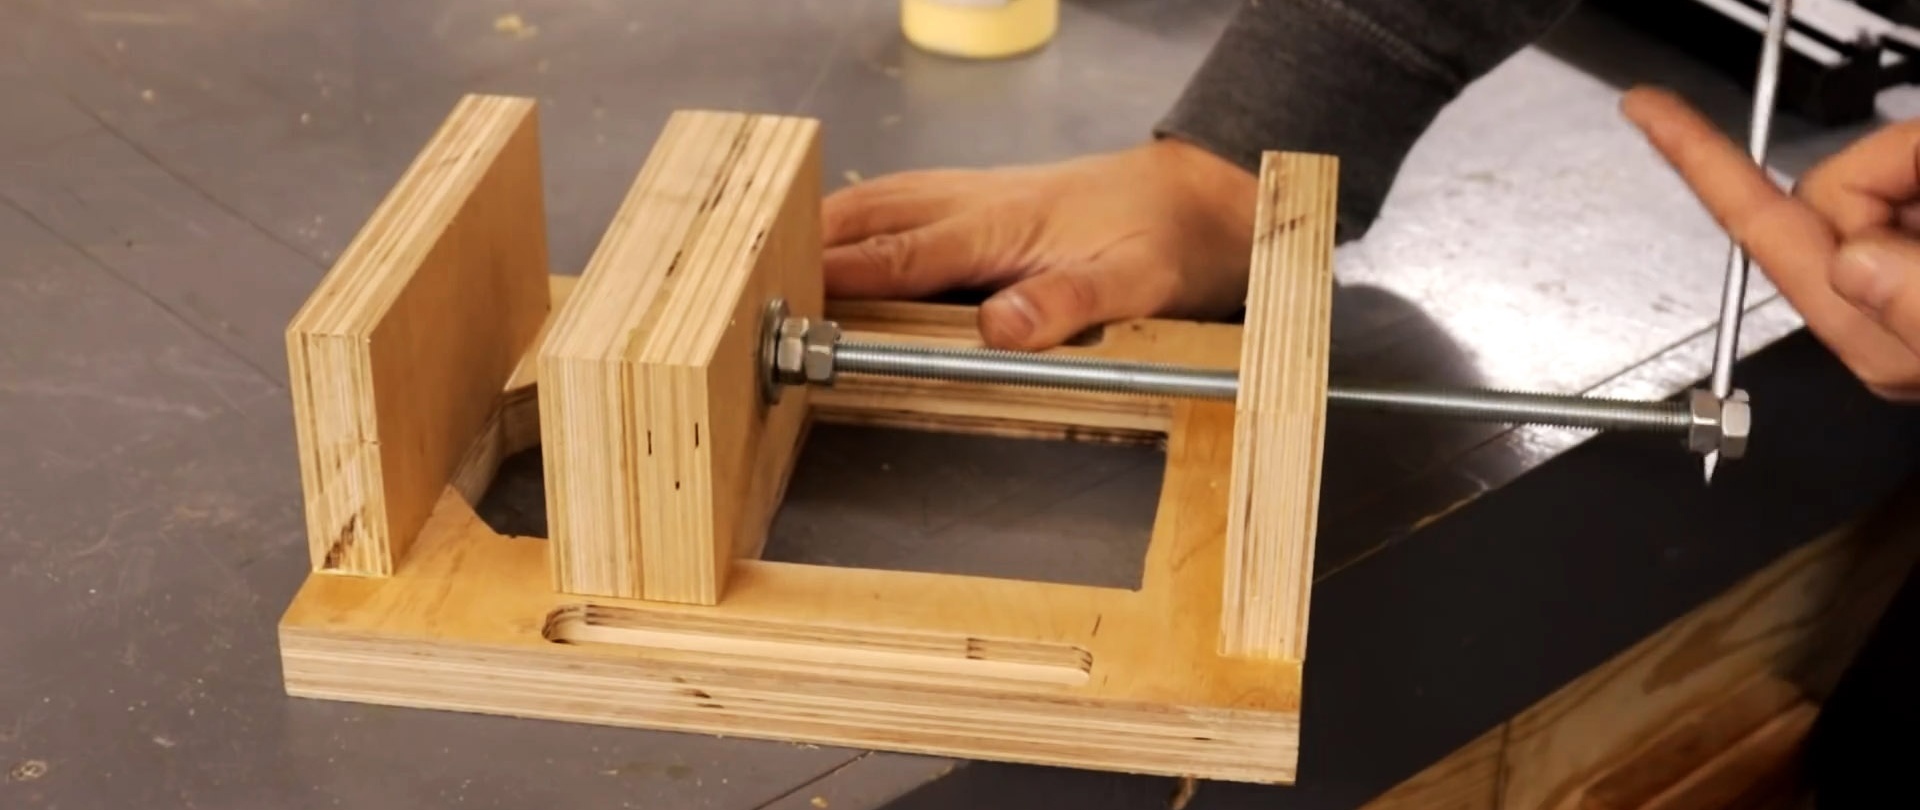
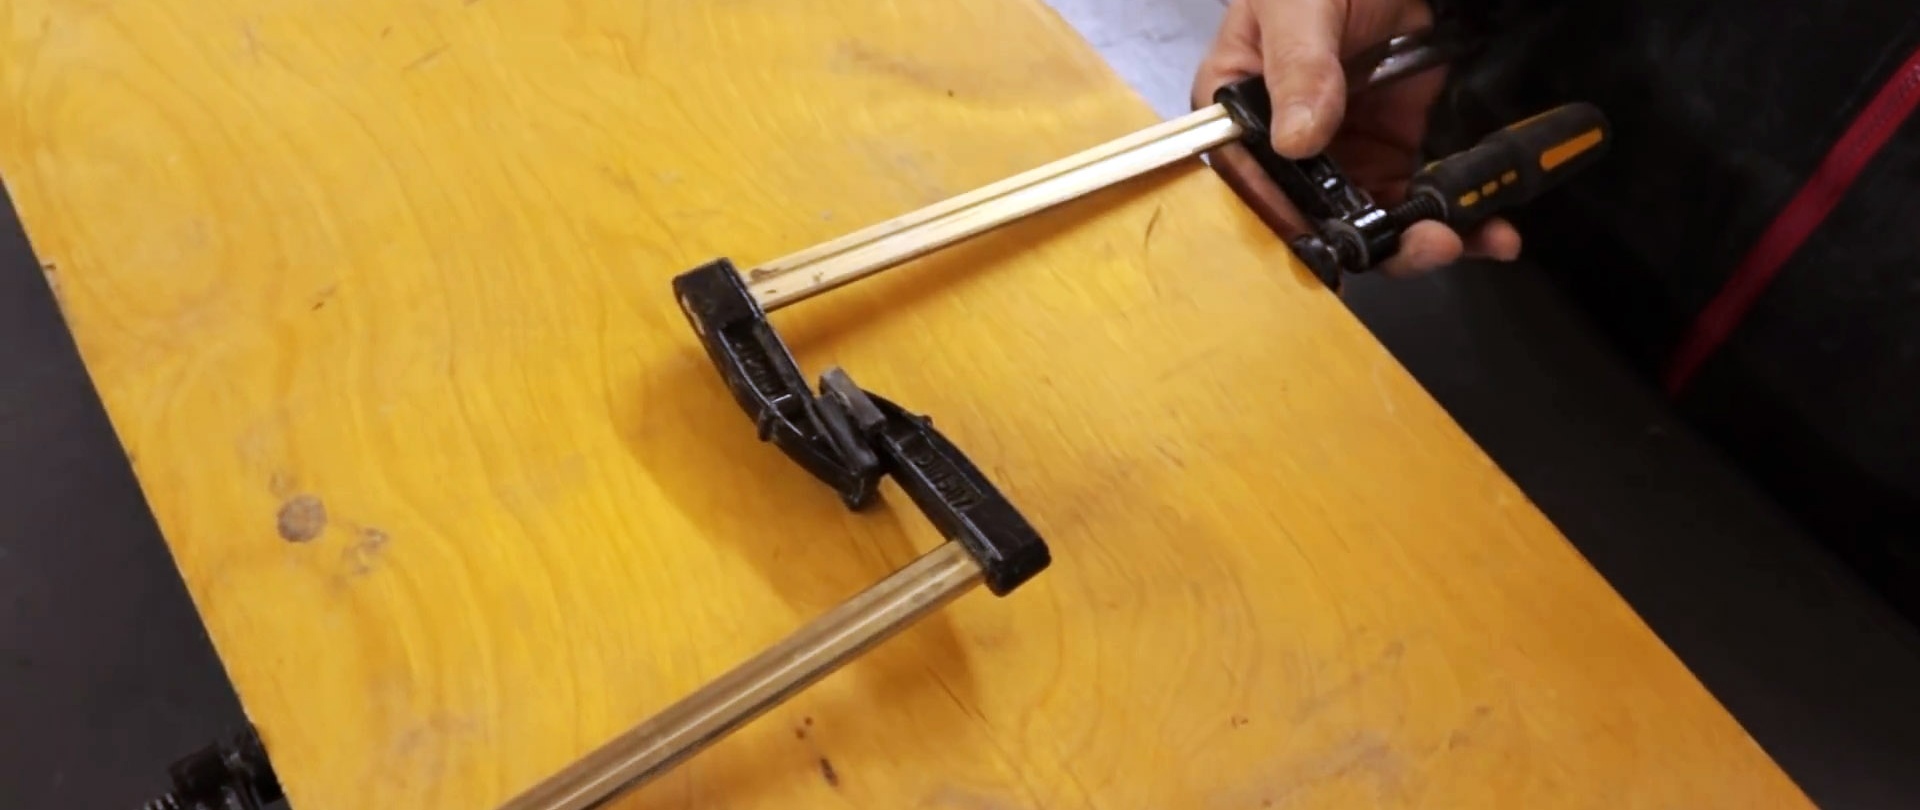
6. Pulling together wide parts with short clamps
If you only have short clamps, but need to tighten a wide piece, then connect them together. To do this, the jaws of the clamps are interlocked, and then they are tightened with a screw.
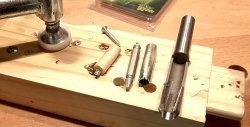
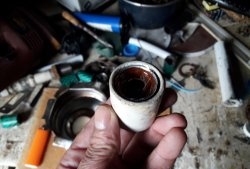
6. Tap for cutting threads in wood
To cut a thread in wood, take a bolt of the same diameter as the one you want to tighten. 4 longitudinal grooves are cut into it from the edge.

The edge of the bolt needs to be slightly tapered to reduce the height of the thread. Now it can be screwed into smaller diameter holes and it will cut tight threads into them.


It turns out to be very powerful, almost like metal.

7. Drawing ovals
If you need to draw an oval on the part, then drive 3 nails into it with a triangle. Then we take a thread, tie its ends, and put a ring between the nails.

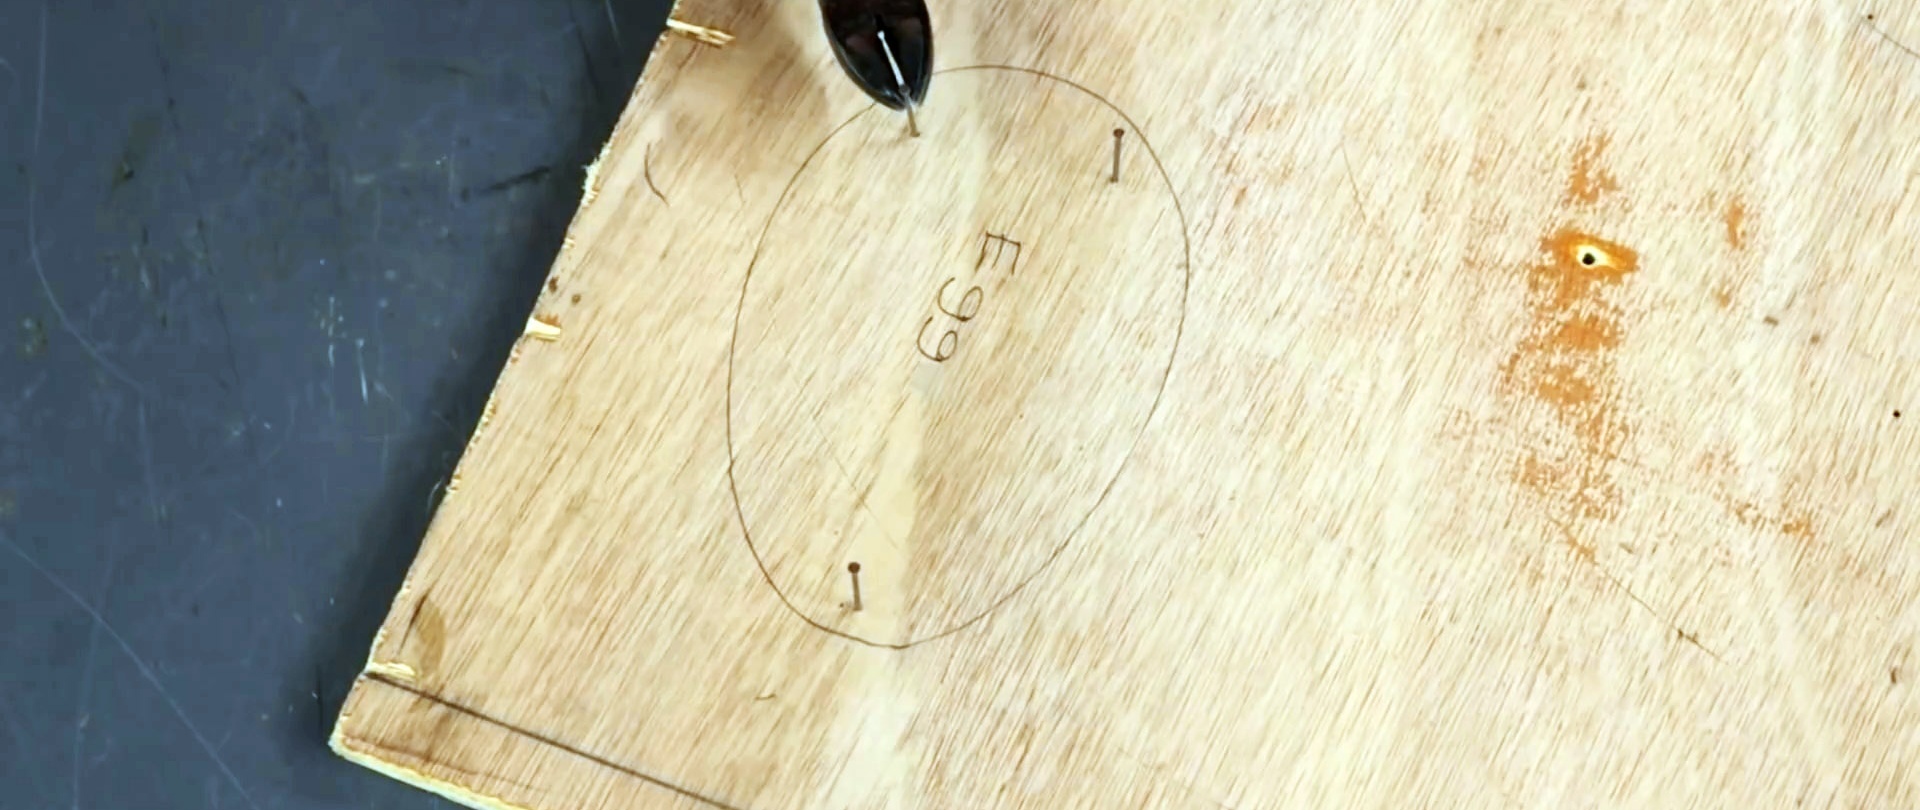
Place a pencil under the thread and pull it as far as possible. Then draw a pencil in a circle, thereby drawing an oval.
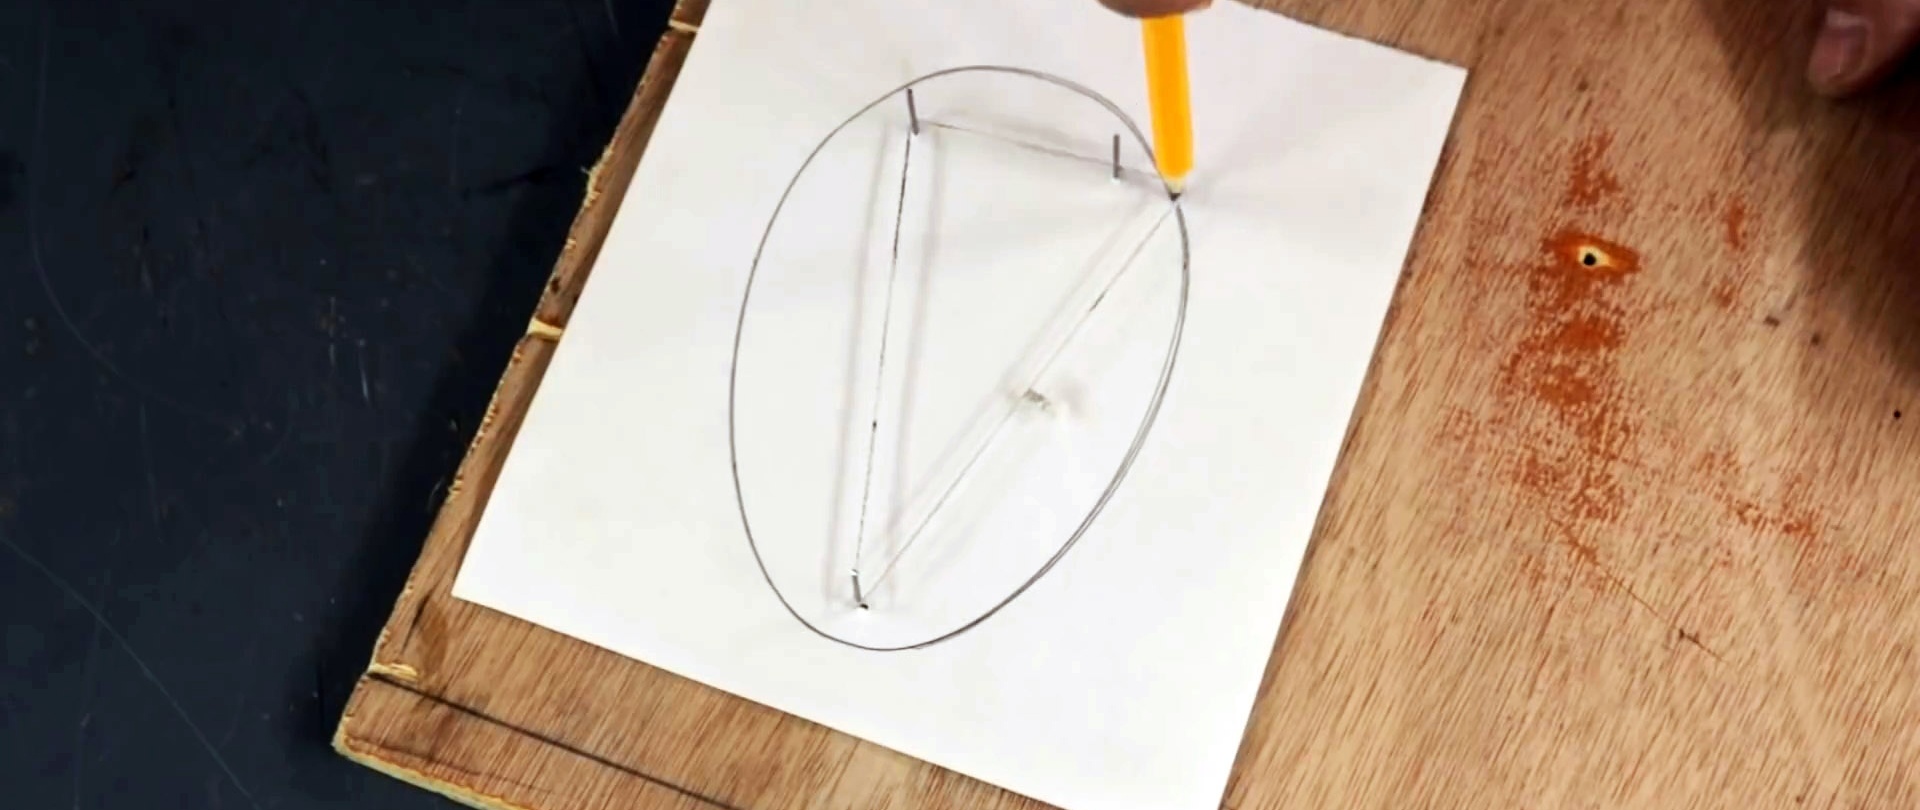
If you need to make a paper template for it, then bite off the heads of the nails and string a leaf on top. Similarly, draw an oval on top with a pencil and thread. Then we cut it out and use it as a template.
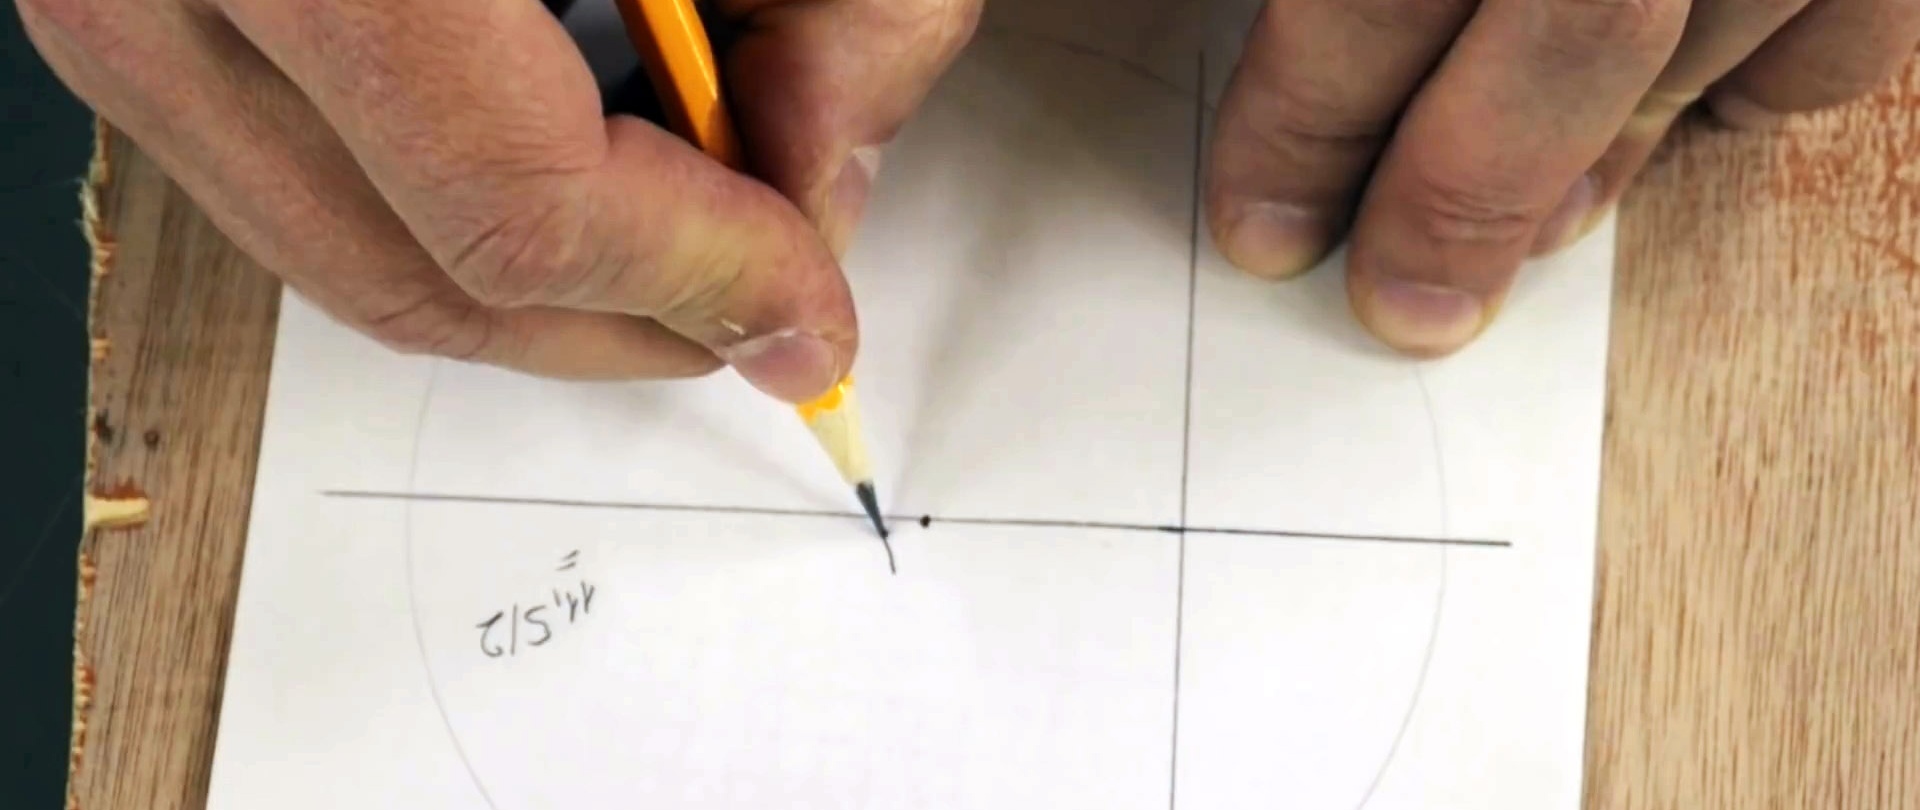
8. How to find the center of a circle
To determine the center of the circle, place a ruler anywhere on it and draw a line. A mark is placed on it in the middle.
Apply a square along the mark and draw a perpendicular line. It will already pass exactly through the center of the circle. Then we measure its length with a ruler and mark the middle. This point will be the center of the circle, which can be verified by using a compass.
9. Attaching the clamp handle
The handle of a homemade clamp with a screw from a hairpin can be made as follows. 2 nuts are clamped at its end. A hole is drilled at their junction.
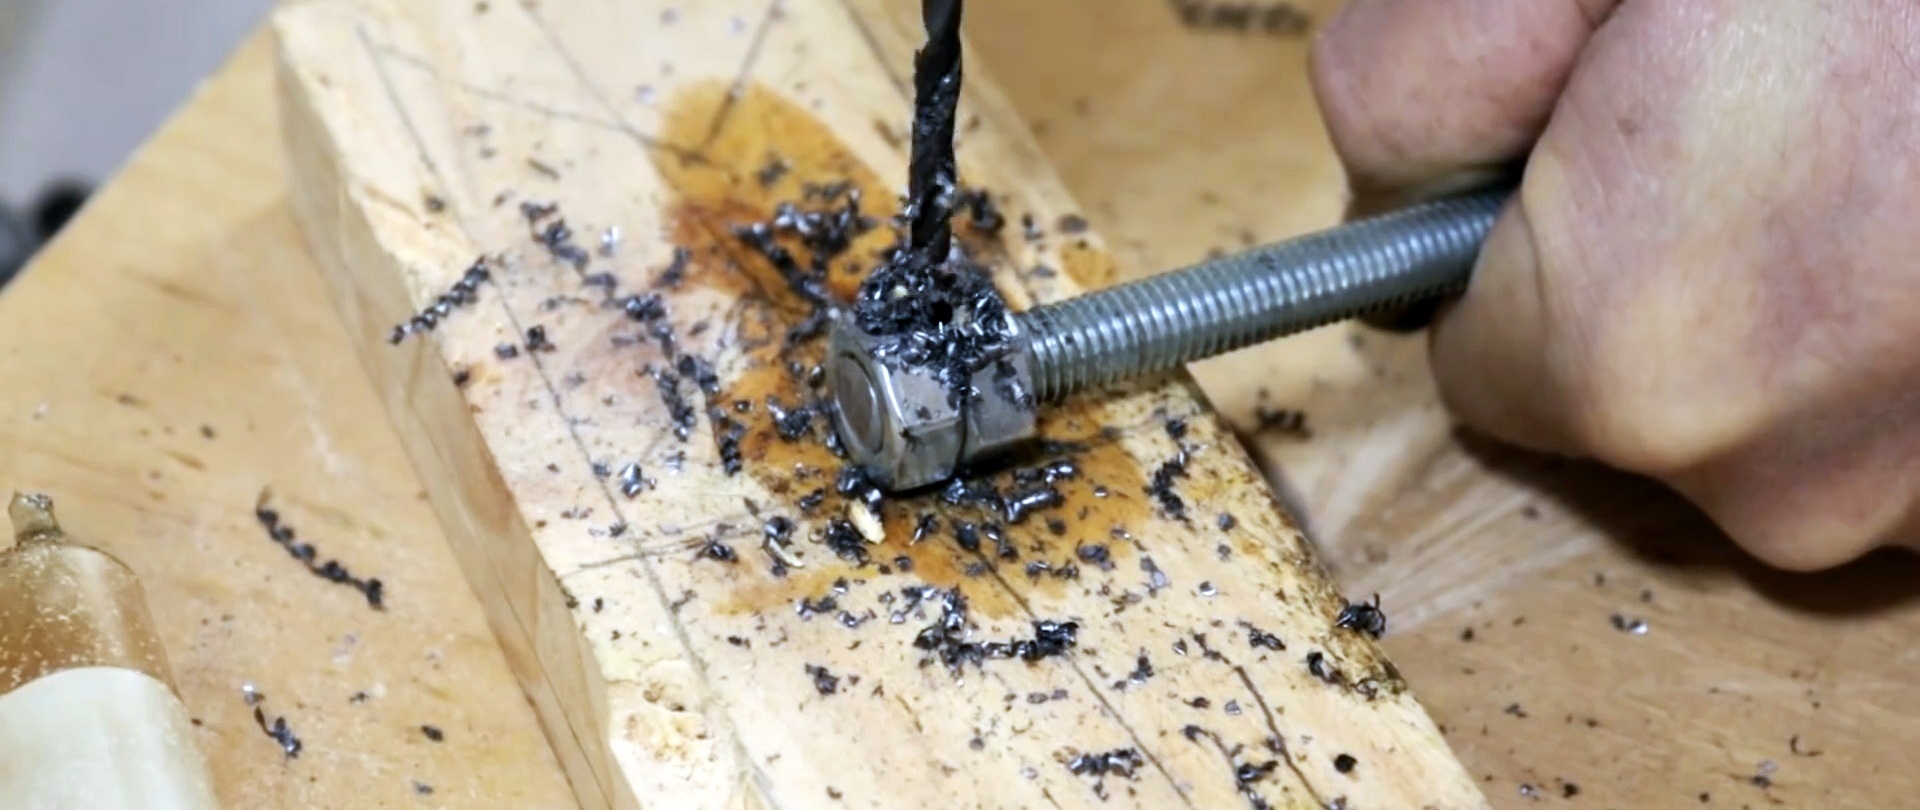
A pin is inserted into it, the edge of which must be hammered out. This makes a great pen.