From time to time you have to use your mind to come up with simplified solutions to certain problems. Some of them are easier, while others require you to rack your brains. We offer a selection of 11 ready-made solutions that will make your work easier.
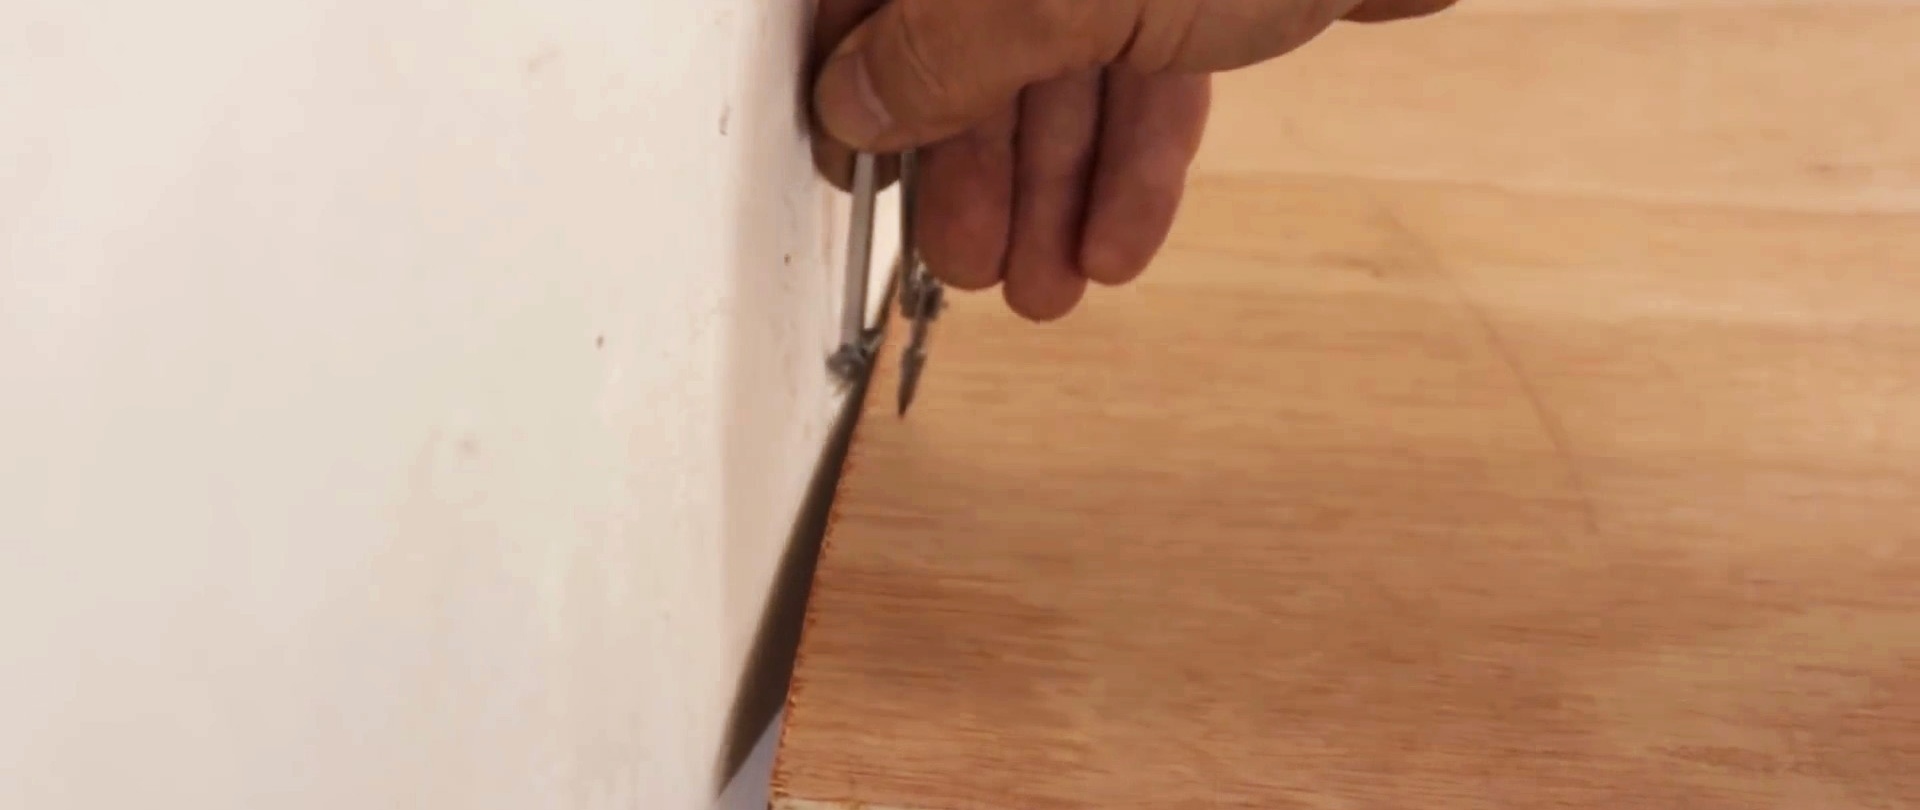
1. How to cut a board or tabletop for a tight fit with a curved wall
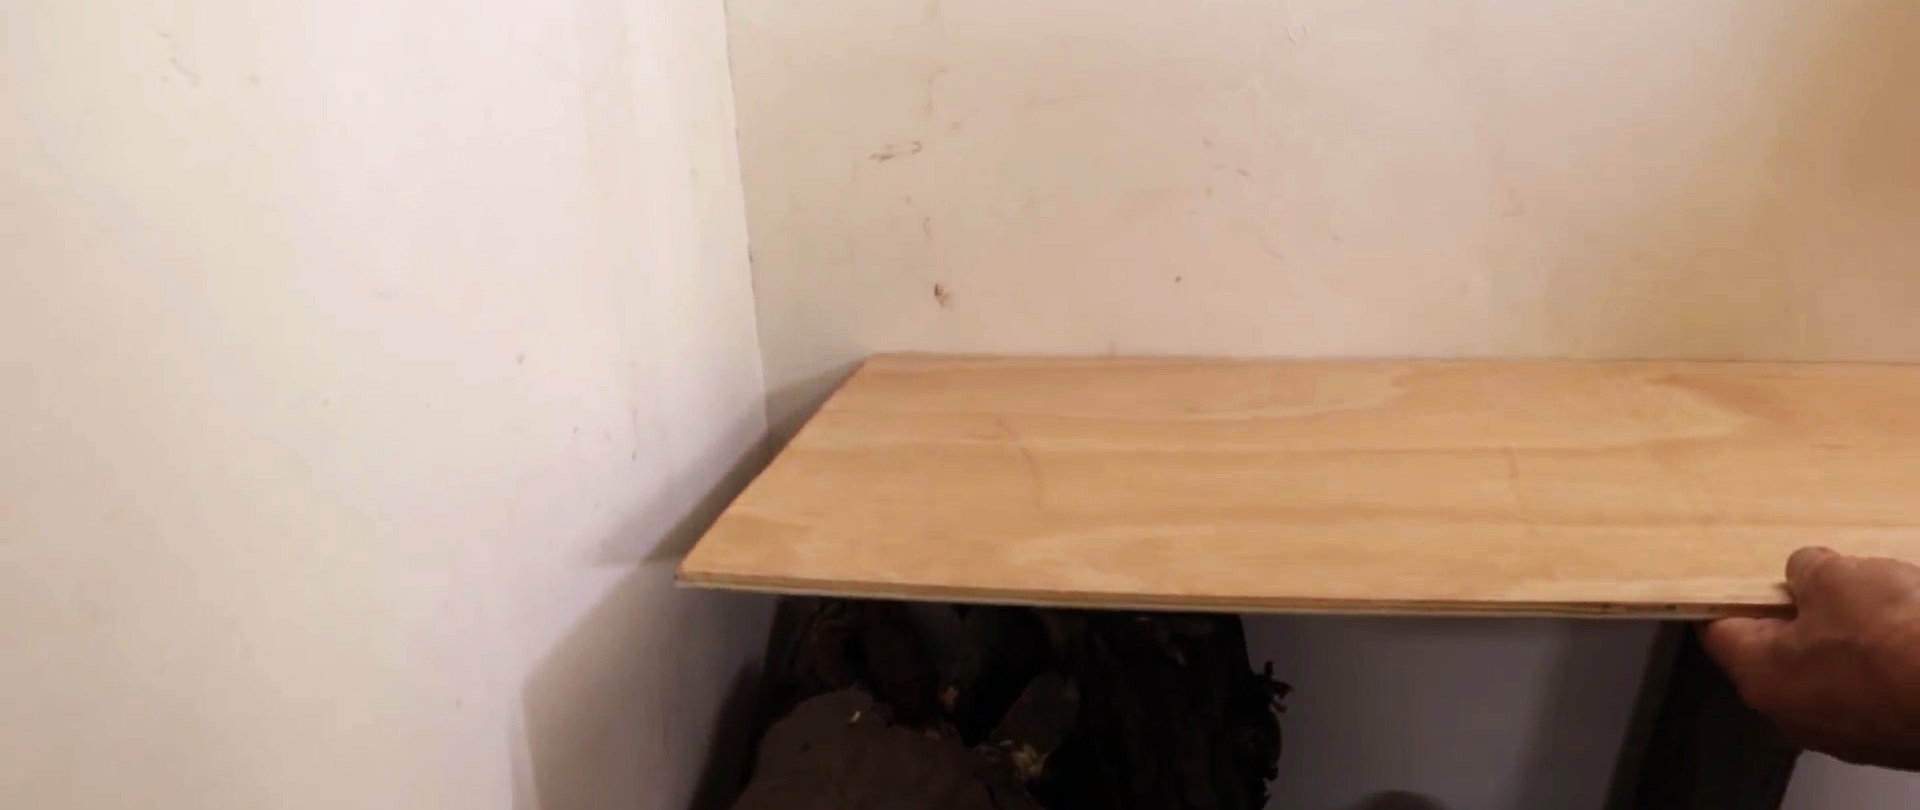
If you need to tightly join a board or tabletop to a curved wall, then its end must also be cut crookedly. To do this, just hold the compass, resting its edge against the wall. Then the board is cut along the resulting line.


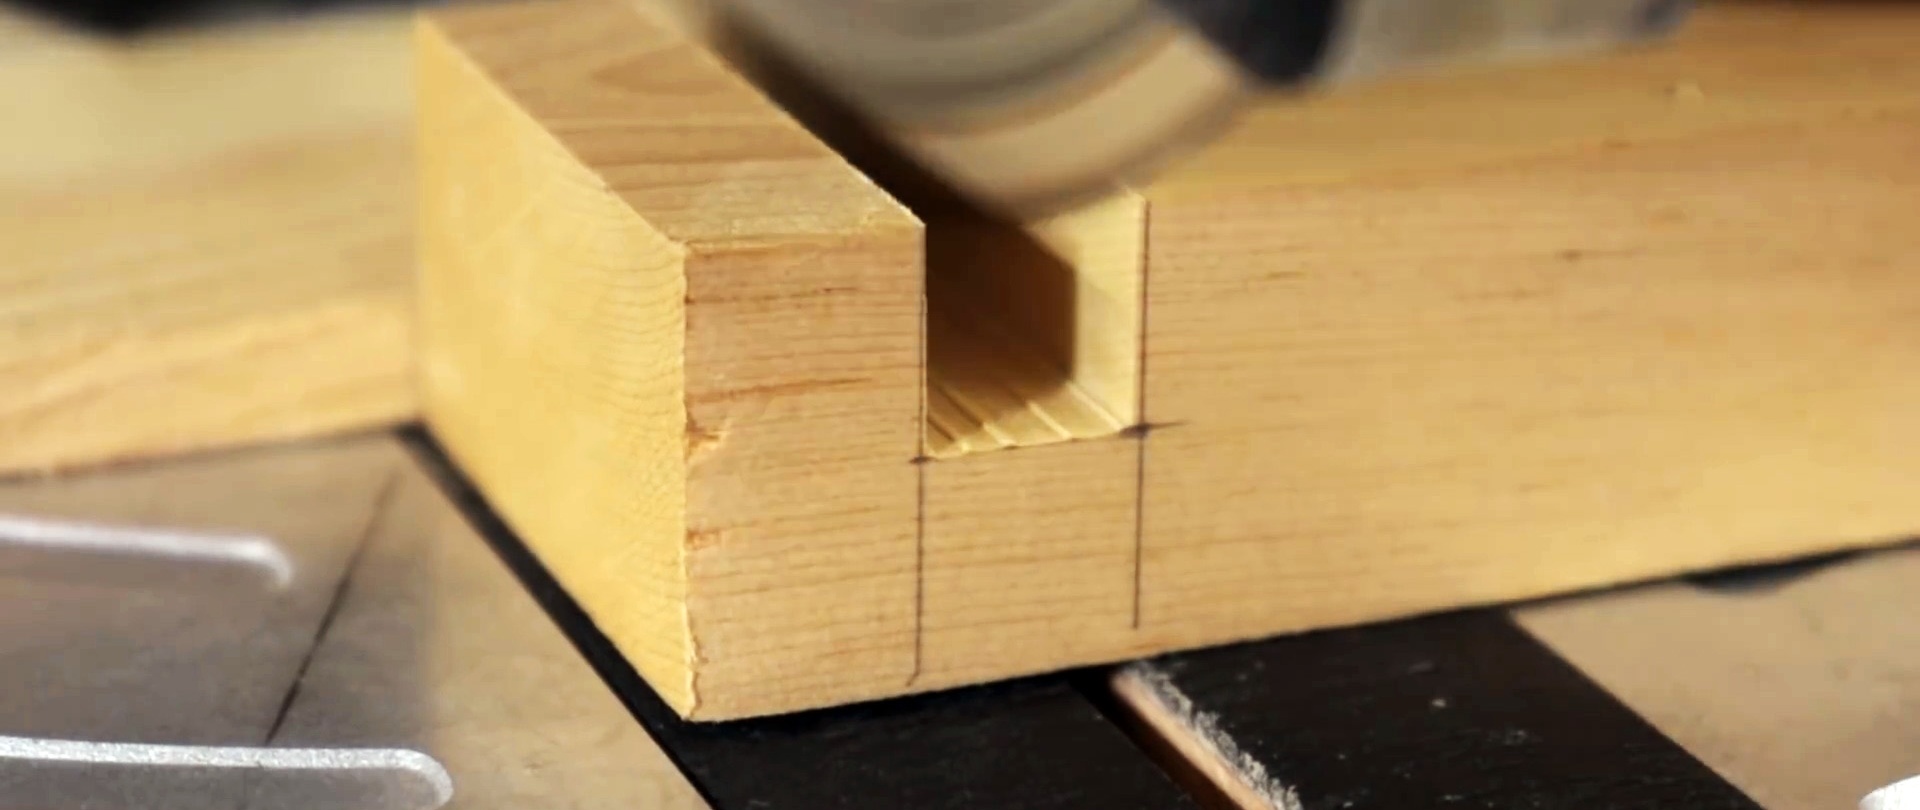
2. Hidden tongue and groove
A standard tongue-and-groove connection is a good connection, but for rough parts that is not visible. When it comes to visible angle, a slightly different approach is required. To do this, one transverse tenon and one groove are formed. They themselves hold the parts well, plus they increase the gluing area, so this connection is reliable.

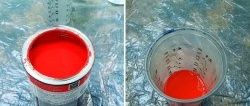
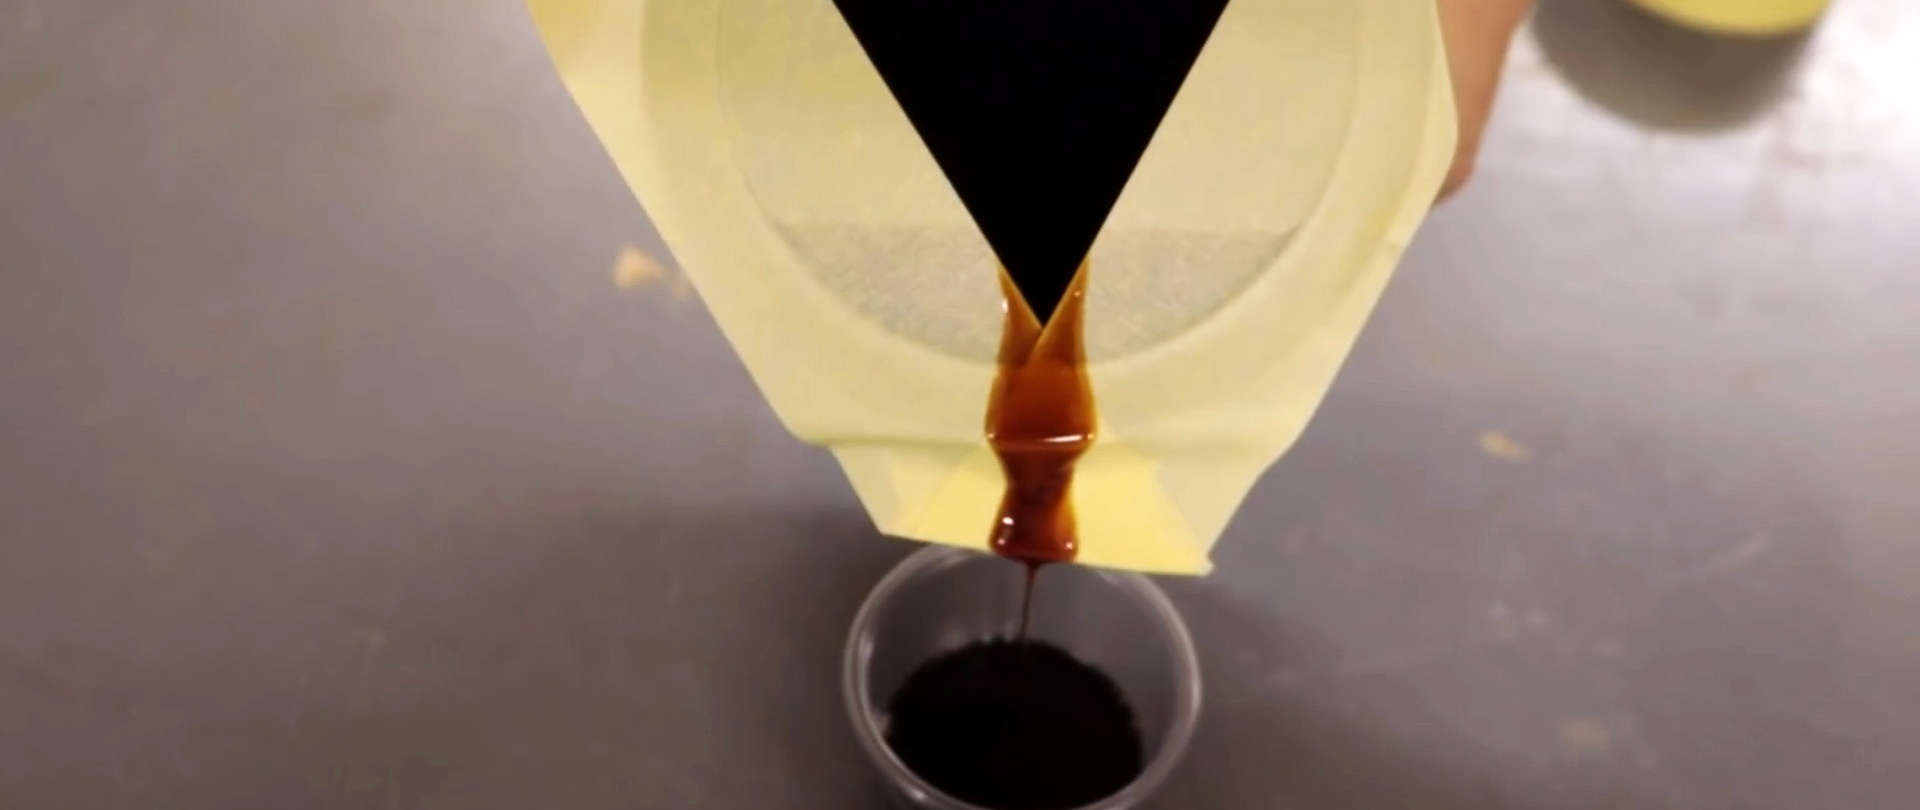
3. How to pour varnish or paint without dirtying the jar
When pouring varnish or paint from a can, it is difficult to avoid smudges. They will not appear if you stick 2 strips of masking tape on top of the jar at an angle.The edges of their intersection must be bent to form a nose.

By pouring varnish or paint now, you will definitely avoid smudges on the can. The tape then comes off and everything remains clean.
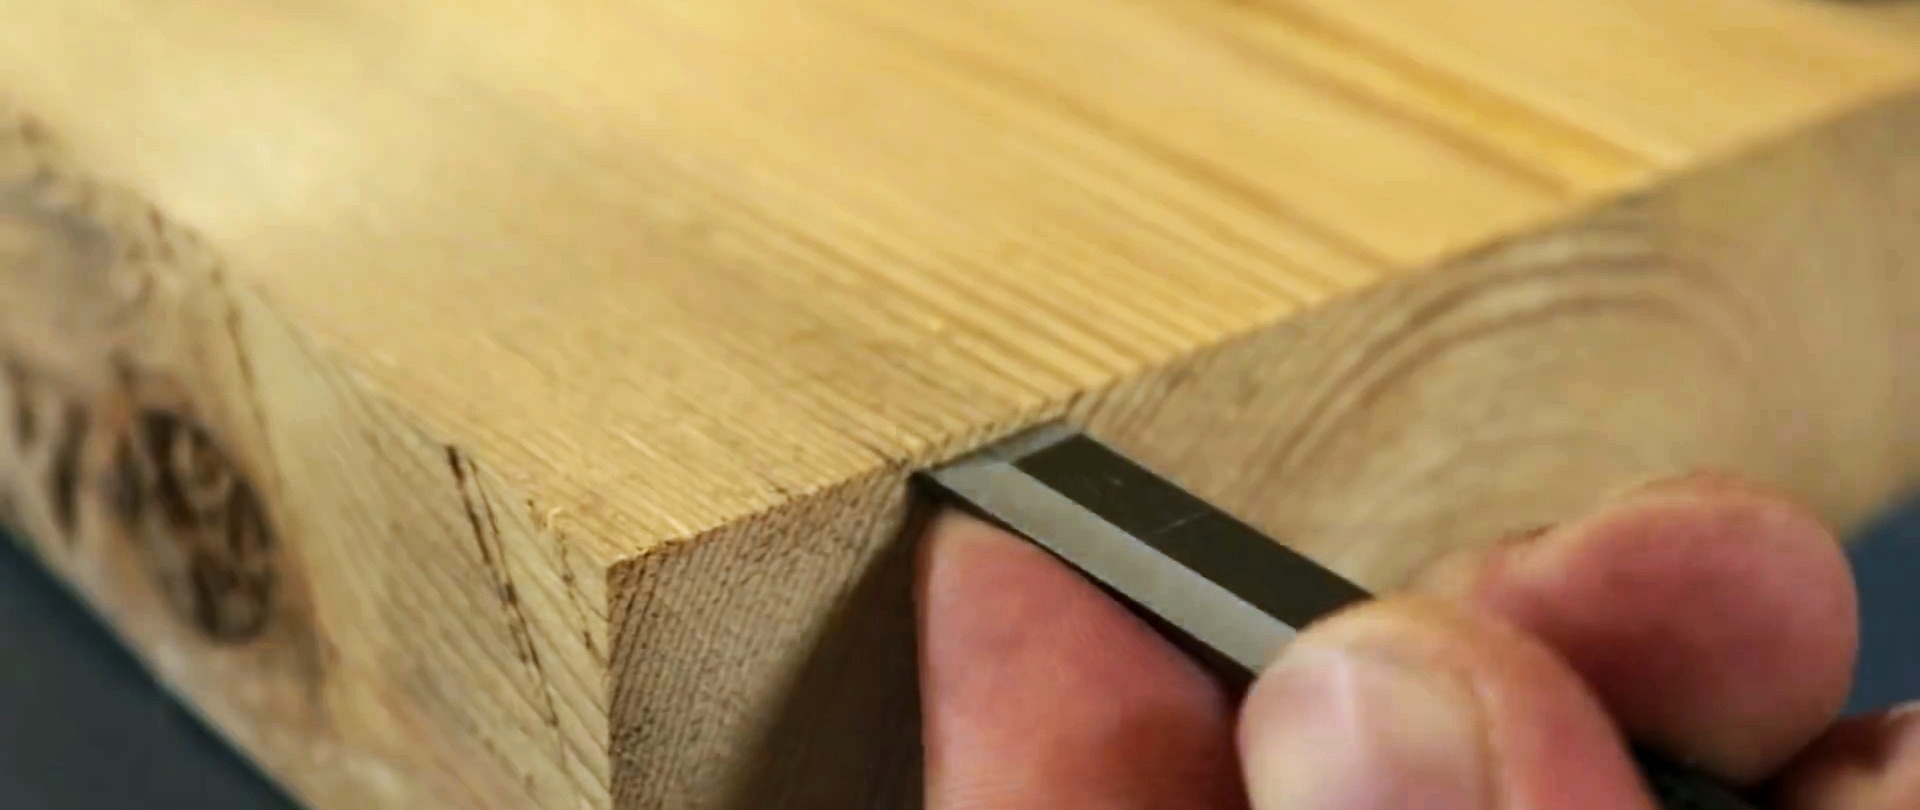
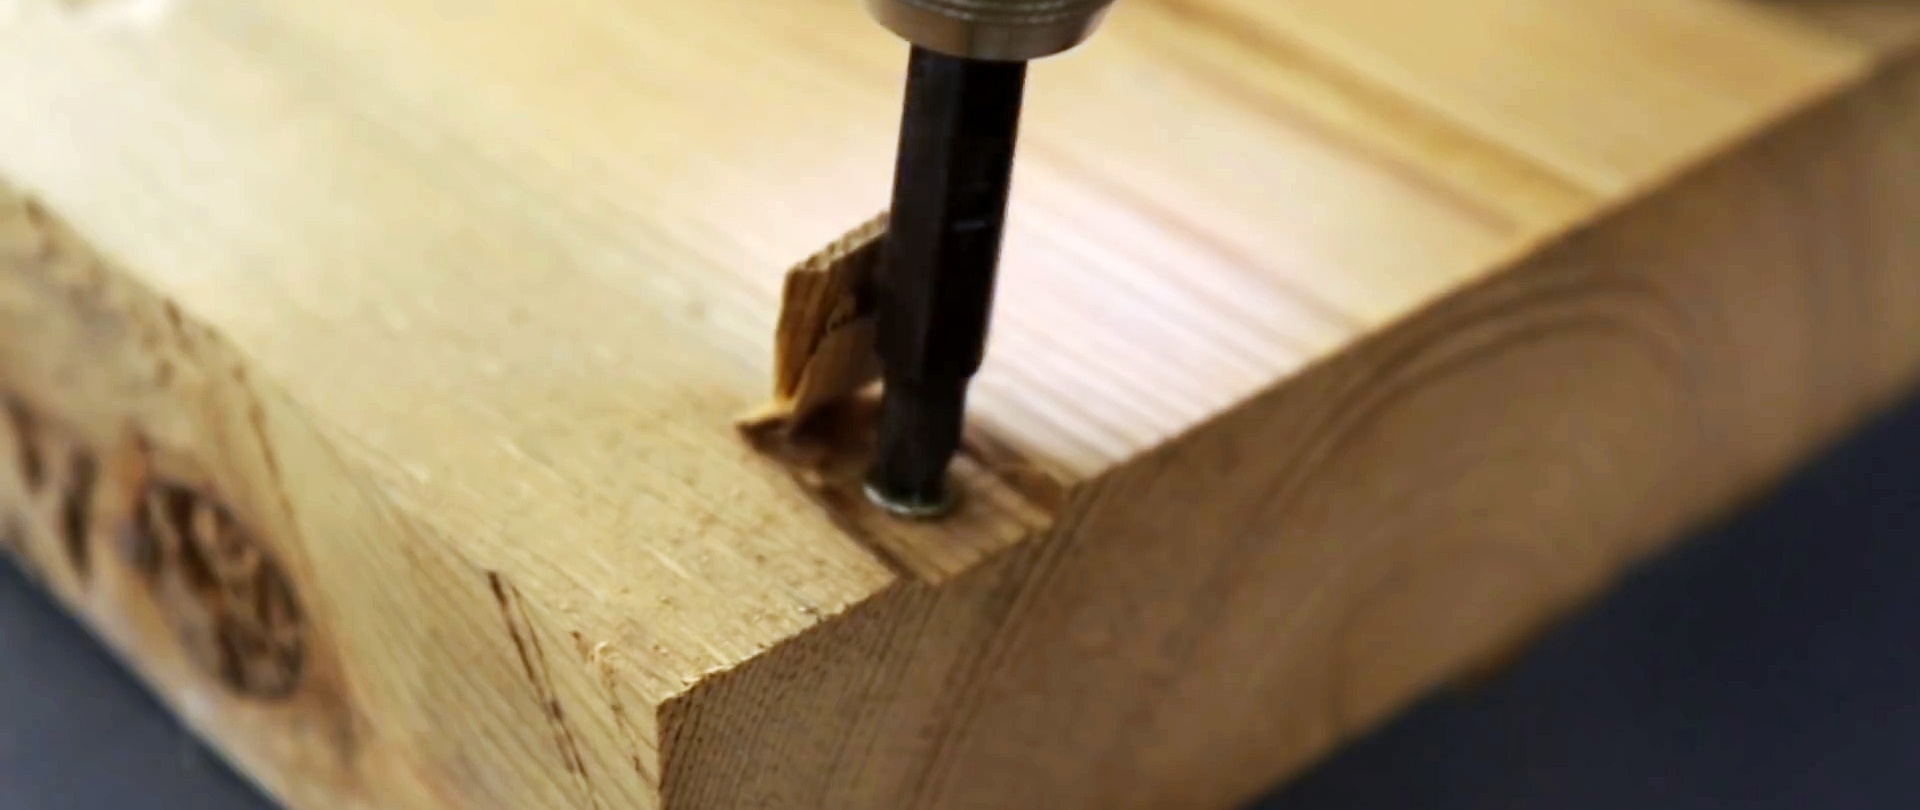
4. How to hide the head of a screw in wood
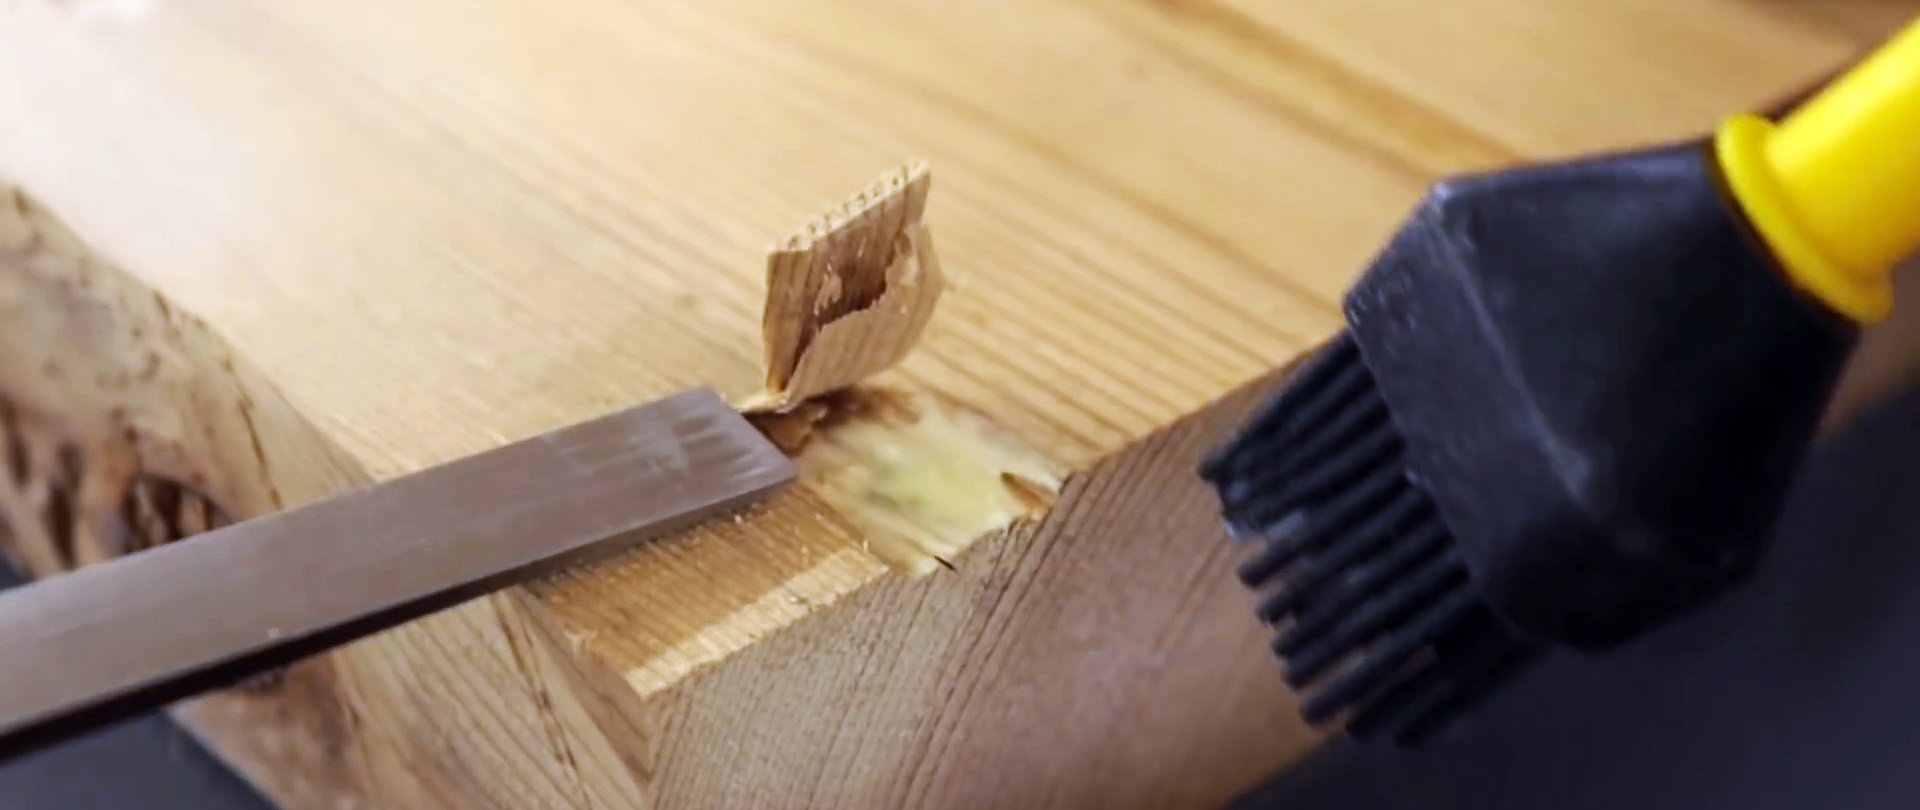
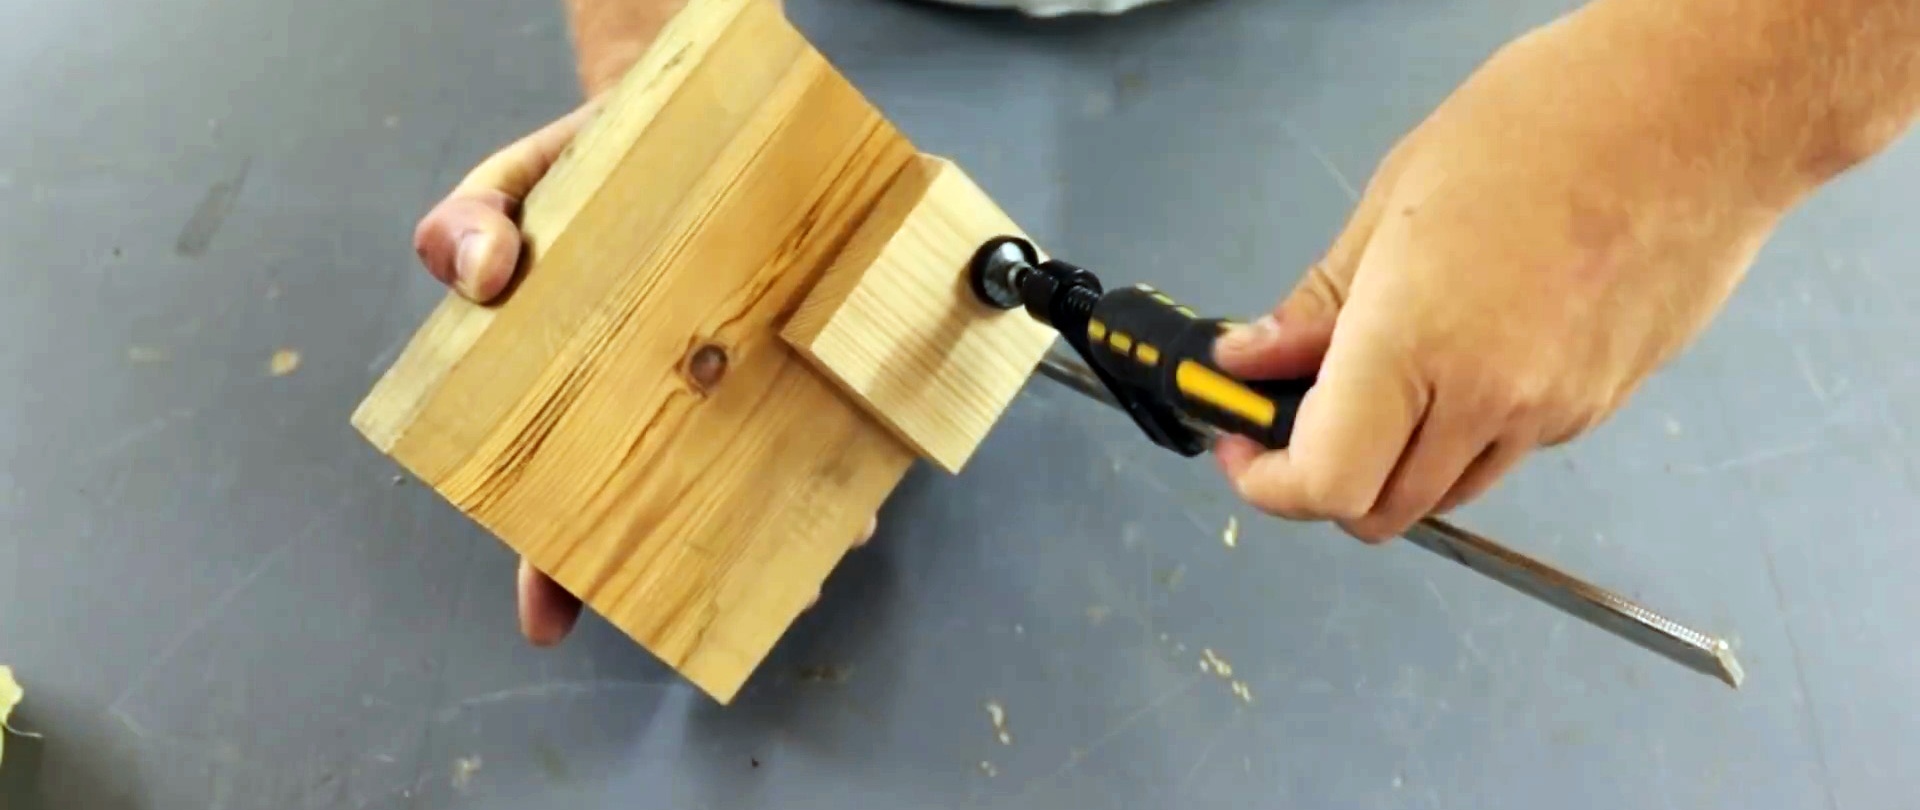
To tighten the screw from the edge of the board, you can undermine a thin layer on it with a chisel. The self-tapping screw is wrapped underneath it, and then the flap is glued on top.
So that nothing is visible, it is better to press the glued flap through the board with a clamp. After the glue has set, you need to sand the surface to remove the characteristic shine and protrusion. As a result, you will never realize that a self-tapping screw is hidden there.

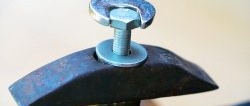
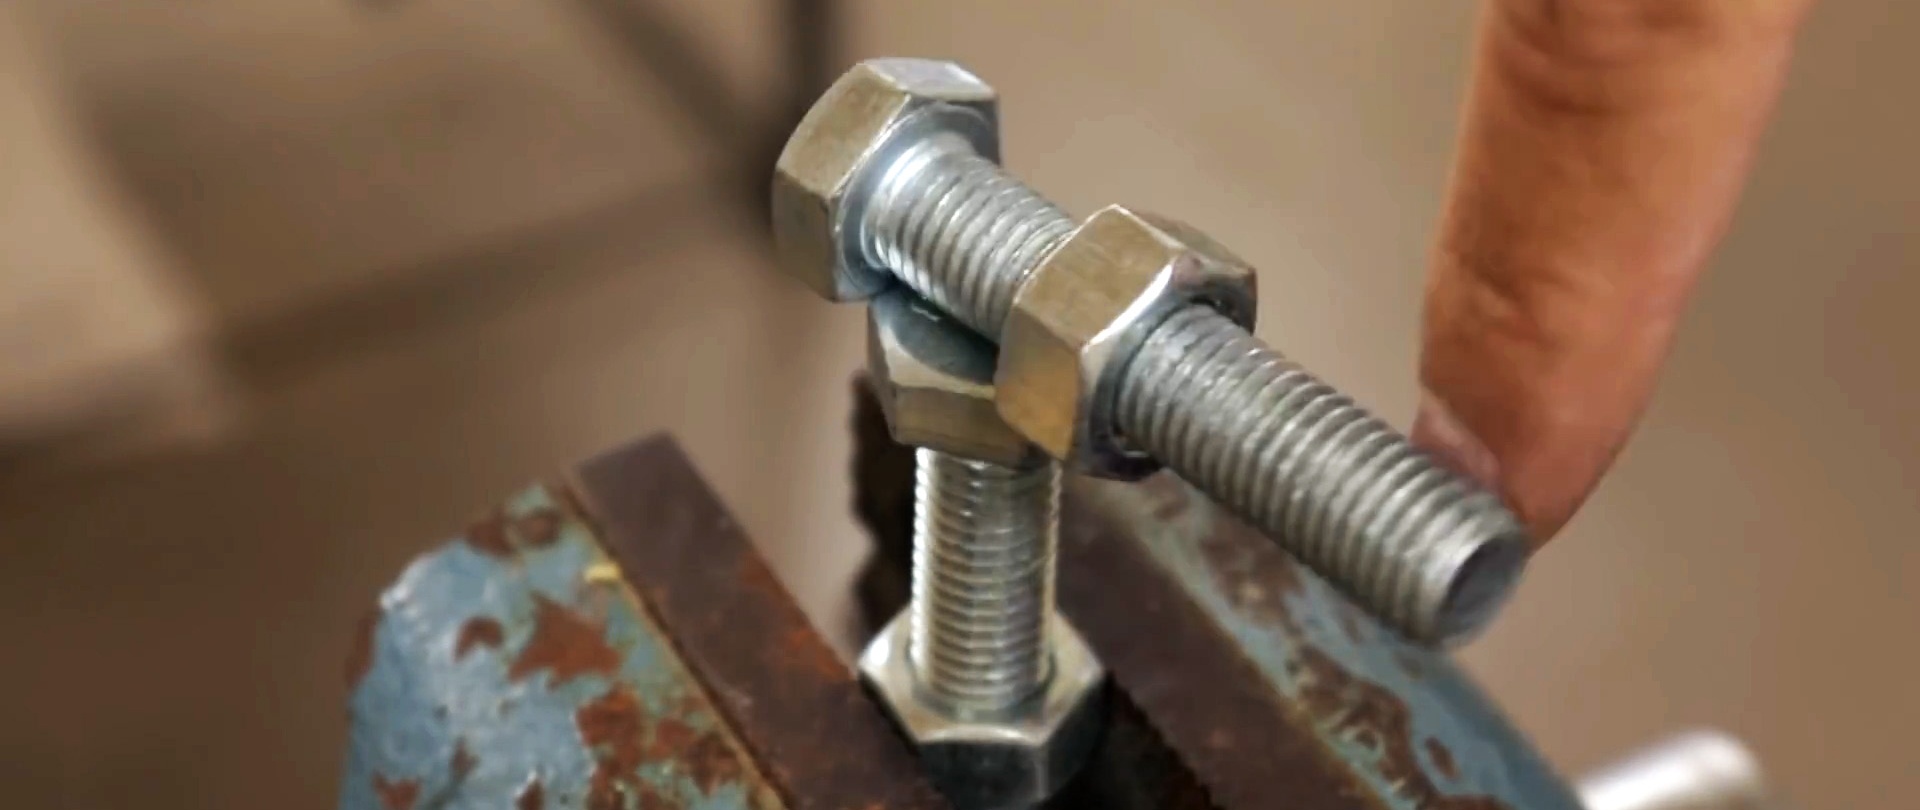
5. What to do if you don’t have a wrench
If you don't have a wrench, then use a bolt and nut. The required gap is simply set between it and its cap. This way you can simulate a wrench of any size.
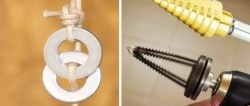
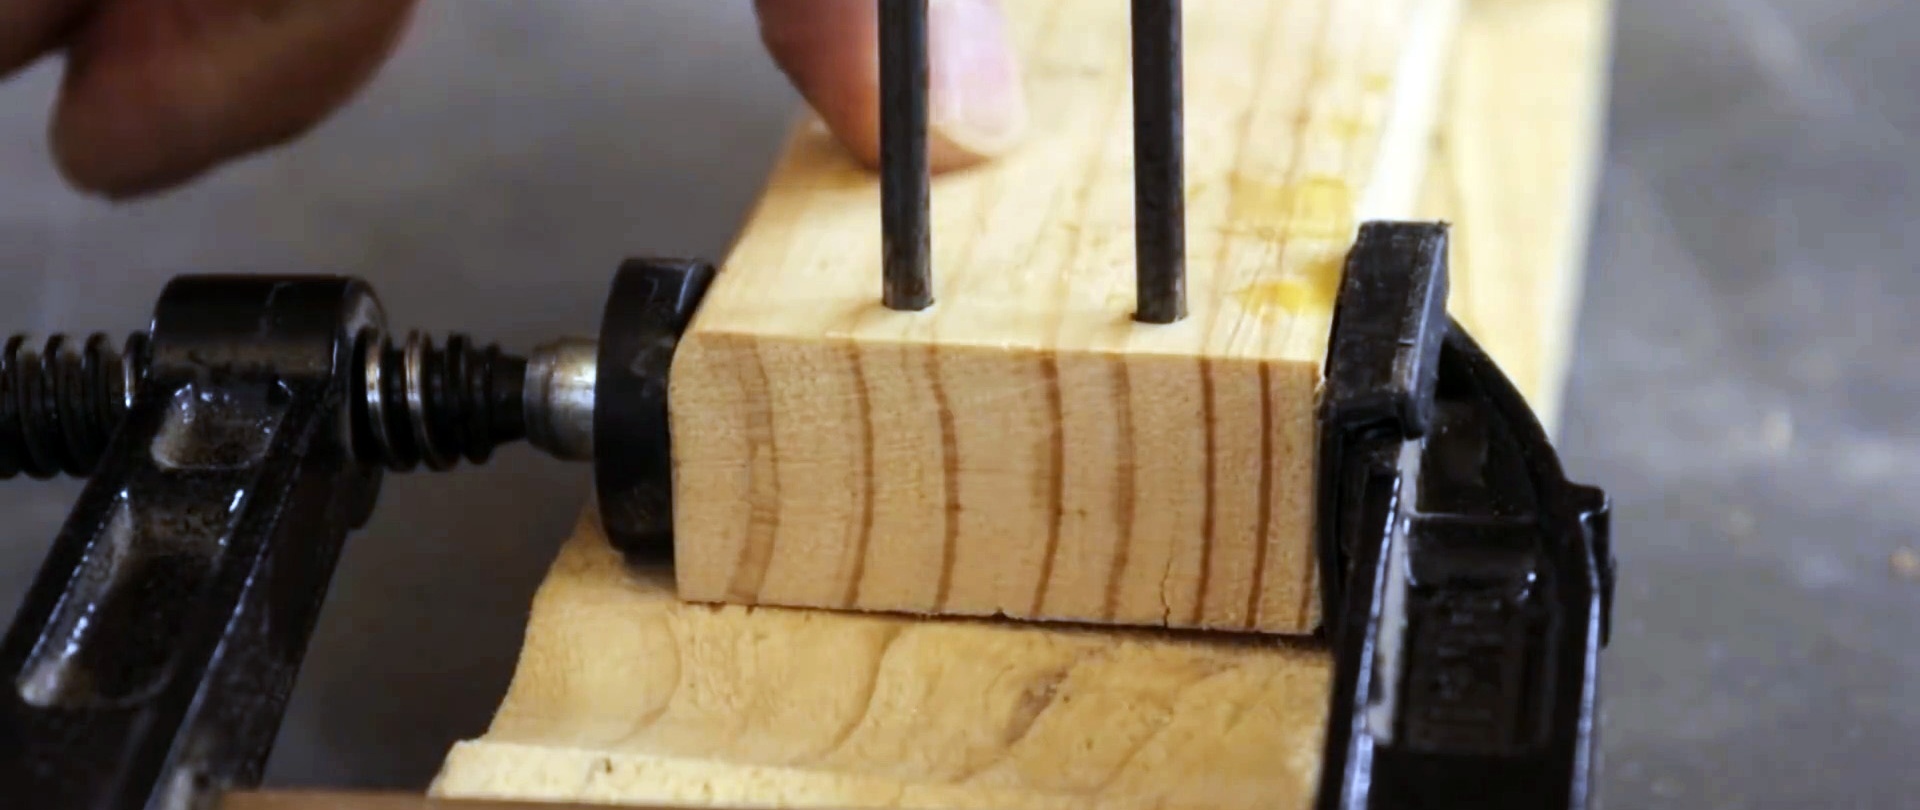
6. Accurate marking for dowels

To mark the drilling points for dowels on the joining part, you need to insert stationery pins into the first one with the needle up. Then the blanks are pressed, and pricked points remain on the counter. By making holes along them, you will 100% hit the dowel exactly where you need it.


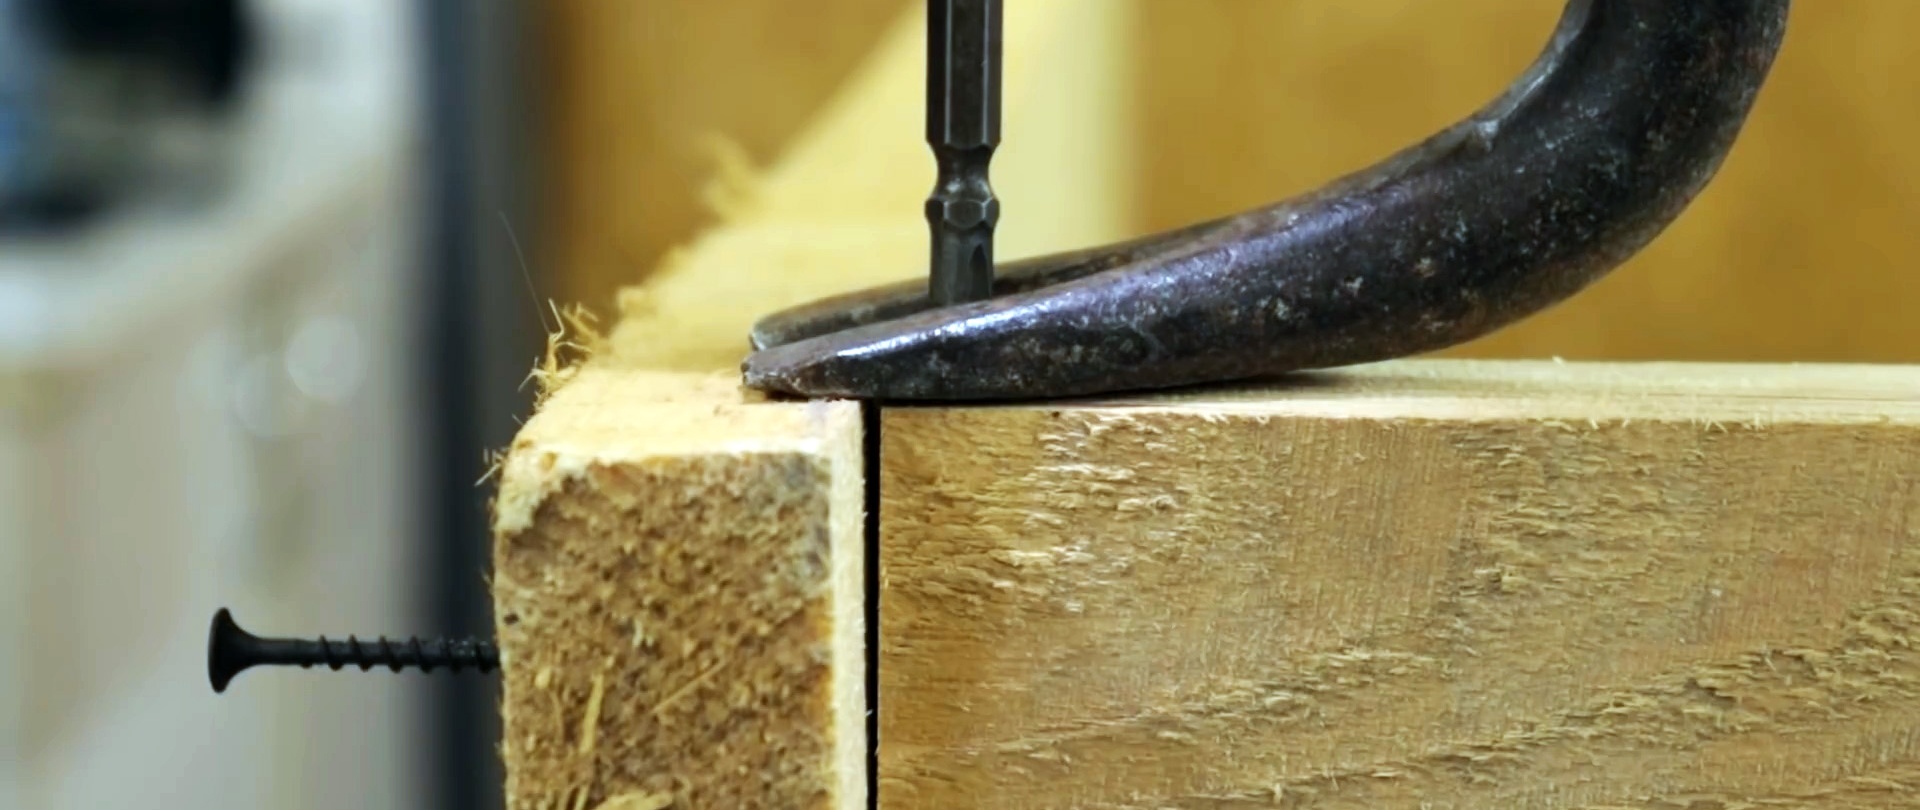
7. How to straighten the edge of a curved board when screwing

It is very difficult to join a humpbacked board in order to twist the end flush with the other. If you encounter this, then screw the screw into it from the very edge. Then grab it with a nail puller and pull. Once aligned, it can be screwed on. This screw is then removed.

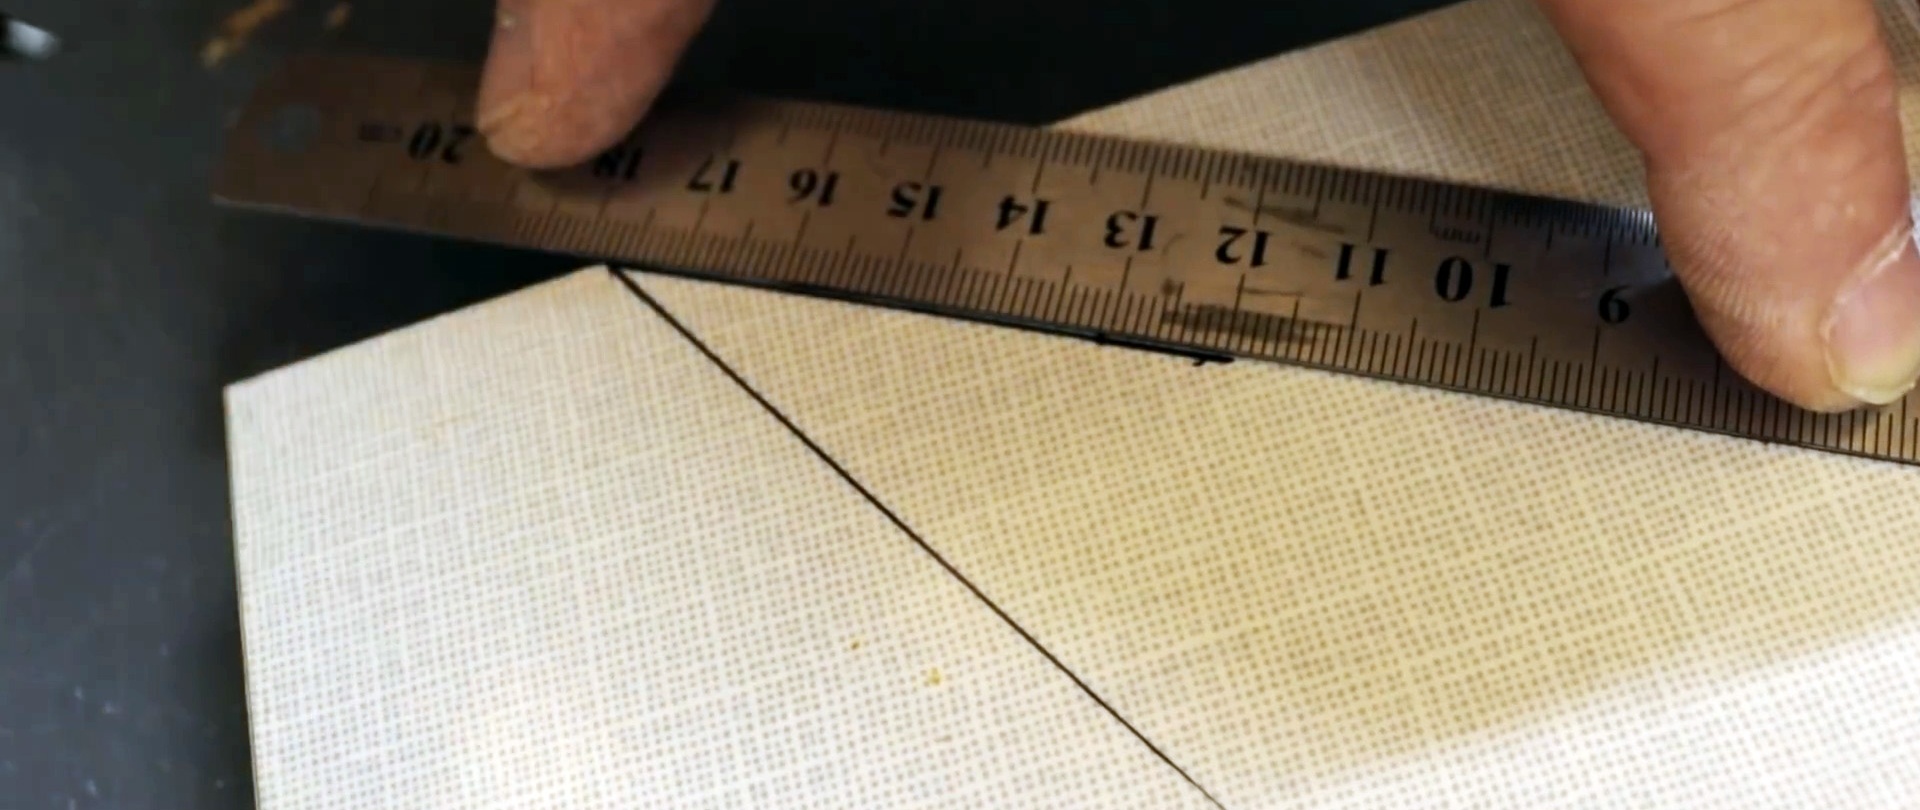
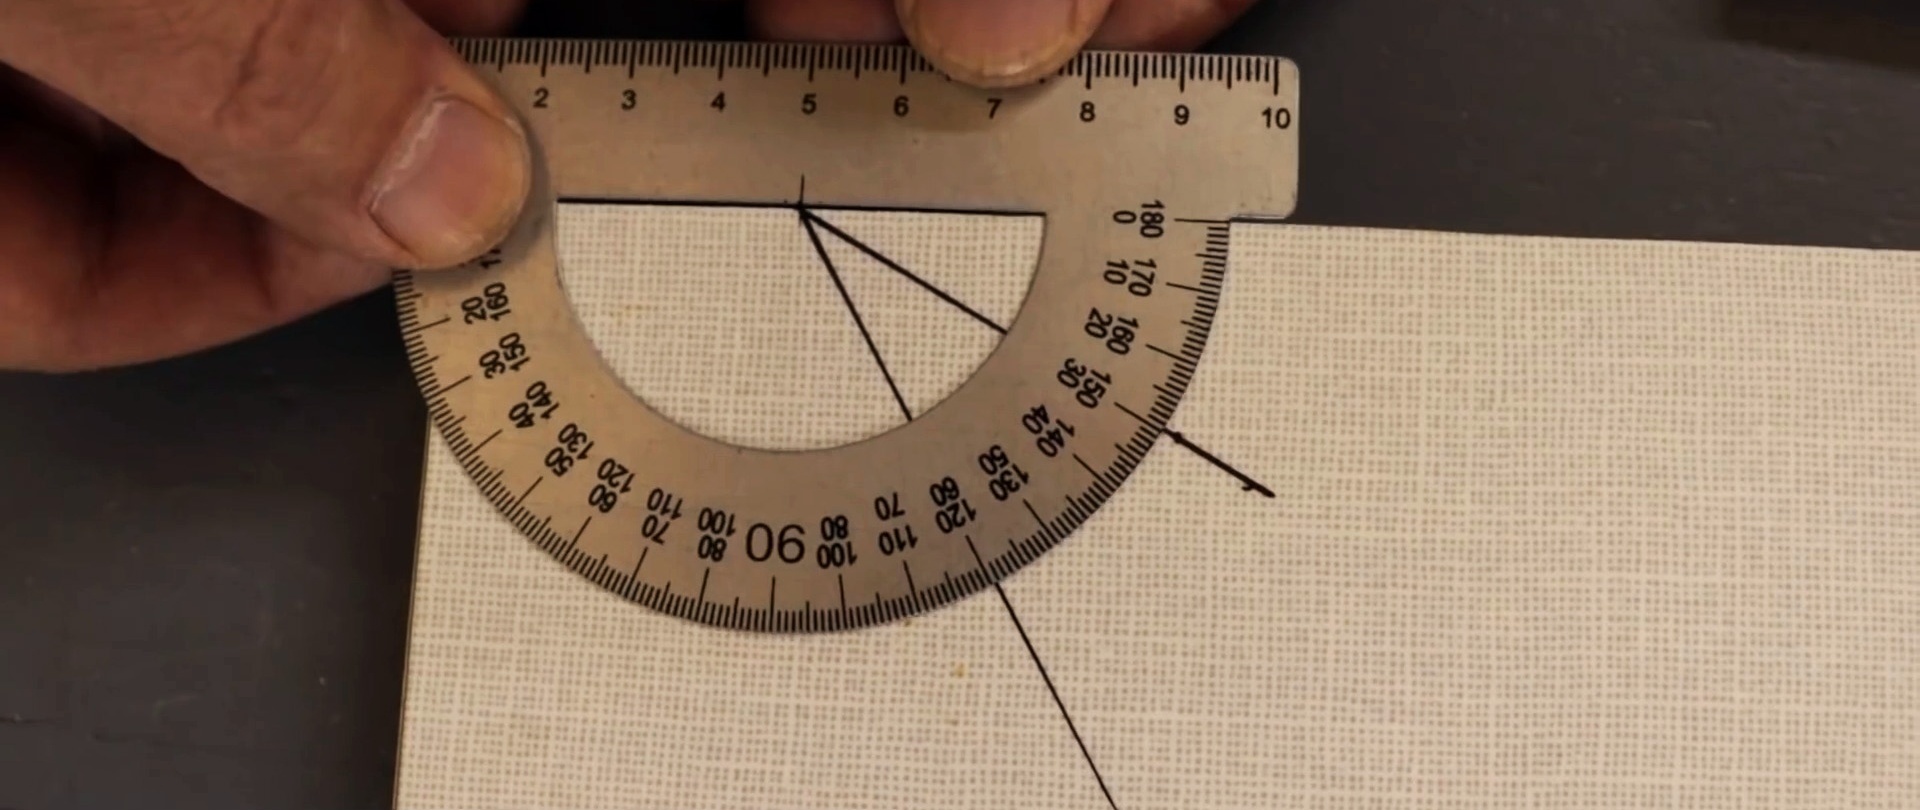
8. How to set basic angles with a square without a protractor
To mark angles without a protractor, you can use a square, and not just to mark 90 or 45 degrees. To do this, it is enough to apply its internal angle to the point from which the construction will be carried out.
If we draw a line from this point to the 56 mm mark, we get an angle of 30 degrees. To construct an angle of 60 degrees, a line is drawn at 102 mm. You can write these tips directly on the square so you don't forget.

9. What to do to prevent the lath from cracking when driving nails
If you hammer a nail into the edge of a thin lath, it will certainly crack. Just tighten it with a clamp and then nail it. In this case, it will definitely not crack, even when the clamp is removed.
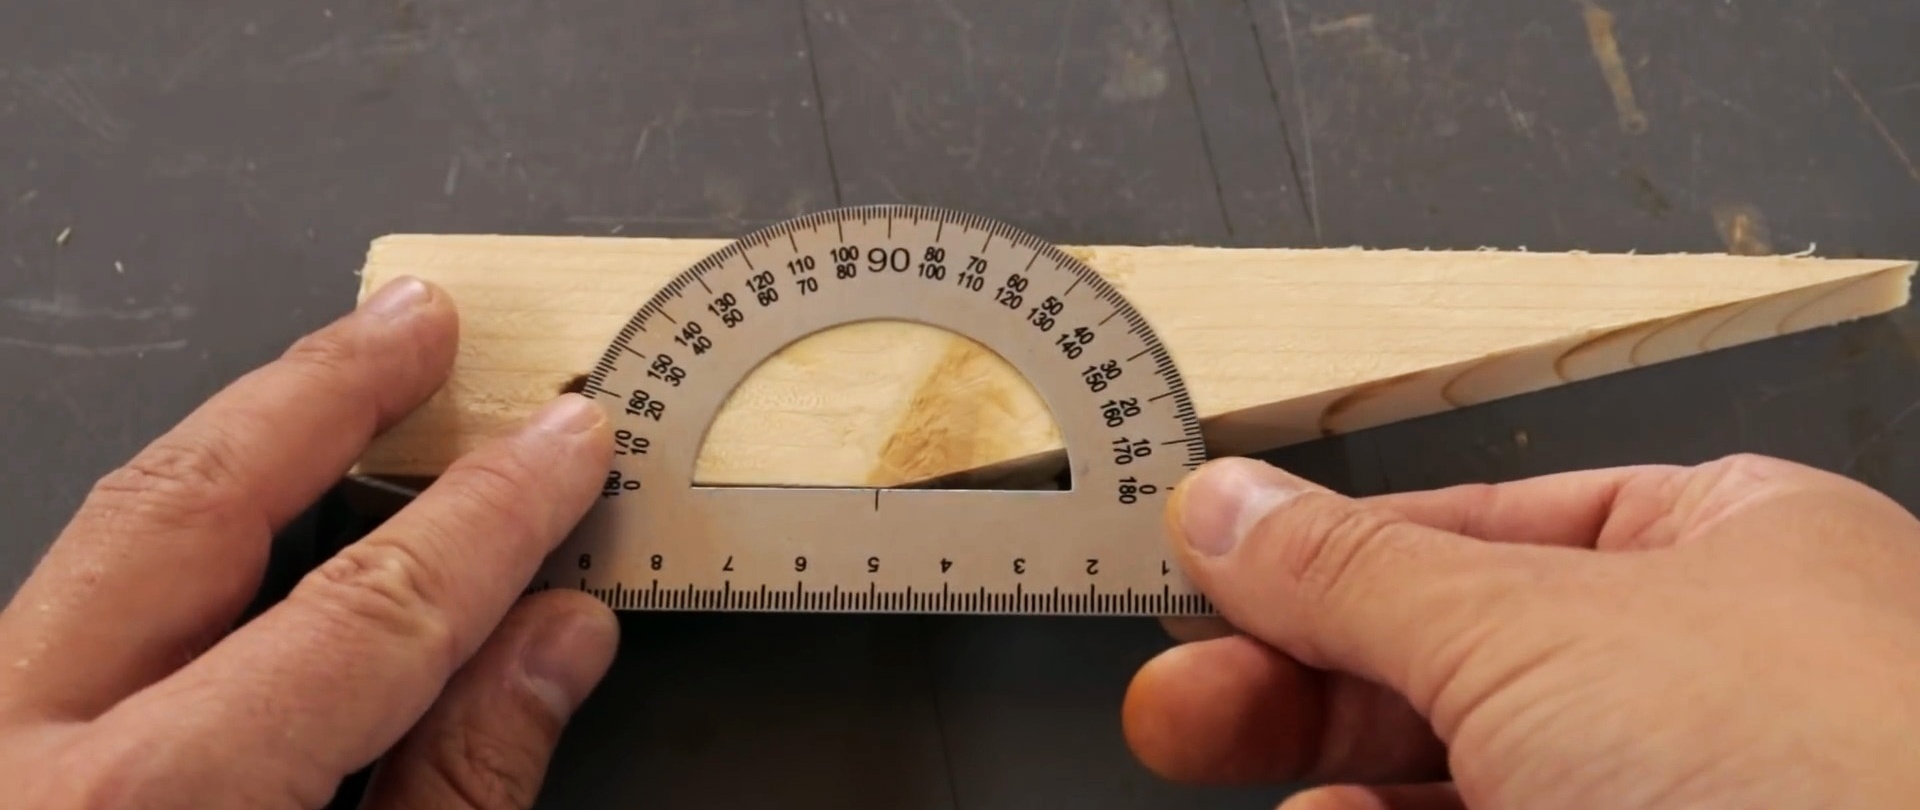
10. How to cut on a crosscut at 15 degrees
Typically, a miter saw does not have the ability to rotate 15 degrees for dusting. In this case, you can lay a board on it and cut its center in 2 directions at 45 degrees.
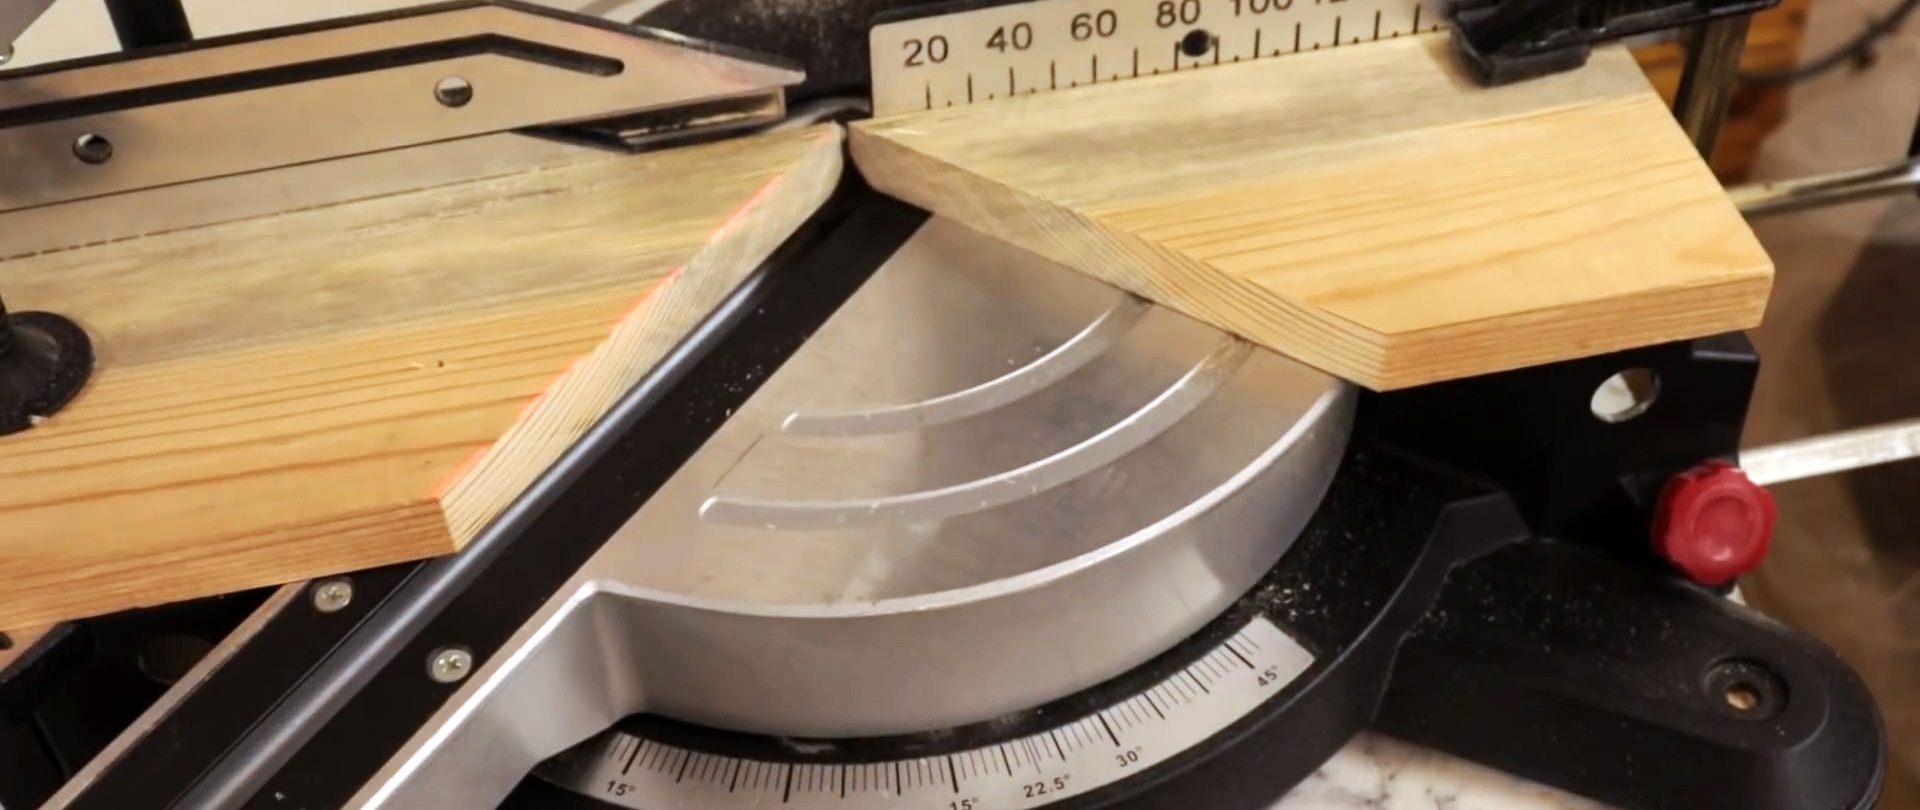
Further, if you use it as a guide for workpieces cut at right angles, then when the actual angle setting on the trim scale is 30 degrees, the workpiece will be cut at 15 degrees.


11. How to make a dowel
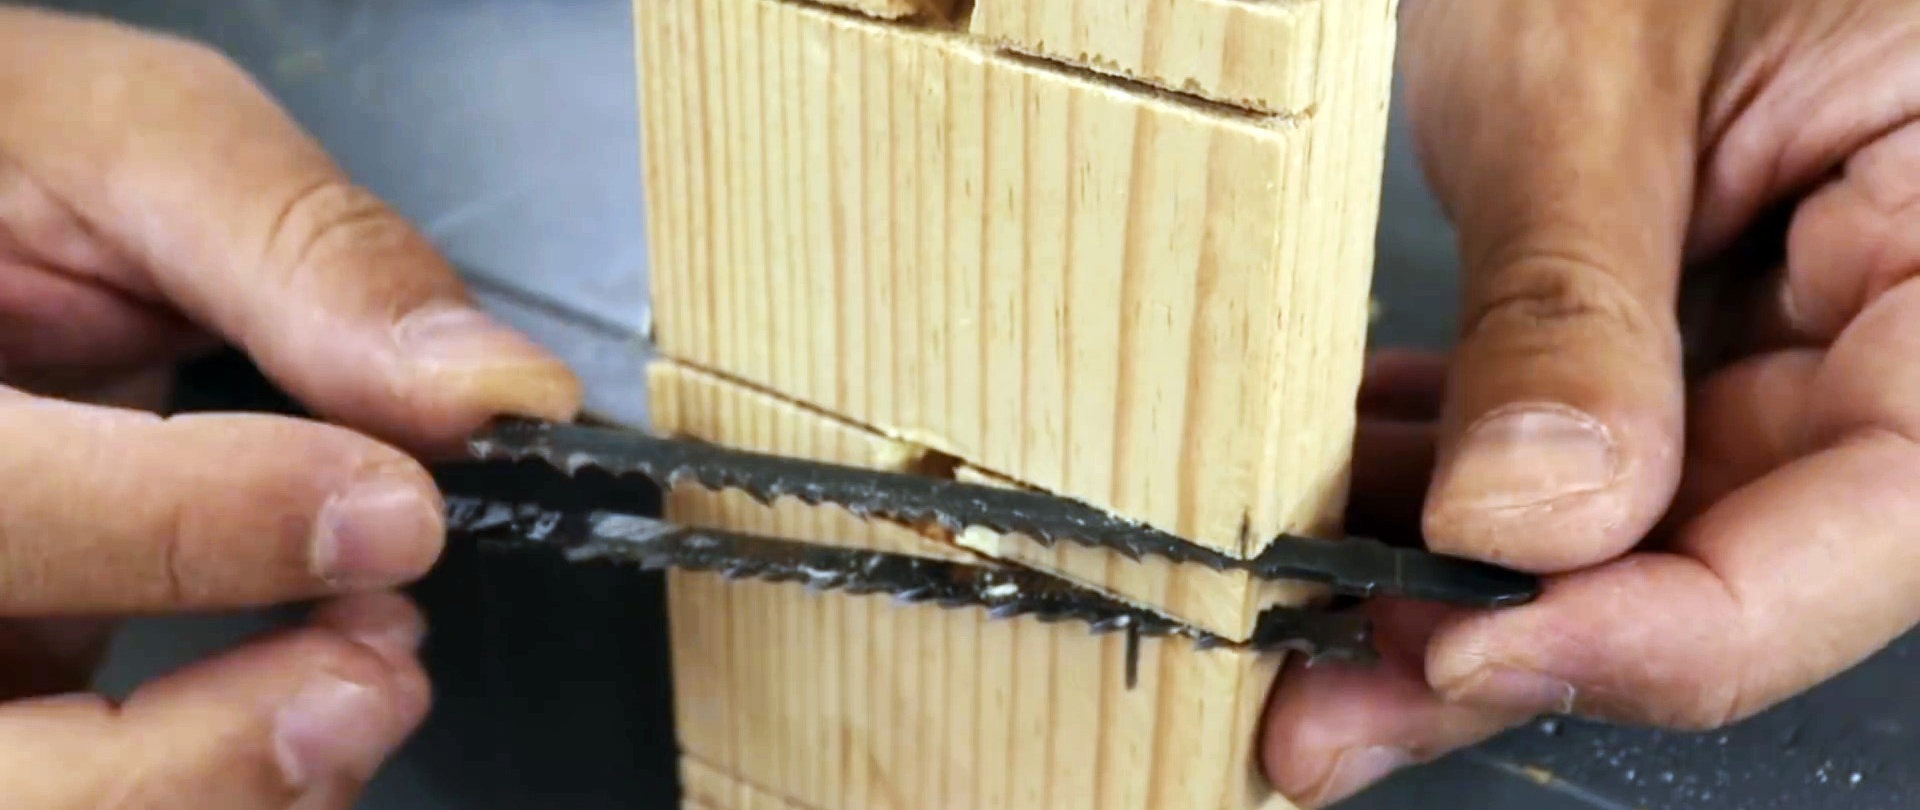
To make a dowel, or just a round wooden rod, you need to drill the board with a drill of the diameter you need for the workpiece. Notches are made along the edge of this hole, into which jigsaw blades are inserted with the teeth up.


By placing the board in a vice and passing slats clamped in a drill chuck through the hole, you can make them cylindrical. The resulting workpiece is then cut into dowels.