The consequences of freezing the foundation are manifested by an increase in the cost of heating the house, deterioration of the microclimate in the room, damage to joists, subfloors, etc. Despite the apparent volume and labor intensity of the work on insulating the foundation, any adult can cope with it. But for this you need to properly plan the process and make the necessary purchases.

Will need
Materials:- “APPS” type thermal insulation sheets;
- deep penetration primer such as “Polimin AC-7”;
- quick-drying polyurethane adhesive such as “Soudal Soudabond Easy”;
- mesh PVC corner;
- adhesive mixtures such as “Cerasit Thermo Universa” or “Master Super”;
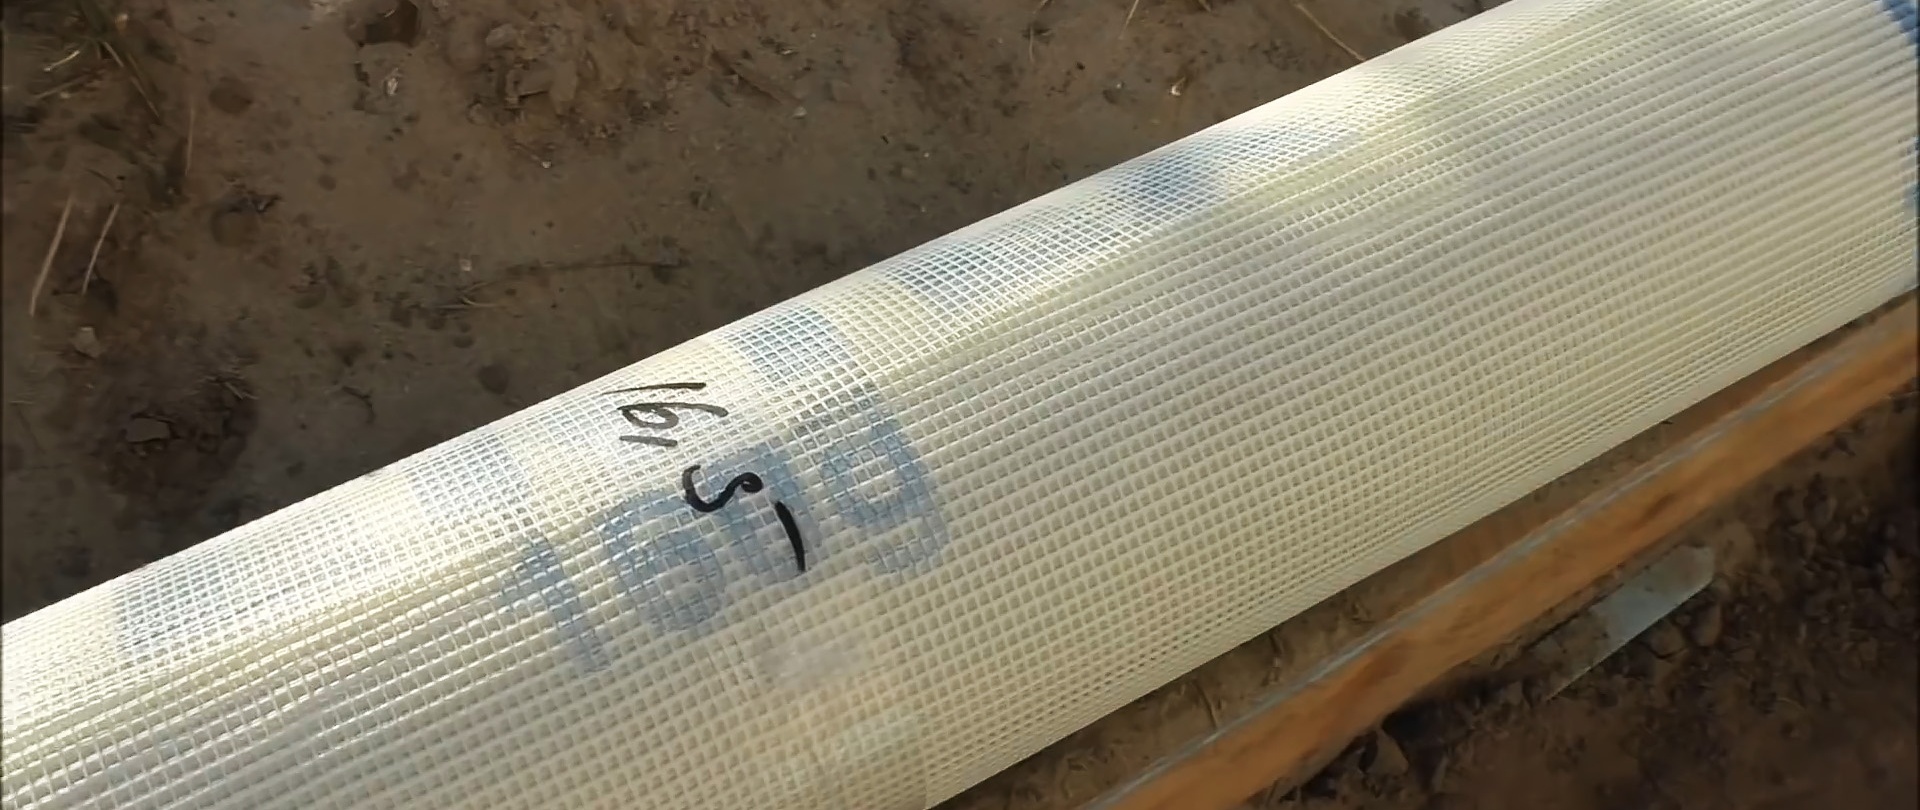
- reinforcing mesh for Vertex type plaster with a density of 160 g/sq.m.
The process of insulating the foundation with your own hands
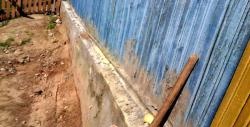
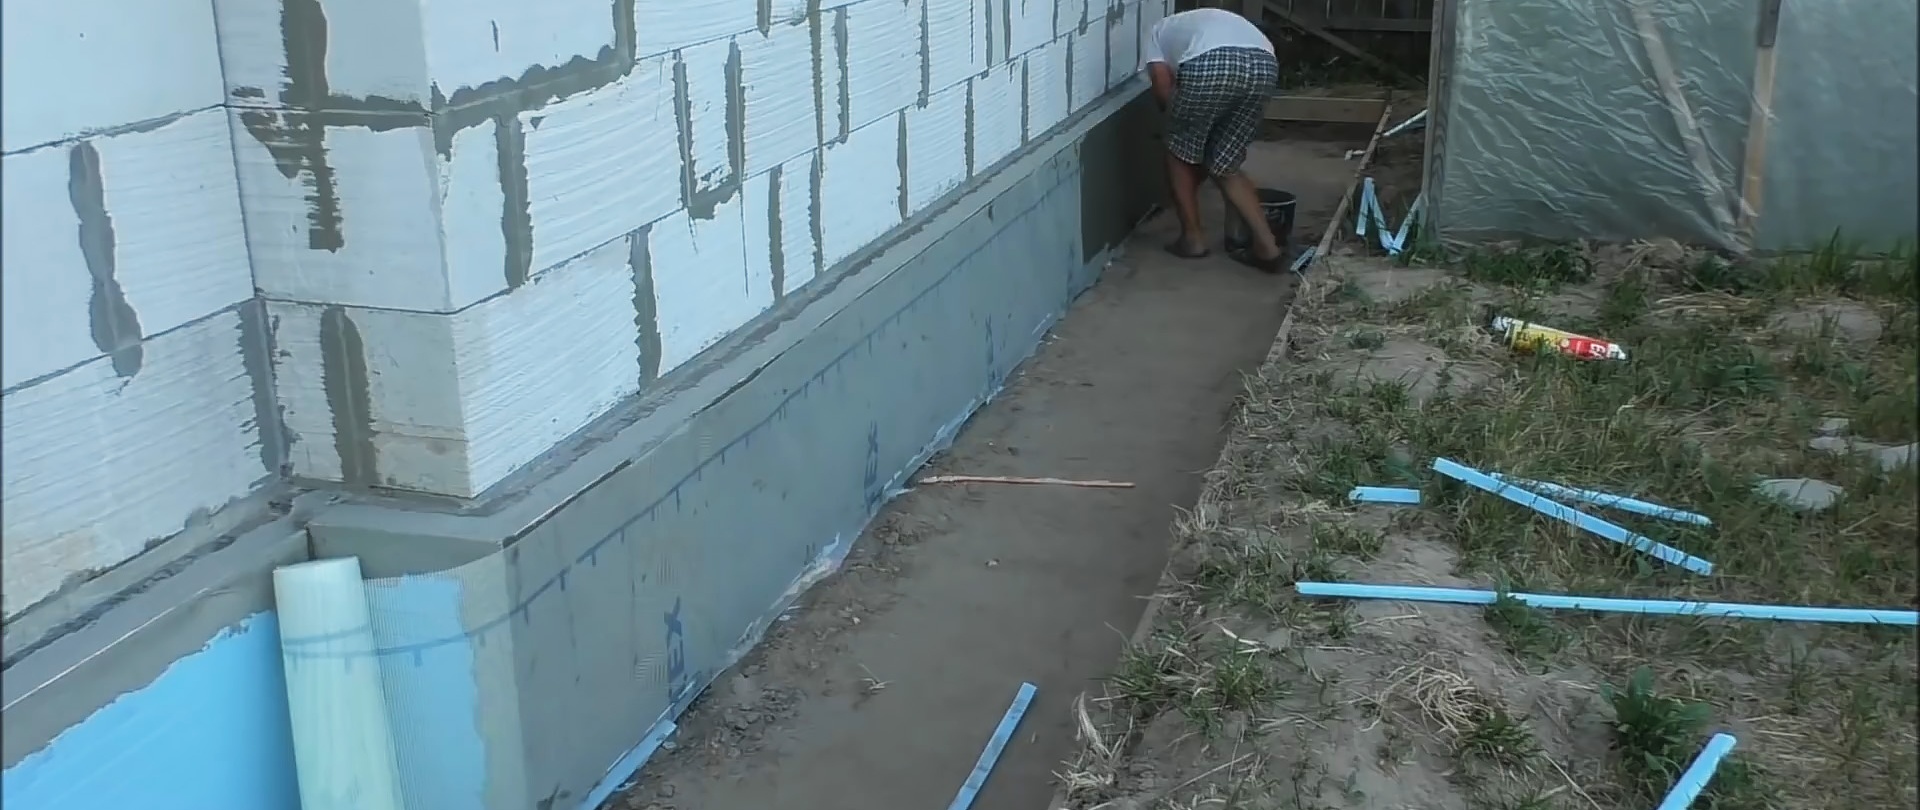
We insulate the base and underground part of the foundation. To do this, we dig a narrow trench close to the base of the house with a depth of up to its base.
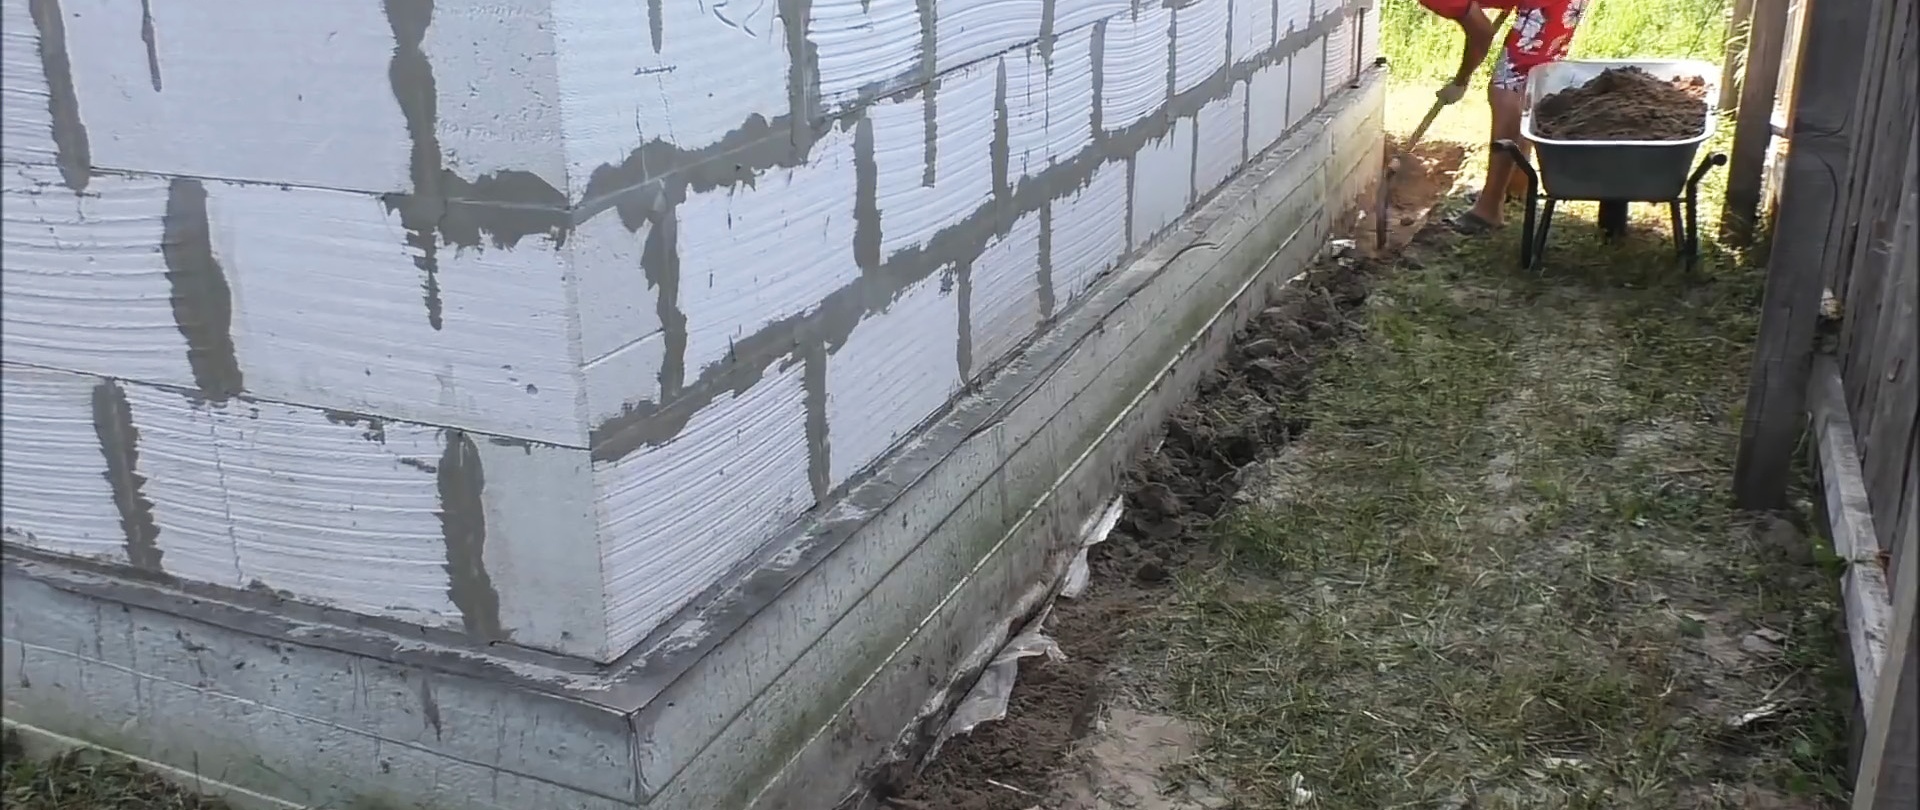
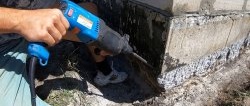
We remove the remaining soil from the foundation with a broom, and remove unevenness in the buried part, for example, with a hammer drill.

We prime the foundation with a deep penetration primer using a paint roller. Let the impregnation dry for the time indicated on its packaging.
For insulation we use thermal insulation sheets 55-60 cm wide and 5 cm thick. We fix them with quick-drying polyurethane glue from a gun.

Shake the can of glue, apply it to the surface of the sheet, leave it for 5 minutes, press it to the surface of the foundation, moistened with water, and hold it for a few seconds.
If, when approaching a corner, the sheet does not completely cover the length, then it is better to move it to the corner, and close the narrow gap between the two sheets with a piece of insulation corresponding in width.
When the distance to the corner is large, but less than the length of the sheet, then we cut it into two parts so as to cover the gap between the previous sheet and the corner, and glue the remaining part on the other side of the corner.

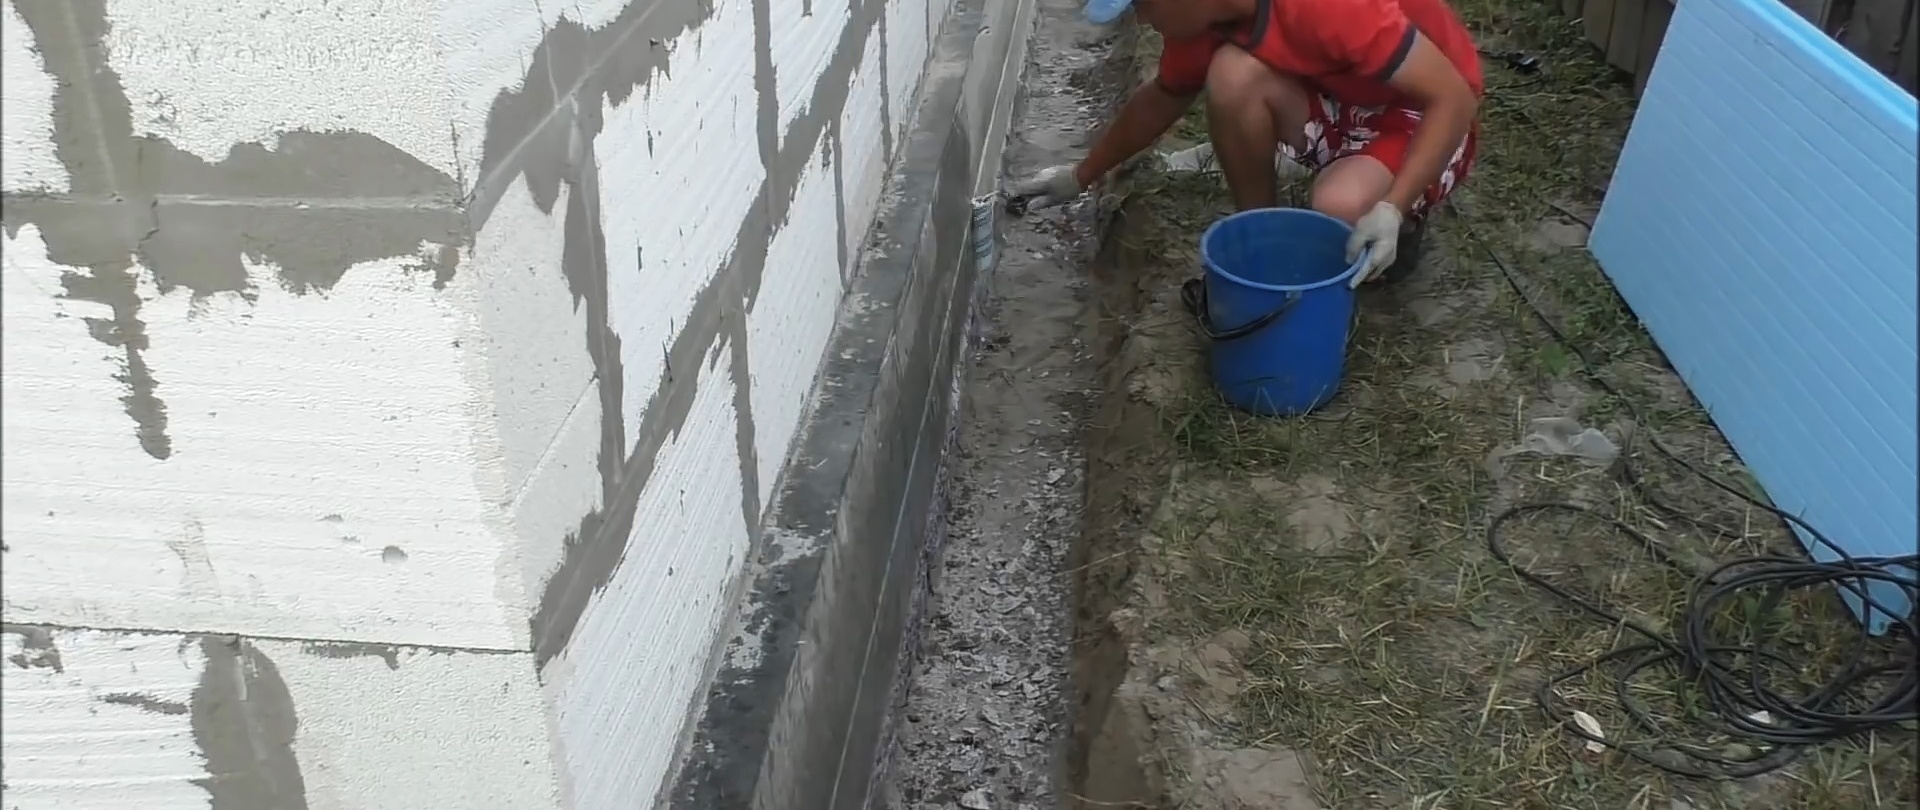
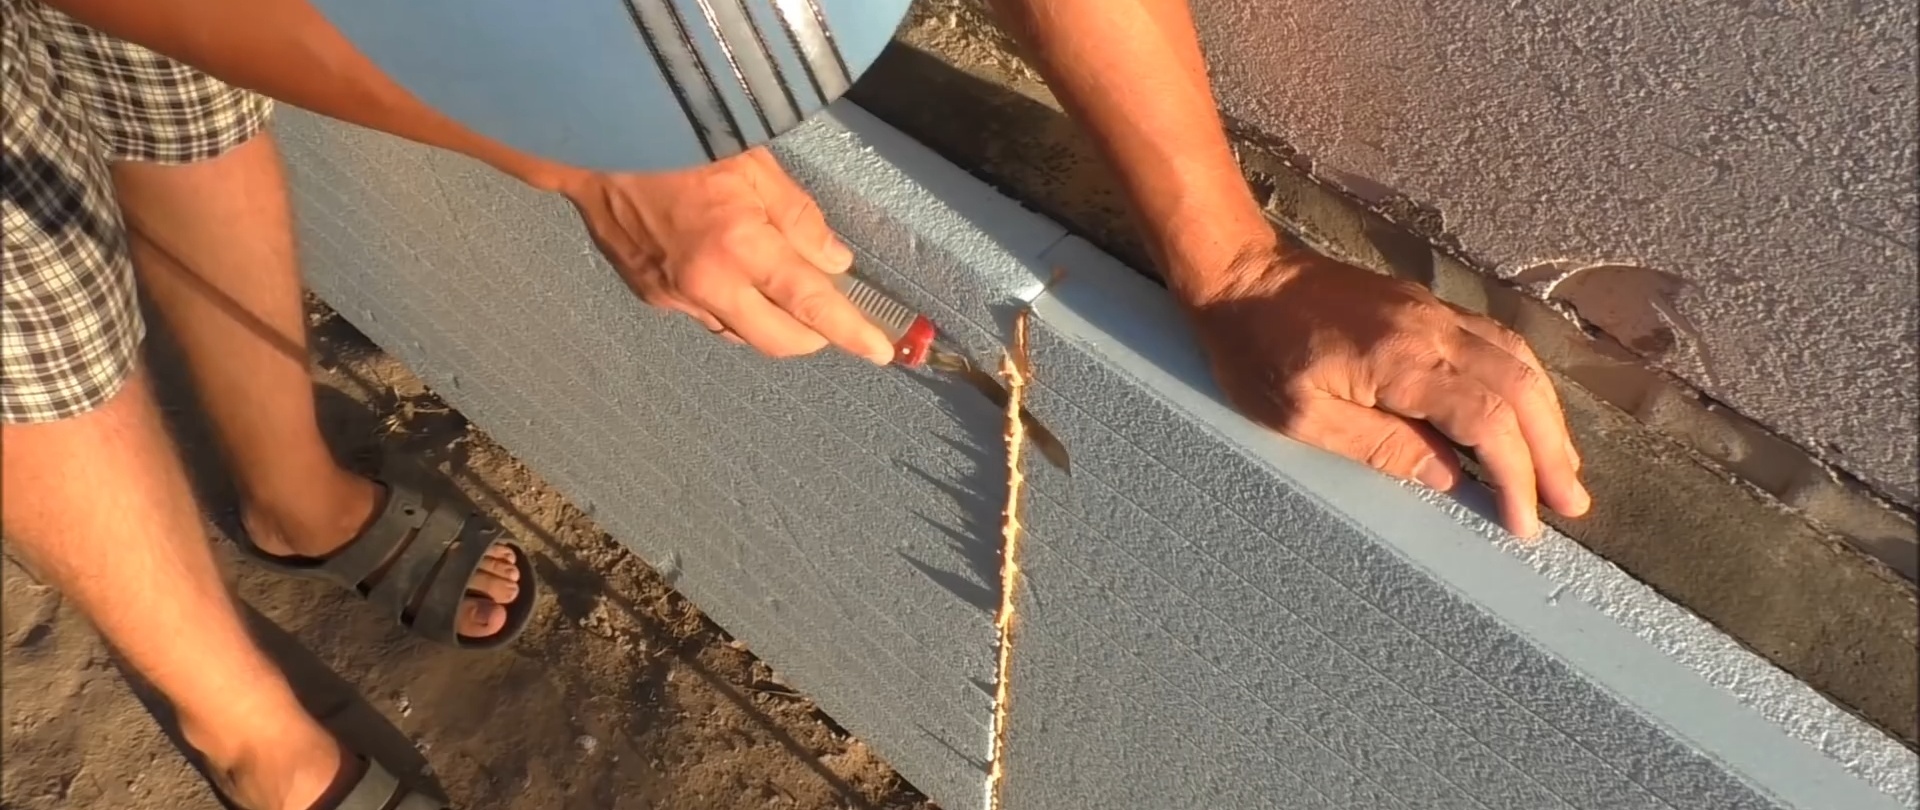
We fill the seams between the insulation with glue from a gun through a narrow plastic nozzle so that the foam gets into the narrow cracks. After drying, we trim the foam with a knife, as well as the differences between the sheets.
To ensure reliable fastening of the insulation to the foundation, it can be reinforced with dowels. However, the adhesive foam holds the sheets so firmly that no additional fastening is required.

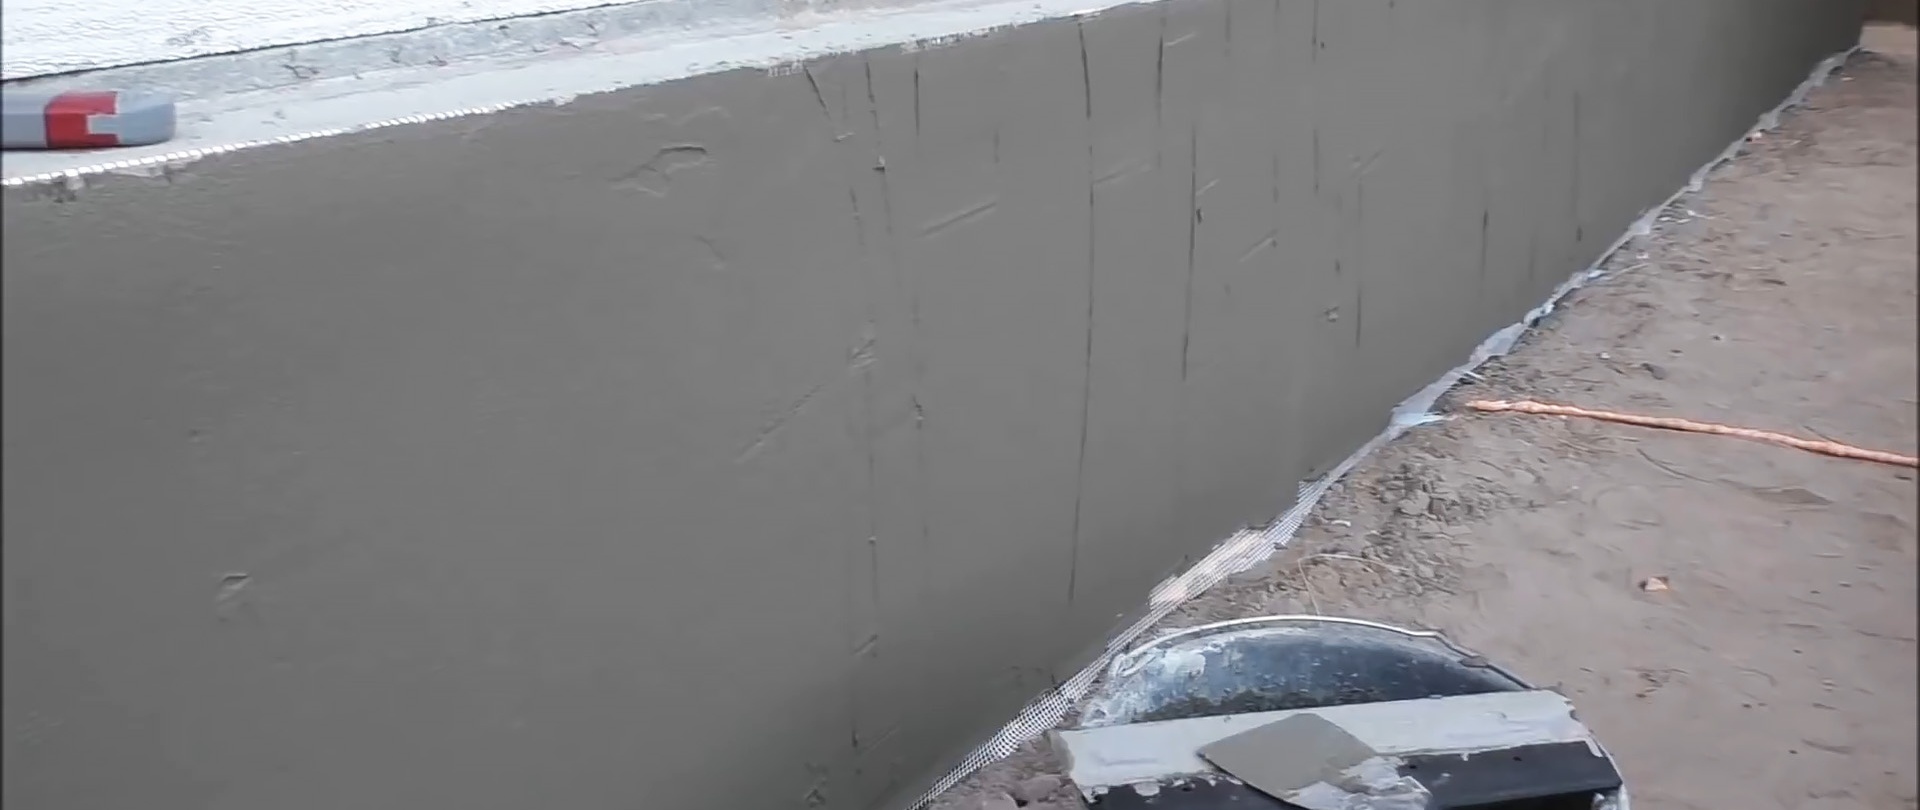
We use a PVC mesh corner to strengthen the upper part of the insulation sheets, all corners and transitions using adhesive mixtures. To do this, prepare the adhesive mass according to the instructions on the package, apply it to the place to be strengthened, lay the mesh and cover it with the same composition on top. We cut the corner with a knife.
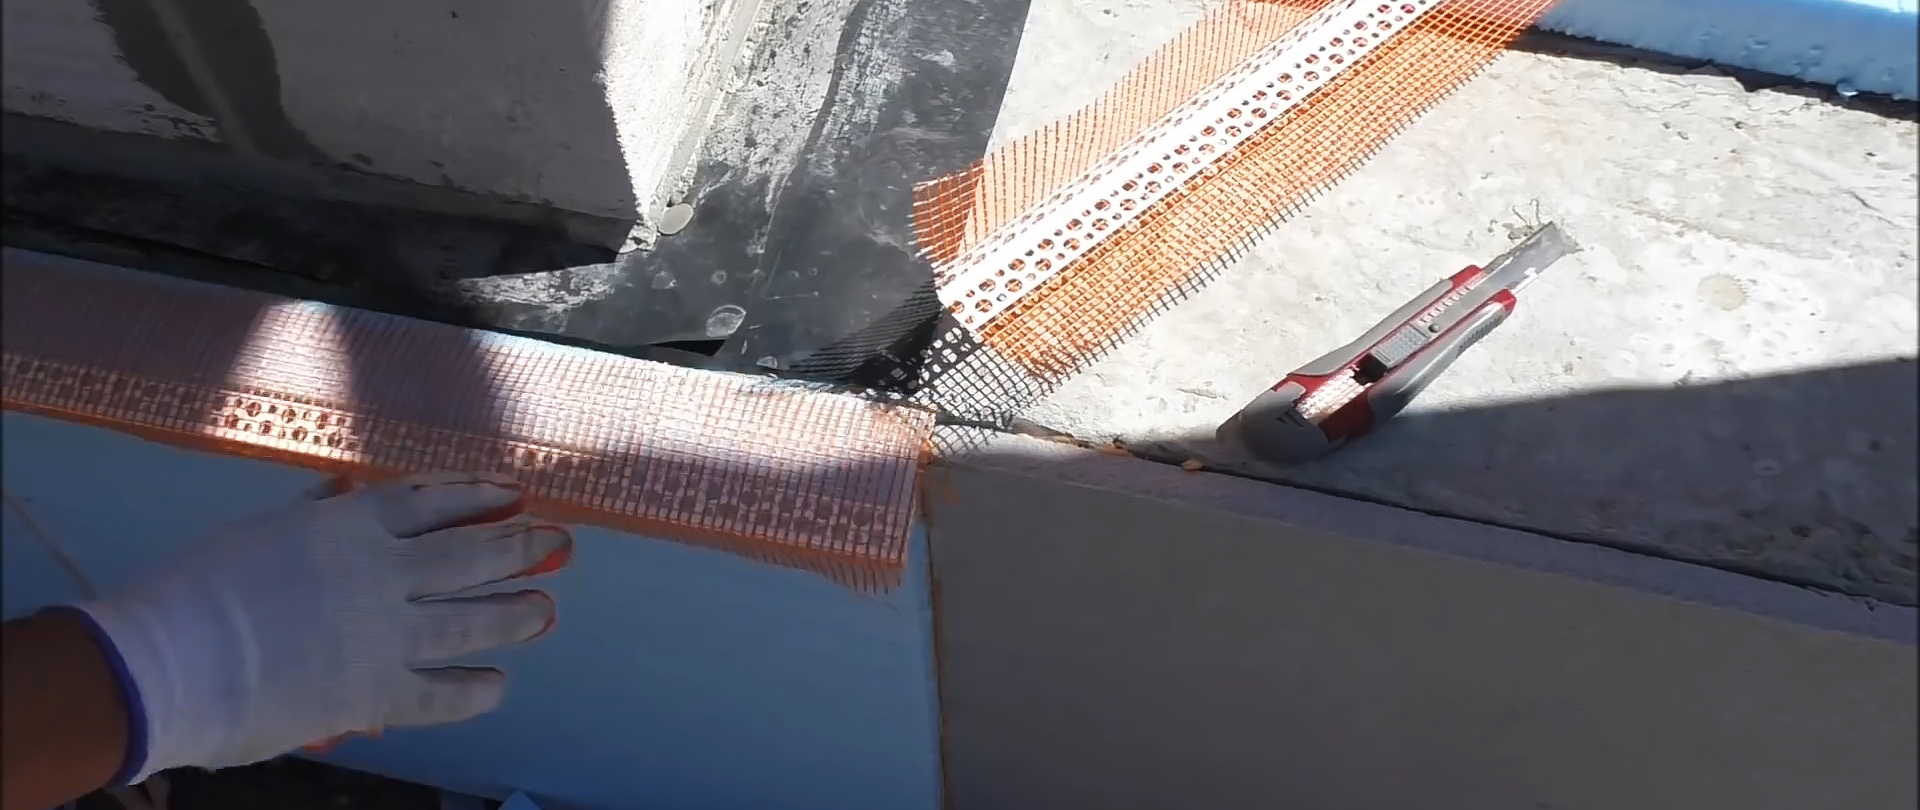

We also cover large differences between the heat-insulating sheets with a mesh, bent to the size of the difference so that its edges lie both on it and on the two sides that formed the difference.
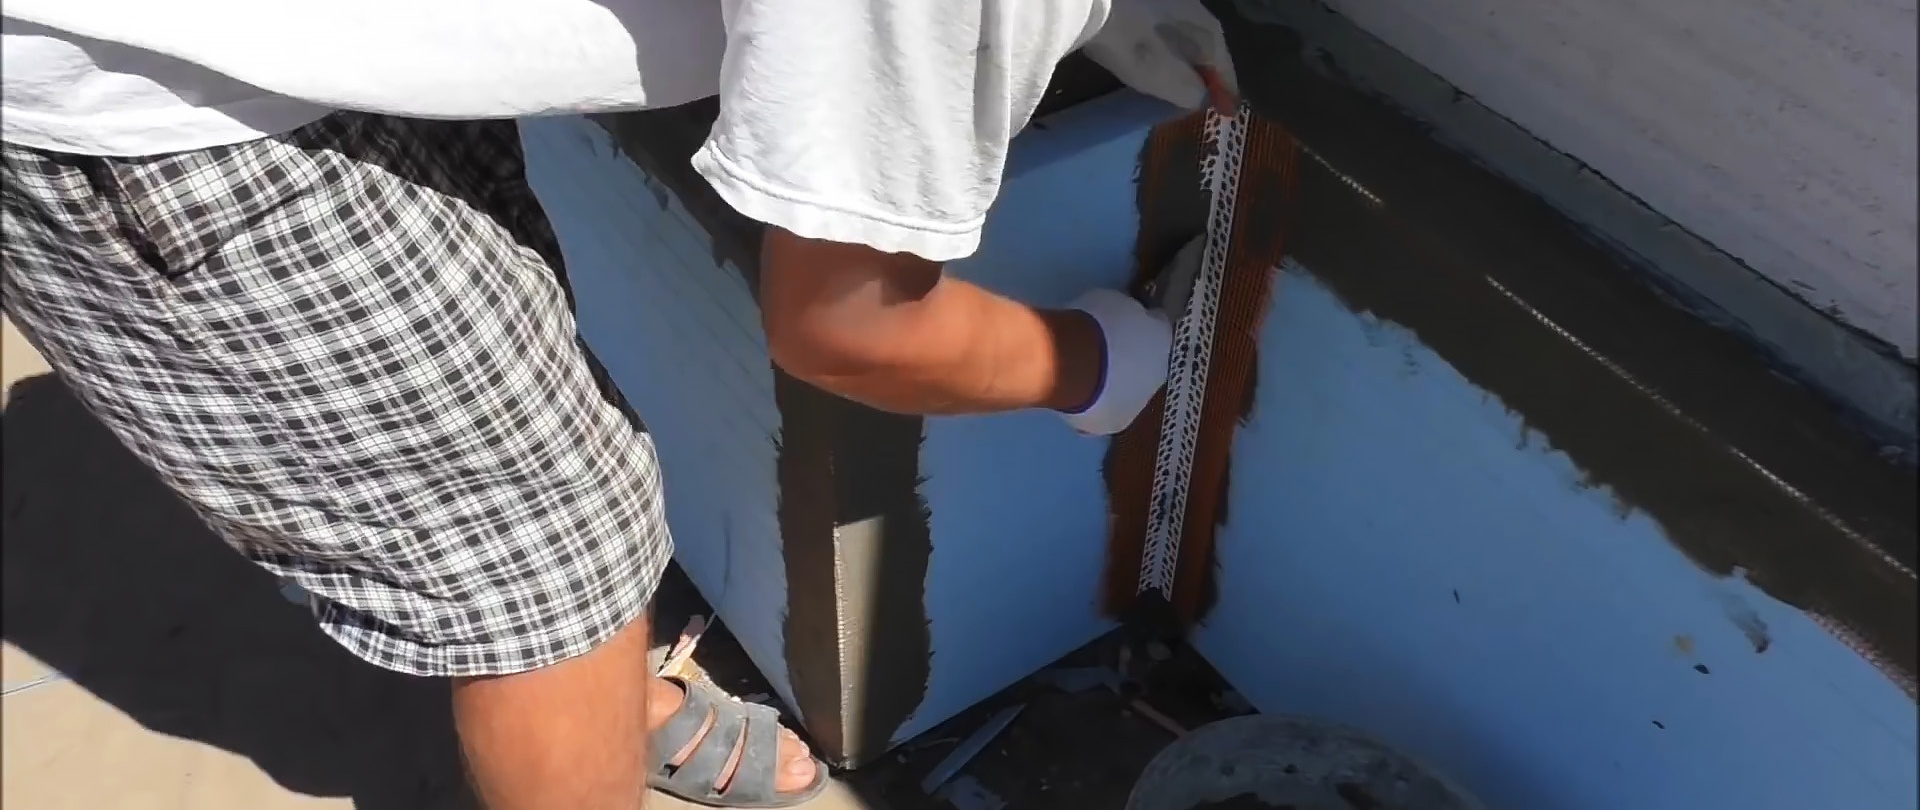
We reinforce the insulation with mesh under the plaster, cutting the roll in advance with a hacksaw into two halves.

We apply glue with a spatula 30 cm wide onto the insulation sheets, roll out half a roll of mesh on top and cover it with the same adhesive. Cut off the remaining part of the mesh with a knife.
After the glue has dried, use a grater to remove any unevenness. We fill the blind area, and plaster the base again, paint it or decorate it with decorative elements.
How to make a strong blind area yourself for many, many years - https://enn.washerhouse.com/6297-kak-samostojatelno-sdelat-krepkuju-otmostku.html