Many car enthusiasts are looking for an opportunity to protect their car’s battery from accidental short circuits when connecting various devices to it. A simple circuit based on a common optocoupler and an N-channel CMOS transistor IRFZ44N with a low pass resistance and high switching speed will help you do this. Since this electronic element was developed specifically for installation on low-voltage switching systems, when polarized at 12V, it enters a saturation mode. In it, the throughput resistance of the transistor tends to a minimum, and up to 70% of the energy is allocated to the load. This prevents the part from reaching extreme temperatures, and additional cooling is not required in this case.
Details
- Transistor IRFZ44N - http://alii.pub/5ct567
- Optocoupler PC817 - http://alii.pub/65k075
- Resistors: 100 kOhm; 1 kOhm - 3 pcs. - http://alii.pub/5h6ouv
- Light-emitting diode - http://alii.pub/5lag4f
- Tact buttons - http://alii.pub/5nnu8o
Making an electronic fuse
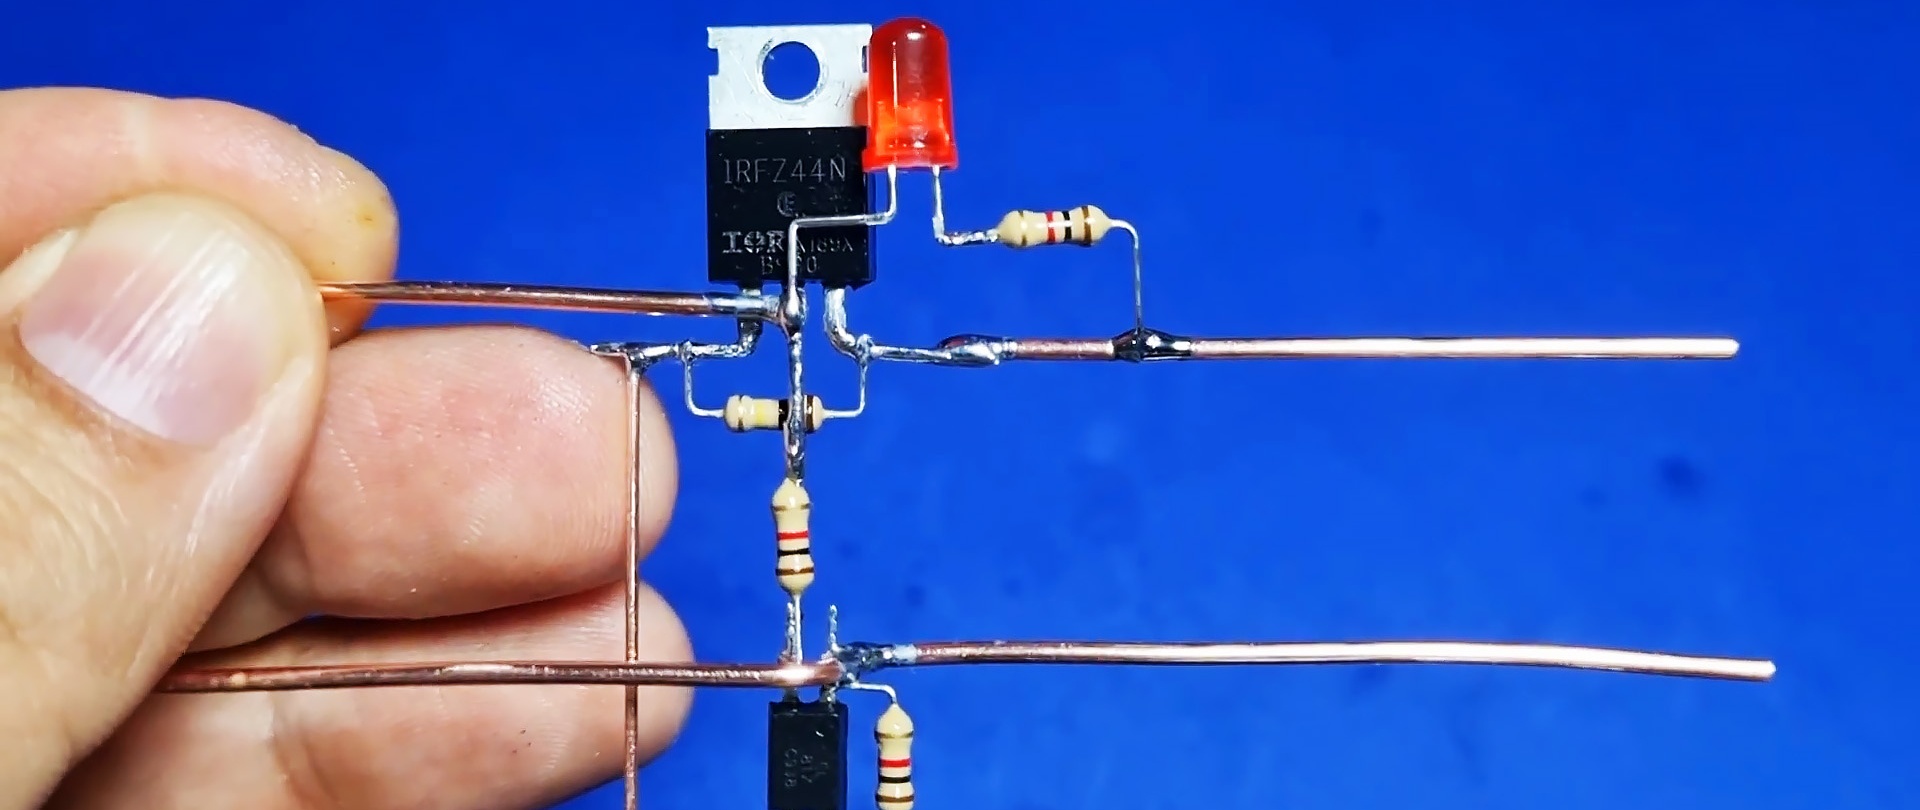
So, it is necessary to prepare the component for subsequent installation. To do this, it is convenient to bend its outer legs to the sides.Having placed the part on the front side, we have the drain in the middle, the source on the right and the gate on the left.
The first step to limit the current is to bypass the source and gate. This can be done with a regular resistor (100 kOhm is enough).

Next, the optocoupler is prepared. A single-channel optocoupler with high input/output voltage isolation and a closed optical channel is used. PC817 or its analogues will do. On the front side it has a depressed point corresponding to the anode of the built-in diode. Then, counterclockwise, come the cathode, emitter and collector.

To limit the current, the anode and collector are bridged through it with a 1 kOhm resistor. Another 1 kOhm resistor is soldered to the cathode of the optocoupler. The second leg of this resistance is connected to the drain of the “field”. Then the emitter of the optocoupler is connected to the gate of the transistor using a thick wire bus.

Three more thick busbars are soldered to the anode of the optocoupler, to the drain and to the source of the triode.
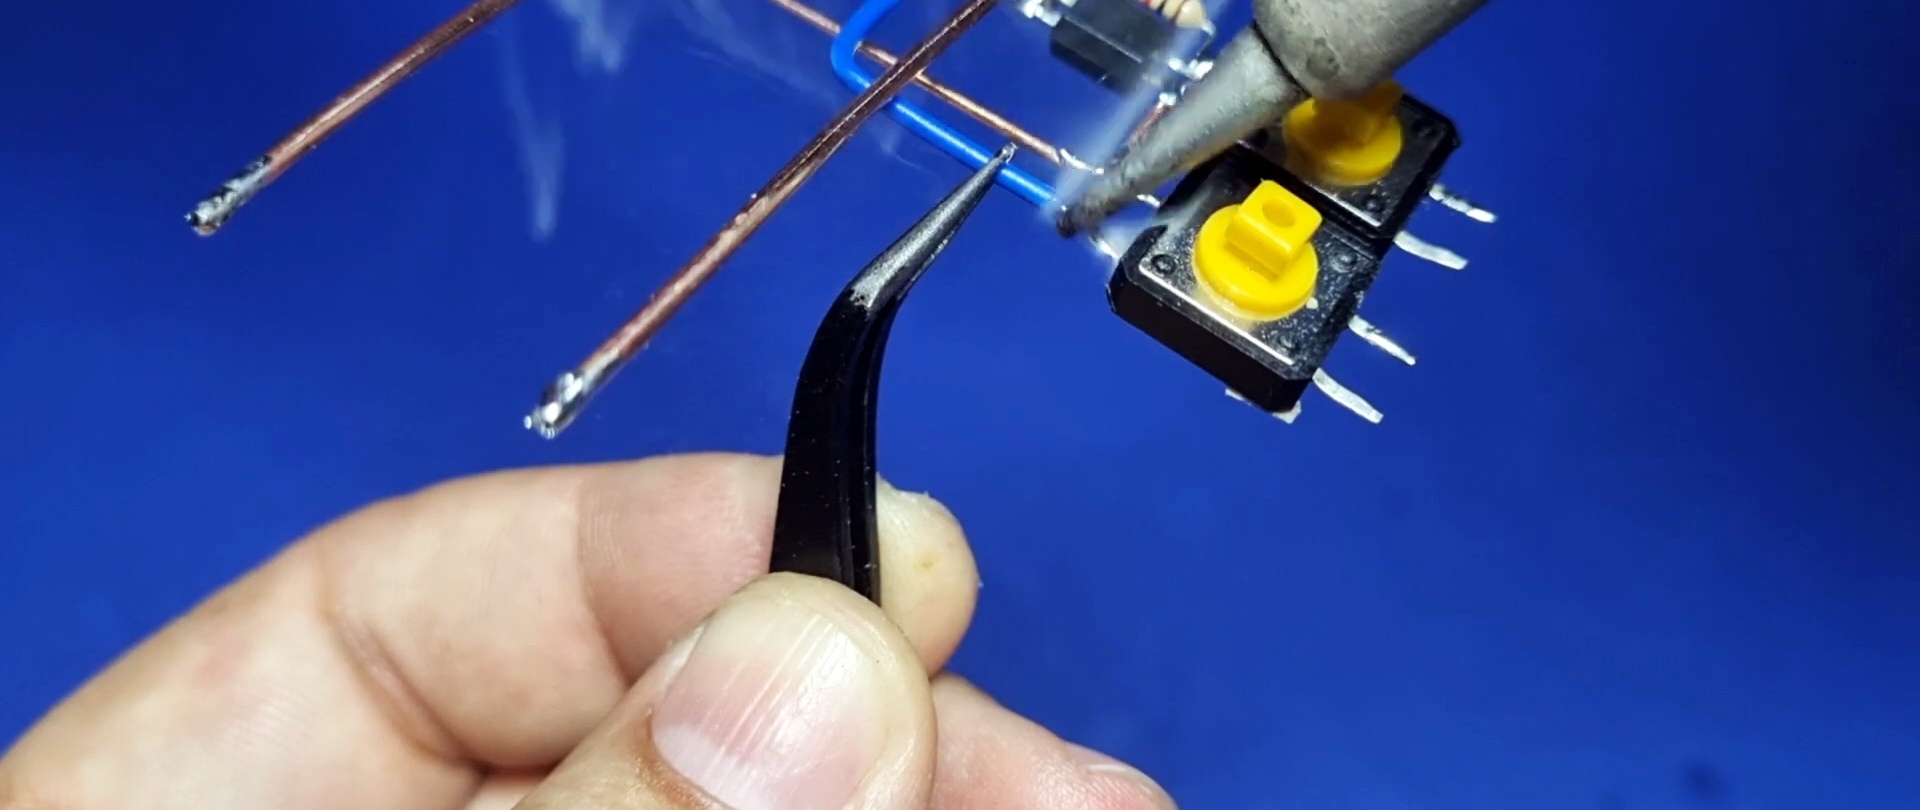
Next, a clock button is connected to the emitter and collector of the optocoupler. Such switches are usually three-pin (common, normally open and normally closed), and their legs are connected lengthwise through the body. The red anode is soldered to the drain of the “field worker”. LED (5mm, 2V, 20mA). Its cathode is connected through a resistance of 1 kOhm to the source of the IRFZ44N.
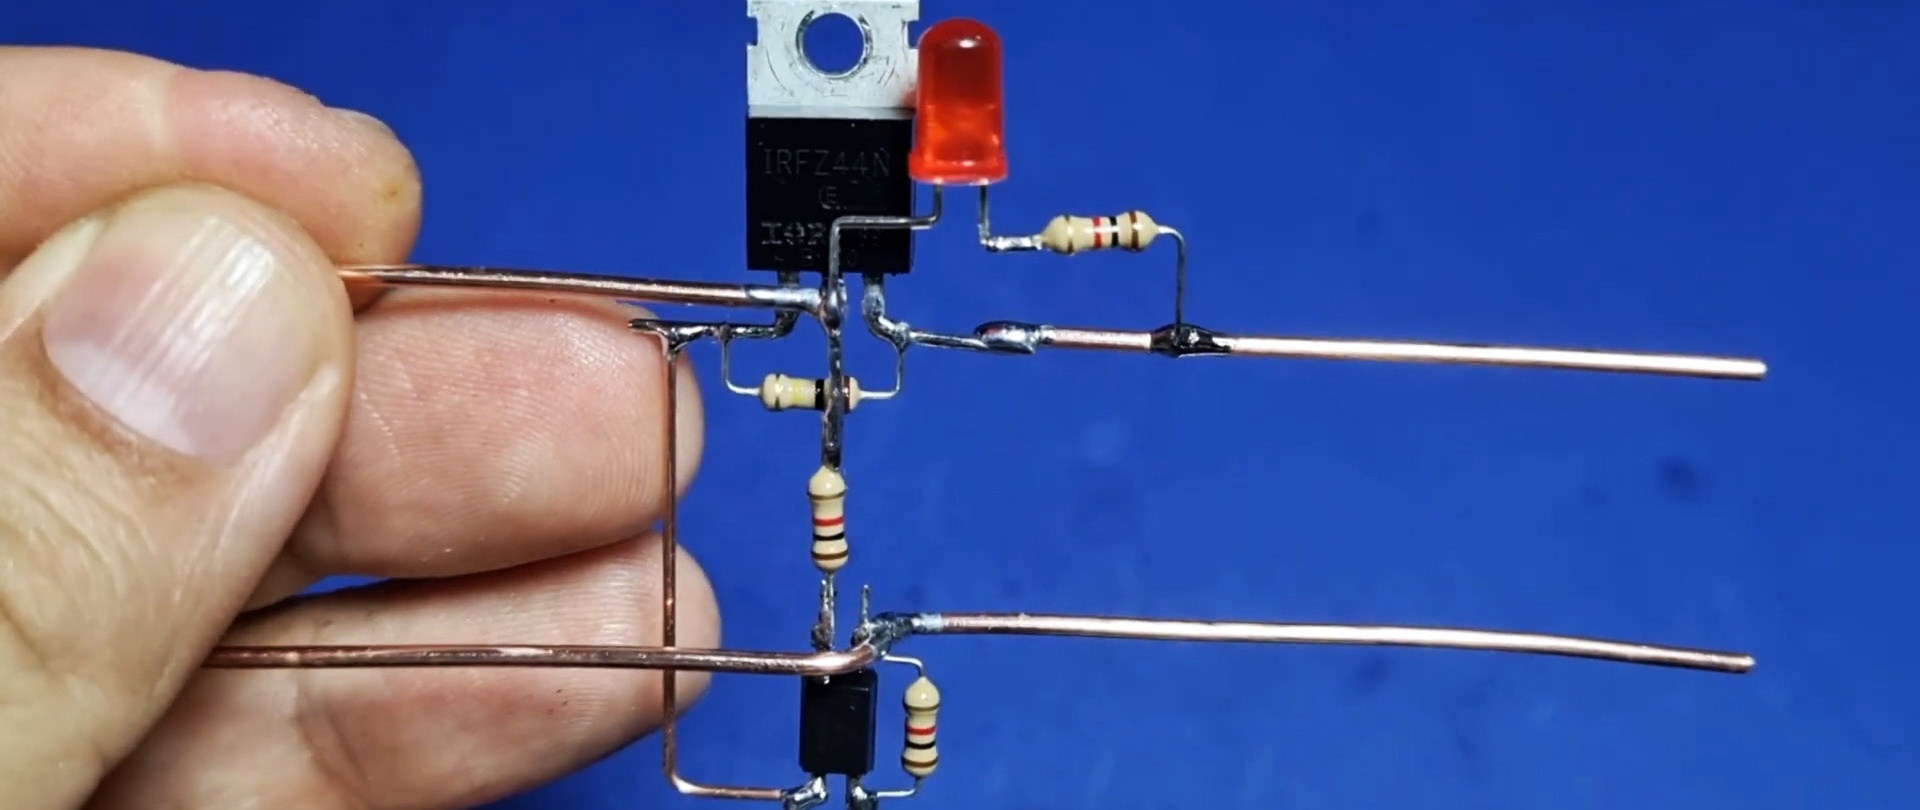
Another button can be installed between the source and gate of the transistor. When it is pressed, when the light bulb is on, a “short” also occurs in the circuit, causing the lamp to go out and light up Light-emitting diode.
The diagram of the resulting module looks like this:

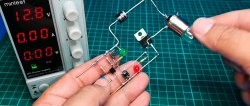
By measuring the current at the input of the circuit, you can see that the module turns off even if it drops slightly, that is, the battery used will be reliably protected.

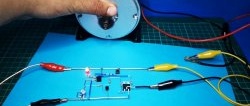
A 12V, 21W light bulb is switched on between the triode gate and the anode of the optocoupler. When 12V DC voltage is supplied between the anode of the optocoupler (“+”) and the source of the “field”, Light-emitting diode lights up.

When you press the button, the diode goes out, but the light comes on.
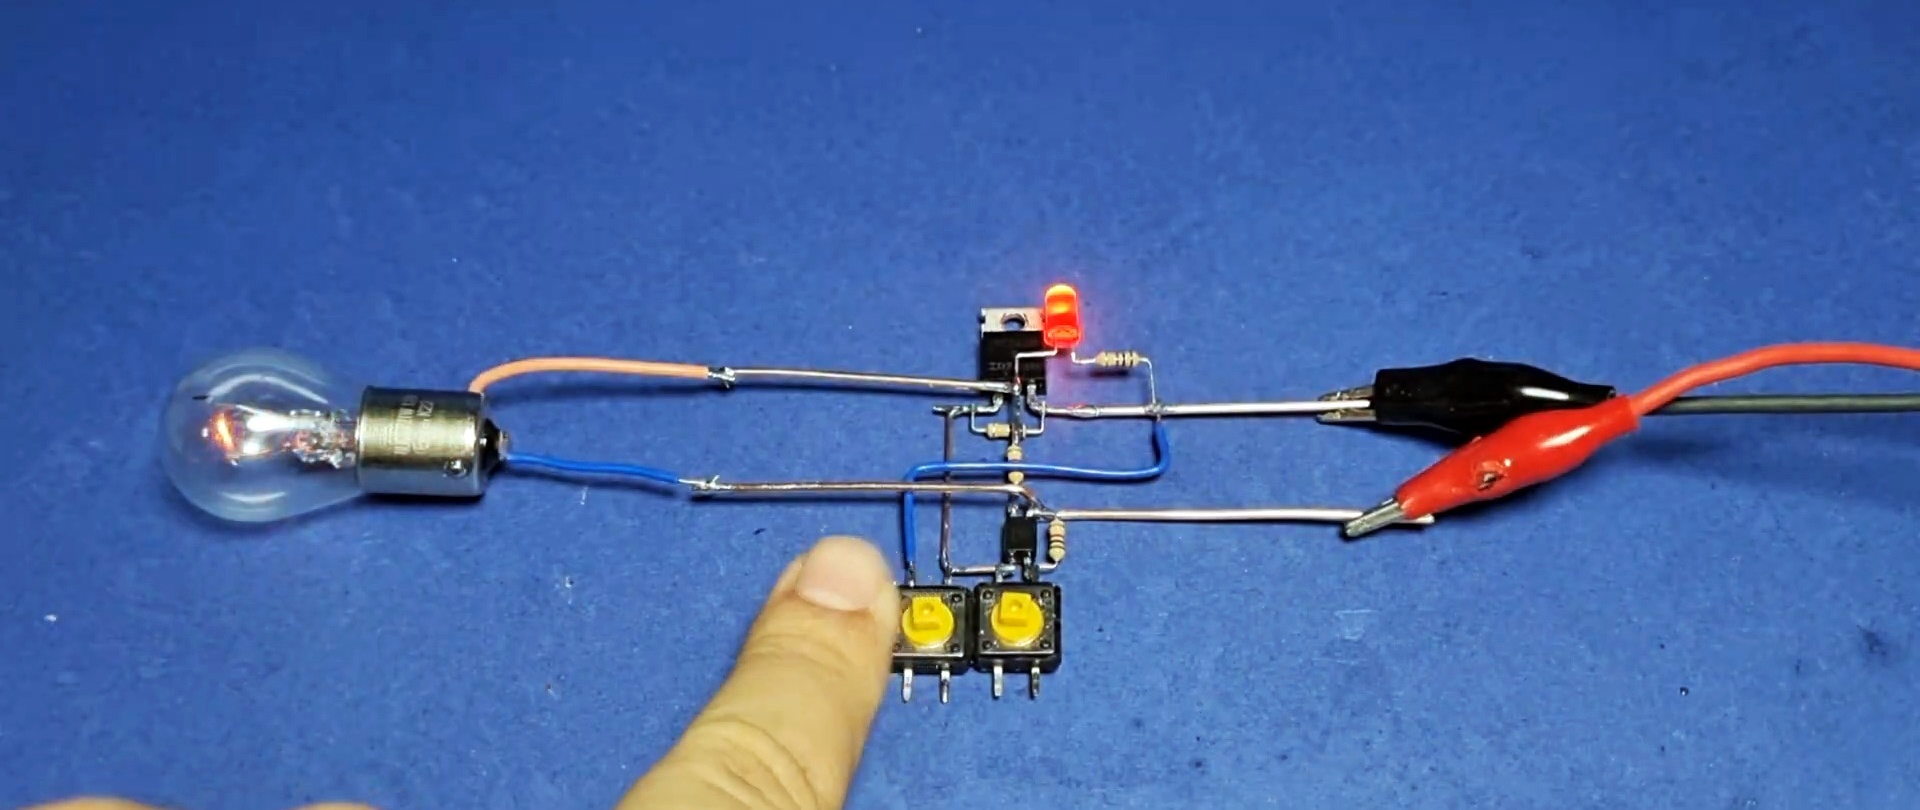
When the light bulb was short-circuited with a wire, it went out and turned red Light-emitting diode. This means that the closed circuit has opened. You can turn it on again by pressing the button again.