Engraving on metal is a rather interesting and entertaining thing. There are a lot of types of making a relief design on the blade of a knife, an ax, or on a watch or rings. Engraving can be laser, chemical, sandblasting or mechanical. Mechanical engraving, in my opinion, is the most interesting. In terms of the process itself. I believe that work should bring not only benefits, but also pleasure from the process and the result.
Why don’t I like chemical or laser engraving? In chemical engraving there is a high risk of ruining the item. The slightest deviation from the norm, in the preparation of the solution, or in the supply of voltage and current - and you can forget about a beautiful drawing. And that's the best case scenario. There is no soul in laser engraving. It is clear that it was made by a soulless machine, and not by human hands - all the elements of the design are located and calculated down to a hundredth of a millimeter! Sandblasting engraving is a rather dusty job. Literally! So my choice settled on mechanical engraving - it is not expensive, not problematic, and very interesting. This is what we will talk about today.
Will need
- Engraver.
- Fine grinding heads.
- Marker with a fine nib.
- A simple pencil.
- Cotton pad.
- Solvent.

Engraving on the blade
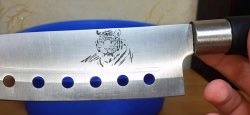
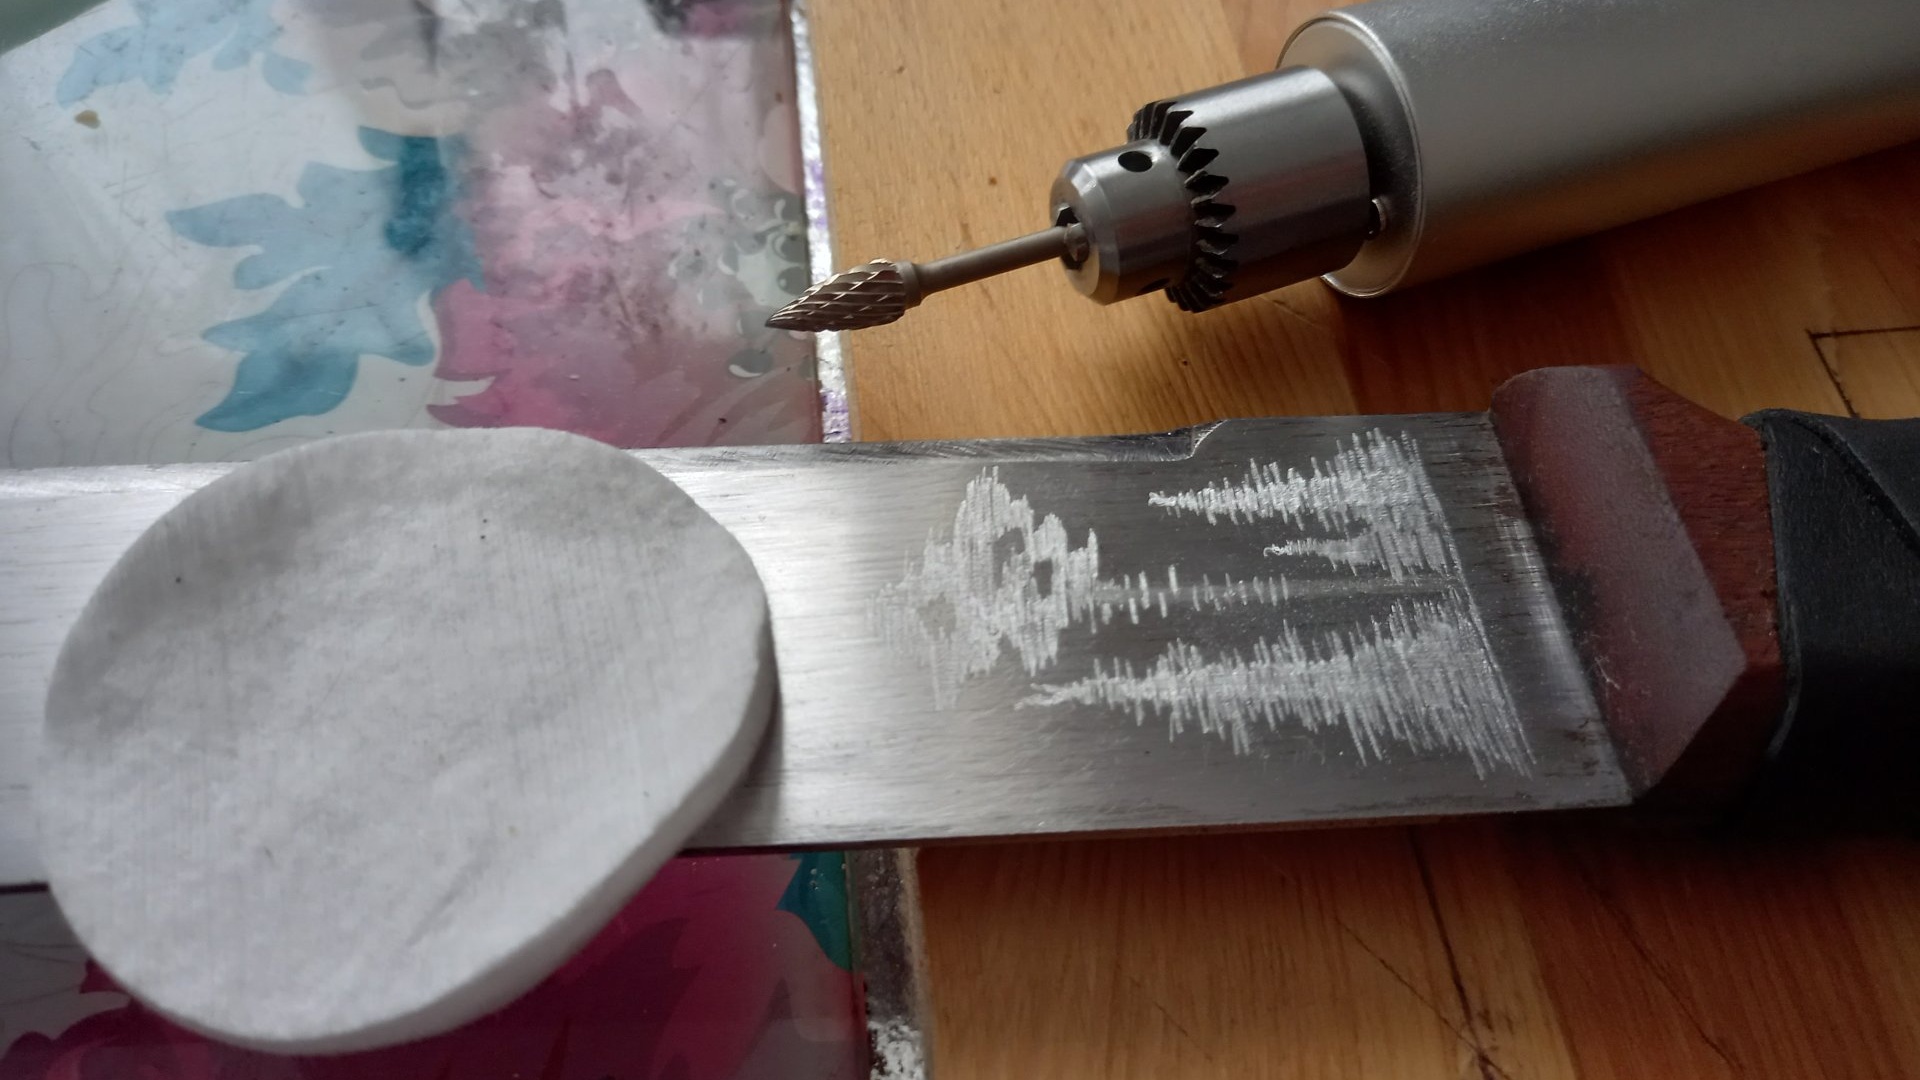
As with any business, there are nuances and subtleties here. On metal polished, for example, to a mirror blue, the engraving will be more contrasting and noticeable. The blade on my machete is polished satin, that is, it is matte, which is why engraving needs to be applied across the grind. This means that drawing and engraving should be applied not along micro scratches left by grinding, but with short transverse strokes. Any tool for engraving will not work either. You need either diamond or tungsten carbide gimlets. Diamond gimlets They are inexpensive, but they wear out quickly - the diamond dust applied to them and the crumbs fall off pretty quickly. Such consumable tools can be purchased if you do not use them often. It's definitely enough for at least one blade. Tungsten carbide heads, practically eternal - the dense and heavy alloy gnaws at steel and iron like warm butter! But they are expensive. So the choice is yours. The engraver is also not a problem; a 6-12 volt motor can be removed from any toy, buy one suitable for the shaft cam or Collet clamp - and here’s an engraver for you! So, first you need to prepare the blade for drawing. To do this, using a cotton pad and solvent, carefully wipe the entire area of the blade.

Next, using a simple pencil, apply the selected design to the desired location on the blade.

If, due to the nature of grinding, the graphite from a pencil lead does not lie on the surface, use a marker with a fine nib.

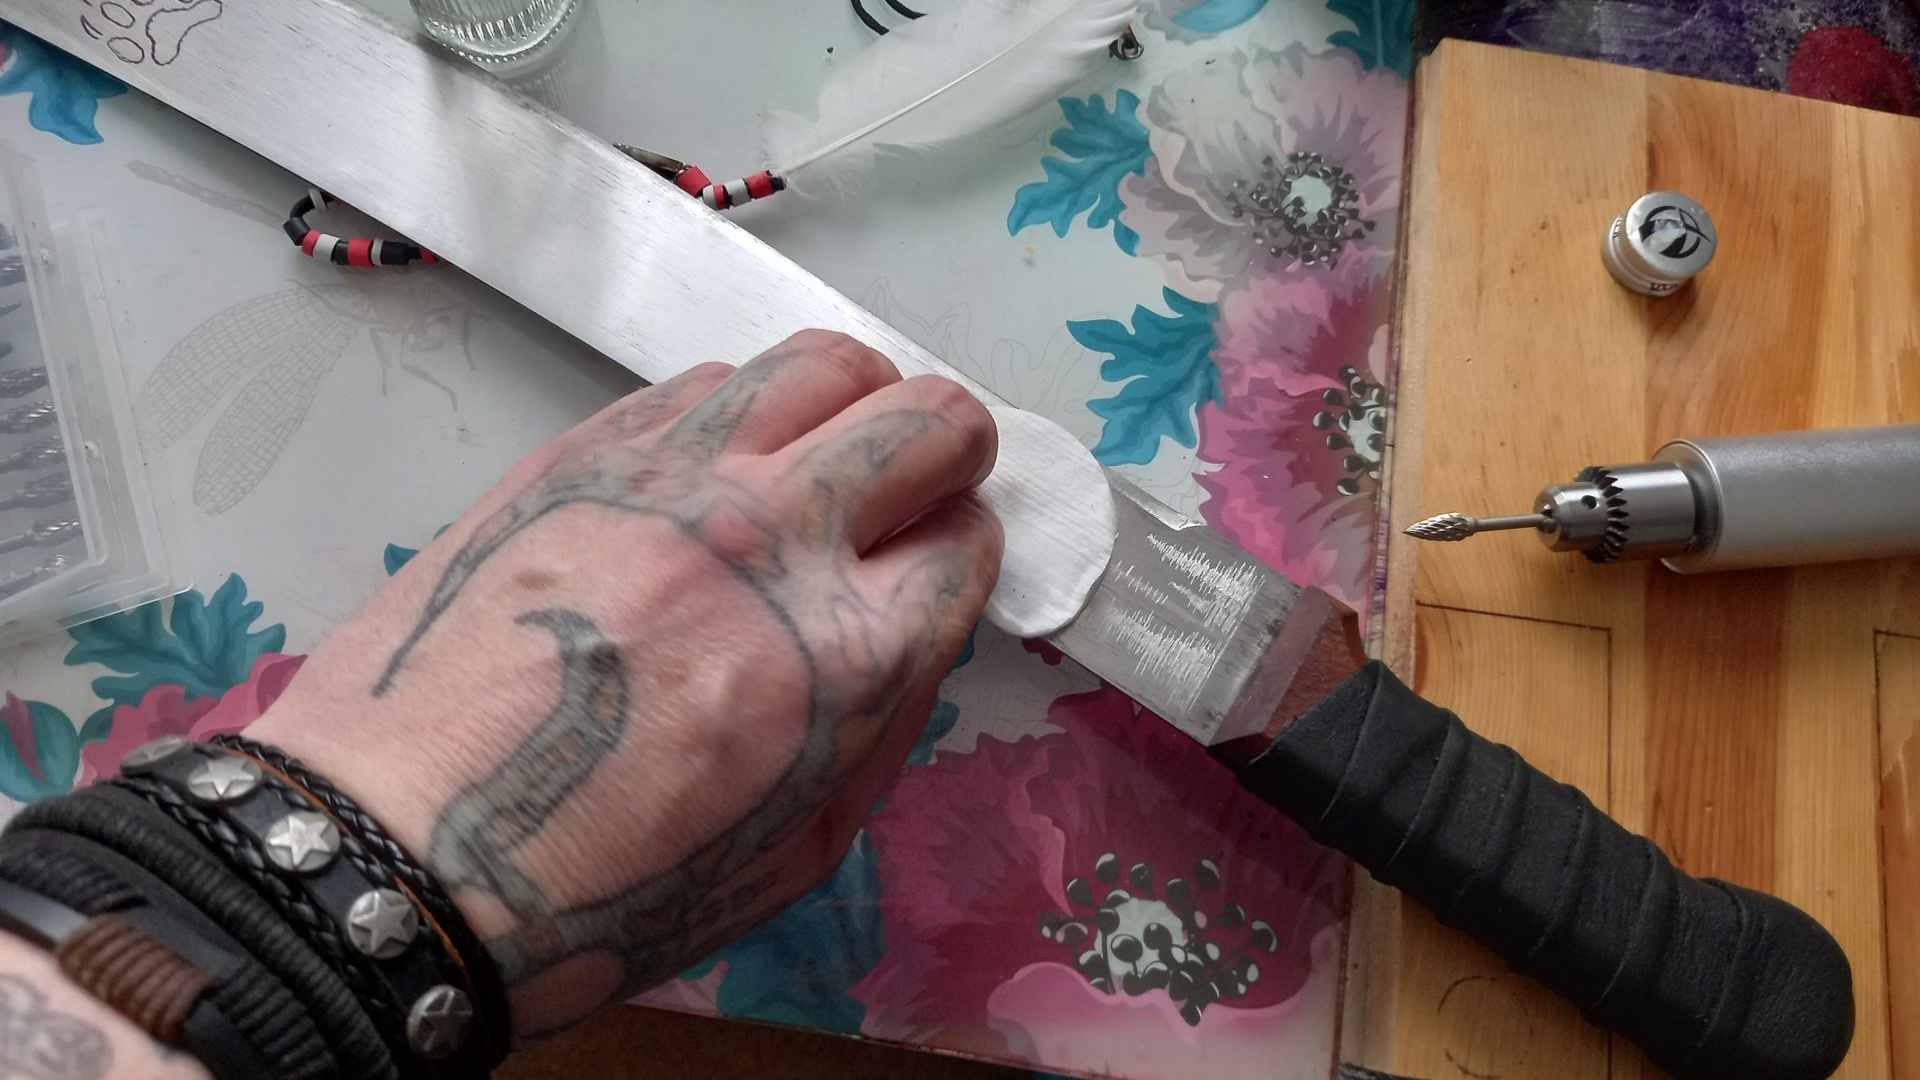
If you have problems with artistic skills, use a printer and transfer paper.The design is applied to the metal, and you can proceed directly to engraving. If the blade, as in my case, is polished to satin, we apply engraving with light transverse strokes. There is no need to put pressure on the machine and try to make the drawing deeper and more prominent; this (if necessary) should be done after drawing the contours and main features.

After applying the engraving, remove the remaining lead with a cotton pad.
And this is what we end up with:


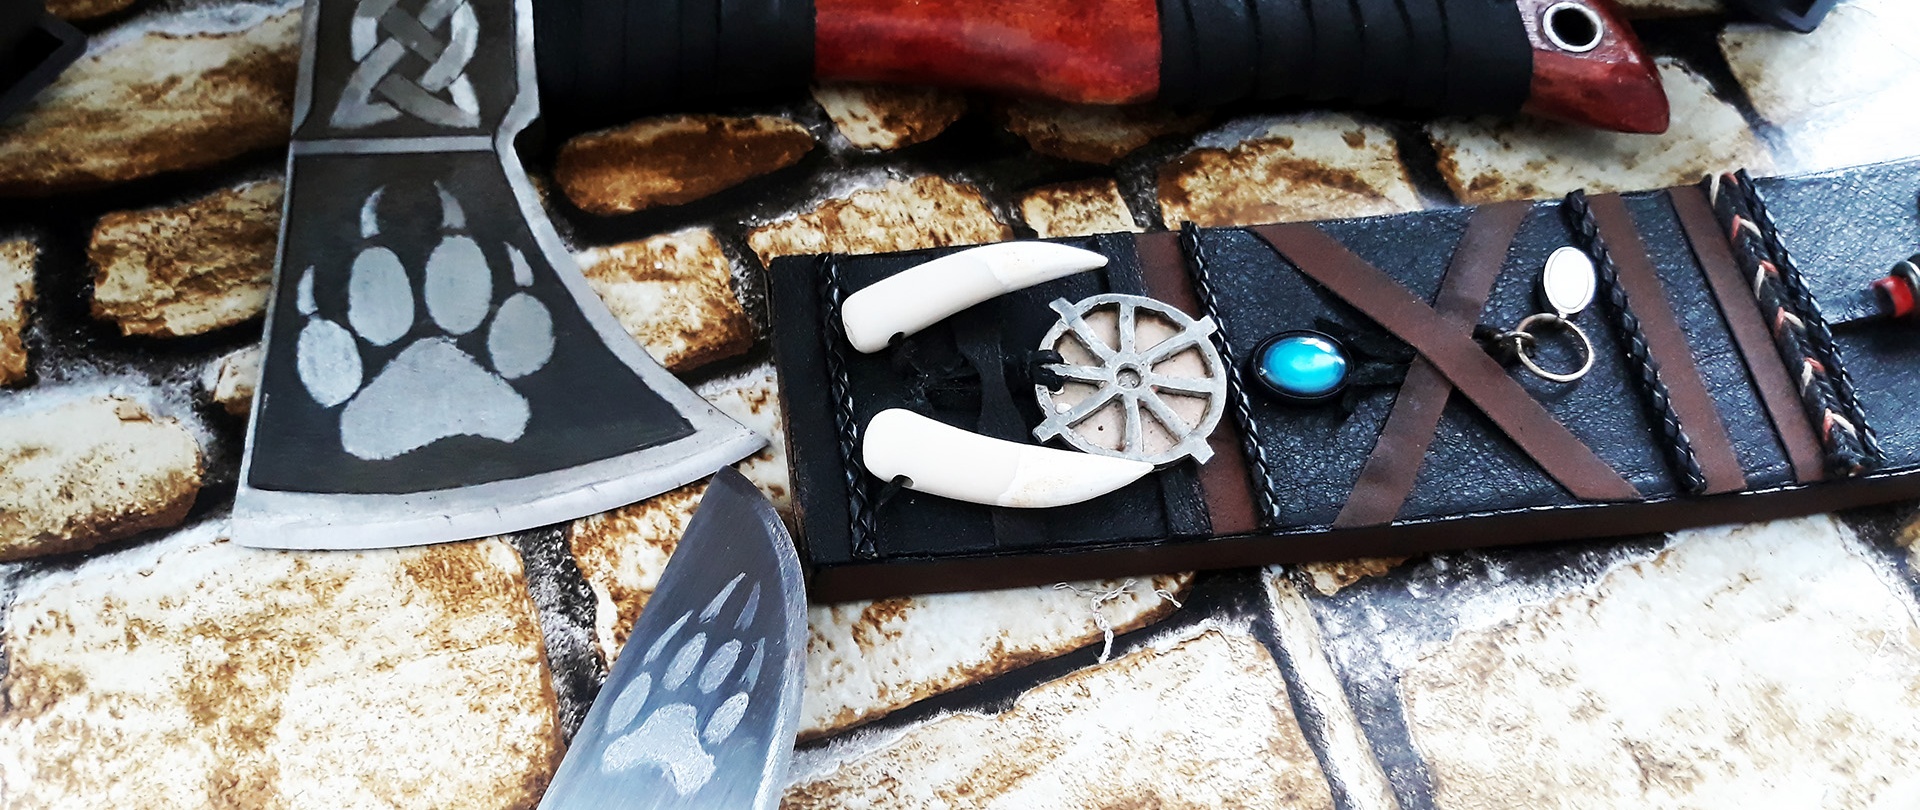
If you need a more contrasting and voluminous design, you can burnish the metal with citric acid before engraving, as on my axe.

Burnishing with citric acid will not only add additional contrast to the engraving, but will also protect the metal from corrosion. Burnishing metal with citric acid is very simple: dissolve a large package of granular acid in half a liter of water, heat it on the stove, and lower the blade into it for half an hour. Of course, it won’t become black as a pistol, but a dark gray tint is guaranteed. It all depends on the metal - the more carbon the steel, the darker the bluing will be. Stainless steels will not bluish with citric acid at all. From the word “absolutely”! Citric acid is too weak for such a purpose; stronger alkalis and acids will be needed. And after this procedure, you can apply engraving.

The duration of the work depends, of course, on the area and complexity of your drawing. After completing the work, you need to treat the blade with a solvent, wipe it dry, apply (if it is an ax or machete) a thin layer of machine oil, and put the blade in a sheath or case. Also, it wouldn’t hurt to drop two or three drops into the sheath.If there is high humidity in the room where such an instrument will be stored, for example in a barn, or in a cold closet, then it is better to use wax or paraffin instead of oil. Rub the metal with wax, then heat it slightly with a blowtorch or on a gas stove so that the wax melts and spreads over all the chips, grooves and crevices. If you are not lazy and take care of the instrument in this way after each use, it will serve faithfully for many, many years.