Making an aquarium is a matter that requires patience, precision and, to some extent, dexterity. It doesn't matter what size or thickness of glass you have to cut. Although, in fairness, it must be said that cutting thick glass is much easier. It's more obedient, or something. It pricks strictly according to the scratch of the glass cutter. At first I tried to cut thin, one and a half millimeter glass for an aquarium. But I'm not friendly with a glass cutter.
And with glass, in general. Thin glass (as kind people later told me) is best cut with a diamond glass cutter, which I never had. I tried to cut the required blanks using an engraver and a diamond blade. Things seem to be going well, sawing normally. But after the first piece was cut off, it turned out that this was not a very good idea - glass dust is not the most pleasant thing to inhale. Tears and other liquids flowed in a stream! In general, having spoiled all the thin glass, I took five-millimeter glass from an old disassembled sideboard. And things moved forward.
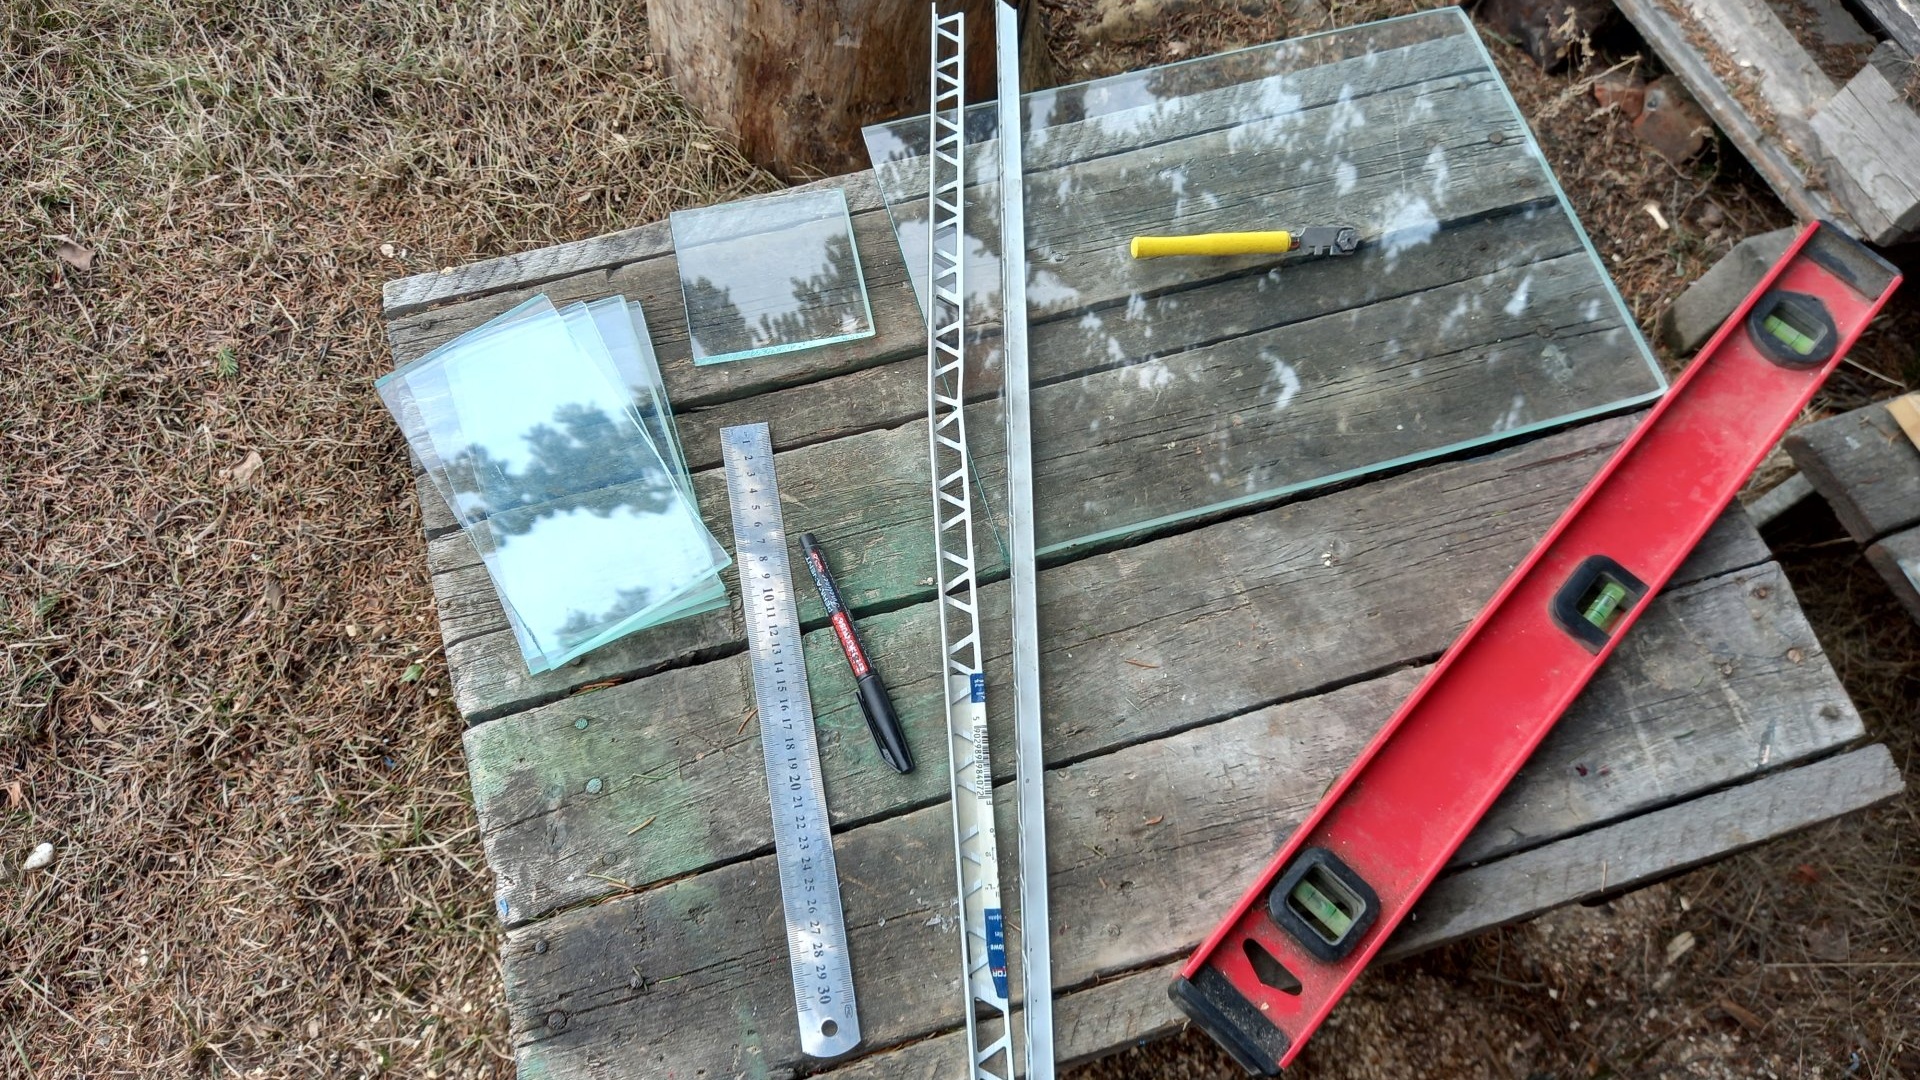
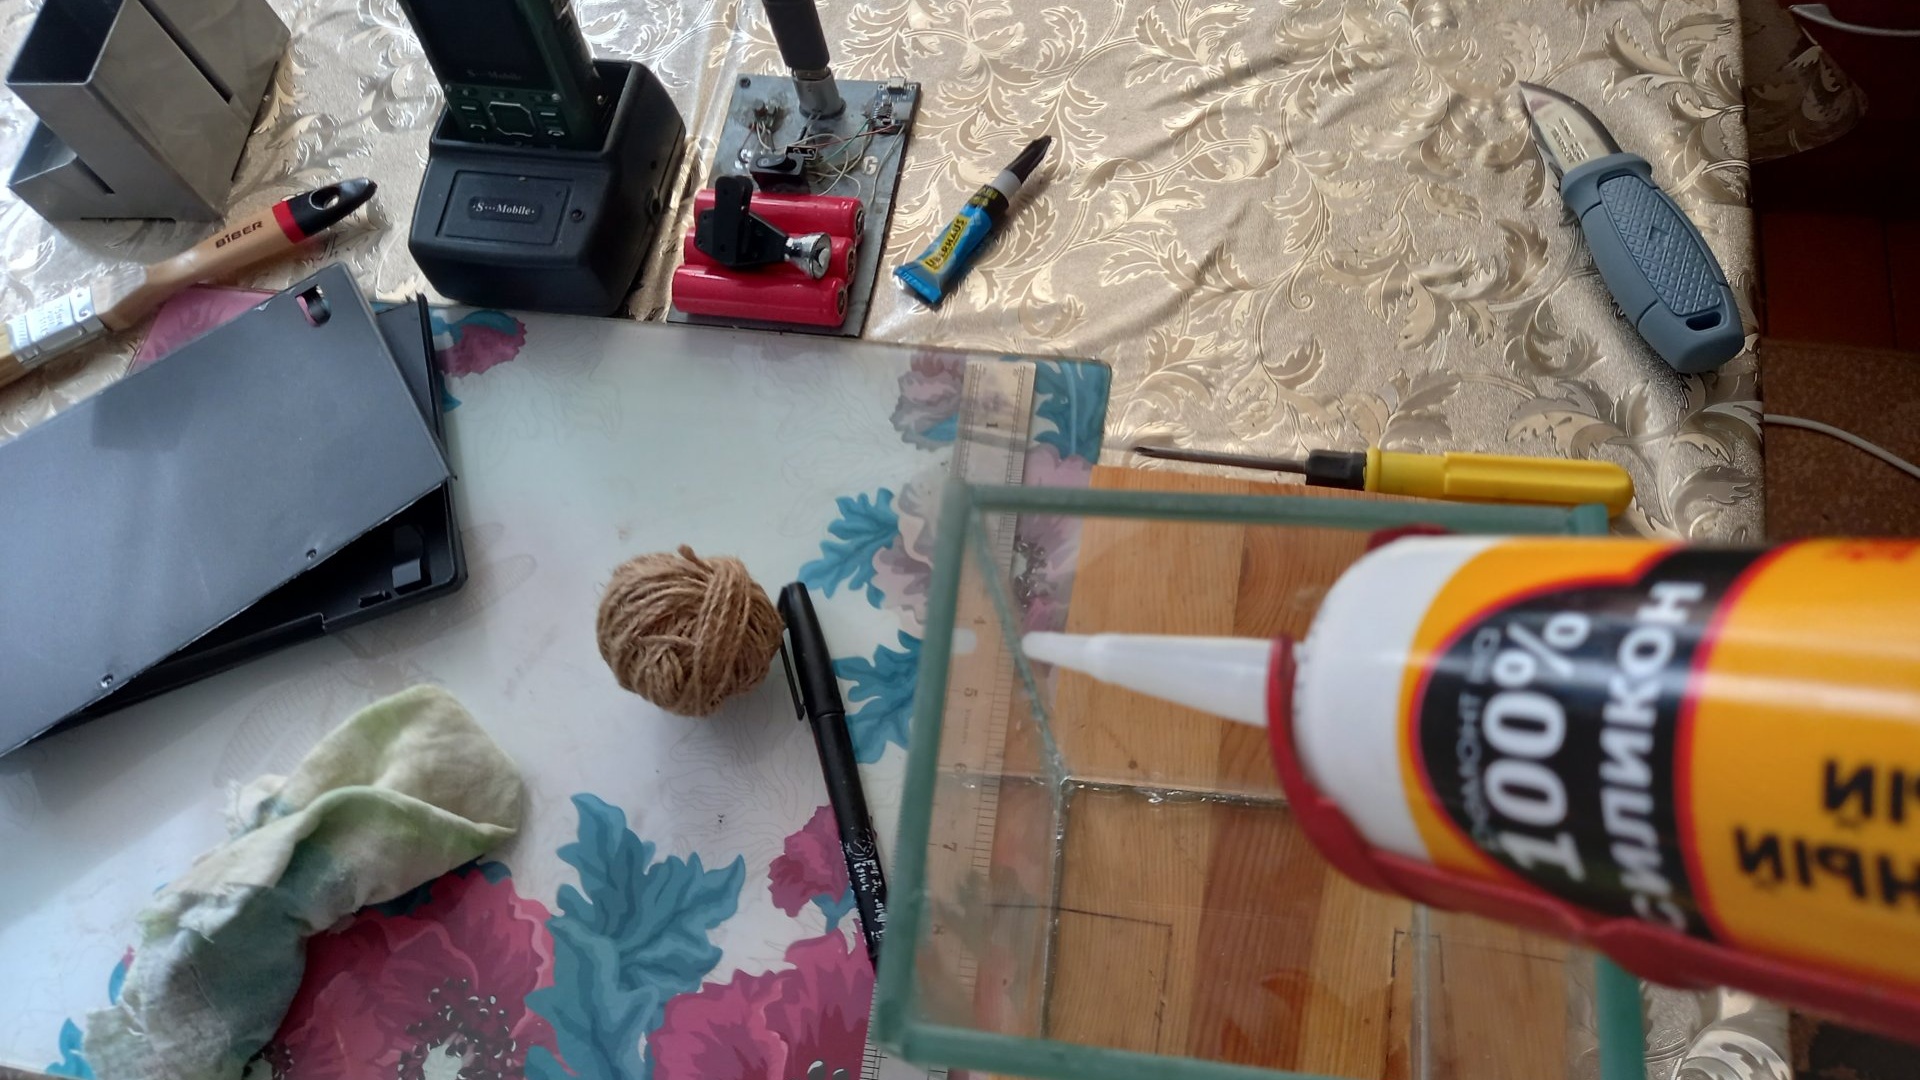
Will need
- Sheet of glass, 200×500×5mm.
- Glass cutter
- Stationery knife.
- Engraver with grinding head.
- Transparent silicone sealant with gun.
- Ruler and marker.
- Square.
- Plastic 200×300×1mm.
- Hot glue.
- Lighter.
- Board 200×120mm
- Organizer for office supplies.
- Decor for an aquarium (algae, stones, etc.)
- Solar garden flashlight.

Making an aquarium organizer
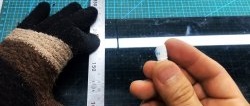
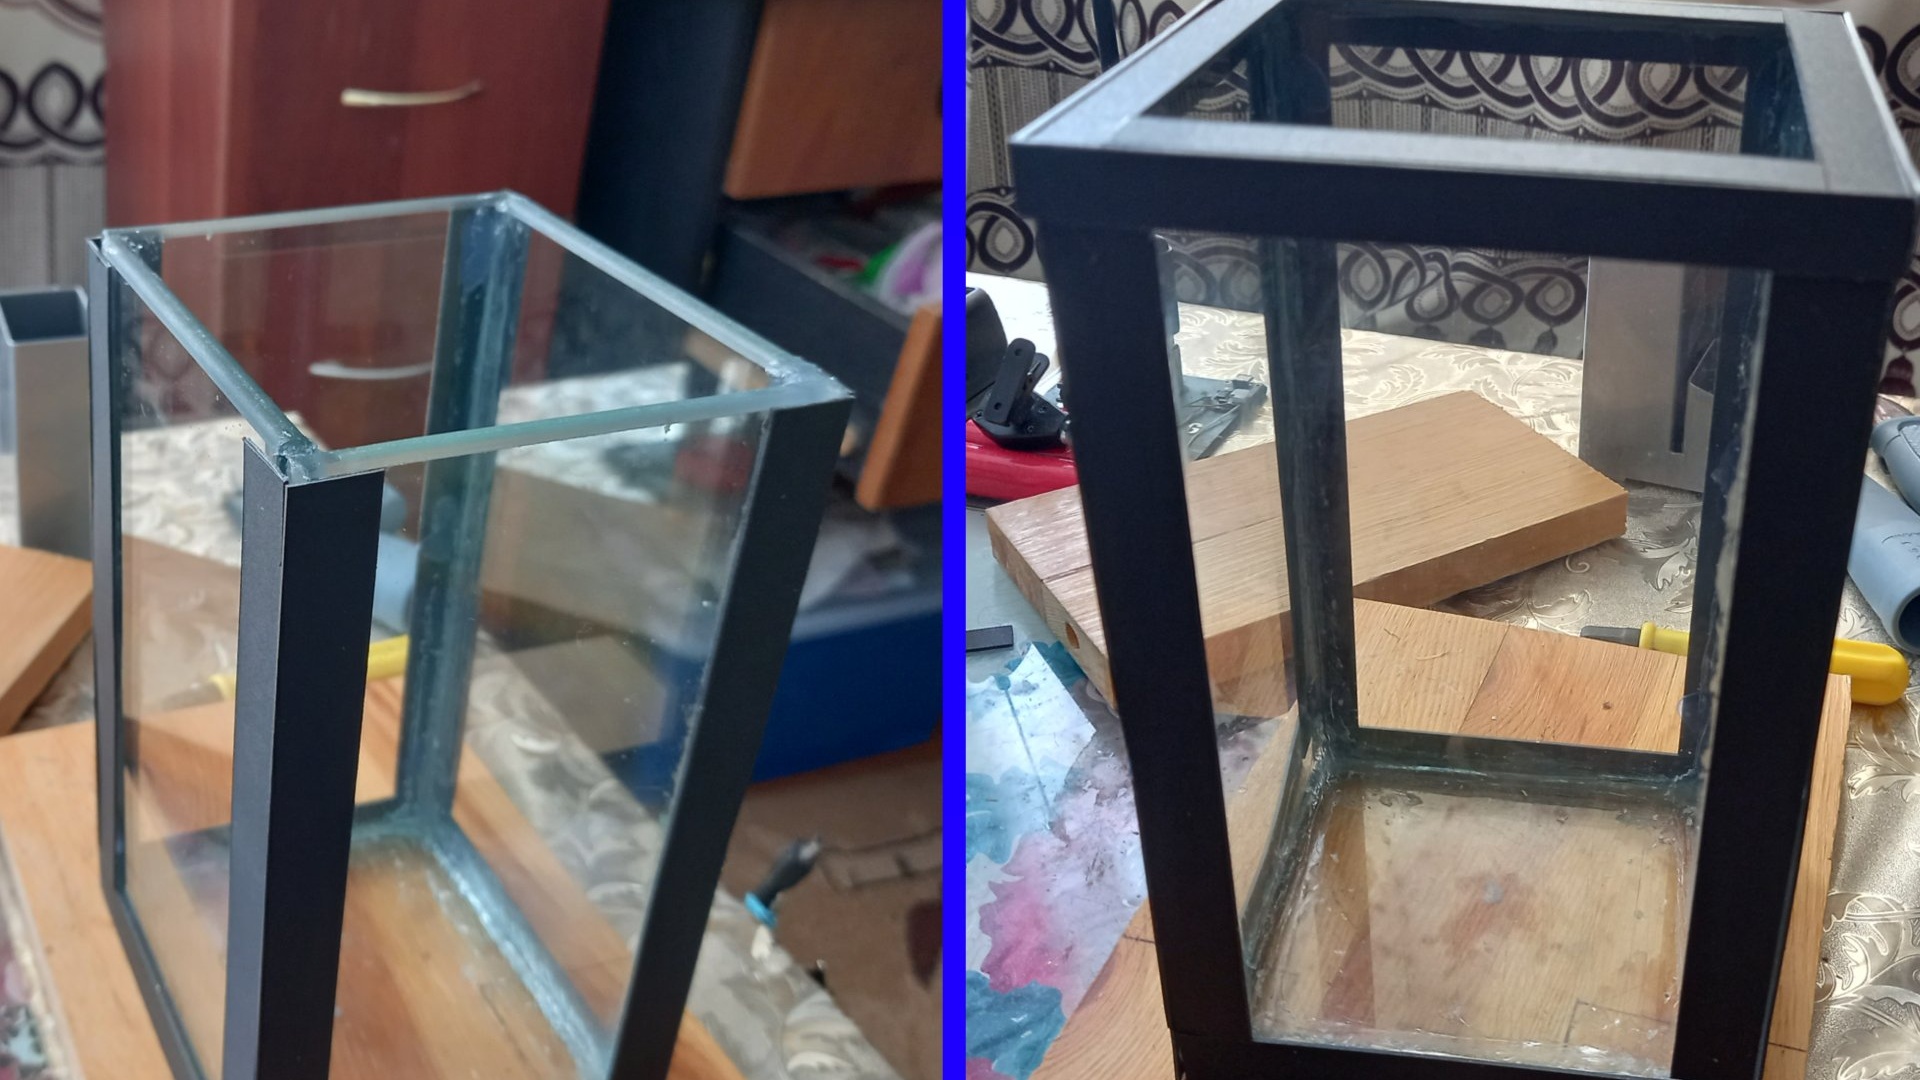
First of all, of course, it is necessary to determine the size of the aquarium. I selected the parameters (width) based on the parameters of the standard, cheapest organizer for stationery purchased in advance. Using a glass cutter and a long ruler or level, cut off the required glass fragments. Having made a cut along the intended line with a glass cutter, carefully tap the scratch on the reverse side, and with a sharp, gentle blow on the edge of the table along the cut line, we separate the fragment from the overall piece.
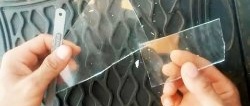
Using the same method, cut out the remaining three walls. We cut the bottom based on the walls folded into the box, taking into account the overlap. Next, you need to immediately sand the edges of the cut out walls and bottom in order to avoid cuts and injuries during further work.

Now let's do the gluing. For an aquarium, a non-toxic sealant should be chosen so as not to poison its scaly inhabitants in the future. So, we apply a thick layer of sealant to the edges and ends of the walls and bottom, and apply them to each other.
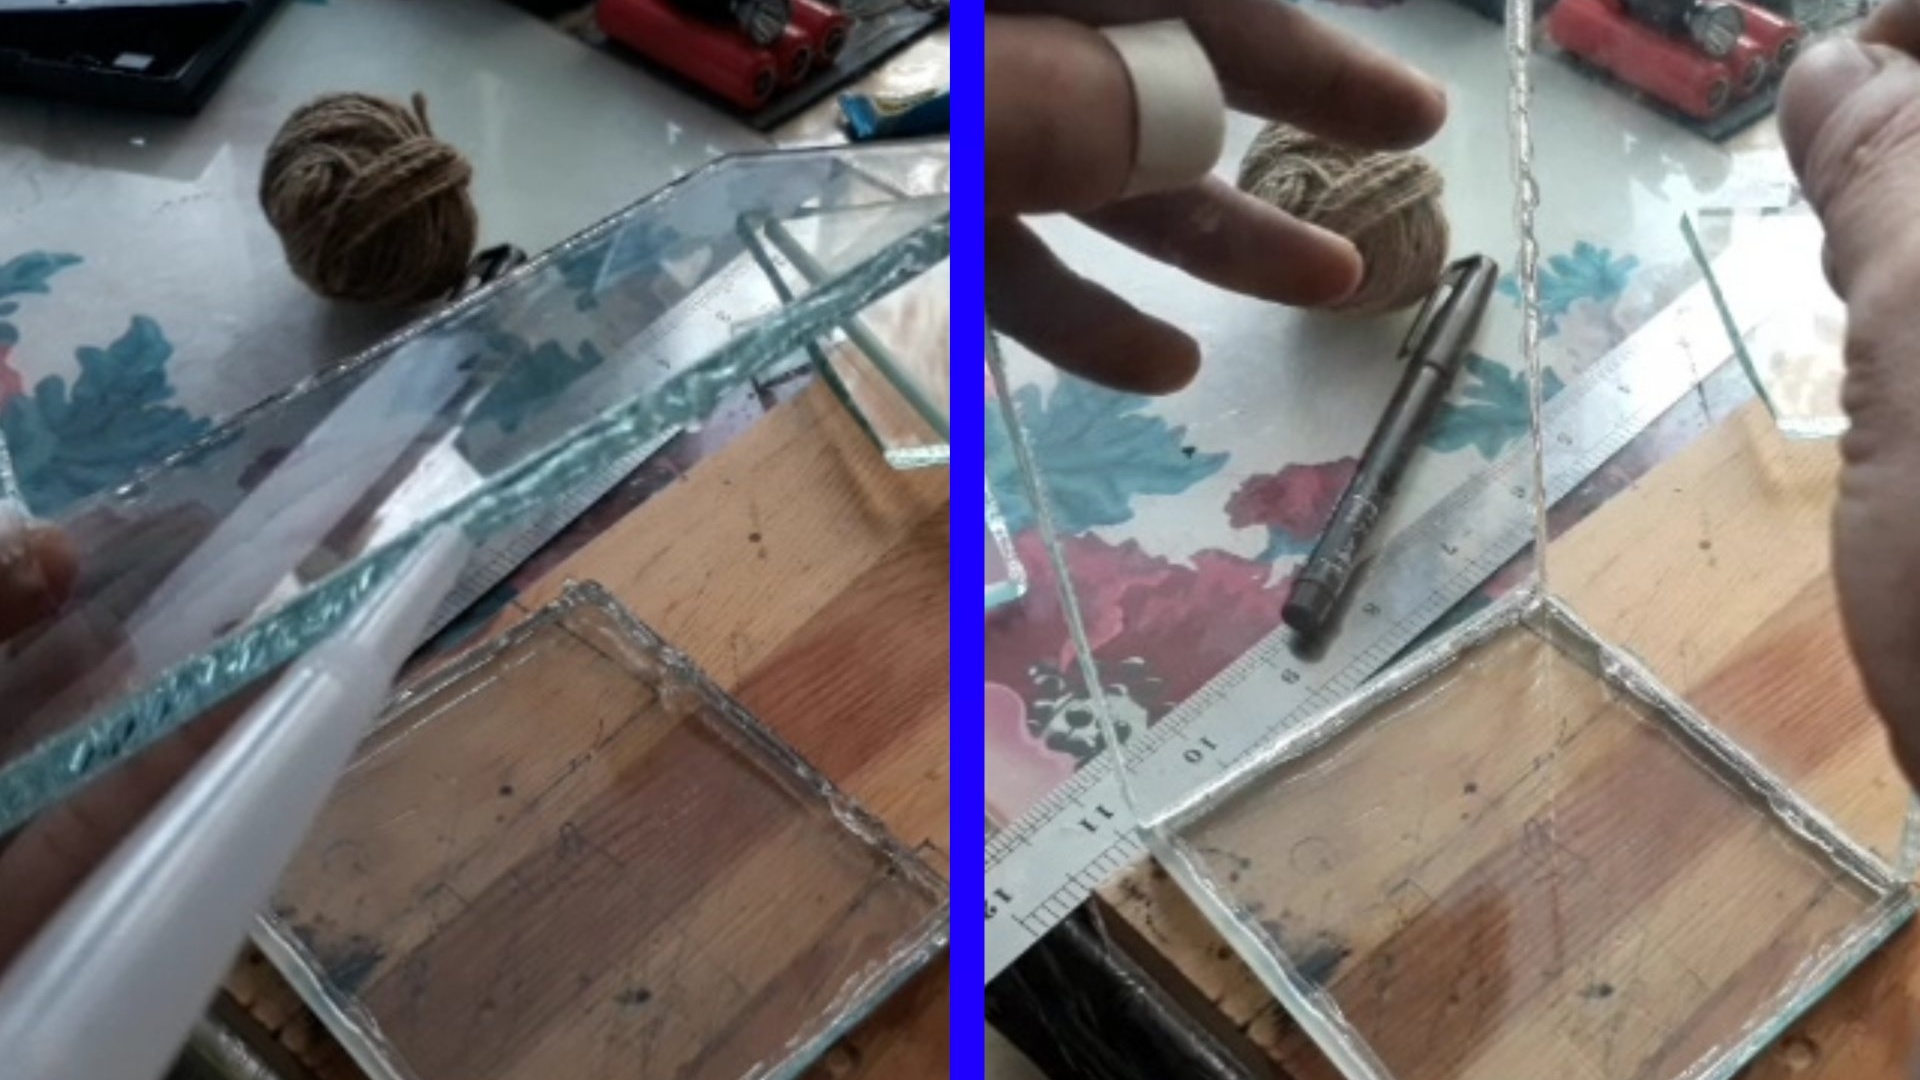
There is no need to rush, the sealant is not glue - we have enough time to level everything with a square.

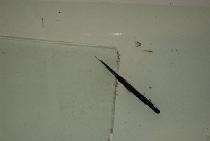
After gluing, you need to take a short break, an hour and a half, until the sealant dries and adheres to the structure. Next, you need to re-fasten the corners, and at the same time seal them. Using a gun, squeeze out the sealant into all corners, and using a spatula or finger, thoroughly coat all corners.

Don't worry if the walls get dirty - the sealant can be easily removed from the glass with vinegar and a thin blade. We set the aquarium aside to dry for another couple of hours. In the meantime, while the aquarium is drying, let’s make preparations for its further decoration so that it has a more decent appearance. To decorate the corners, I thought of using decorative corners, like those used in renovations, but I didn’t have the required dimensions. The ones in the store were also quite wide. Therefore, I simply cut strips of thin plastic of the required width so that in the future I could simply paste them over the corners.

Now, having waited the right time, let's begin cleaning the aquarium from random drops and smears of sealant. We moisten a cotton pad in a solution of water and 70 percent vinegar (50×50) and wipe off small strokes. Remove large drips and drops with a knife blade.

After cleaning, thoroughly wipe the finished aquarium with glass cleaner.

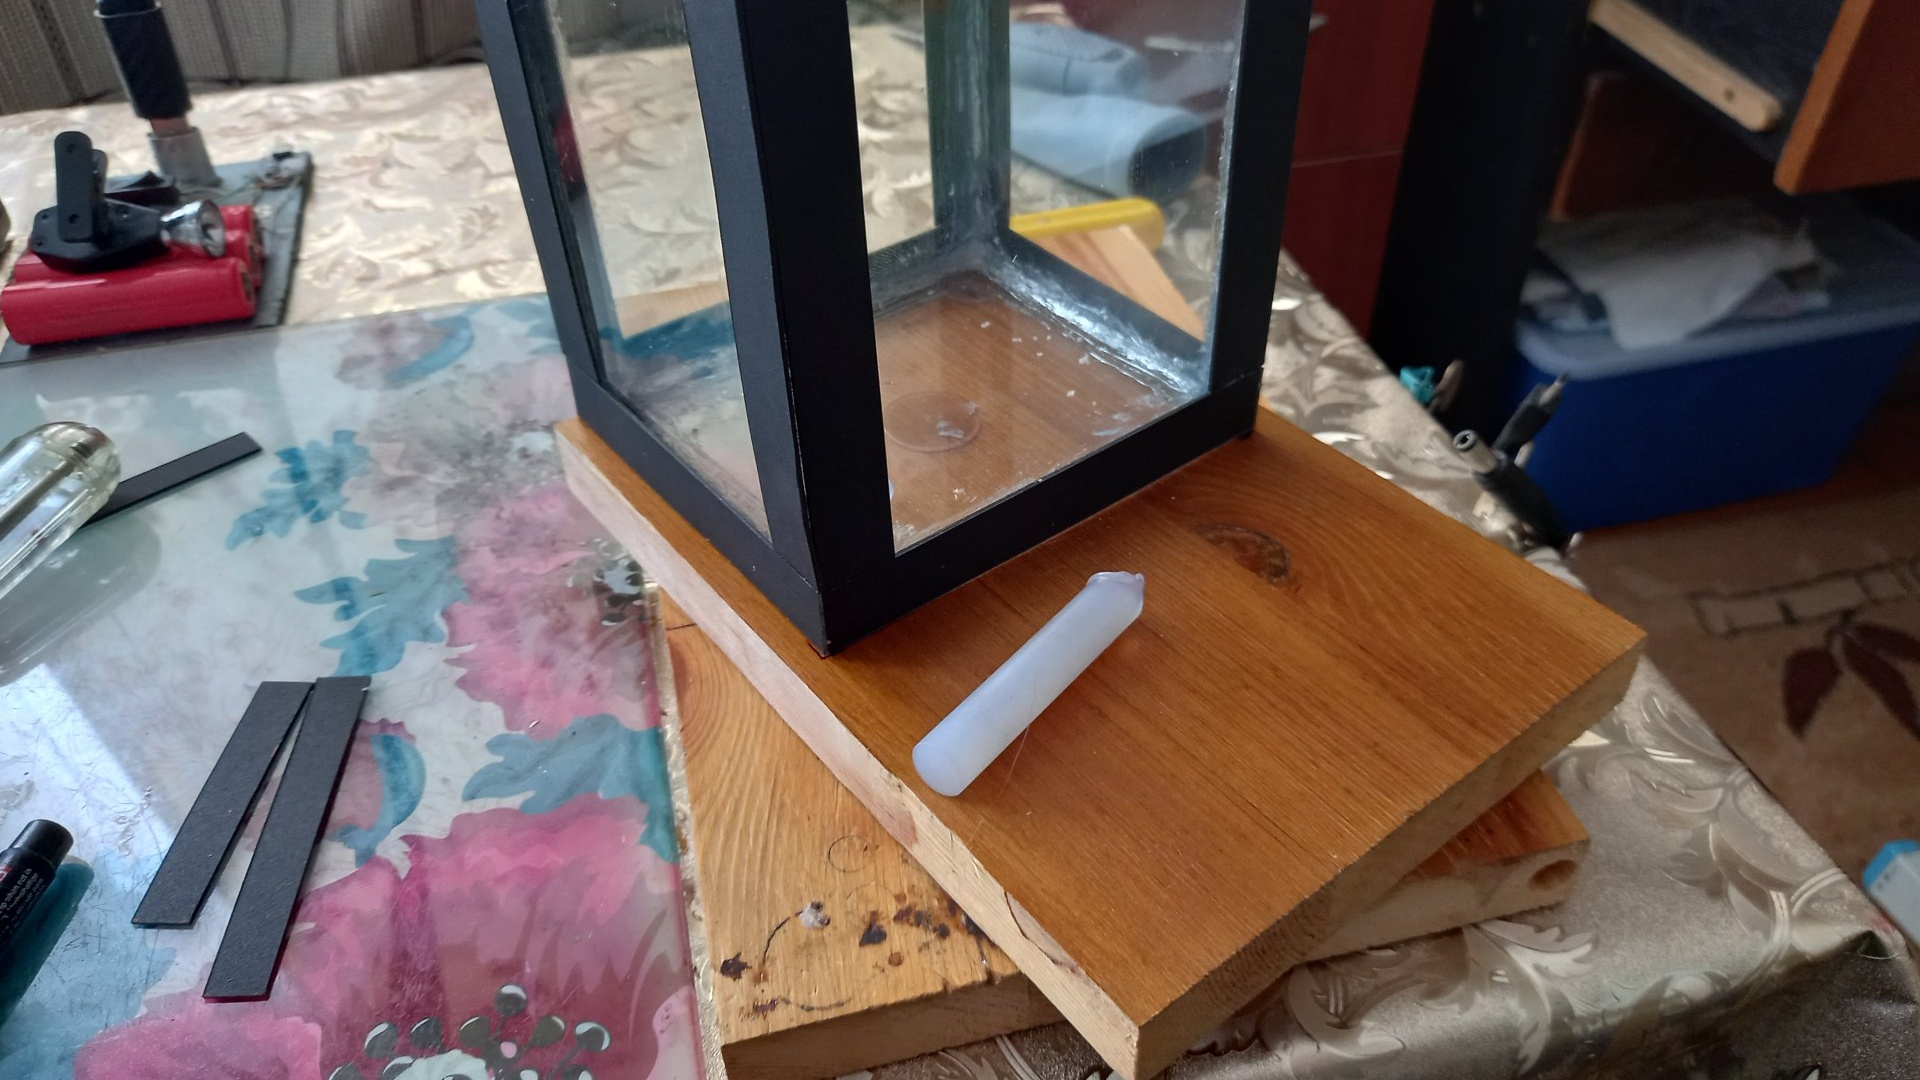
Now, using a hot glue gun, we decorate the outside corners with cut strips.
If you have suitable corners that are not too wide, then it will be even better! After finishing the decoration, you need to select the basis for the entire structure. Platform. I didn’t try to be tricky and simply sawed off a piece of varnished board of suitable width and sanded the edges.

We calculate the area of the base based on the area of the bottom of the aquarium and the bottom of the organizer combined. Apply hot glue to one of the edges of the base and place the aquarium on it as evenly as possible.
Next, close to the aquarium, we glue the organizer itself.

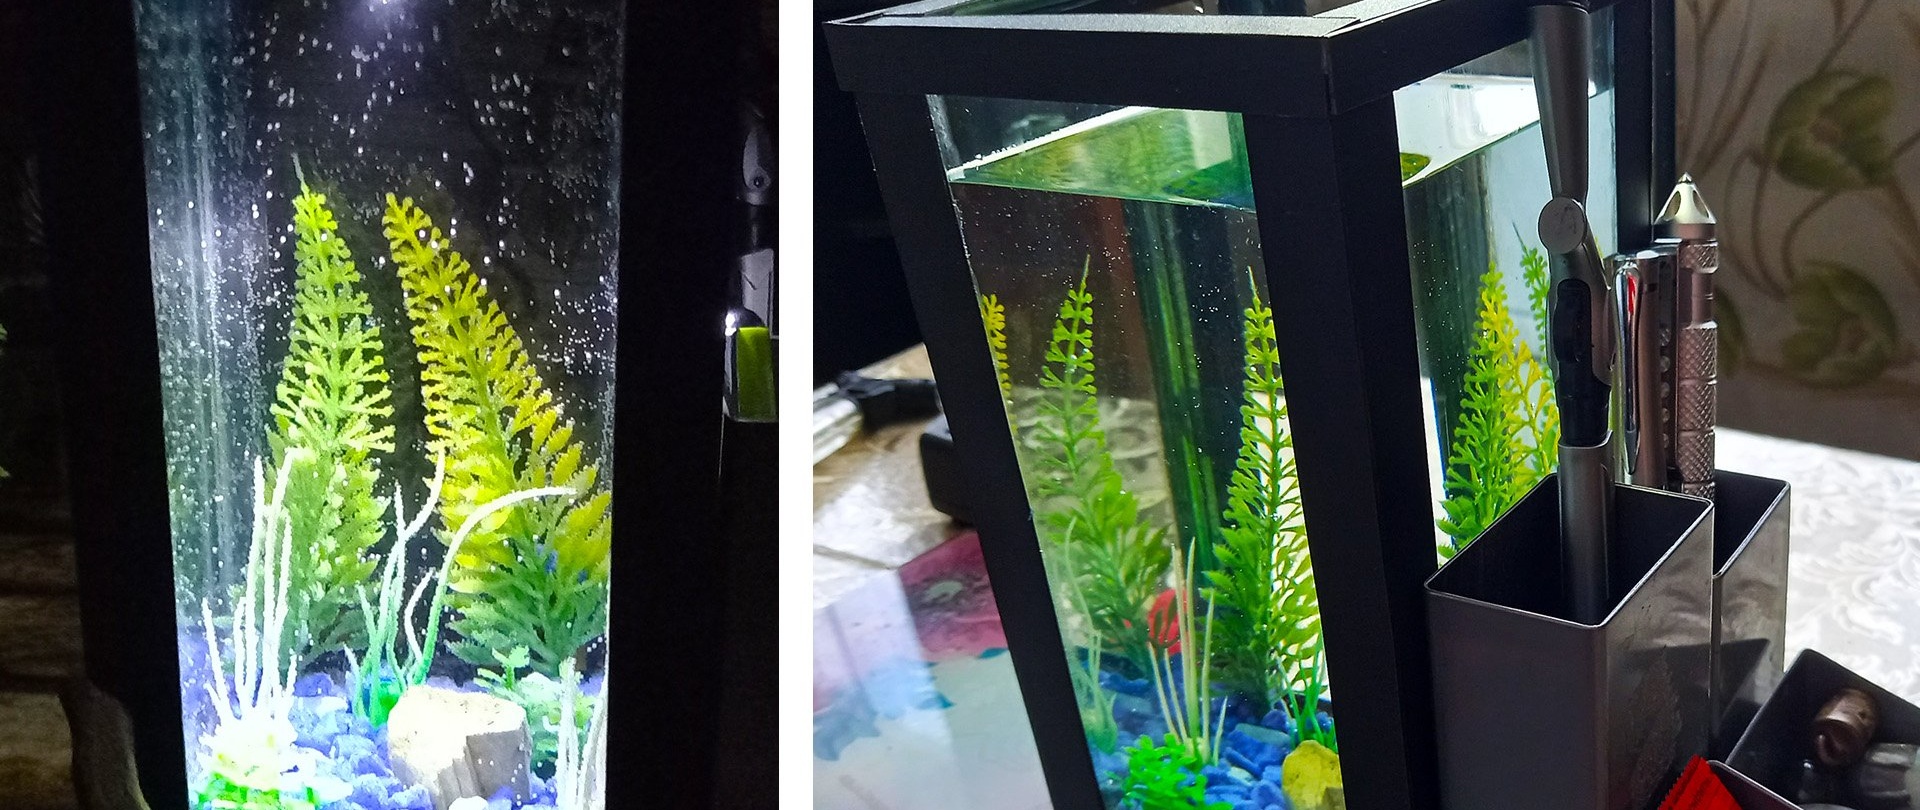
This completes the main part of the work. As a result, thanks to the thick glass, the aquarium turned out to be quite heavy. About 2 kg, offhand.But this is for the best - a cat will not knock it over, or someone will not sweep it away with a random wave of their hand. And if it does fall on the floor, it is unlikely that it will break. All that remains is to thoroughly disinfect the aquarium. We wipe it from the inside with medical alcohol and wash it with hot water. You should also disinfect all other decorative elements that will come into contact with water: stones, artificial algae, etc.

Next, using the same hot glue, we attach artificial algae and other decorative elements to the bottom, and fill it with soil.


Of course, everyone can decorate the interior of the aquarium at their own discretion. After decorating, pour water inside.

We put the stationery we need into the compartments of the organizer.
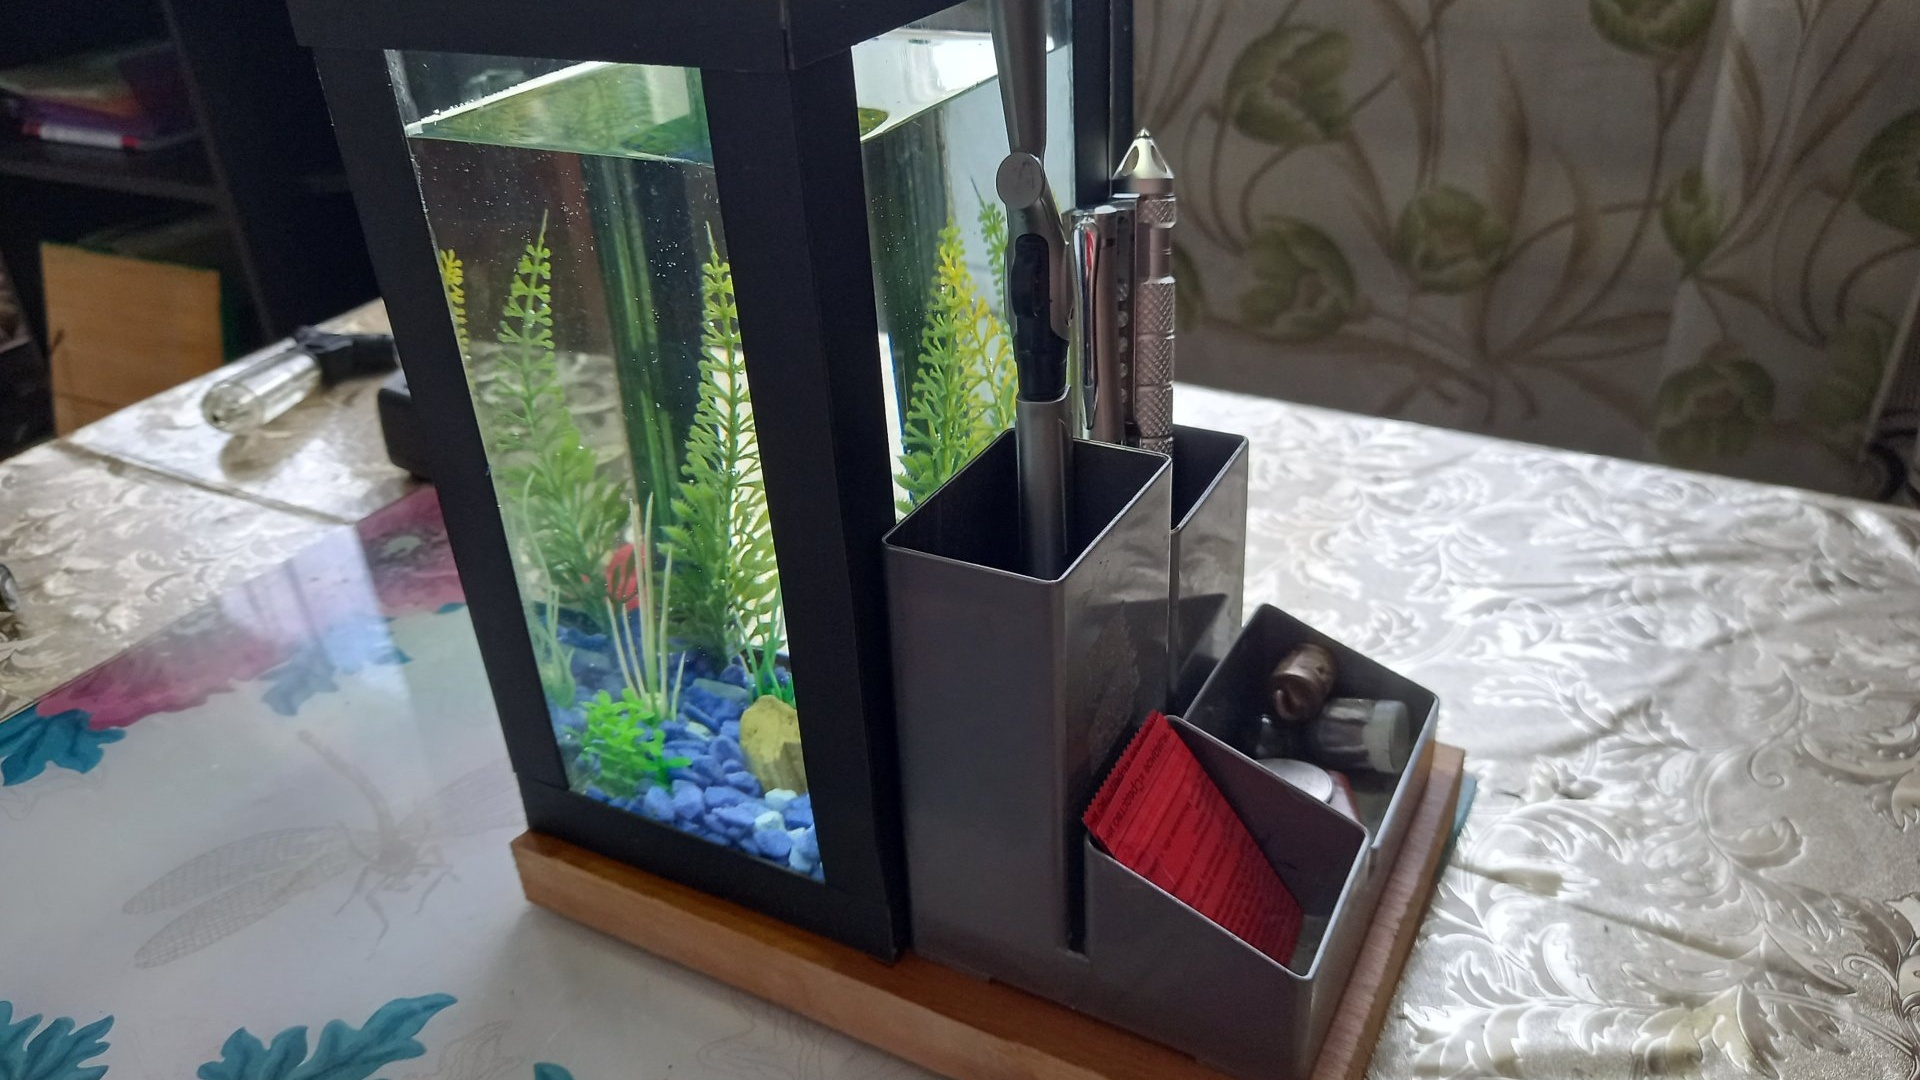
And you can let silent tenants into your new home. Unfortunately, I don’t keep fish, due to individual intolerance or allergies, so I can’t attach a photo with fish swimming inside, but I made this piece of furniture to order. And one moment; If you have a playful striped pet in your house, then it is better to make a lid for the aquarium.
Making a lid with self-charging backlight
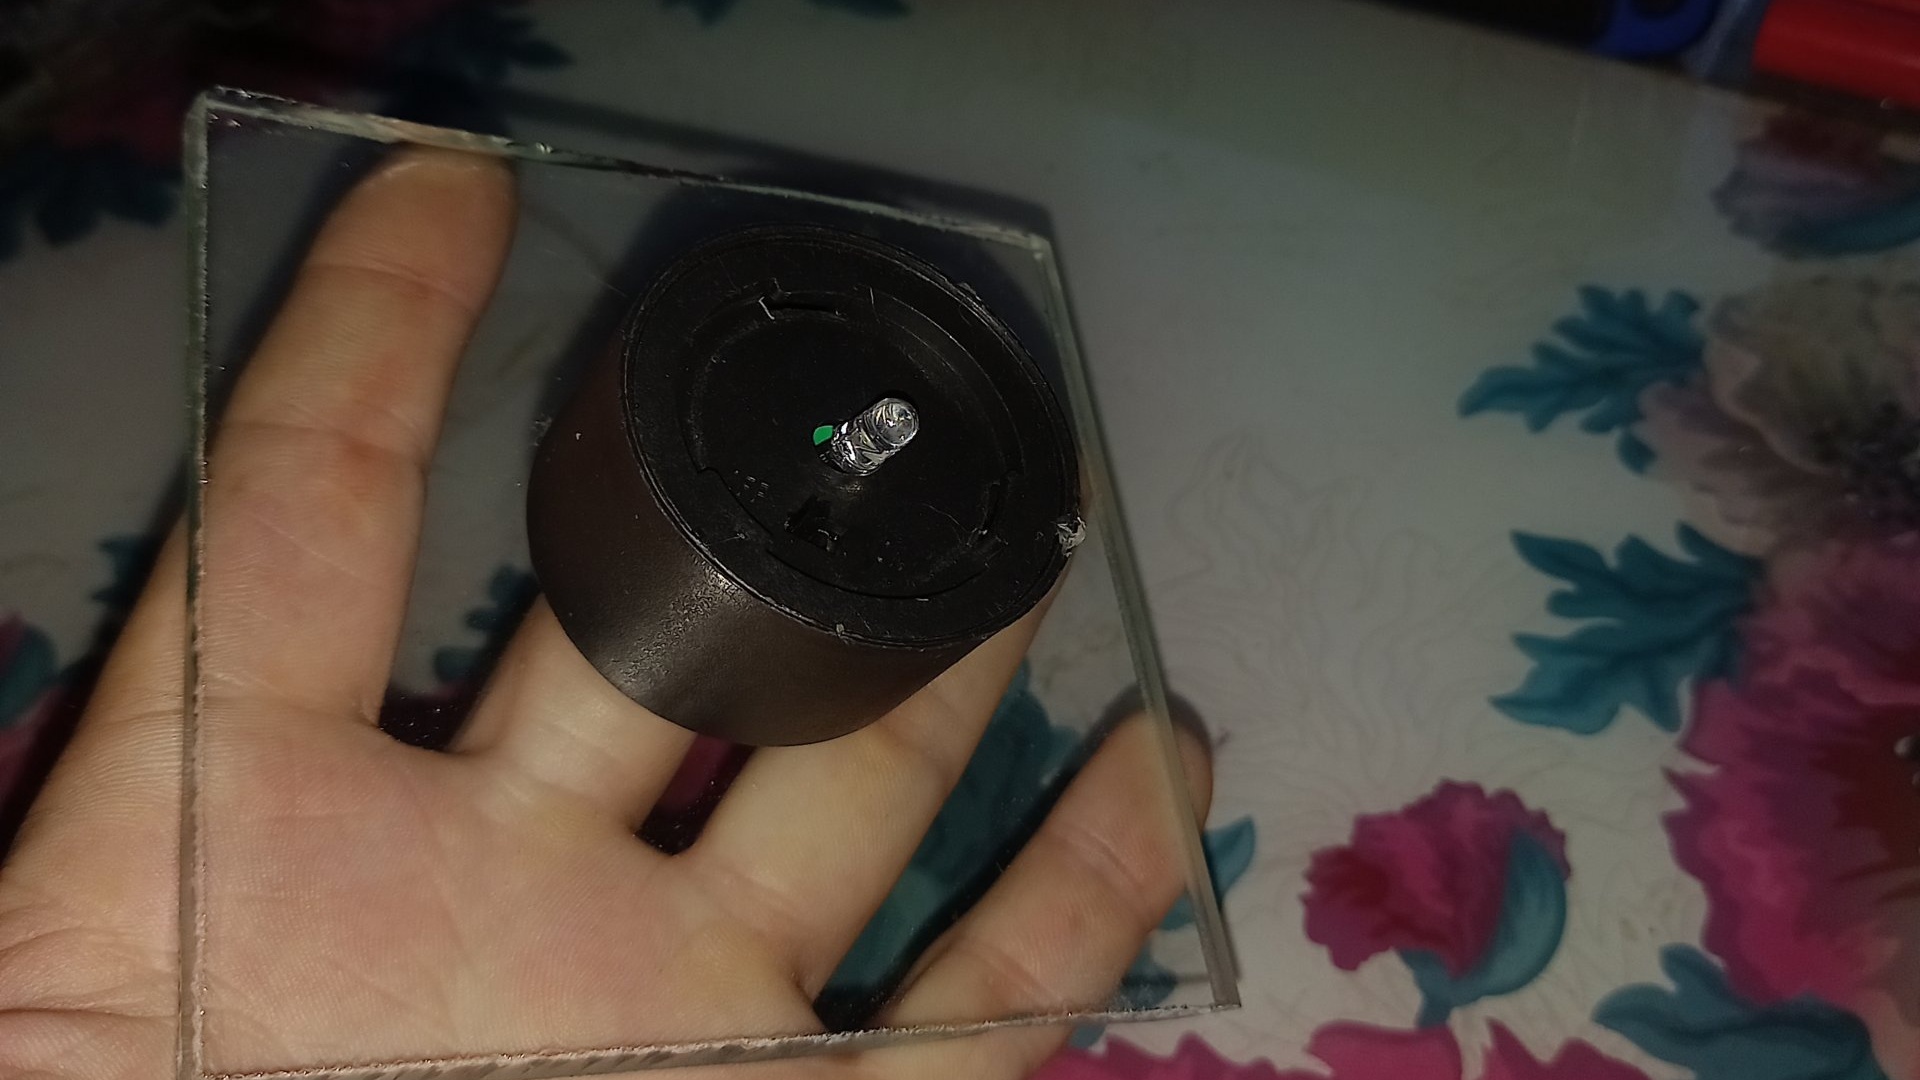
I made the lid with a self-charging light. We also cut and process a square of glass. More precisely, a rectangle. To leave small gaps around the edges for air circulation. For illumination, I took the head part from a garden lantern. It has a small solar panel, battery and charging module inside. It also has a photocell that includes Light-emitting diode when darkness falls, and extinguishes it when it begins to get light.
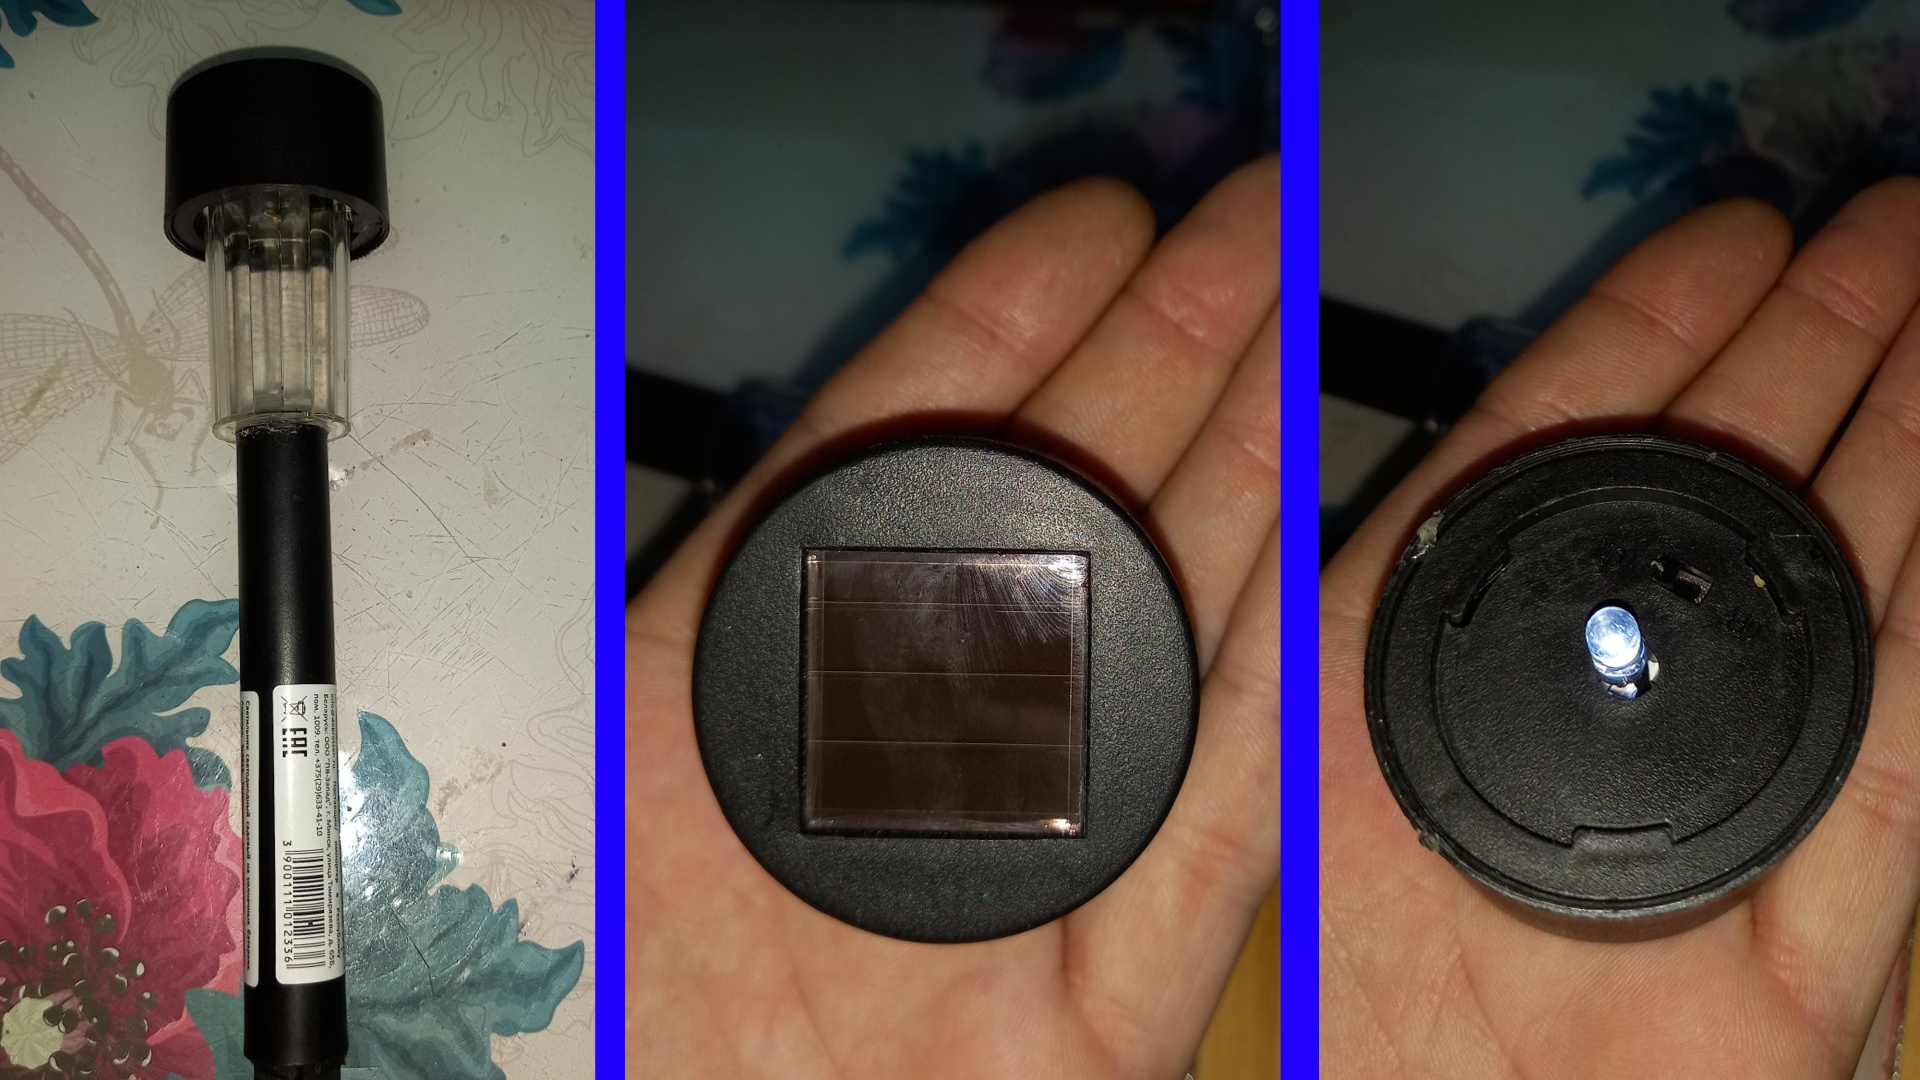
I bought this flashlight for 99 rubles. in the first store you come across, where they sell gardening tools, seeds, and other supplies for the garden.So, unscrew the head part of the flashlight and attach it with hot glue to the inside of the lid, with the solar panel facing up, like this:
In the end, this is the little thing we can do to complement the interior!