Once, while living in a country house, I needed to silver-plate a wire for a high-quality inductor, but the purchased distilled water turned out to be worthless: immediately when silver nitrate was dissolved in it, the solution became cloudy.
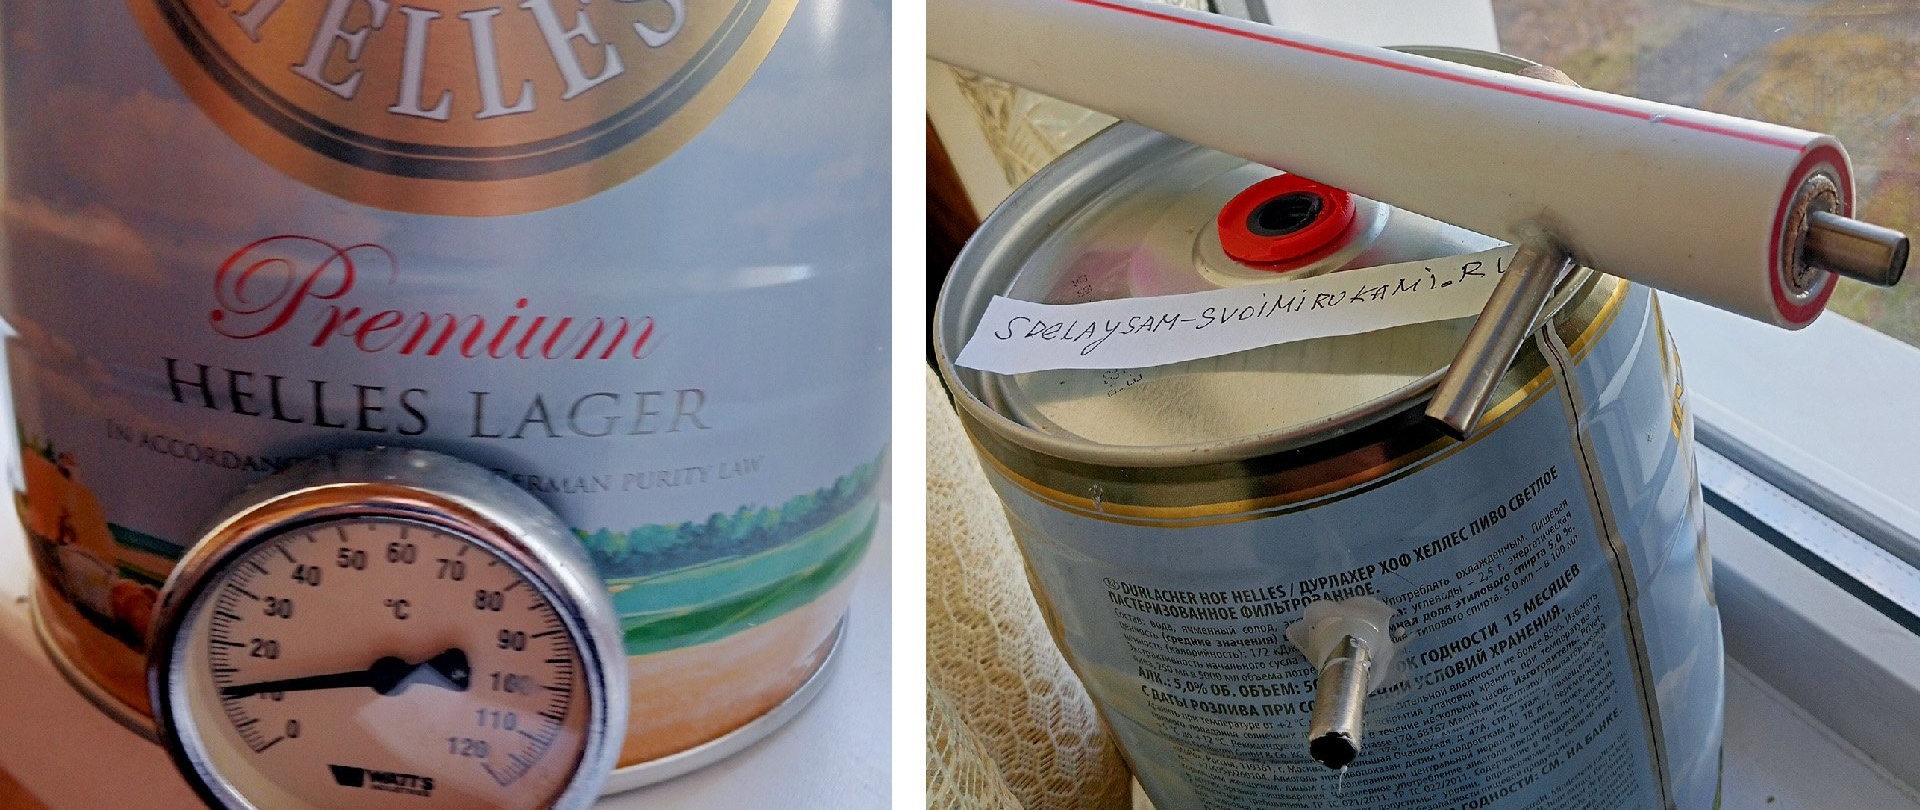
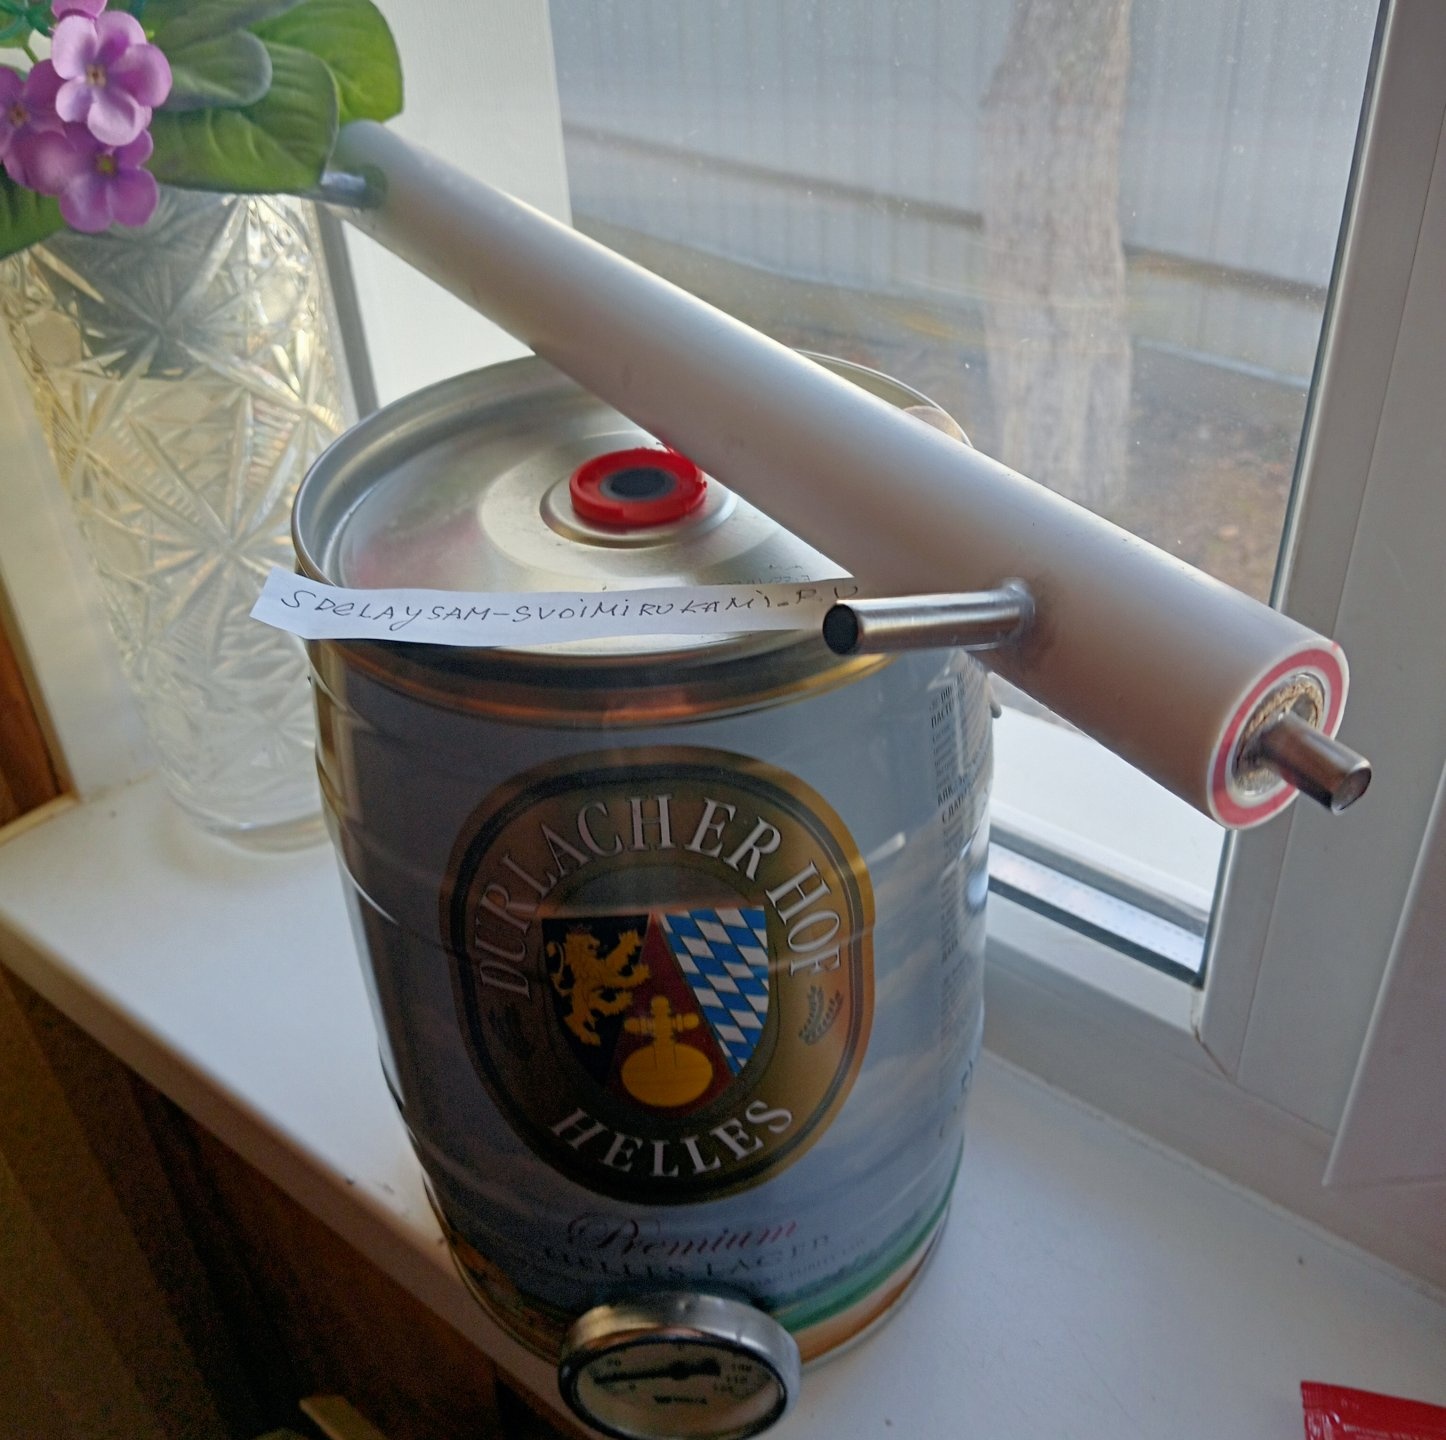
Distilled water was needed in a volume of 3 liters: for silvering and for restoring a lead battery. Then I remembered how I obtained pure alcohol from vodka using distillation. Yes, and here it is present I was given a present the other day – a large keg of beer. 5 liter tin can with tap. So it was decided to make a simple distillation apparatus from existing parts.
The difficult task was emptying the barrel ;) and thus turning it into a container for the still.
Making a distiller with your own hands
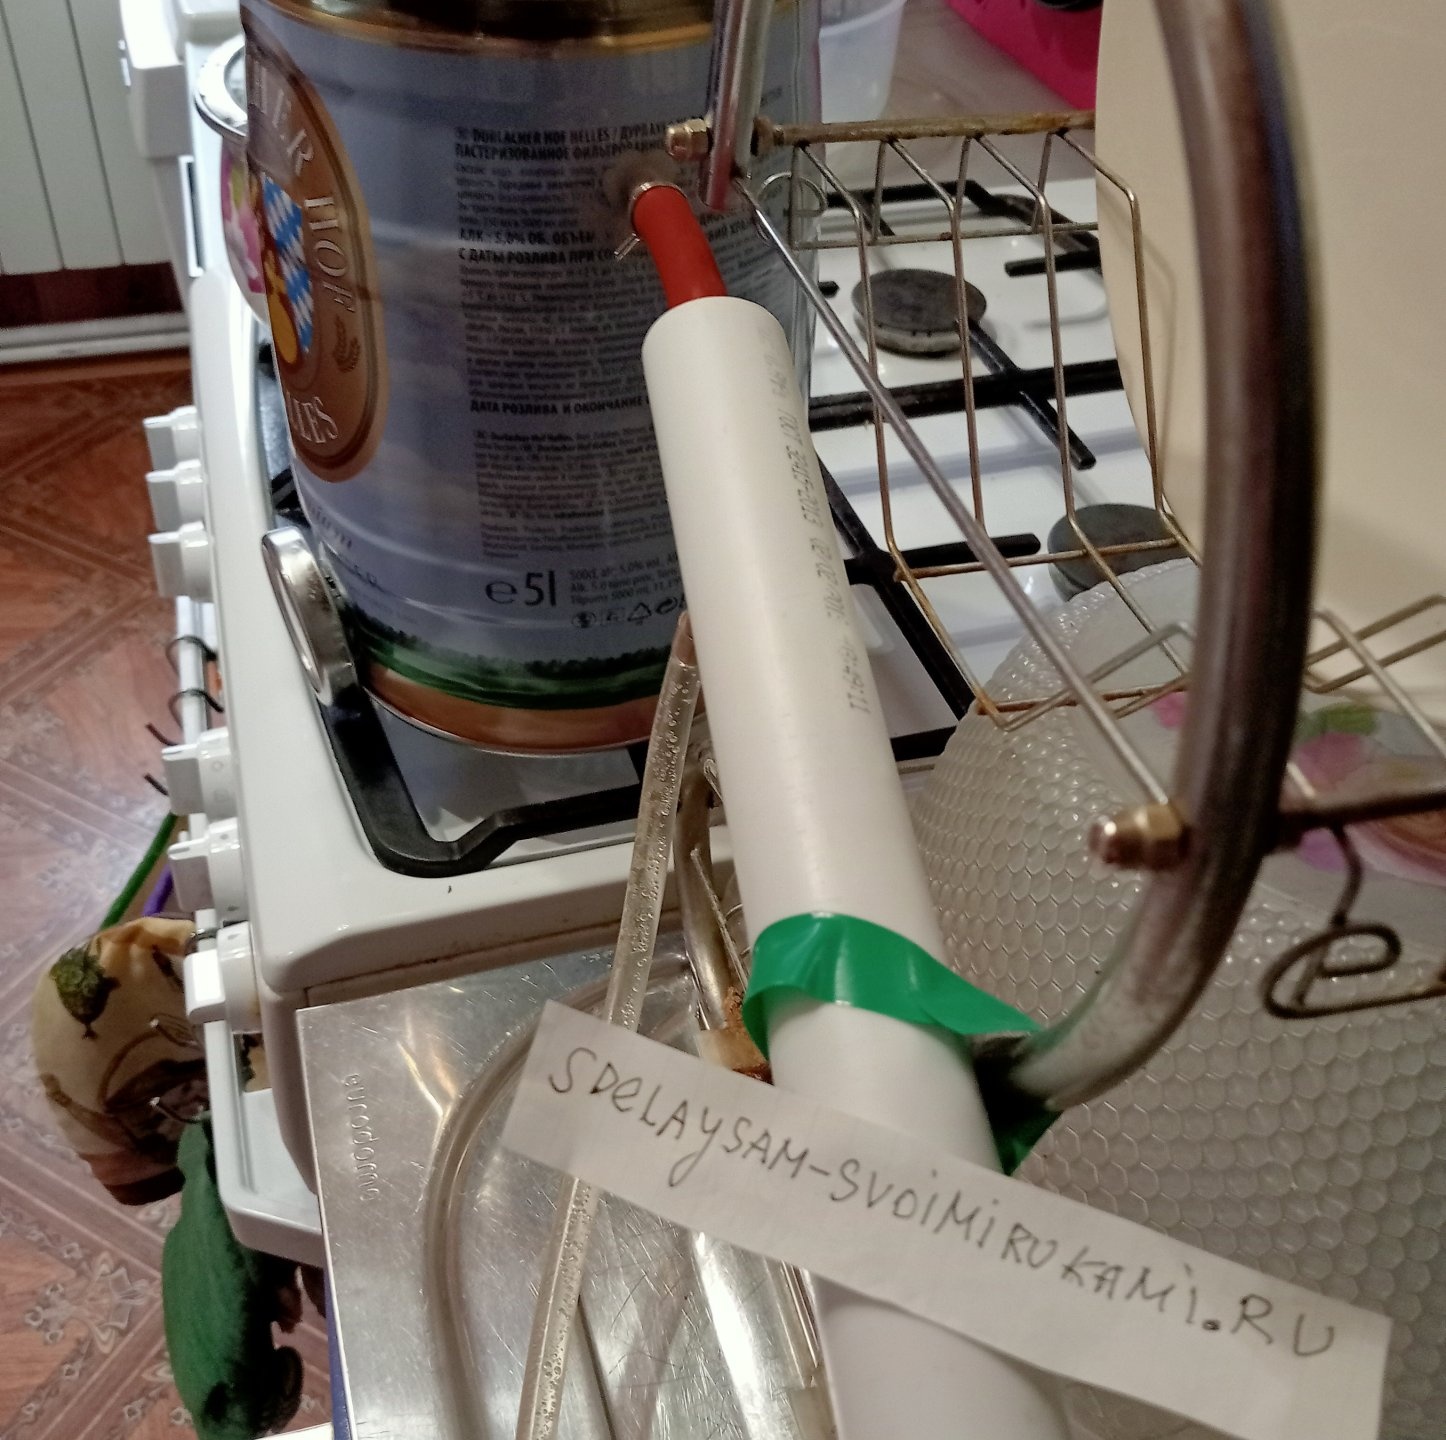
A barrel of foam is sold in supermarkets, and is not expensive, considering the contents. You need to rinse this jar several times, after first removing the stopper and faucet, leaving the plastic inserts in place, they will not melt. After drying, I rummaged around in the workshop and found a round thermometer, which is usually simply inserted into the pipes of the home heating circuit without contact with liquid.It would be possible to simply plug the hole from the tap in the barrel with a conical stopper. Because practice has shown that on gas it gets very hot, it can lie a little, and the glass can melt a little because it is plastic.
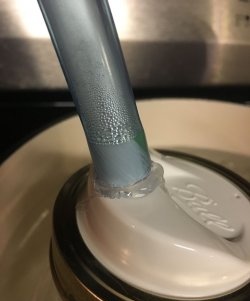
But since the thermometer is inserted into the hole in place of the faucet - it fits perfectly in size, I decided to pull out the glass, and, applying sealant, stuck it in tightly for visual control.

There is a hole in the top of the barrel where the valve used to be. The valve must be removed and a plug must be selected from the cork, turning it into a cone so that it does not fit into the tank too tightly. By the way, wine corks are different, and it is advisable to check them at least with a lighter or torch so that they do not deform, melt or burn. I used synthetic rather than solid balsa wood or pressed chips. It turned out that the plastic one can withstand heat just as well. Next you need to find the handset. I took from two used country lanterns. Powered by solar batteries and LEDs.
The beacon is held on a stainless steel tube with a diameter of approximately 10-12 mm.
We will need at least two of these. Next, 3 cm from the top edge of the barrel, carefully, trying to avoid nicks and creases, drill a hole in the tank slightly smaller than the diameter of the tube. We cut three equal pieces 4 cm long and drive one of them into the resulting side hole of the tank. Be sure to coat it very tightly with a vinegar-based, heat-resistant silicone sealant. Preferably a couple of times, and perhaps by providing some kind of washer, because... This is a very important place in this design.
Thus, our tank is ready, and we can begin making the coil.

In fact, its role will be played by a straight tube from the same flashlights, extended by heat shrink to a length of 50 -60 mm. The finished cooler is called a “direct Liebig refrigerator.” It consists of two tubes of different diameters inserted inside each other through insulating gaskets.
And perpendicularly, at different ends along the length of the thick tube, at a distance of 3 cm from the ends, two holes were made for water cooling tubes.
For the outer tube, I took a metal-plastic pipe with a diameter of 3.5-4 cm and a length of 30 to 45 cm. The walls of the metal-plastic tube should be as thick as possible so that the water tubes do not dangle and are fitted as tightly as possible.

The next step is to need two identical end gaskets. For these purposes, a wine stopper that fits tightly into the outer pipe is suitable. The plug needs to be drilled lengthwise in the center, slightly smaller than the diameter of the inner tube. Next, the cork is cut crosswise in half with a utility knife.
It is more convenient to assemble the assembly in the following sequence:
- coat the inner tube with sealant and insert it into the gasket to a length of 3 cm;
- thread the inner tube inside the outer metal-plastic; coat the gasket with sealant inside and outside;
- tightly insert the gasket with the inserted tube into the metal-plastic material;
- From the other end of the metal-plastic, coat the inner tube with sealant and push the sealed gasket inside the metal-plastic until the end, holding it from different sides.
Next, the remaining two coated tubes for water cooling are driven into the previously made holes (very carefully so as not to touch the inner tube. Then coat all the seams and leave until the sealant dries. The cooler is ready.
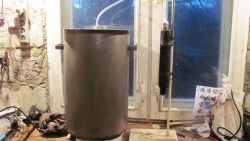
All that remains is to insert the water hoses, connect one end to the cold water tap, and lead the other to the sewer drain. Please note that cold water from the tap should flow into the tube closer to the tank, and pour into the sewer on the opposite side.
After the sealant has dried, you can connect the cooler to the tank with as short a heat-resistant curved pipe as possible with fixing clips. (I got them from a broken electric steamer). The pipe does not melt, does not soften and is very flexible.

After washing, you can begin distillation by first supplying cooling water, and only after that begin heating the bottom of the tank.