Do it yourself
Life hacks, master classes, useful tips, recipes.
home » Electronics » DIY electronics » Smooth load switching on and off

Probably many people wanted to add something new to their car, today I will tell you how to do this without special costs and technical changes in the design of the car.

The device that I want to present to you today is not a large circuit for adjusting the startup and shutdown of the load, in our case, lighting fixtures, interior lighting, dashboard lighting, etc. Our device will allow you to smoothly turn on and off any of the listed loads. Agree, it’s much more pleasant when, when you turn on the ignition, we see not a sharp switching on of the dashboard backlight, but a smooth ignition. The same can be said about interior lighting and lighting fixtures.

Let's move on from words to action and before starting assembly, I suggest you familiarize yourself with the diagram:

Smooth load switching on and off
First, I’ll tell you how it connects. We need to supply VCC+ with constant 12 V from the battery, which will power our load. We connect to REM those 12 V that appear after turning on the ignition, it is they that will initiate ignition and when they disappear, the circuit will turn off the lighting.Accordingly, we connect our load to the LED+ LED- contacts (in my case LEDs)

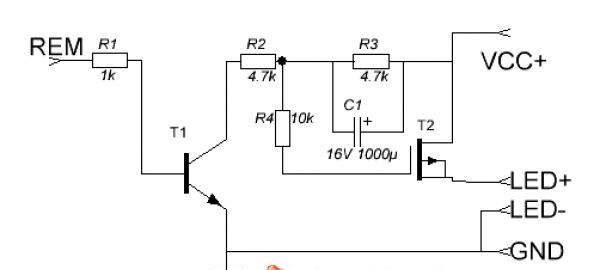
I used BC817 (analogue of KT503V) as transistor T1; I used IRF9540S as transistor T2. If you want to increase the ignition time, you need to increase the R2 value; to decrease it, lower it accordingly. To control the damping time, a similar operation must be done with resistor R3.

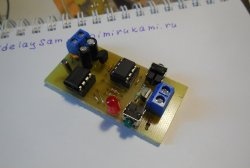
Now you can proceed to assembly. To reduce the size of the device, I used surface mounting.

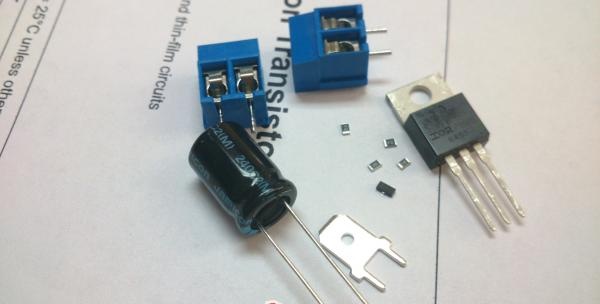
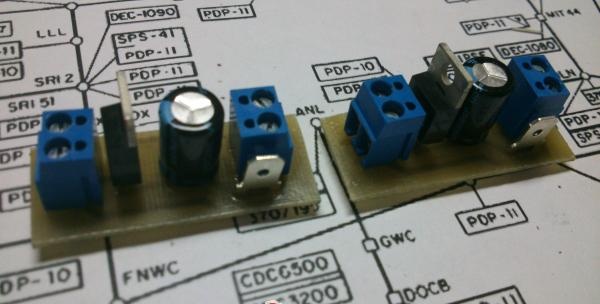
Here is the entire set of elements that I needed:

Smooth load switching on and off

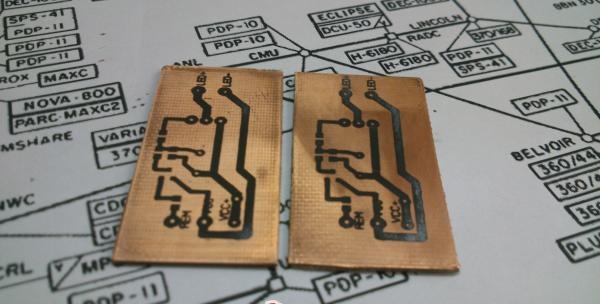
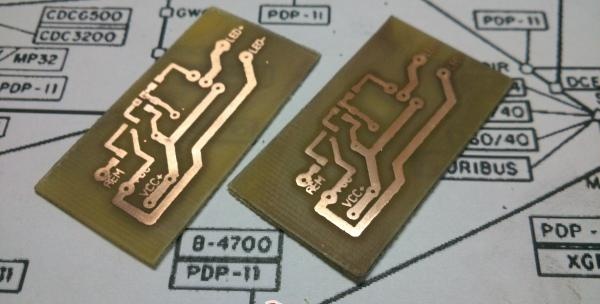
The boards were manufactured using “LUT” technology from single-sided PCB.

Smooth load switching on and off

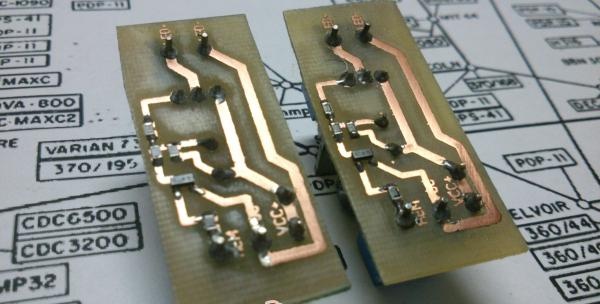
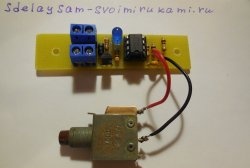
We finally got such a compact device that can add aesthetics to our car.

Expenses:

  • 1. Resistors 0.25 rubles per piece. x4 = 1 rub.
  • 2. BC817 = 3 rub.
  • 3. IRF9540S = 35 rub.
  • 4. Capacitor 8 rub.
  • 5. Terminals 21.5

Result: For only 70 rubles. we get quite an interesting device.

P.S. Video of the device in action:

Watch the video

come back
Comment
  • bowtiesmilelaughingblushsmileyrelaxed relaxedsmirk
    heart_eyeskissing_heartkissing_closed_eyesflushedrelievedsatisfiedgrin
    winkstuck_out_tongue_winking_eyestuck_out_tongue_closed_eyesgrinningkissingstuck_out_tonguesleeping
    worriedfrowninganguishedopen_mouthgrimacingconfusedhushed
    expressionlessunamusedsweat_smilesweatdisappointed_relievedwearypassive
    disappointedconfoundedfearfulcold_sweatperseverecrysob
    joyastonishedscreamtired_faceangryragetriumph
    sleepyyummasksunglassesdizzy_faceimpsmiling_imp
    neutral_faceno_mouthinnocent
3+three=
Comments (12)
  1. Sergey
    #1 Sergey Guests 24 November 2013 16:29
    1
    supported load size in watts?
  2. Paul
    #2 Paul Guests May 9, 2014 00:31
    1
    Is it possible to use the TL431 transistor instead of the KT503V transistor? And how to connect it?
    1. Angry747
      #3 Angry747 Guests 19 February 2019 23:16
      1
      this is not a transistor! This is a stabilizer, google it!
  3. up
    #4 up Guests June 30, 2014 10:23
    5
    Considering that the VS817 transistor is 50V max, you don’t have to ask about the maximum load. You can't turn on a regular light bulb like that, only LEDs.
  4. Dr.Bro
    #5 Dr.Bro Guests August 28, 2014 04:06
    1
    Can you add it to the diagram? Light-emitting diode and a resistor to it, parallel connection from REM but put a switch in front of it in order to make a special switch built into the car? It seems that I calculated the resistance of the resistor correctly, based on considerations: 12V (REM) - 1.5V (Light-emitting diode) = 10.5V required voltage drop.
    According to Ohm's law R=U/I | R=10.5V / 0.02A (consumption LED) | R=525Ohm
    ***In the picture 2B Light-emitting diode, as an option... Then R=500 Ohm or 0.5 kOhm

  5. Seryoga
    #6 Seryoga Guests September 27, 2014 12:33
    3
    A very bad idea implemented in this scheme. Dig towards the shim, the simplest options work without problems at 500 watts.
  6. Andrey
    #7 Andrey Guests 8 December 2014 19:22
    4
    Can I get a stamp? :)
  7. Talgat
    #8 Talgat Guests 8 December 2015 18:55
    1
    Good day, can you tell me what rem and vcc are? I'm just new to this. I want to study at home)
  8. Andrij
    #9 Andrij Guests January 25, 2016 10:30
    1
    Read the text "To REM we connect those 12 V that appear after turning on the ignition, it is they that will initiate ignition and when they disappear, the circuit will turn off the lighting."
  9. Sergey
    #10 Sergey Guests November 2, 2016 00:25
    1
    To make it work on 24 volts, what needs to be changed besides the capacitor?
  10. Valery
    #11 Valery Guests 17 March 2017 16:27
    1
    Hello! Is it possible to buy a board?

How to crochet a blue rose | Do it yourself

“Saving” a stale loaf | Do it yourself

How to prepare 3 types of thermally stable coatings for various surfaces from liquid glass

Homemade products from box scraps | Do it yourself

«Do it yourself - with your own hands» - a site of interesting homemade products made from scrap materials and items at home. Step-by-step master classes with photos and descriptions, technologies, life hacks - everything a real master or just a craftsman needs for needlework. Crafts of any complexity, a large selection of directions and ideas for creativity.

We recommend reading

Washing machine error codes