Do it yourself
Life hacks, master classes, useful tips, recipes.
home » Games and toys » Stuffed Toys » DIY soft toys » Cheerful sunny bunny
Taking care of their children, mothers choose toys that are reliable and of high quality. And lately they even prefer to sew a toy themselves. Such toys are filled with light, kindness, mother’s affection and care, positive energy, which will certainly be transmitted to the child during play. I propose to sew a cheerful sunny bunny from an unusual material at hand, from a children's sock.

To make this fabulous toy we will need:
- sock;
- needle and thread for internal seams and thread in a contrasting color;
- padding polyester;
- pencil;
- scissors.

Materials for the hare


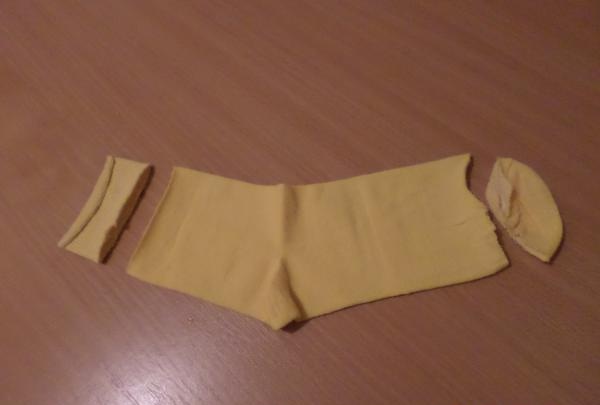
Take a sock (preferably a new one), lay it out and cut off the elastic and sock slightly at an angle.

cut off the elastic


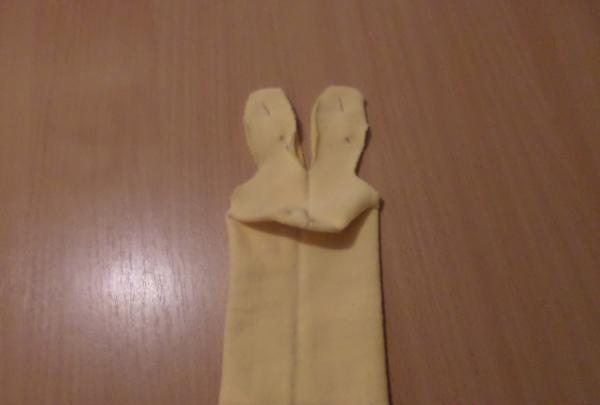
Now fold the prepared sock so that the heel is on top. Use a pencil to draw out the outlines of the ears.

draw out the contours of the ears


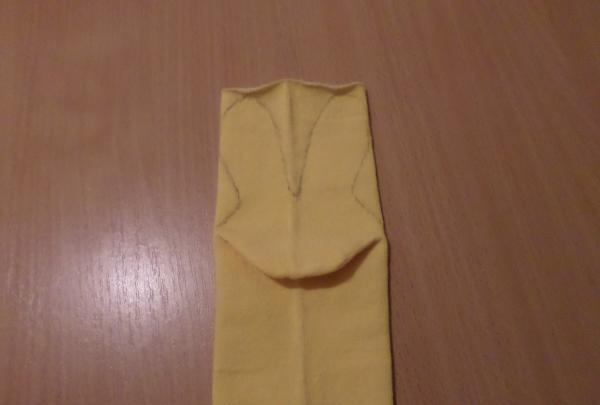
We get the outline of a hare's face from the heel. We make adjustments so that everything is smooth. Cut out the ears.

Cut out the ears


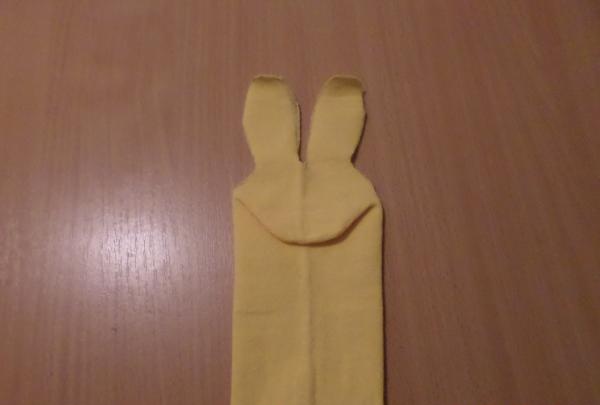
We turn the pattern inside out and pin it together to make it easier to work with.

Turn the pattern inside out


We sew up the ears. To do this, you can use a sewing machine and sew, or you can sew by hand, it will be even more soulful.

Sew up the ears


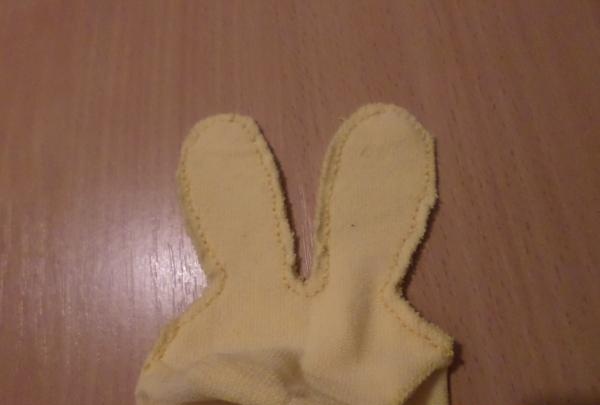
Having stitched the ears, we turn the product back (on the front side) and fill it with padding polyester, using a pencil for convenience.

turn it back inside out


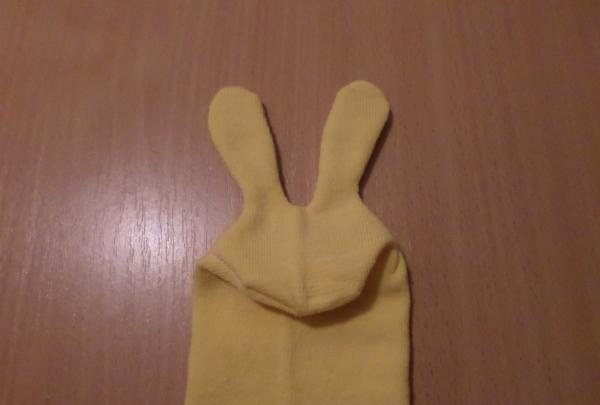
To prevent the ears from falling, it is necessary to lay a padding pad at their base.

lay a padding pad


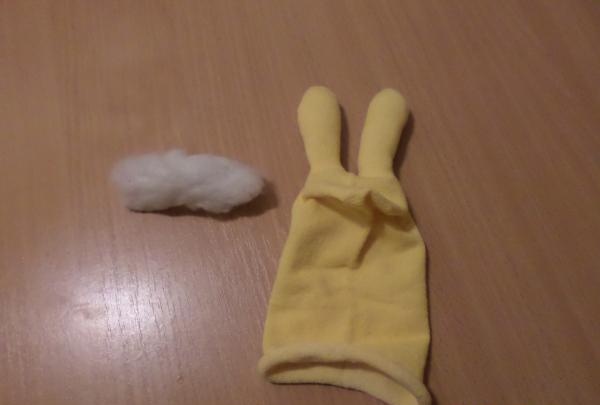
Next, we continue to stuff the bunny’s body with padding polyester.

Stuff the torso with synthetic padding


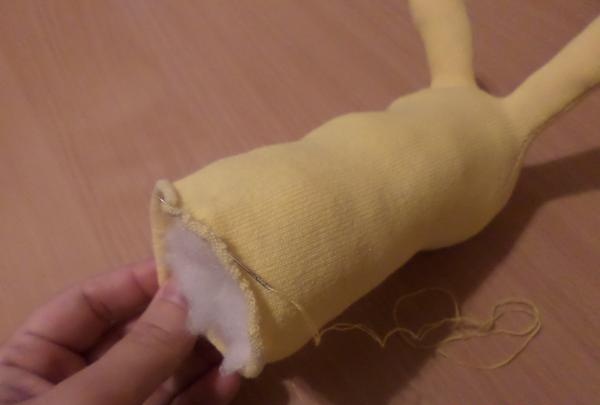
Approaching the edge, we put the fabric on a thread and begin to pull it together, thus closing the hole. In this case, we leave the thread and do not cut it.

we put the fabric on a thread


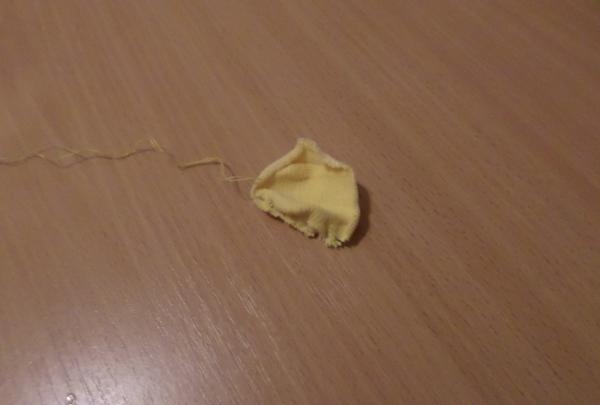
We cut out a small circle from the remains of the sock and collect it on a thread along the edge.

cut out a small circle


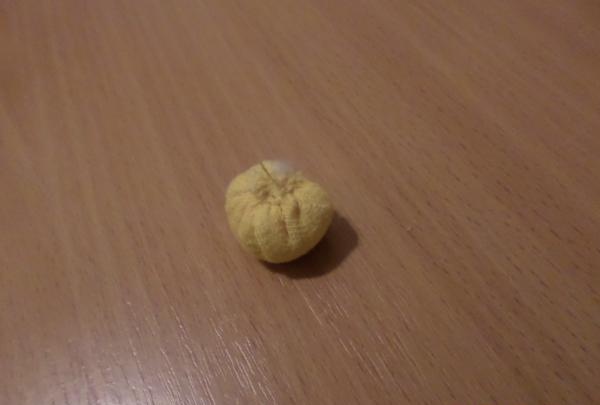
Fill the circle with padding polyester and tighten it. We got a soft ball. This is a bunny tail.

Fill the circle with padding polyester


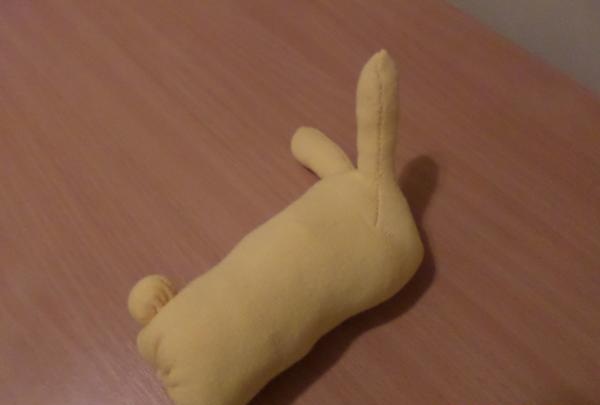
Sew the tail to the body.

Sew on the tail


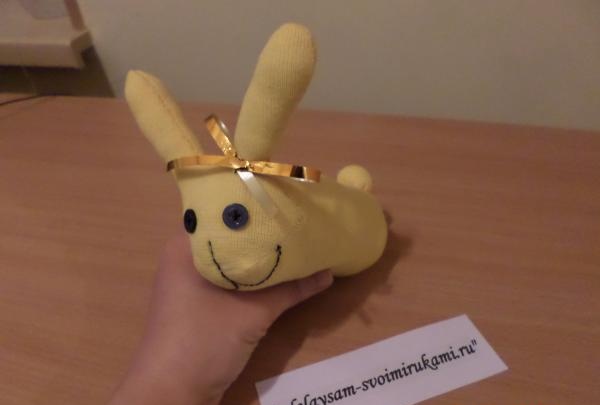
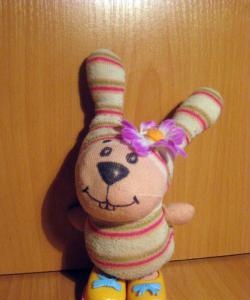
On the muzzle, carefully draw a muzzle with a contour. Using a contrasting thread, we embroider along the finished outline with large stitches.

draw a face


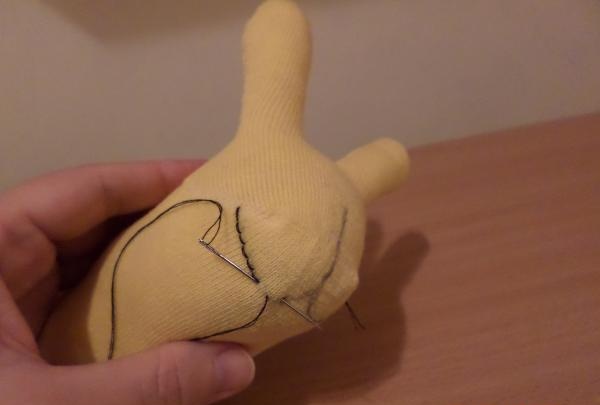
We got a cute little face. Missing eyes. Sew on two small buttons.

it turned out to be a cute face


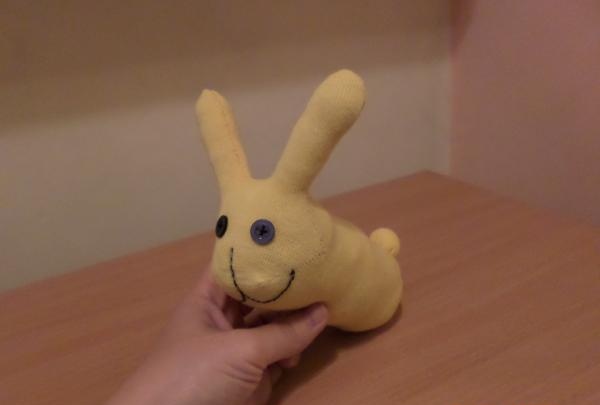
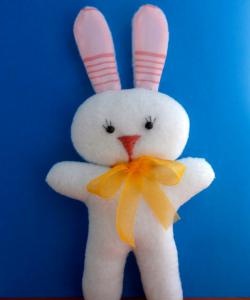
Now all that remains is to decorate the bunny. You can tie a bow on his ear or a butterfly on his neck. And our cheerful sunny bunny is ready.

cheerful sunny bunny
come back
Comment
  • bowtiesmilelaughingblushsmileyrelaxed relaxedsmirk
    heart_eyeskissing_heartkissing_closed_eyesflushedrelievedsatisfiedgrin
    winkstuck_out_tongue_winking_eyestuck_out_tongue_closed_eyesgrinningkissingstuck_out_tonguesleeping
    worriedfrowninganguishedopen_mouthgrimacingconfusedhushed
    expressionlessunamusedsweat_smilesweatdisappointed_relievedwearypassive
    disappointedconfoundedfearfulcold_sweatperseverecrysob
    joyastonishedscreamtired_faceangryragetriumph
    sleepyyummasksunglassesdizzy_faceimpsmiling_imp
    neutral_faceno_mouthinnocent
4 minus one =
Comments (0)

5 Ways to Use Old Toothbrushes

Handicraft techniques | Page 44 | Do it yourself

Simple Wall Lamp | Do it yourself

Hunting fishing tourism survival | Page 3 | Do it yourself

«Do it yourself - with your own hands» - a site of interesting homemade products made from scrap materials and items at home. Step-by-step master classes with photos and descriptions, technologies, life hacks - everything a real master or just a craftsman needs for needlework. Crafts of any complexity, a large selection of directions and ideas for creativity.

We recommend reading

Washing machine error codes