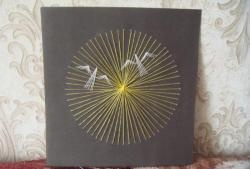
While browsing various craft sites, I caught my eye on a couple drawn as silhouettes on a black and white background. And I picked up the idea and decided to make a panel using the Iris folding technique.
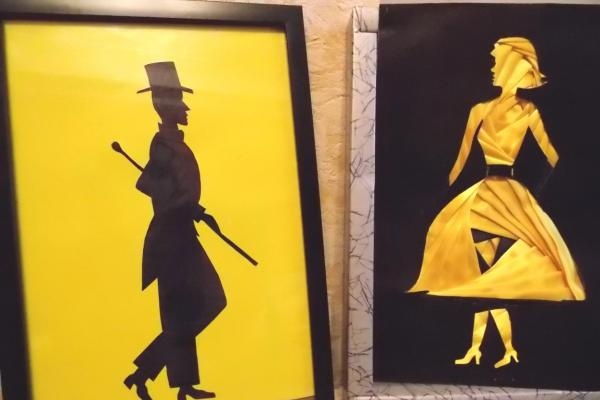
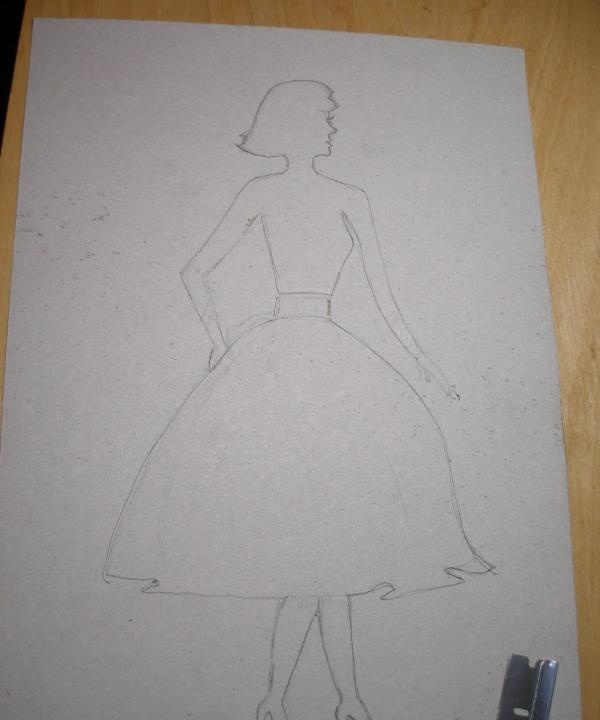
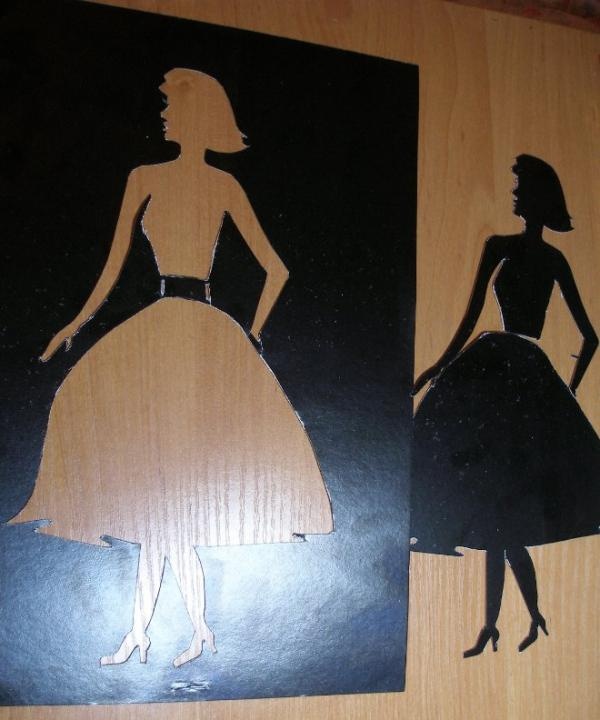
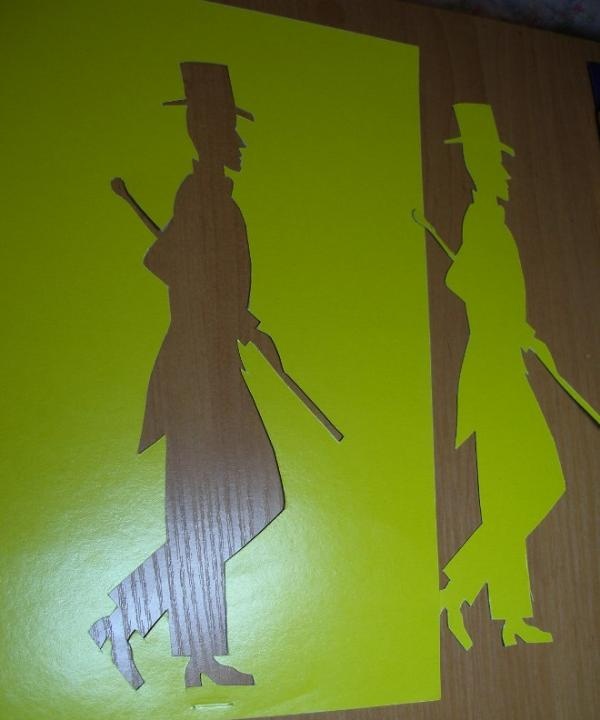
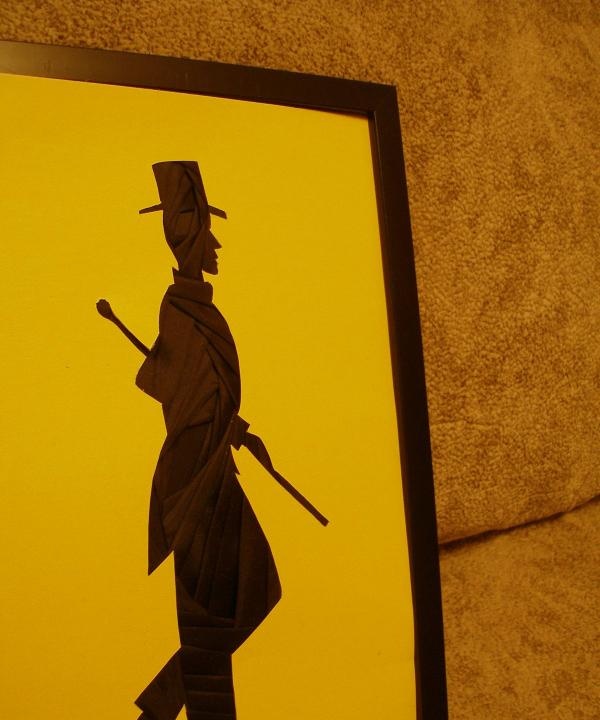
I will share the main stages of work, here is my master class. Having chosen two contrasting colors (yellow and black), we take thick cardboard and draw the silhouette of a gentleman with a cane and an elegant lady. It was decided to make the lady in yellow on a black background, and the man, on the contrary, in black on a yellow background.
For crafts required: thick colored cardboard (in our case, 1 sheet of black and 1 sheet of bright yellow cardboard), 2 sheets of regular white cardboard, black and yellow fabric, scissors, a stationery knife or blade, tape and an iris folding template.
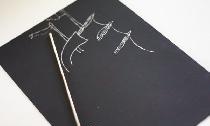
You can prepare templates yourself or use those offered by thematic sites on handicrafts. In the presented works, the templates were drawn independently. Two geometric shapes were used - a rectangle and a triangle.
On the reverse side, we mark and draw silhouettes on colored cardboard. After the silhouettes are drawn, they must be cut out with a sharp stationery knife or blade strictly along the contour. This will be our base on which the strips of fabric will be attached. The edges of the silhouettes should be clear and even.
Let's start with the silhouette of a man. First you need to cut strips of black fabric 2 cm wide; they can be of different lengths. Each strip must be folded and thoroughly ironed, then it will be easier to secure the tape. For the male silhouette, 2 rectangles of different sizes were used - in the head area and in the tailcoat area. We secure the templates on the table with tape and place the prepared base on top and also secure with tape.
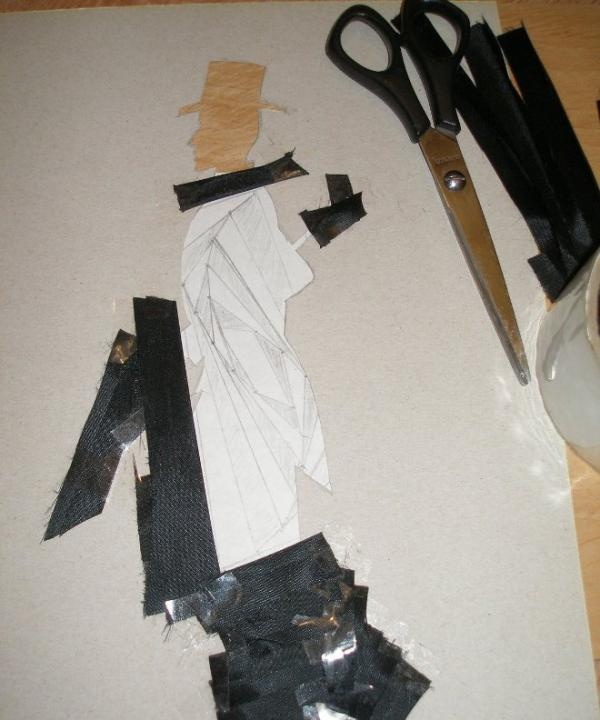
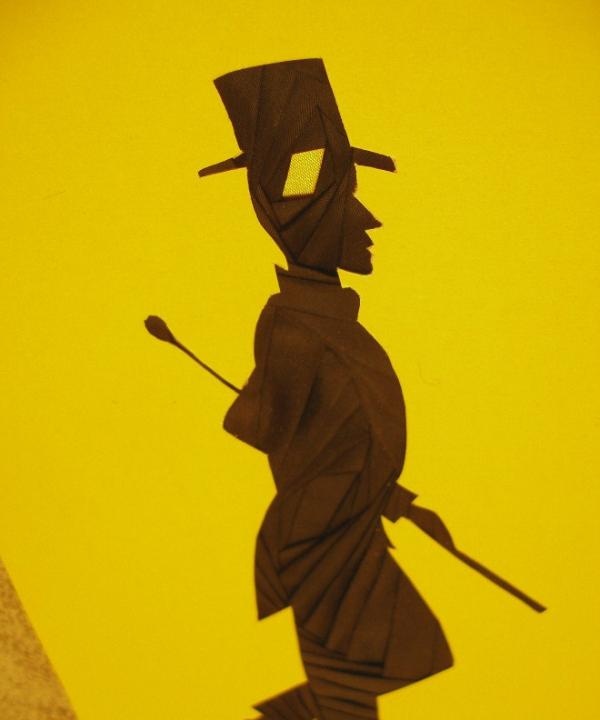
Now comes the most labor-intensive process, which requires accuracy and attentiveness from the performer. We lay out each strip of fabric according to the drawn template in a circle, starting from the edge to the middle, with the fold in the middle. We secure the edges of the fabric with pieces of tape, gluing the edge of the fabric to the base. And so on until everything is closed and a small rectangle remains in the middle, which can be covered with cloth or black cardboard. From the reverse side, the craft may look sloppy, but be patient and complete the panel.
The wrong side is covered with a clean sheet of cardboard or fiberboard, prepared to the size of the base. Now you peel the product off the surface and turn it over. And here is a result that was worth the effort.
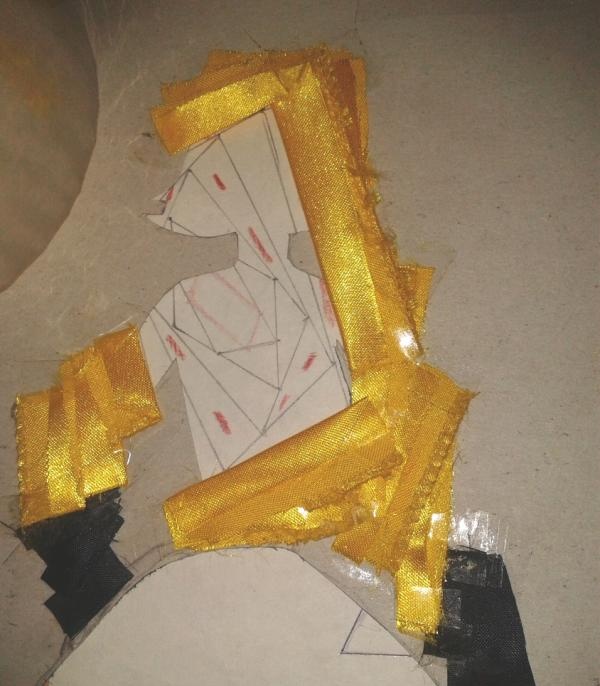
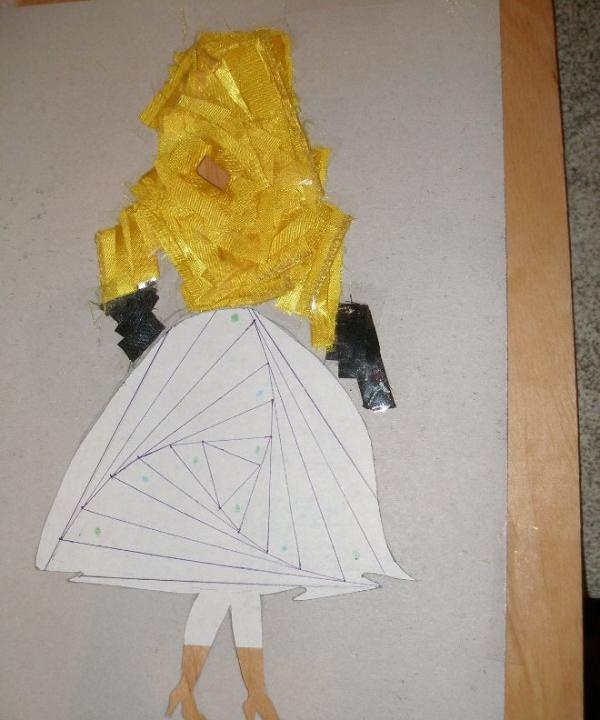
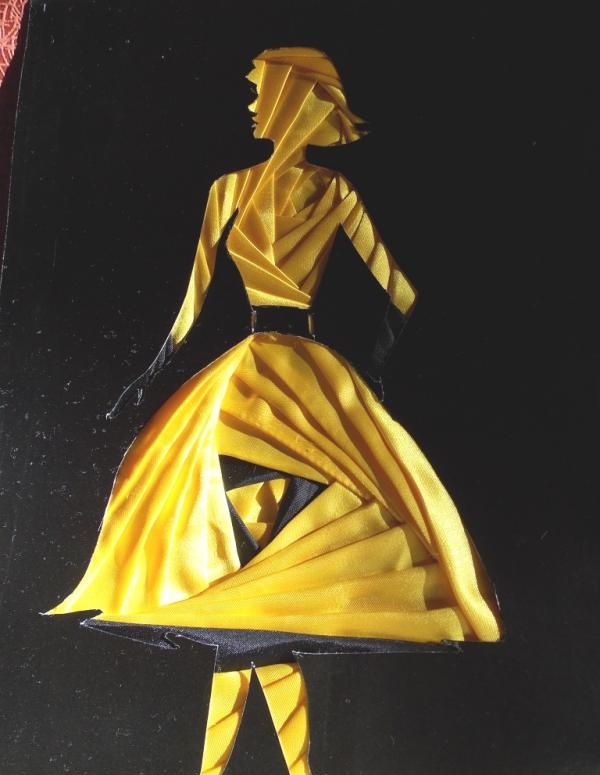
We make a lady in the same way. We secure the templates and base with tape so that they do not move while working. The upper part (head and torso to the waist) will be laid out according to a rectangle pattern, and the skirt - according to a triangle pattern. The legs and black gloves (and hands) were laid out separately in simply parallel stripes. Since the lady is carved on a black background, yellow satin fabric was used. And the second panel is laid out strip by strip in the same way; the middle in the triangle can be covered with black fabric for contrast.
When the work is completed, you can additionally cover all the strips with a single strip of tape. Then the reverse side is sealed with white cardboard or fiberboard. You can turn the finished panel over and admire the resulting work.
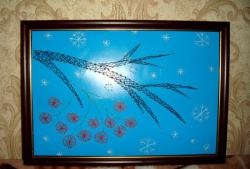
All that remains is to place both panels in frames and hang them on the wall. They will be a wonderful decoration for the interior of any room. It is especially important that it was made by hand.