Do it yourself
Life hacks, master classes, useful tips, recipes.
home » Handicraft techniques » Quilling » Quilling paintings » Quilling painting “Forest Fairy”
Technique quilling allows needlewomen to show all their imagination. As a result of simple manipulations, paper strips are transformed into spiral blanks from which volumetric ones can be made crafts and paintings. And if you combine several techniques (quilling, contour quilling and applique), you will get a very beautiful panel.
From this detailed master class you will learn the secrets of making the painting “Forest Fairy”.
To work, you need to collect the following set of materials and tools:
  • - a sheet of white cardboard;
  • - graphic drawing of a girl in profile;
  • - a sheet of golden paper;
  • - scissors;
  • - a piece of black cardboard;
  • - stripes for quilling of different shades;
  • - a tube of PVA glue;
  • - wooden skewer;
  • - frame.

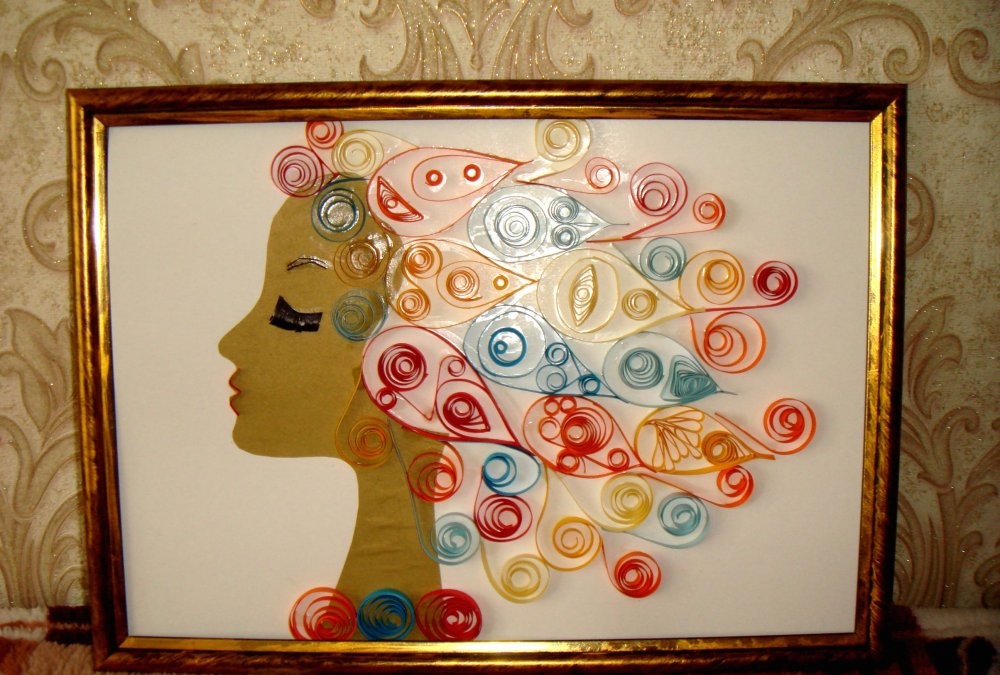
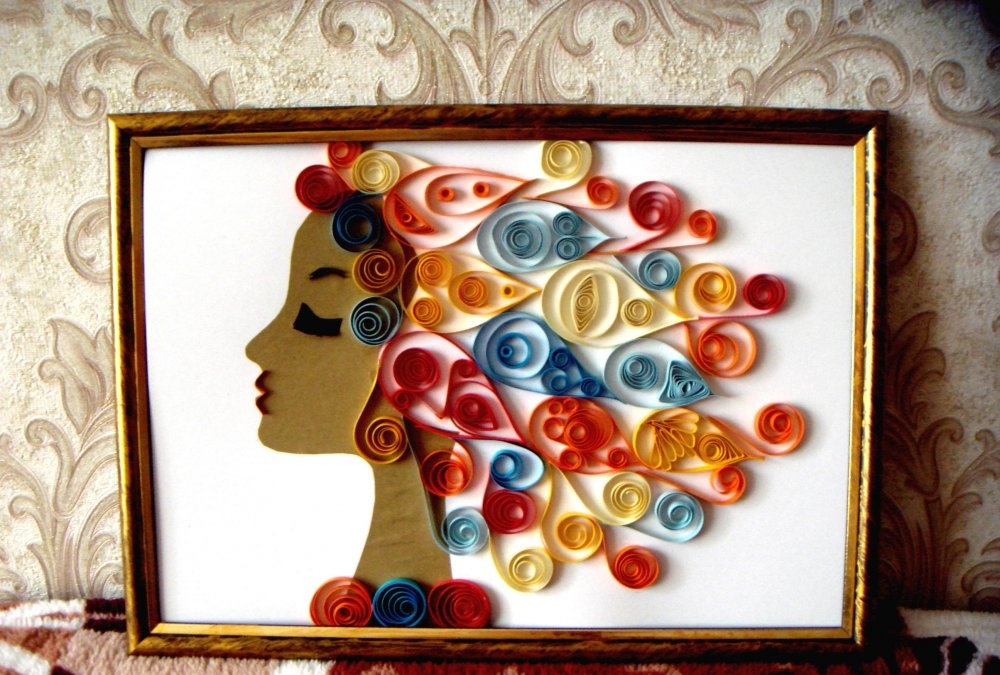
Three techniques will be used in the work: regular applique, quilling and contour quilling.
As a base, you can use a sheet of ordinary white cardboard. You will also need a profile picture of the girl. You can find it online and print it out on a piece of paper.
Painting using quilling technique

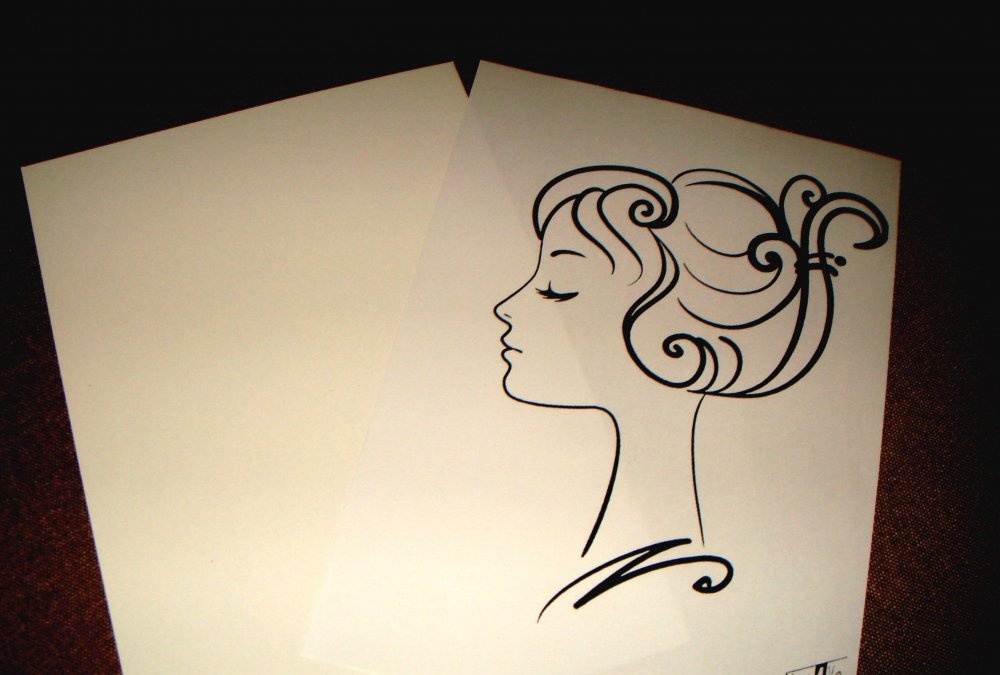
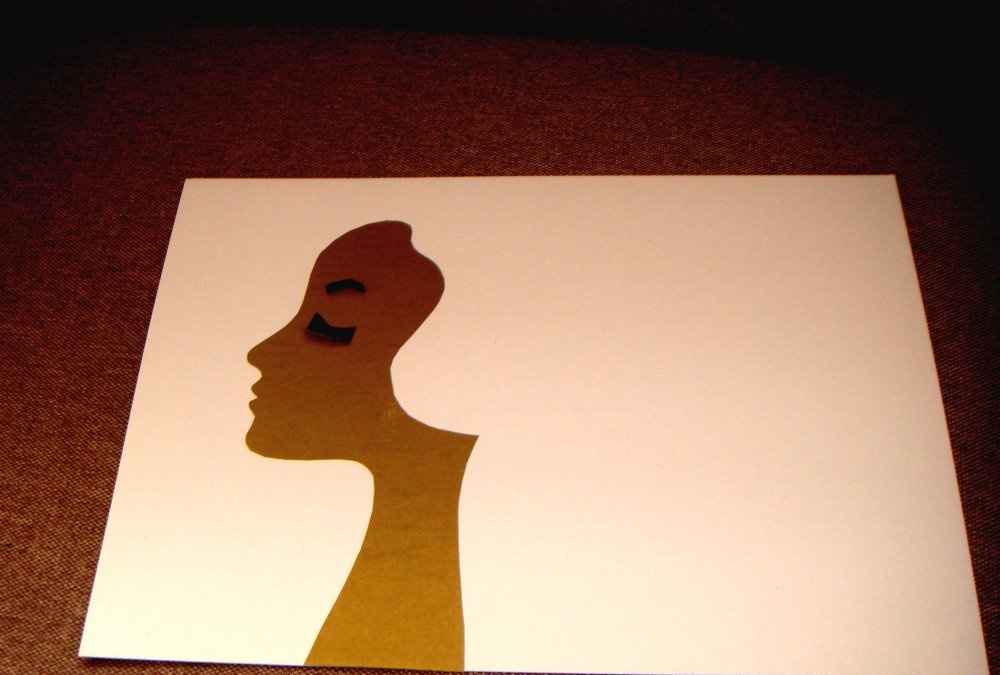
First, take a sheet of golden paper and a drawing of a girl.
Painting using quilling technique

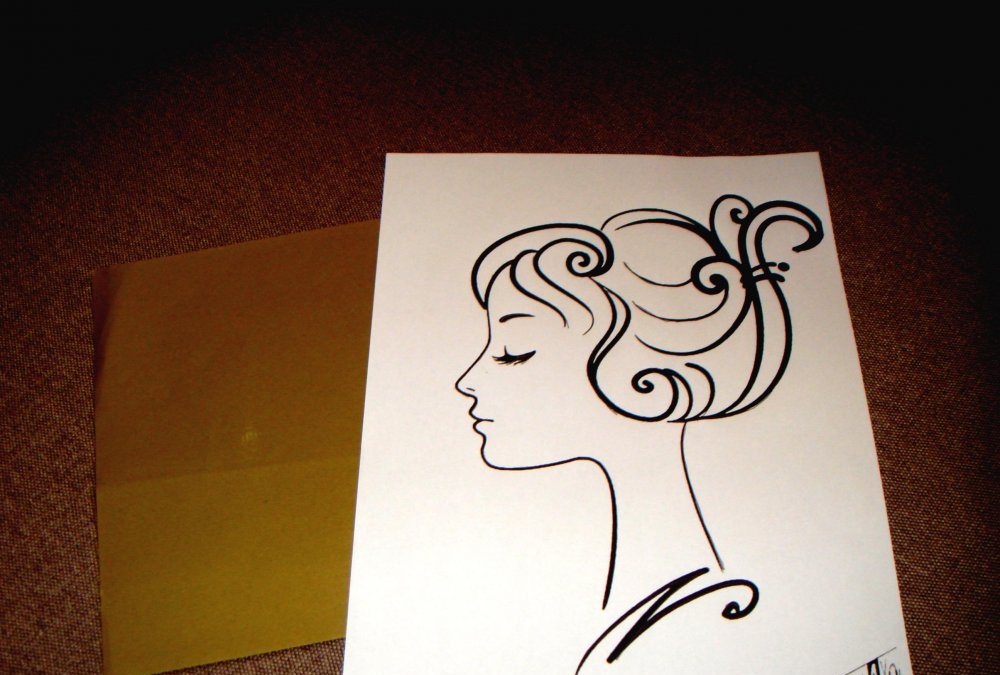
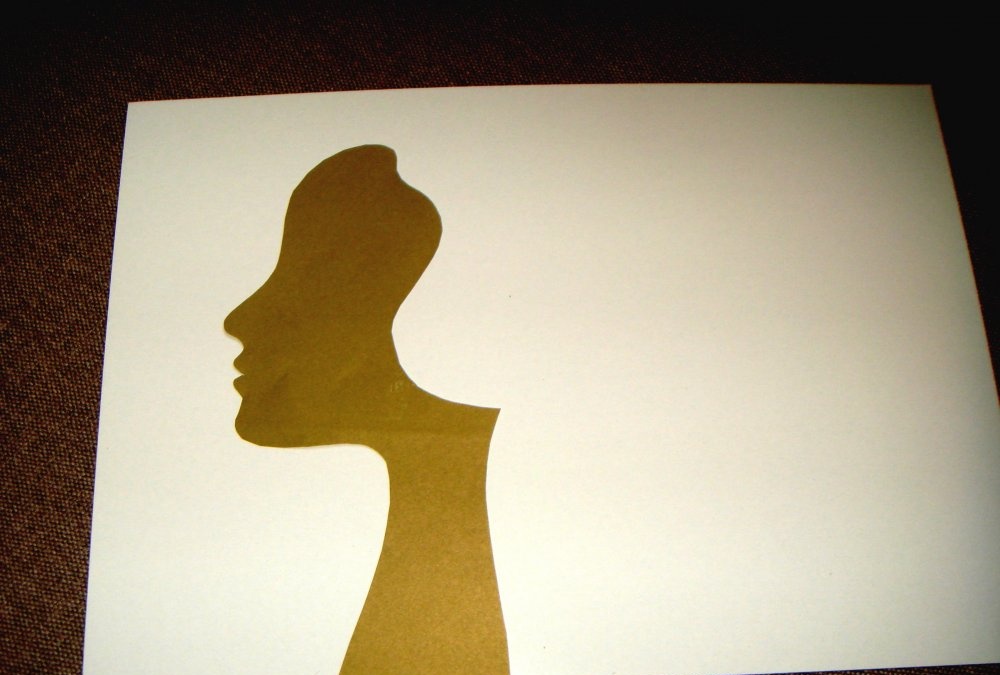
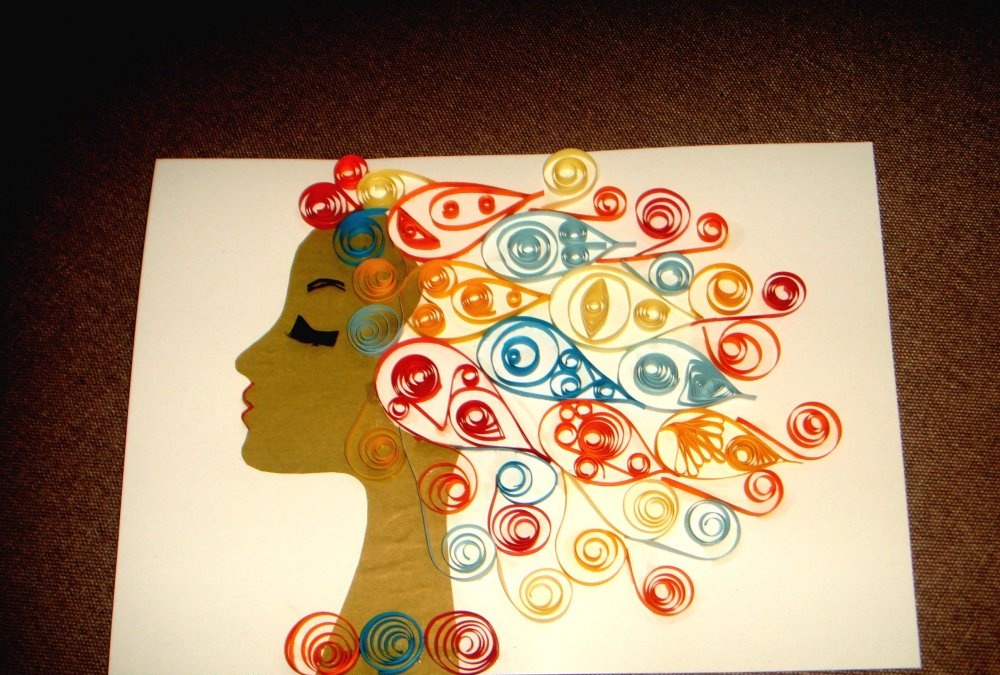
Place a colored sheet under the drawing and cut out only the girl’s face and neck.
Glue it onto white cardboard, slightly moving it to the left of center.
Painting using quilling technique

Cut out eyelashes and an eyebrow from a piece of black cardboard and glue them onto your face.
Painting using quilling technique

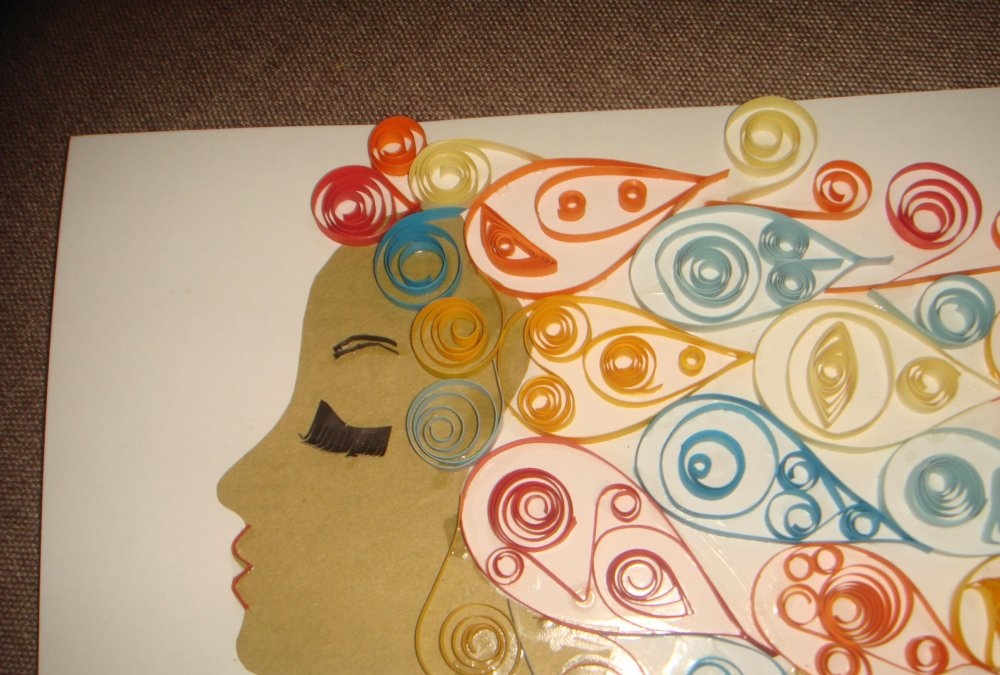
Form sponges from a thin red quilling strip.
Painting using quilling technique

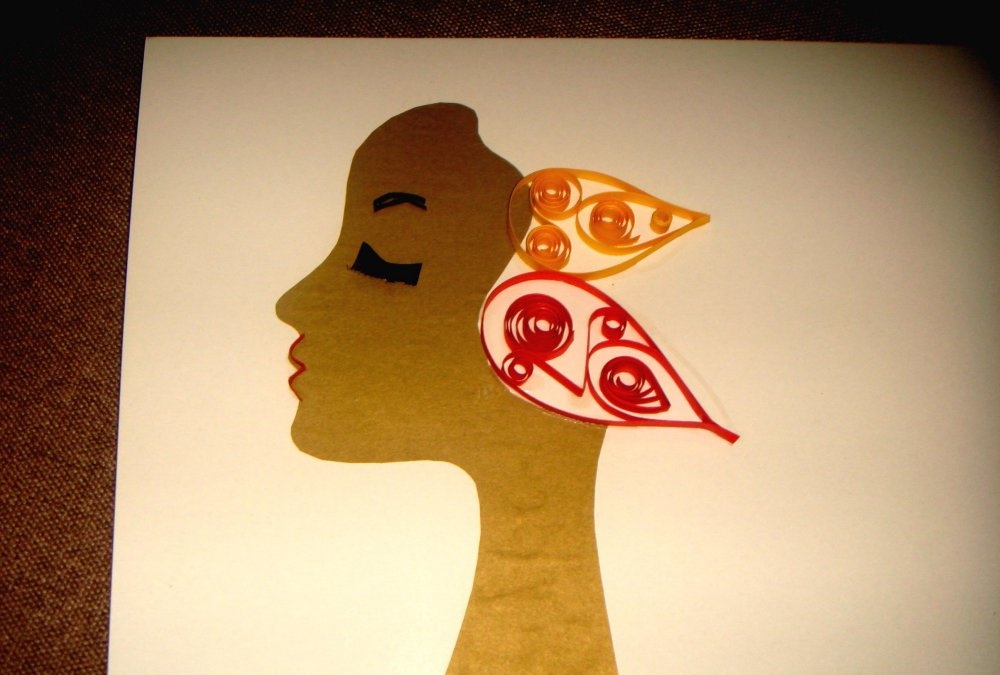
Now move on to making the hair. They will be unusual, formed from quilling elements.
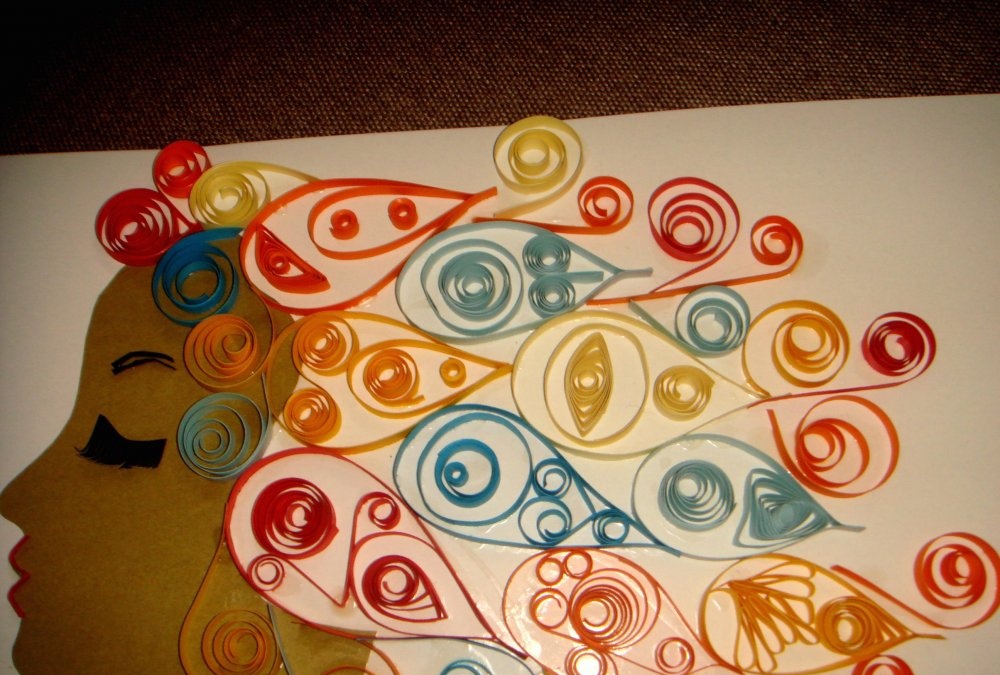
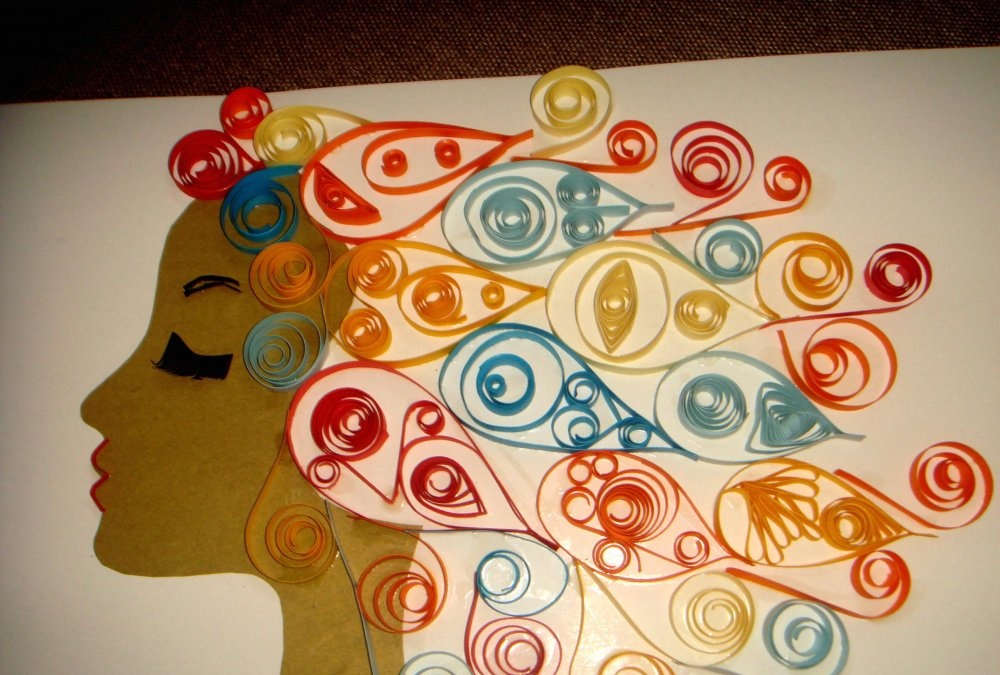
Choose multi-colored stripes. Make a teardrop-shaped piece from a piece of strip and glue it to the base (this is a contour quilling technique in which the strips are glued with the end side). Fill the middle of each drop with other smaller elements. To make them, you need to wind the strips onto a wooden stick, and form different elements from the resulting spirals.
Painting using quilling technique

Gradually you will get voluminous hair of a fairy girl.
Painting using quilling technique

Painting using quilling technique

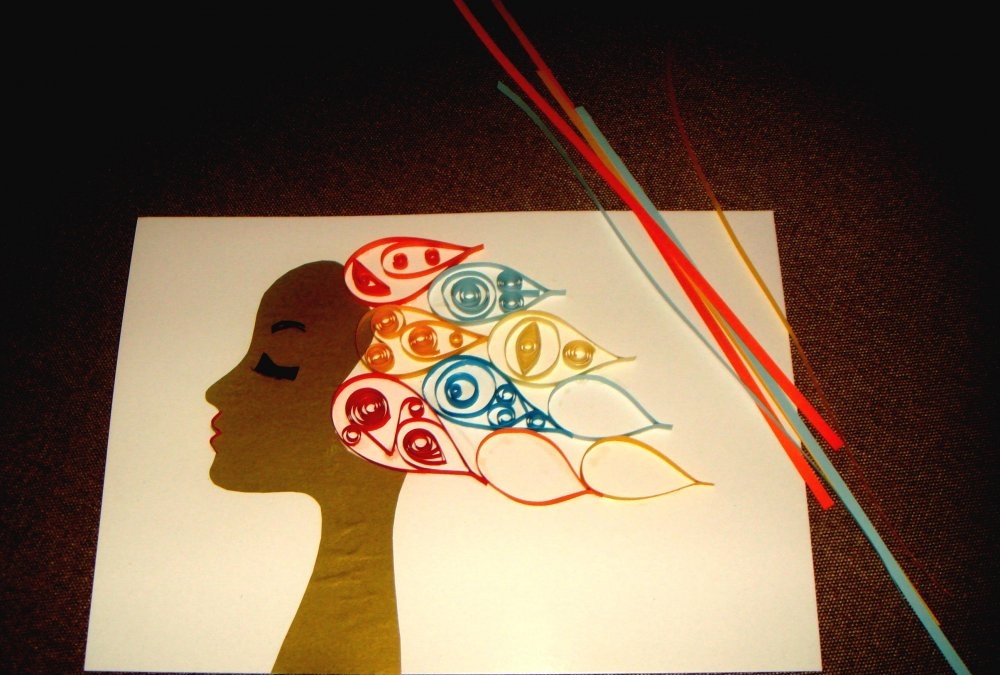
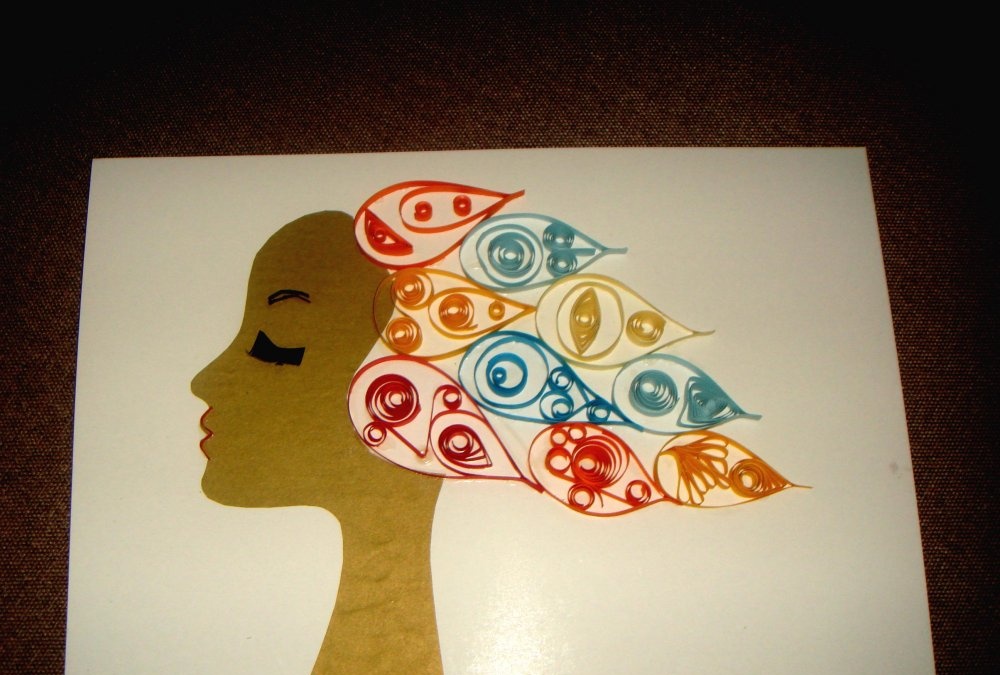
All that remains is to decorate the empty spaces with free spirals.
Painting using quilling technique

Painting using quilling technique

Painting using quilling technique

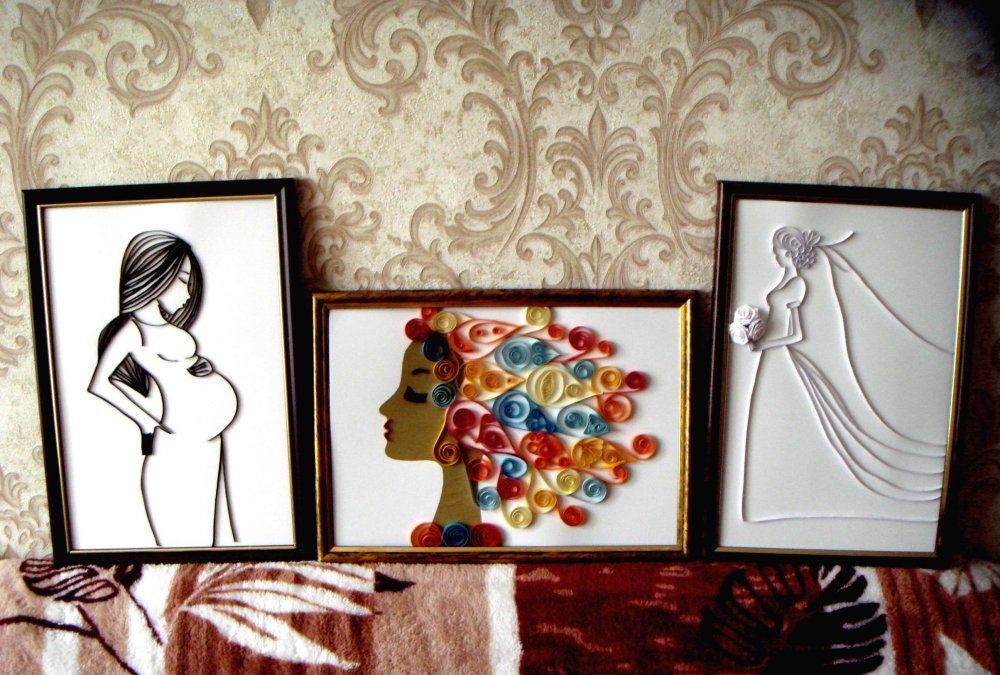
The picture is ready! The result of painstaking work was this unusual forest fairy with openwork patterns in her hair.
Painting using quilling technique

Place the picture in a frame and hang it in the hallway, hallway or bedroom.
Painting using quilling technique

The craft looks original and attractive!
Painting using quilling technique

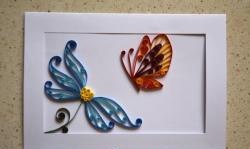
If you are not used to such brightness, then create images in white or black colors. They turn out to be more restrained, but just as gorgeous.
Painting using quilling technique

It is enough to try your hand at quilling and contour quilling techniques once to fall in love with them forever. After the first job it will be impossible to stop. Dozens of new ideas will begin to appear in your head, and the desire to bring them to life will not give you rest for a minute.
come back
Comment
  • bowtiesmilelaughingblushsmileyrelaxed relaxedsmirk
    heart_eyeskissing_heartkissing_closed_eyesflushedrelievedsatisfiedgrin
    winkstuck_out_tongue_winking_eyestuck_out_tongue_closed_eyesgrinningkissingstuck_out_tonguesleeping
    worriedfrowninganguishedopen_mouthgrimacingconfusedhushed
    expressionlessunamusedsweat_smilesweatdisappointed_relievedwearypassive
    disappointedconfoundedfearfulcold_sweatperseverecrysob
    joyastonishedscreamtired_faceangryragetriumph
    sleepyyummasksunglassesdizzy_faceimpsmiling_imp
    neutral_faceno_mouthinnocent
3+three=
Comments (3)
  1. Karinka
    #1 Karinka Guests 9 August 2017 15:05
    2
    Tried to make this picture! It turned out incredible! After spending just a little time, we got such beauty!
  2. MMddMM
    #2 MMddMM Guests 23 August 2017 23:51
    0
    I am always dissatisfied with the manufacturing technique in master classes. everything is almost thoroughly right there. I even repeated the sketch, everything is the same as in the source!
  3. Katya-0802
    #3 Katya-0802 Guests 26 August 2017 17:55
    0
    We made this picture with a child: it turned out almost perfect! You can give it to your grandma or hang it on the wall, thank you!

10 ingenious DIY life hacks for the DIYer

A method for emergency blood pressure reduction without drugs using plastic bottles

USB twisted pair extension cable

Indian amulet – dream catcher | Do it yourself

«Do it yourself - with your own hands» - a site of interesting homemade products made from scrap materials and items at home. Step-by-step master classes with photos and descriptions, technologies, life hacks - everything a real master or just a craftsman needs for needlework. Crafts of any complexity, a large selection of directions and ideas for creativity.

We recommend reading

Washing machine error codes