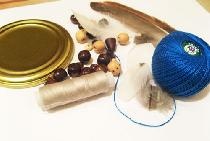
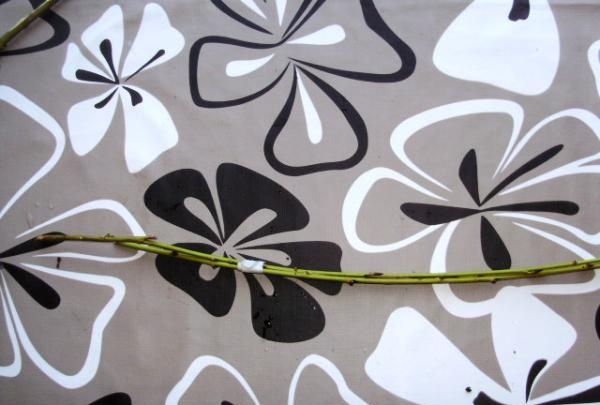
The catcher consists of a rim and a net. Any round base is suitable for the rim: made of wire, hoop. However, a base made of flexible branches is more natural. Willow, willow, wild grape shoots or hops are suitable. It is better to cut branches in early spring or autumn. Dry ones are no good - they have lost their flexibility. The collected branches should be soaked in hot water before work.
It is better to weave branches in 3-4 pieces. approximately the same thickness.
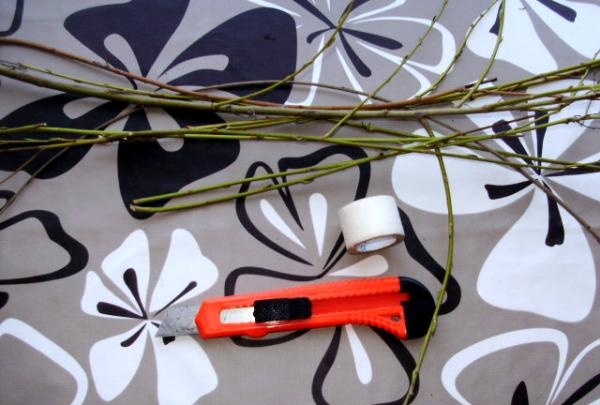
Secure the bundle with paper tape, then begin to bend it while twisting the branches.
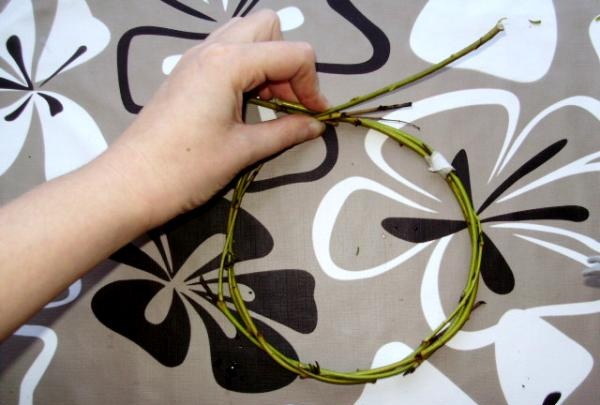
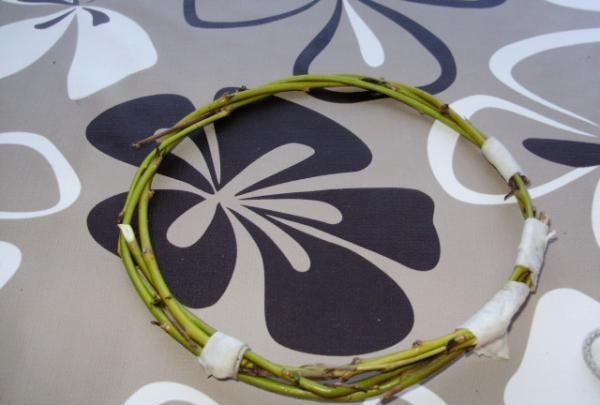
The ends of the end need to be intertwined with the beginning of the bundle to make a ring. Secure all protruding ends with paper tape, and cut off thick ends with a breadboard knife. While the base is flexible, it can be slightly wrinkled, giving it a shape as close as possible to a regular circle. Then put it under weight and let it dry for 2-3 days. The dried base is hard.
You can weave a net directly on the base (which can also be painted or varnished). You can also wrap the base with cord or thread.

The winding is tight.At the same time, do not rush to cut off the entire paper patch at once - individual branches can be very brittle. Choose the thickness of the thread proportional to the size of the future catcher.
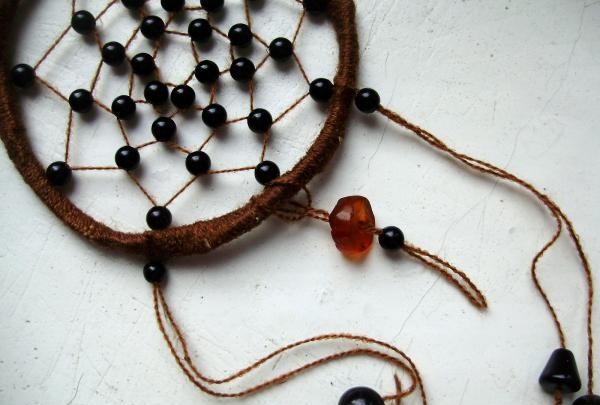
The resulting rim is ready to put a mesh on it. Unwind about a meter (for a catcher with a diameter of 8-10 cm) of thread and secure one end of it to the rim, and thread the other through a needle. The thread should not be too thin - such a net will not look good, especially on a large catcher. Its thickness should pass through the beads selected for decoration twice.
Thread the first and second beads onto the thread.
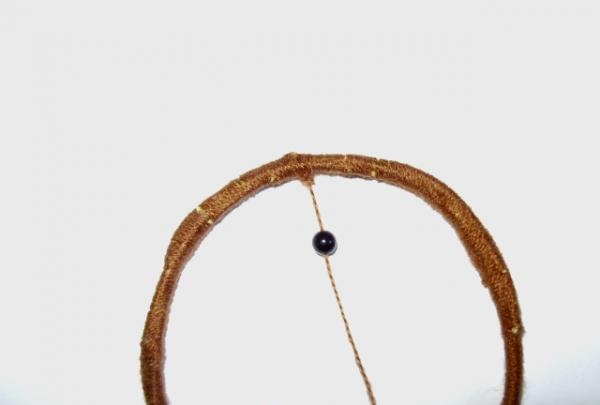
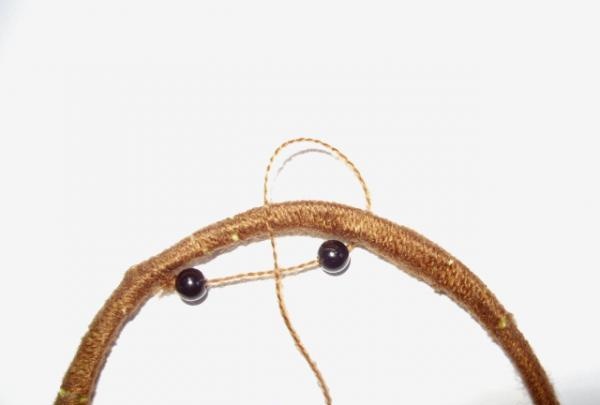
After this, make a loop around the rim.
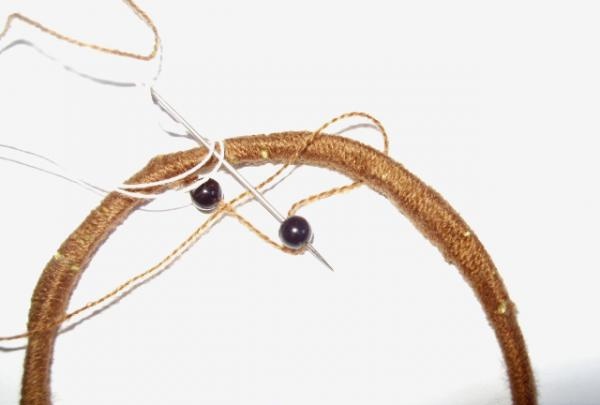
Once completed, thread the thread through bead two and tighten the thread. Then you can blunt three, four, and so on to the bead, securing each of the loops running at equal intervals along the rim.
The thread should be kept taut so that the loops do not come apart.
When the circle is completed, the next loop with a bead is attached between the first and second loops.
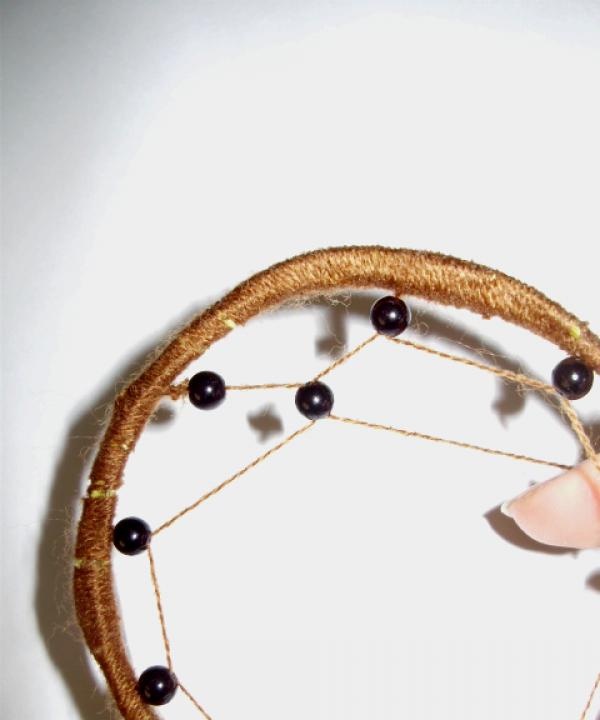
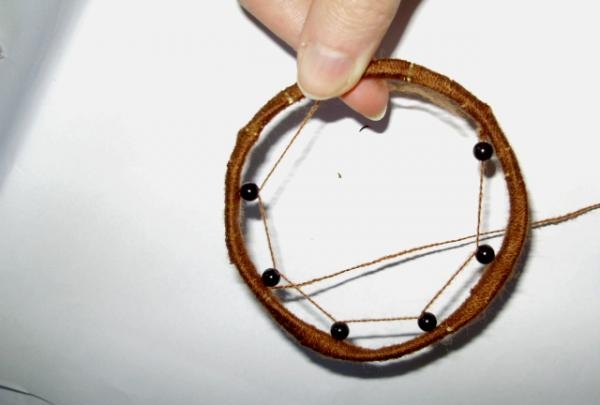
Thus, in a spiral, the loops go one after another. Due to the fact that the loops are not fixed, you can move them slightly, aligning the resulting network.
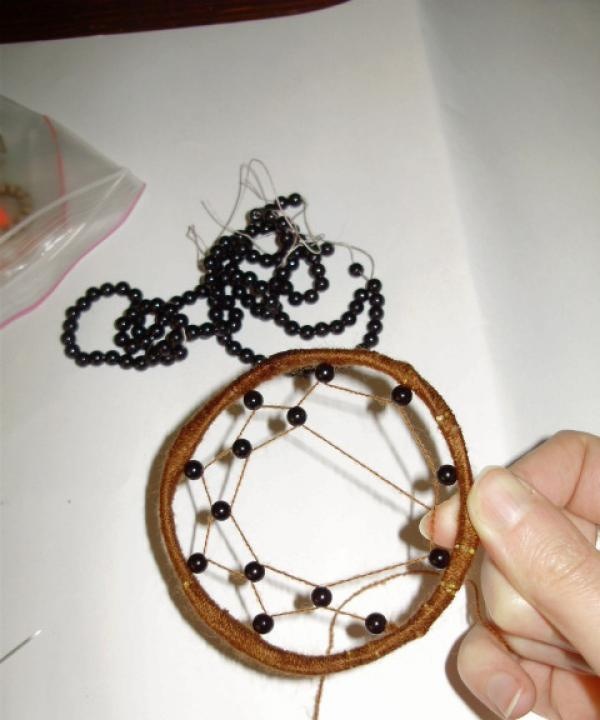
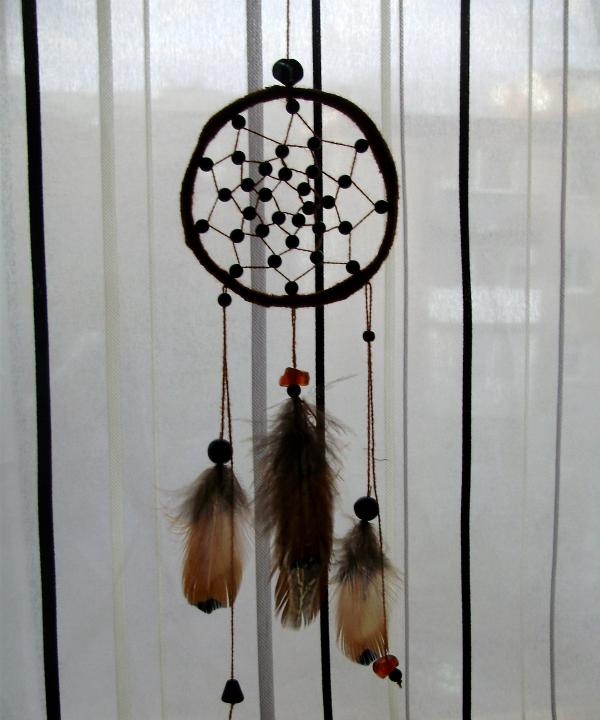
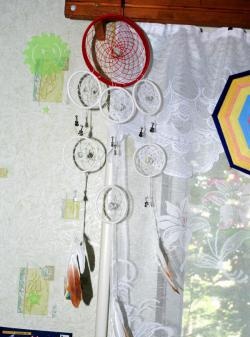
Its dimensions, in the end, are limited only by the diameter of the catcher and the size of the beads (which may be smaller in a smaller circle). Also keep an eye on the tension of the thread - the looser it is, the lower the density of the mesh in the catcher we will get in the end. The catcher ends with an inner circle with a hole into which the tip of the little finger can be inserted.
The final stage of working with the catcher is making a loop for hanging and decorating. The catcher is traditionally decorated with feathers (owl, hawk, pheasant) and beads.

First, string the beads onto the threads, then secure the threads to the catcher.
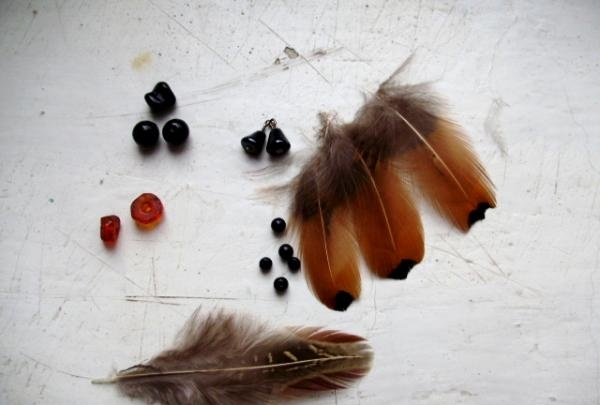

You can hide feather trunks inside the beads (by securing them with glue or tying them with thread).