Do it yourself
Life hacks, master classes, useful tips, recipes.
home » Different » Beekeeper's hat
My beloved husband has had positive emotions towards insects since early childhood. Bees and bumblebees evoked particular delight and admiration for the little boy. The boy has grown up. But the love for the “striped fly” remained. We got our first hive as soon as we bought a dacha in one of the most picturesque and wonderful places in Belarus. To care for bees, many special devices were needed. There simply wasn’t enough money in our family budget to purchase all the equipment. For many years I was interested in cutting and sewing, watching fashion shows and reading glossy magazines of leading fashion houses. I decided to sew a beekeeper's hat and thereby save a lot of money.

You will need:
  • fabric made from natural fibers (ideally dense linen)
  • color yellow and black (add creativity and positivity to your life)
  • two metal hoops of the required diameter
  • a piece of mesh (the structure is dense and transparent)
  • lace
  • lanyard fasteners
  • small piece of elastic or Velcro
  • free time
  • your desire and desire to make an individual beautiful thing


See the visual sketch in the photo.
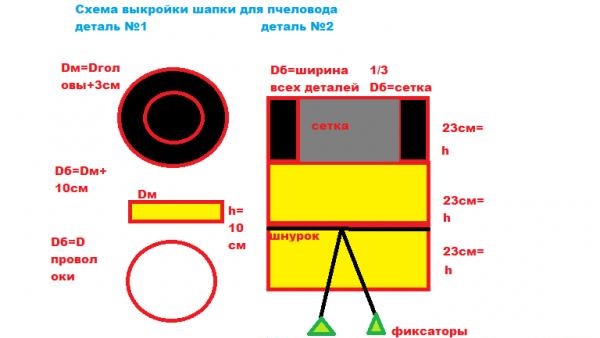
Beekeeper's hat


Allowances:
At seams and along cuts - 1.5 cm.
For the hem of the bottom of the hat - 4 cm.
Cut:
part No. 1-1pcs
part No. 2-1 piece
part No. 3-1 piece
part No. 4-1 piece
item No. 5-1pcs
item No. 6-1pcs
item No. 9-1pcs
After cutting, iron and steam all parts. You can starch it.

Sewing:
Part 1:
Stitch the short sections of part No. 3 together. Process the edges. Connect part No. 3 to part No. 2 and sew along the small diameter of part No. 1. Process the edges. Connect the metal rim to the edge of part No. 1, place it under it and stitch it to the edge. Iron the hat and steam it. To give it shape, put it on a 3 liter jar or blank and leave it for a couple of hours, or better yet a day.

Part #2:
Connect and stitch the short ends of part No. 5 and part No. 6. Process the edges.
Connect parts No. 4 and part No. 9 together and stitch them together. Process the edges. Connect the resulting structure in a circle and stitch with part No. 5. Connect the resulting structure in a circle and stitch it with part No. 6. Place the edge of the structure by 4 cm and topstitch. Sew a drawstring between parts No. 5 and No. 6 and tighten the lace. Place fasteners on the ends of the lace. Place a metal hoop between the top part No. 4/No. 9 and part No. 5 and stitch in a circle.
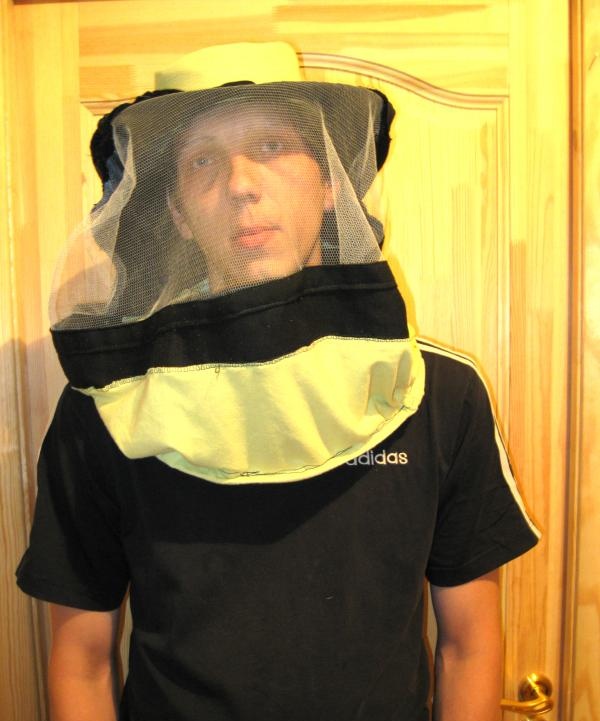
Assembling the beekeeper's hat:
At the top of part No. 2, install an elastic band or Velcro. Connect part No. 1 and part No. 2 in this way: leave a distance opposite the face.
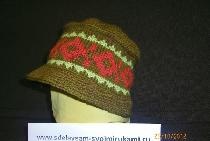
I got such a beautiful beekeeper’s hat.

Beekeeper's hat


My husband will pamper me with the first honey for my hat.
R.S: For the New Year, I sewed a wizard’s hat for my beloved son, following the example I described in this article in part 1. I decorated it with colored rhinestones. I embroidered with beads. Everything turned out great. We received for the best carnival costume sweet present from Santa Claus. My baby was pleased to catch curious glances and listen to compliments from the children and teachers. It is a pity that the photographs were not preserved.
come back
Comment
  • bowtiesmilelaughingblushsmileyrelaxed relaxedsmirk
    heart_eyeskissing_heartkissing_closed_eyesflushedrelievedsatisfiedgrin
    winkstuck_out_tongue_winking_eyestuck_out_tongue_closed_eyesgrinningkissingstuck_out_tonguesleeping
    worriedfrowninganguishedopen_mouthgrimacingconfusedhushed
    expressionlessunamusedsweat_smilesweatdisappointed_relievedwearypassive
    disappointedconfoundedfearfulcold_sweatperseverecrysob
    joyastonishedscreamtired_faceangryragetriumph
    sleepyyummasksunglassesdizzy_faceimpsmiling_imp
    neutral_faceno_mouthinnocent
5+two=
Comments (3)
  1. Igor
    #1 Igor Guests 24 July 2014 22:25
    5
    It doesn't look like he was very happy; by the look of it, you could say he was full of sorrow.
    or was he stung by a bee? wink
  2. Nina
    #2 Nina Guests 2 March 2015 21:46
    1
    Thank you for your publication! I don’t understand which part has which number... is it possible to somehow sign it on the picture?
  3. Sveta
    #3 Sveta Guests September 21, 2018 07:06
    2
    the mesh must be black, otherwise when the bright sun is bright, nothing can be seen. checked.

Salt dough souvenir | Do it yourself

How to convert a corded jigsaw into a cordless one with your own hands

Power supply for a beginner radio amateur

Inexpensive homemade guide with a carriage for a manual circular saw

«Do it yourself - with your own hands» - a site of interesting homemade products made from scrap materials and items at home. Step-by-step master classes with photos and descriptions, technologies, life hacks - everything a real master or just a craftsman needs for needlework. Crafts of any complexity, a large selection of directions and ideas for creativity.

We recommend reading

Washing machine error codes