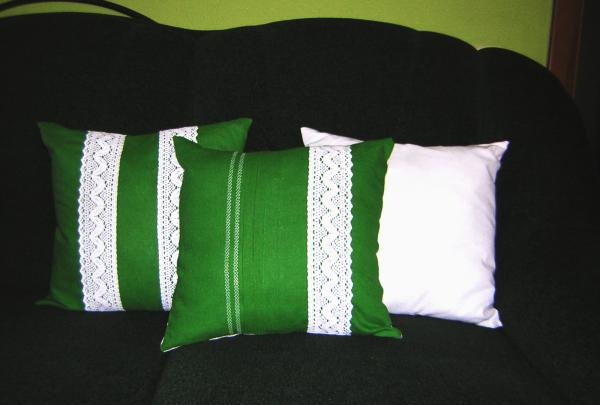
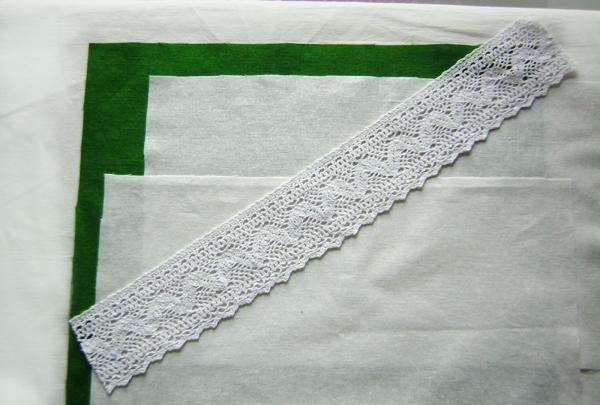
So, the example describes sewing a cover measuring 40x40 cm. Cut a piece of green fabric measuring 43x50 cm (the size of the pillow plus allowances for seams and fabric for folds). Then, for the back side with the clasp, we cut out two more pieces of white fabric 43x26.5 cm (the side of the cover divided in half plus 5 cm for the clasp). You can do without a fastener and just carefully sew up the unstitched part with your hands after putting on the cover, but with a fastener it will be more convenient to wash the cover itself later, especially if the fabric is light and you will have to wash it more often. Take a piece of linen lace, slightly longer than the side of the cover.
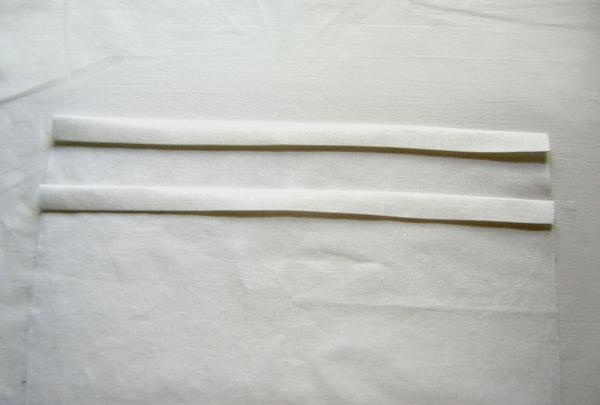
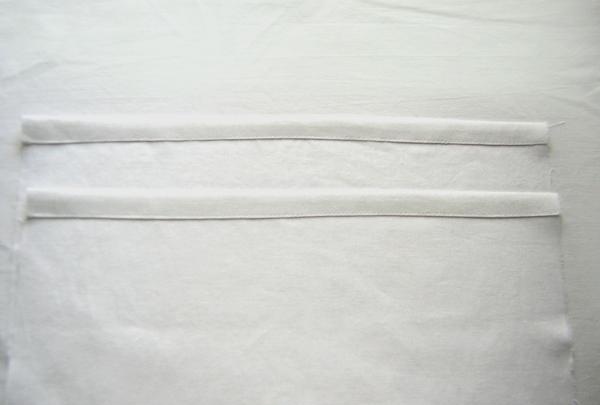
We process the back part of the cover. Iron the seam allowance by 2 cm, then again by 2 cm.It’s good to press down the ironed part for a few seconds with a wooden ruler immediately after ironing. Wood absorbs moisture well, acting as an ideal press.
We sew off, retreating 1 mm from the ironed edge.
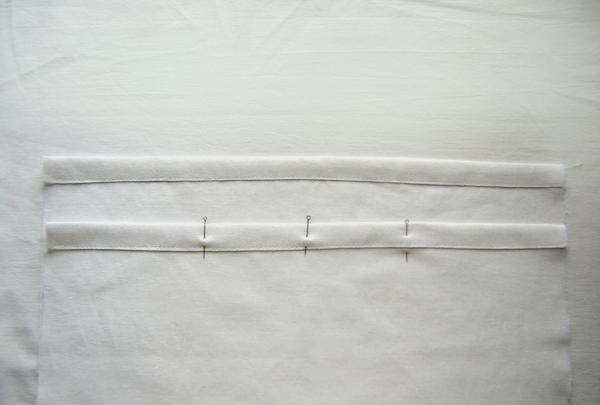
We mark with pins on the completed fastener bar the places where the buttons will be sewn on - we sew one in the middle and another pair, 7 cm apart from the middle button.
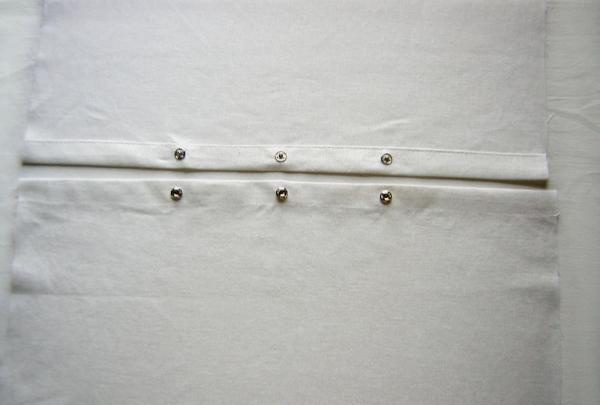
We sew on the buttons, taking care so that the threads are not visible on the front part of the fastener; to do this, we sew, touching only the top layer of fabric with the needle.
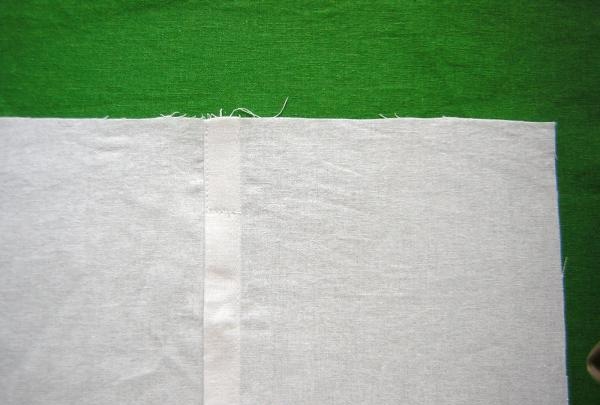
We fasten the buttons of our fastener and along the front part of the fabric with the letter “G” we sew both parts of the back of the cover by about 5 cm. On the short part of our seam we make a tack so that the seam does not come apart when putting the cover on the pillow.
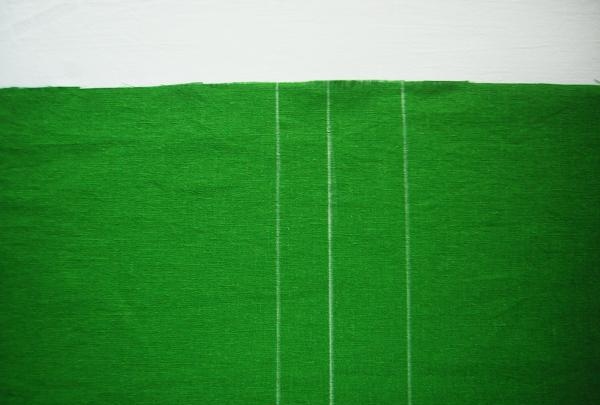
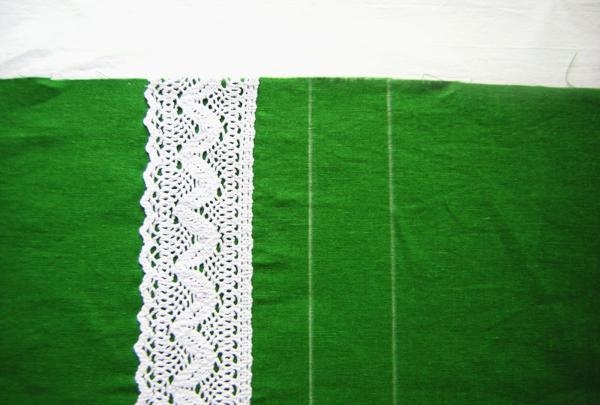
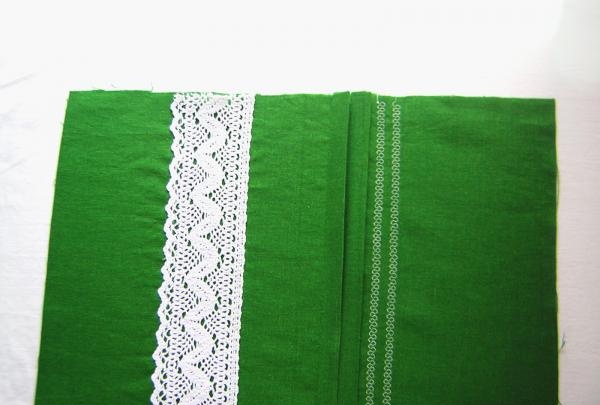
We take a green piece of fabric and make markings on it for sewing on lace and folds. This is done so that the decorative elements look symmetrical. On the longer side of the fabric, set aside 21.5 cm from the cut to the right (the length of the side of the cover, divided in half plus an allowance). This is our middle of the pillow. To the left of the resulting midline we set aside 3 cm (half the width of the lace). To the right of the middle line we set aside 4.5 cm (half the width of the lace plus the width of the fold - 1.5 cm).
We apply the lace to the left line and sew it with an even stitch on both sides. Be sure to lay two lines in the same direction! Otherwise, the fabric under the lace will stretch during sewing.
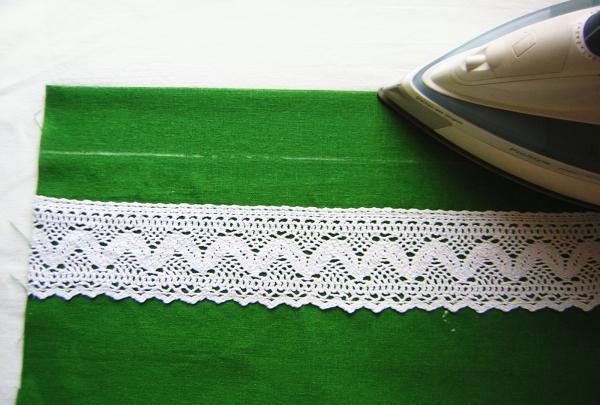
We begin to lay out the folds. Iron the fabric by folding it in half along the drawn line on the far right. This way the folds are perfectly even.
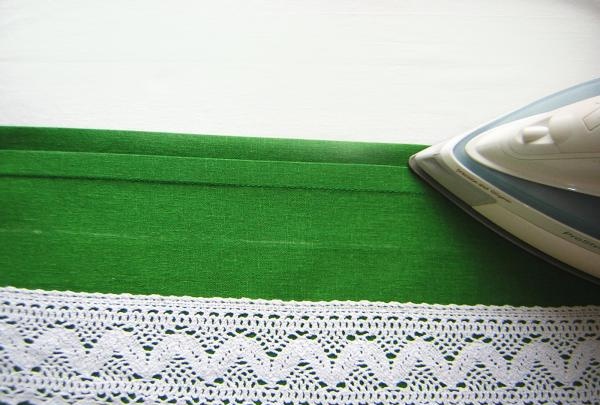
Sew off the fold, departing from the ironed edge 1.5 cm (width of the fold). Iron the fold from the inside out, away from the lace.We fold the fabric again with the expectation that the new fold will also be 1.5 cm wide, and iron it.
We sew the fold again, but this time we retreat 1.7 cm from the ironed edge - so that the stitching is not visible from under the folds. In principle, you can make as many folds as you want, just don’t forget to first calculate the fabric consumption. I didn't have much fabric, so I laid a decorative stitch in two rows along the resulting folds. You can sew narrow lace. Or make the pillow symmetrical by simply sewing lace in two rows. Here it all depends on your imagination and, if you don’t want to spend extra money on buying decor, on what you have in your home supply.
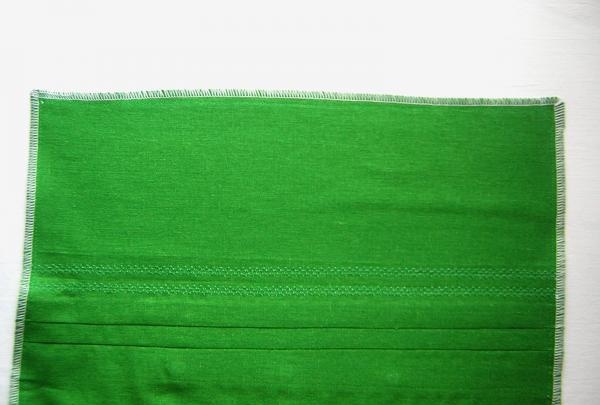
We fold our two parts of the cover face to face, pin together, align the cuts and stitch along the perimeter. Finish the edge with an overlock or zigzag stitch.
This is how we ended up with a decorative pillow for the sofa. And it is indispensable as decoration and convenient for relaxation.