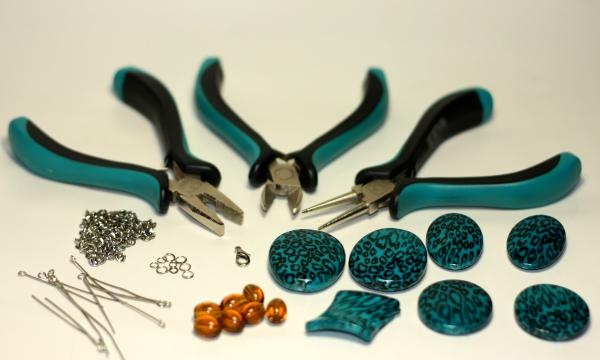
We will need:
• pliers
• side cutters
• round nose pliers
• pins with loops at the end
• chain with large links
• carbine
• jewelry rings for fastening with a diameter of 0.5 cm
• amber glass beads
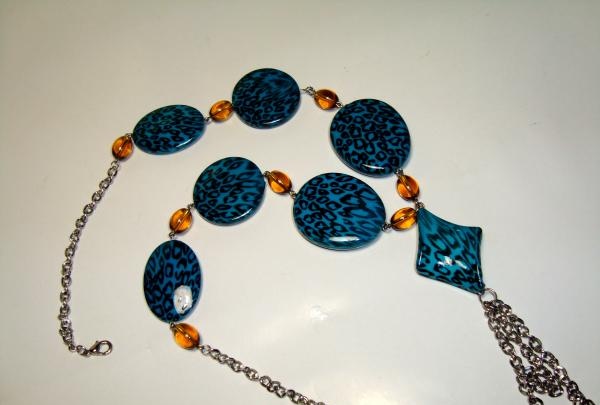
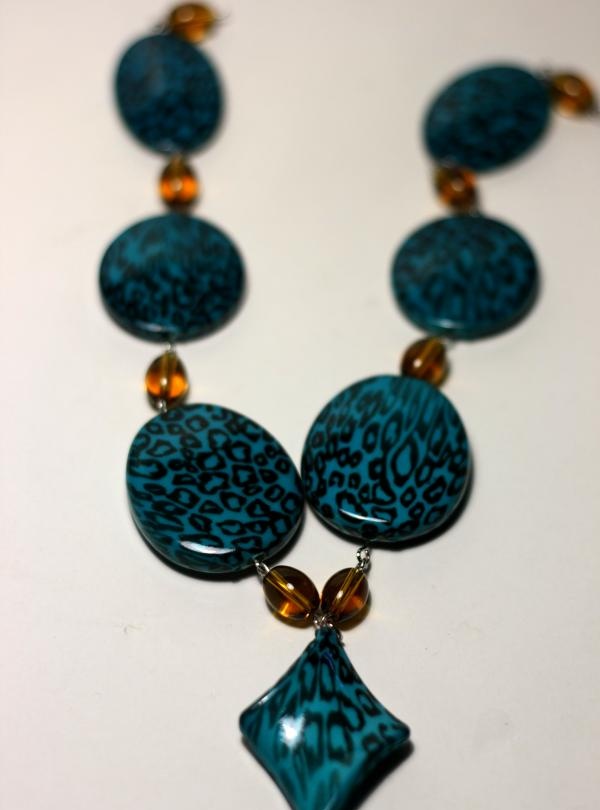
• large figured beads of turquoise color
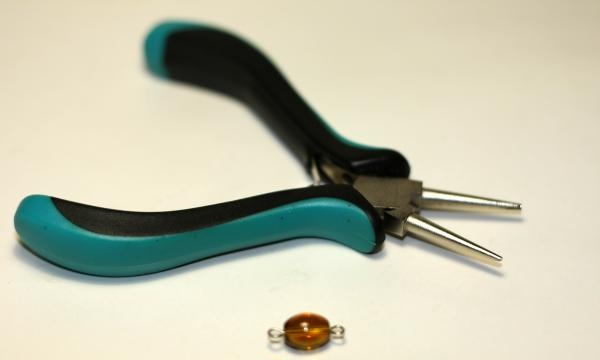
We put small glass beads on the pin and bend it with our hands.
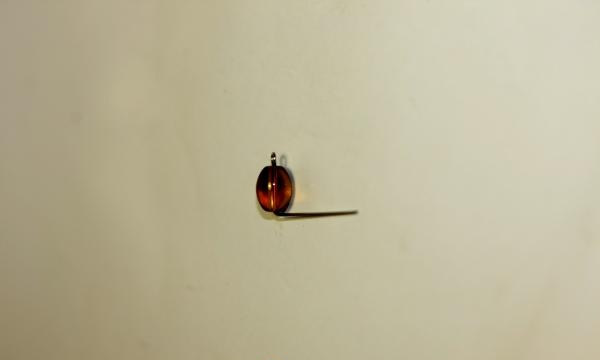
We take side cutters and cut off the pin, leaving approximately 1 cm.
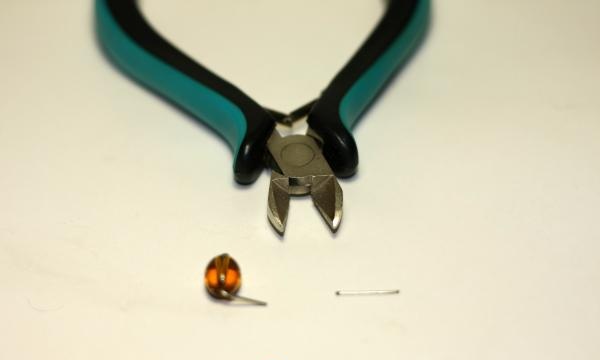
Now we need to make exactly the same loop on the second end of the bead. To do this, use pliers to grab the tip of the pin and bend it in the opposite direction. For example, if you bent the pin to the left with your hands, now you need to use pliers to bend it to the right. It turns out to be a beautiful loop.
Let's do the same with all the glass beads that we plan to use in our work. These are the Cheburashkas we will get.
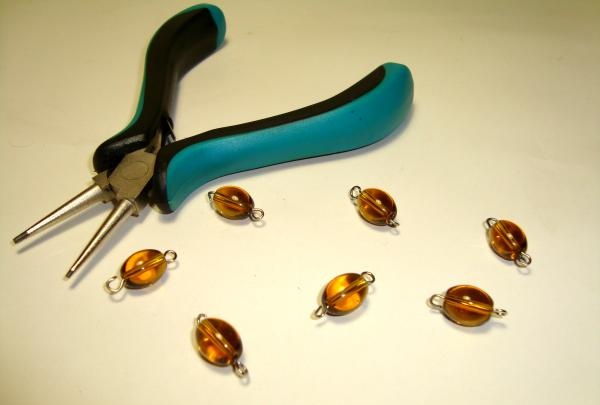
Remember that at this stage there is no need to close our loops, leave them slightly open, we will close them a little later.
Next, we thread pins into our main beads and make rings in the same way. We do not close the rings. Show your imagination and try different combinations of shaped beads. I chose this combination for my beads.
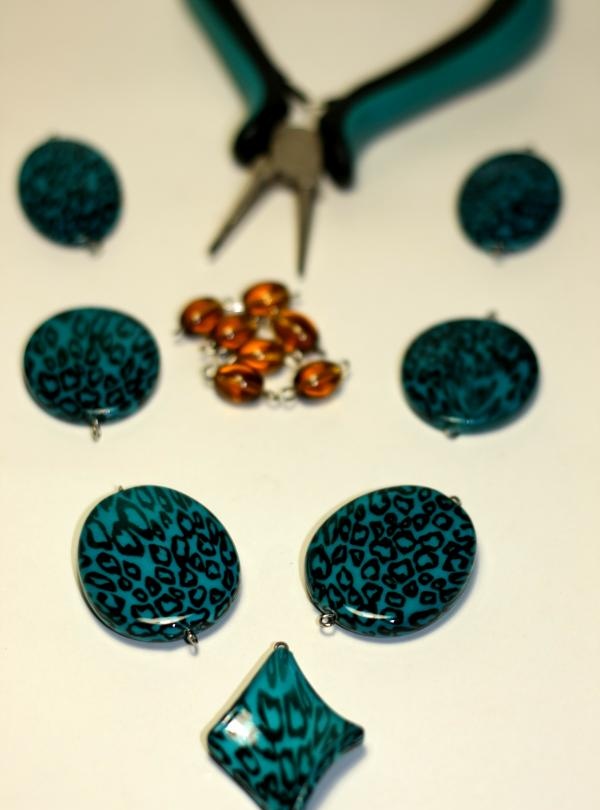
Now we need to assemble the scattered beads into a single whole. For me, this stage is the most interesting, because... Now we can already see how our product will turn out. If you decide to change your bead combination, do it now before it's too late.
So, with the help of the loops, which we prudently left slightly open, we can easily assemble the product. We close all the loops tightly with round nose pliers.
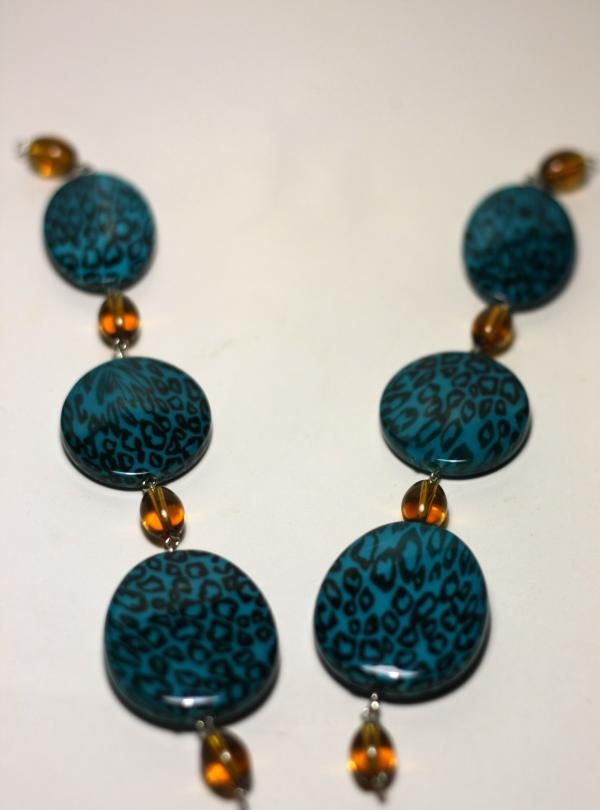
Using a connecting ring, we attach the bead that we focus on. I have this diamond-shaped bead, the same color as the main curly beads. You can highlight it with a different color if you wish. We thread the connecting ring into the ears of two amber beads and a diamond-shaped bead. Close the ring tightly.
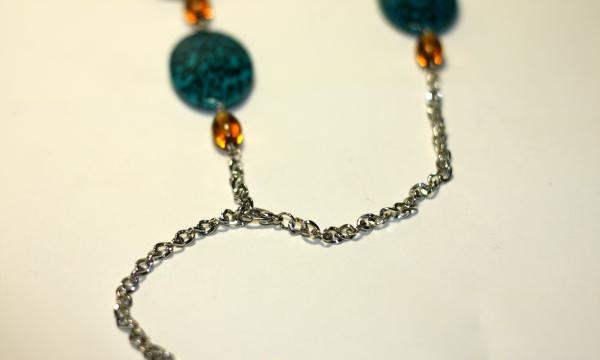
We measure out 3 pieces of chain. They don't have to be the same. On the contrary, let their lengths be slightly different. I have chains 6-7 cm long. We thread the connecting ring into the outer links of the chains, do not close the ring yet.
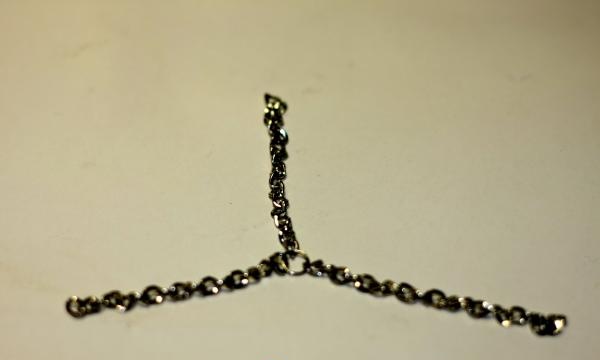
We thread our ring with strung chains into the free eye of a diamond-shaped bead. Close the ring tightly.
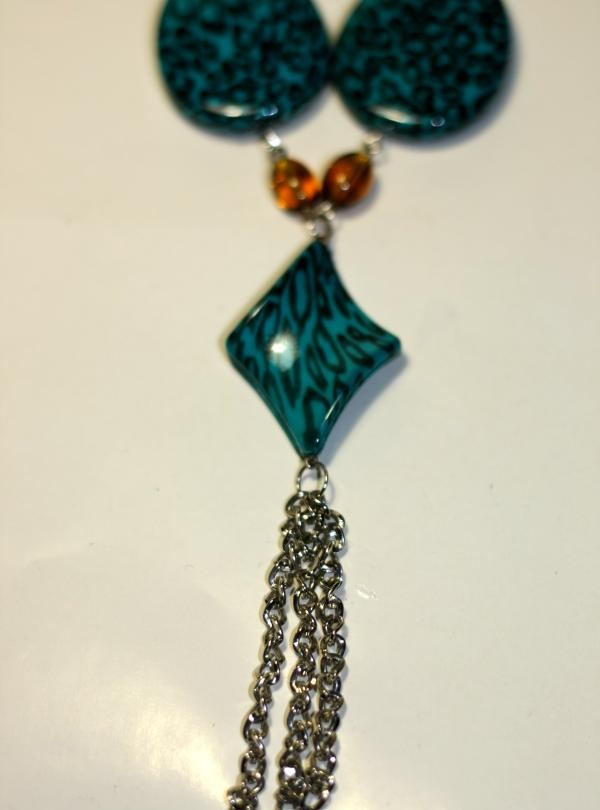
We measure out 2 more sections of the chain. Now it is desirable to make them the same. I have pieces 8 cm long.
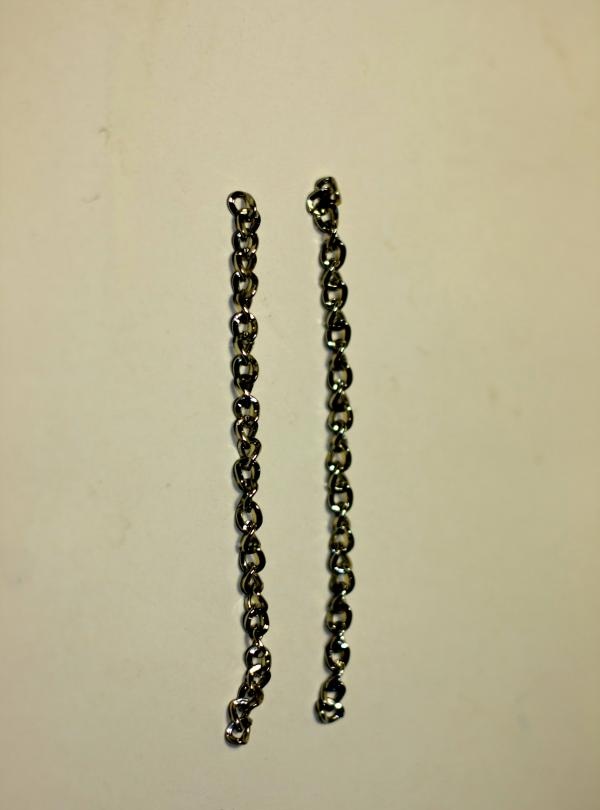
Using connecting rings, we attach the chains to the outermost amber beads.
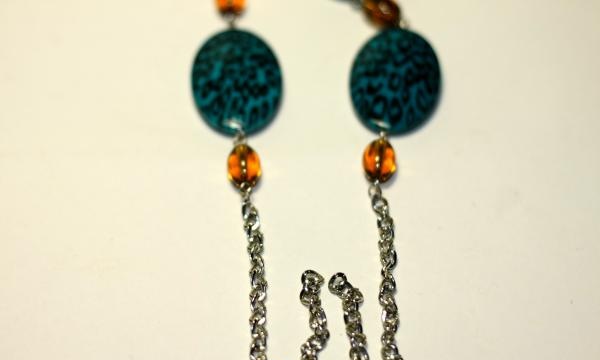
All we have to do is attach the clasp. I chose the carabiner. We attach it using a connecting ring to the extreme link of one of the chains.
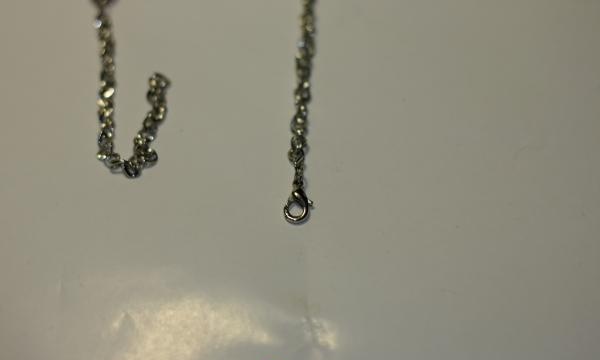
The links of my chain are wide enough, so I can attach a carabiner to any of them, thereby adjusting the length of the product.
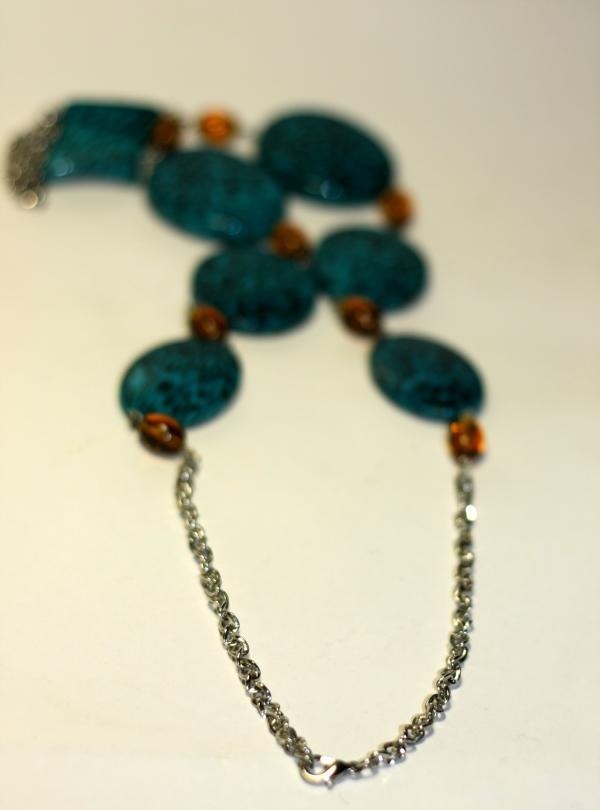
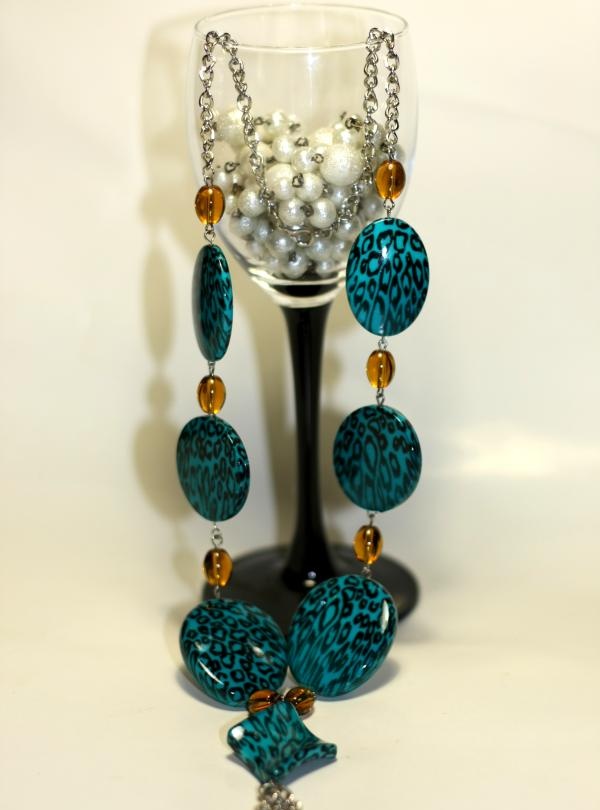
Our beads are ready!