To make a toy we need:
- Children's plain tights.
- Big scissors.
- Sintepon or other filler.
- Piece of chalk.
- Needle.
- Blue or black thread.
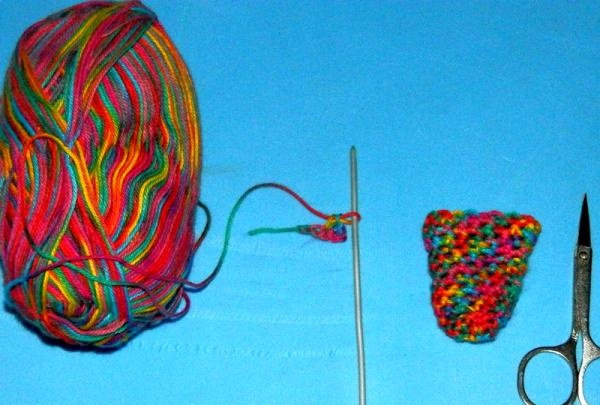
- Long knitting needle.
- Silver fabric outline.
- Two buttons in black or any other color.
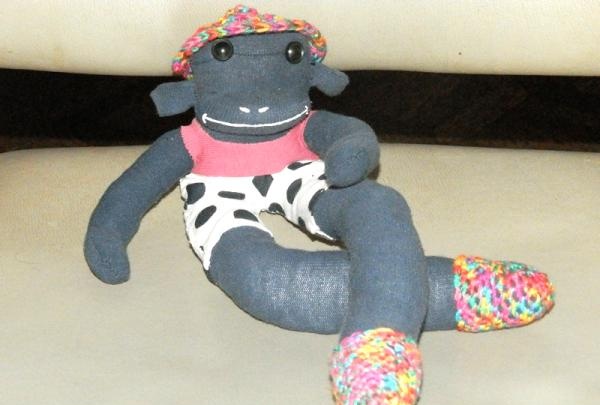
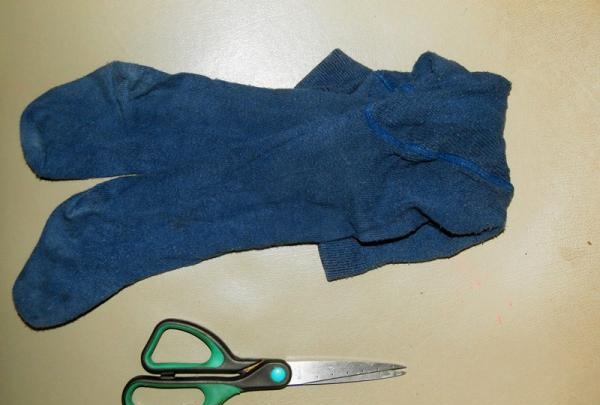
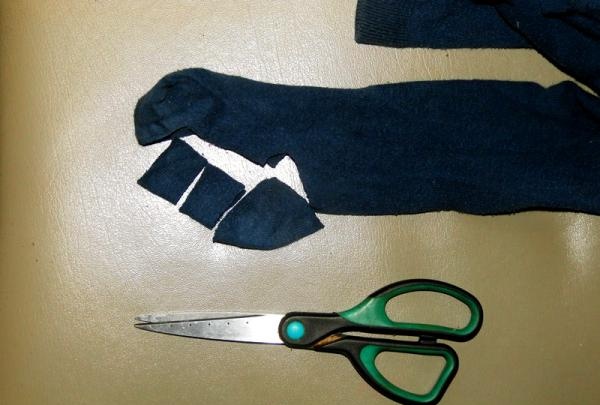
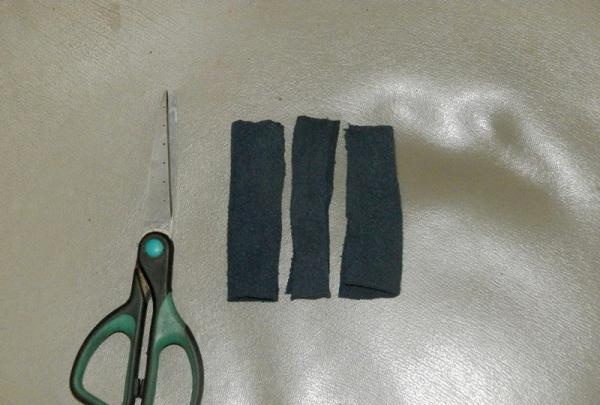
We take children's tights. You can take new tights, but I took our children's small tights. Using scissors, cut off one ear approximately knee-length. This will later be the torso and legs of our toy.
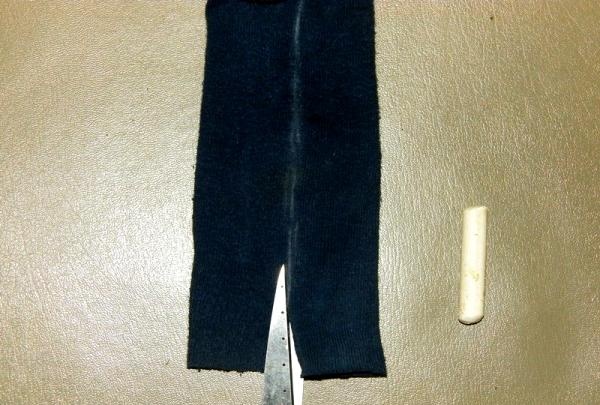
We take a cut piece of tights and straighten it well so that the heel is at the back. Next, we draw a stripe in the middle with chalk, so that later we will have identical legs. Using scissors, we cut the tights in half, but not to the very end, but as shown in the photo, leaving a little space for the torso. To ensure that the monkey’s legs are not square, but rounded, you need to slightly trim the edges of the tights with scissors.
Now we thread the needle and begin to sew the legs of the future monkey. It is necessary to sew very tightly so that the thread does not break and the filling does not come out of the toy in the future. So, the body is sewn, turn it inside out. Now you can fill it with padding polyester. You can use any other filler for the filler. Even dry grass, and then the toy will have a good and pleasant aroma.
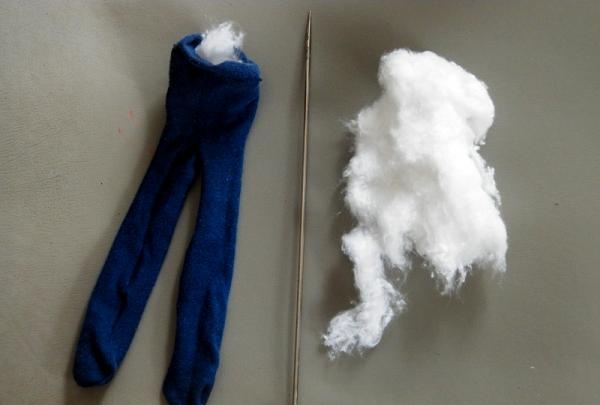
To push the stuffing into the legs, I used a knitting needle, but you can use any long pencil or pen. When the body of the toy is tightly stuffed with filler, it needs to be sewn together.
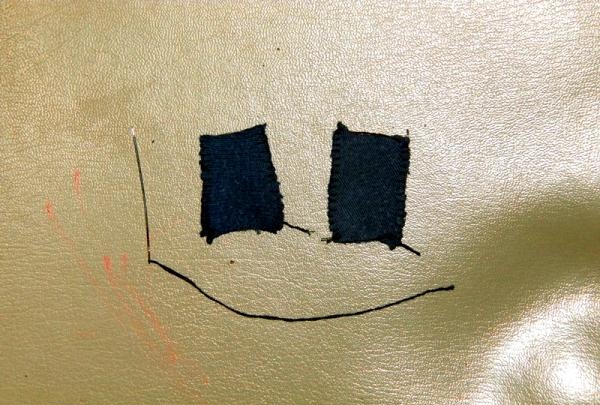
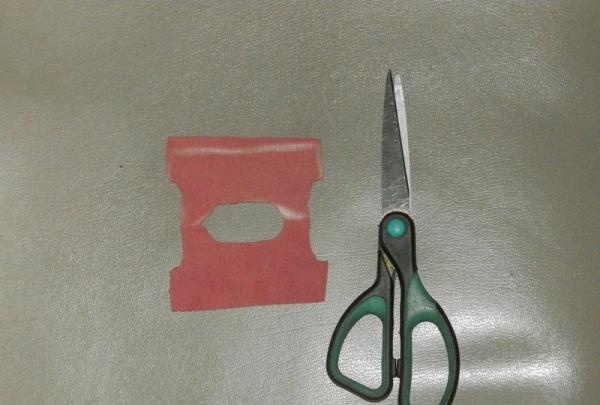
Next, let's start cutting out other parts of the toy. We straighten the second galosh of the tights and cut out the ears from it, and the heel will be the monkey’s face. We sew the small squares from which we will make ears, turn them inside out, then fill them quite a bit with padding poly and sew them at the same distance with a needle to the body of the toy.
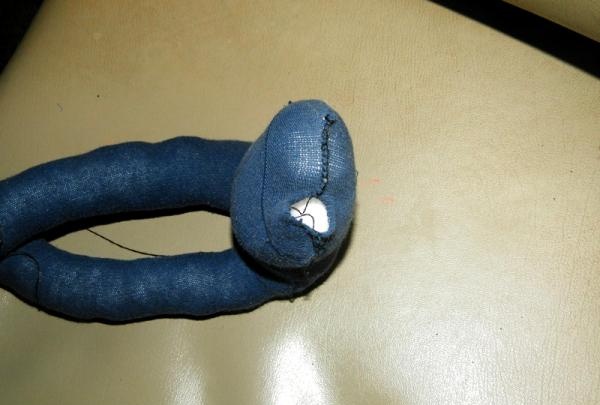
Now we take the cut piece of the heel, fold it and stitch it to the middle. Then, through the unstitched hole, we stuff the muzzle with padding poly and sew it up completely. Next, we attach the muzzle to the monkey’s body and sew it on both sides.
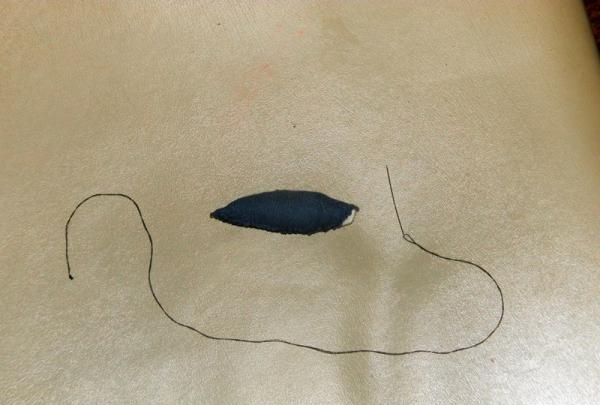
Now, next we cut off two identical strips from the tights, just not long ones - these will be the monkey’s arms. We do the same as with the legs - first we sew them together, then we fill them with padding polyester and sew them to the body.
The monkey seems to be ready, but how will it be without clothes? I cut out a small square of fabric from an old T-shirt. On it I drew the outline of a T-shirt according to the size of my toy. I cut and sewed a little pink t-shirt for the monkey.
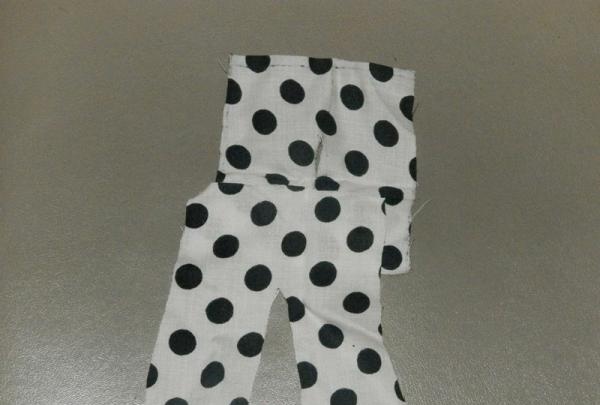
I made trousers for her from polka dot fabric.To do this, I also drew the outline of the trousers on a piece of fabric, cut them out and sewed them on. My trousers were wide at the waist. So, after I put them on the monkey, I sewed trousers into the belt and legs of the toy.
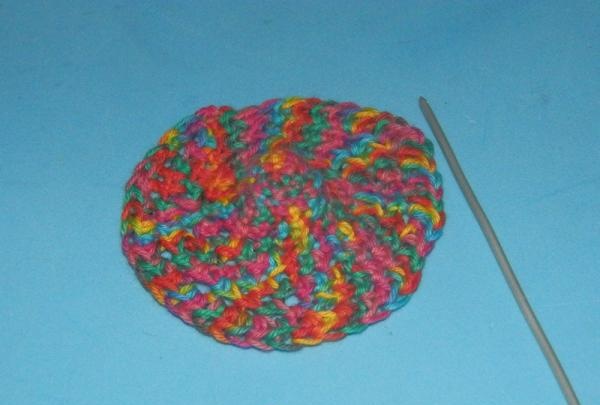
Next I wanted to make a hat and socks for her. I took thin multi-colored threads and crocheted in the round and knitted a hat for the monkey. I knitted the socks using the same principle. I put all the connected items of clothing on the toy and sewed them well so that they would not go anywhere.
All that remains is to outline the monkey’s nose and mouth. And that’s it, you can give it to your child to play with a new toy.