Do it yourself
Life hacks, master classes, useful tips, recipes.
home » Electronics » DIY electronics » Simple soldering iron temperature controller
For decent quality soldering work, a home craftsman, and even more so a radio amateur, will need a simple and convenient soldering iron tip temperature regulator. For the first time I saw a diagram of the device in the magazine “Young Technician” in the early 80s, and having collected several copies, I still use it.

regulator circuit


To assemble the device you will need:
- diode 1N4007 or any other, with a permissible current of 1A and a voltage of 400 - 600V.
- thyristor KU101G.
-electrolytic capacitor 4.7 microfarads with an operating voltage of 50 - 100V.
-resistance 27 - 33 kilo-ohms with permissible power 0.25 - 0.5 watts.
-variable resistor 30 or 47 kilo-ohm SP-1, with linear characteristic.

soldering iron temperature controller


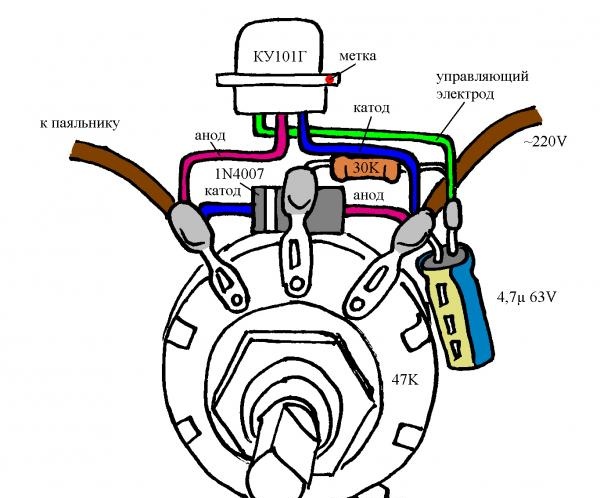
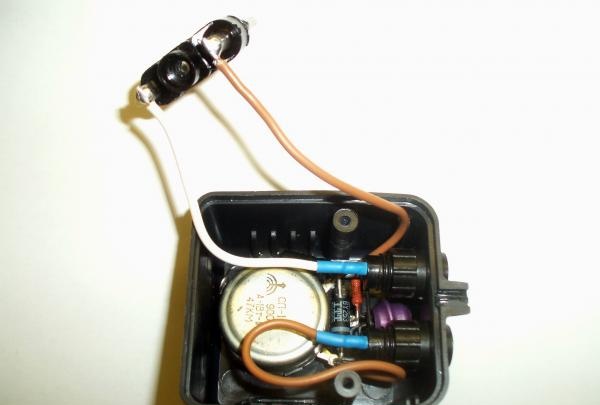
For simplicity and clarity, I drew the placement and interconnection of parts.

soldering iron temperature controller


Before assembly, it is necessary to insulate and mold the leads of the parts. We put 20mm long insulating tubes on the thyristor terminals, and 5mm long on the diode and resistor terminals. For clarity, you can use colored PVC insulation removed from suitable wires, or apply heat shrink. Trying not to damage the insulation, we bend the conductors, guided by the drawing and photographs.

Simple soldering iron temperature controller


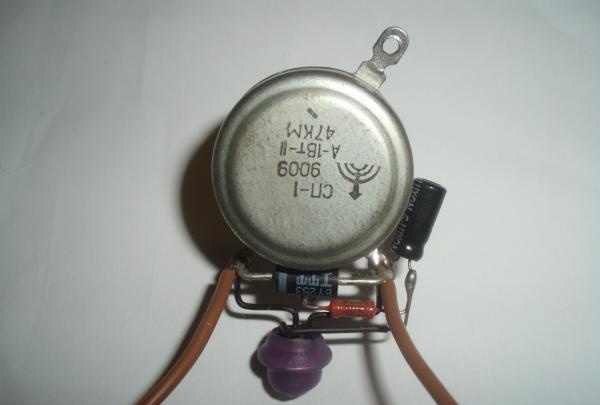
All parts are mounted on the terminals of a variable resistor, connected into a circuit with four soldering points. We insert the component conductors into the holes on the terminals of the variable resistor, trim everything and solder it. We shorten the leads of the radio elements. The positive terminal of the capacitor, the control electrode of the thyristor, the resistance terminal, are connected together and fixed by soldering. The thyristor body is the anode; for safety, we insulate it.

soldering iron temperature controller


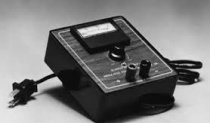
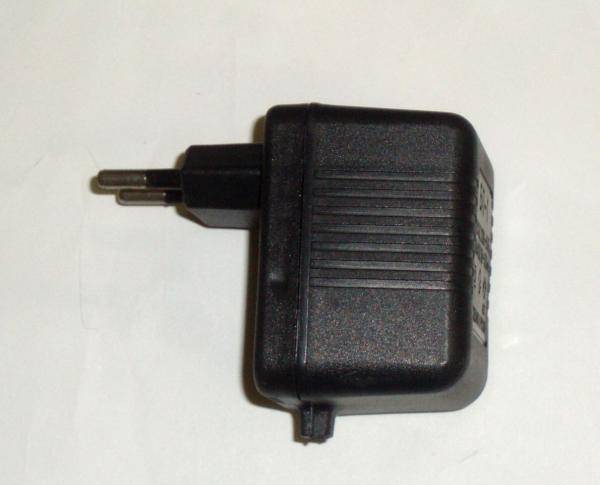
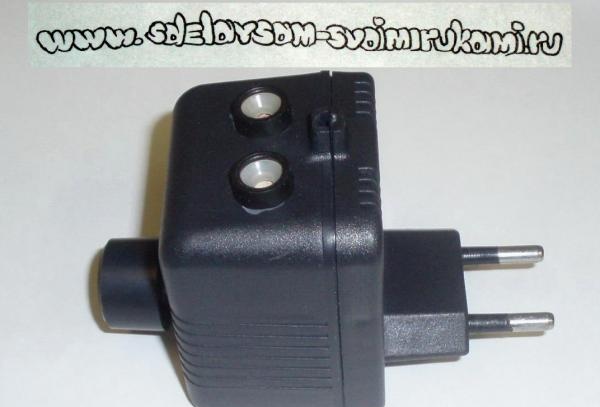
To give the design a finished look, it is convenient to use a housing from a power supply with a power plug.

temperature controller inside


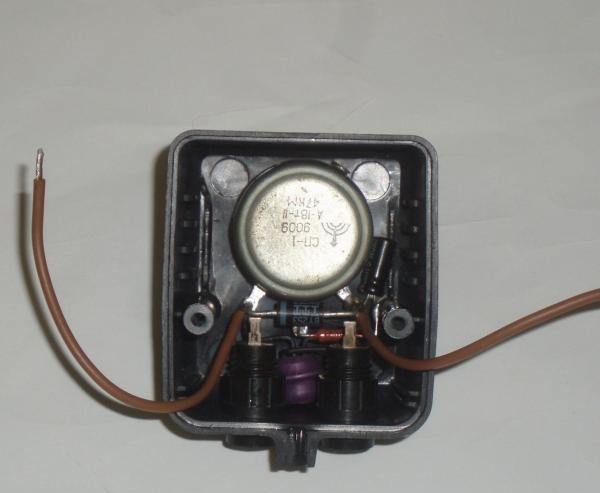
On the top edge of the case we drill a hole with a diameter of 10 mm. We insert the threaded part of the variable resistor into the hole and secure it with a nut.

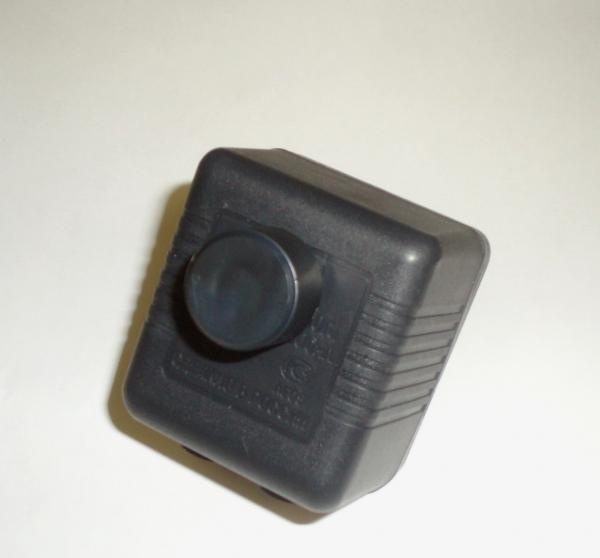
To connect the load, I used two connectors with holes for pins with a diameter of 4 mm. On the body we mark the centers of the holes, with a distance between them of 19 mm. In drilled holes with a diameter of 10 mm. insert the connectors and secure with nuts. We connect the plug on the case, the output connectors and the assembled circuit; the soldering points can be protected with heat shrink. For a variable resistor, it is necessary to select a handle made of insulating material of such shape and size as to cover the axle and nut. We assemble the body and securely fix the regulator handle.

Simple soldering iron temperature controller


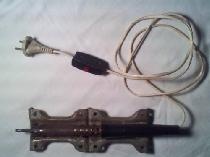
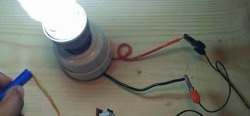
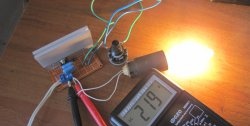
We check the regulator by connecting a 20 - 40 watt incandescent lamp as a load. By rotating the knob, we make sure that the brightness of the lamp changes smoothly, from half brightness to full intensity.

Simple soldering iron temperature controller


When working with soft solders (for example POS-61), with an EPSN 25 soldering iron, 75% of the power is sufficient (the position of the control knob is approximately in the middle of the stroke). Important: all elements of the circuit have a supply voltage of 220 volts! Electrical safety precautions must be observed.

come back
Comment
  • bowtiesmilelaughingblushsmileyrelaxed relaxedsmirk
    heart_eyeskissing_heartkissing_closed_eyesflushedrelievedsatisfiedgrin
    winkstuck_out_tongue_winking_eyestuck_out_tongue_closed_eyesgrinningkissingstuck_out_tonguesleeping
    worriedfrowninganguishedopen_mouthgrimacingconfusedhushed
    expressionlessunamusedsweat_smilesweatdisappointed_relievedwearypassive
    disappointedconfoundedfearfulcold_sweatperseverecrysob
    joyastonishedscreamtired_faceangryragetriumph
    sleepyyummasksunglassesdizzy_faceimpsmiling_imp
    neutral_faceno_mouthinnocent
5+two=
Comments (38)
  1. ALPom
    #1 ALPom Guests 24 October 2014 20:48
    1
    Is there any interference on the network from such a regulator?
  2. -serg-
    #2 -serg- Guests 25 October 2014 17:15
    2
    When the power consumption from two semi-waves of alternating voltage is asymmetrical, interference will inevitably occur.
    But when regulating a low power, 15-25 watts, in my experience, there is no noticeable influence of interference on modern equipment (LCD TV, computer, music center).
  3. Dmitriy
    #3 Dmitriy Guests 31 October 2014 13:07
    2
    The constant applied voltage in the closed state of the KU101G is only 80 volts. It won't be enough! Maybe it's better to use KU712A2? The dimensions are not much larger, but it is possible to regulate a much larger load.
  4. -serg-
    #4 -serg- Guests November 2, 2014 00:15
    1
    The resistance of a 25-watt soldering iron is a little more than 2 kilo-ohms, the current passing through it will not exceed 115 milliamps.
    This is a gentle mode for the circuit; the voltage between the cathode and anode of the thyristor varies from 30 to 110 volts.
    The oldest example of this design has been in operation for more than a quarter of a century.For a slightly heavier load, you can use the KU101E thyristor (150 volts).
  5. Edward
    #5 Edward Guests 12 February 2015 15:12
    0
    Can more powerful thyristors like bta12-600 (12 amperes 600 volts) be used? and a modern variable resistor if used combined with a switch? and can this circuit be used as a night light for a 25 watt light bulb)
  6. =Andrey=
    #6 =Andrey= Guests 18 February 2015 16:57
    3
    And if instead of a soldering iron you use a 500 W boiler, then what parts need to be changed??? or is this scheme not suitable???
  7. -serg-
    #7 -serg- Guests 30 March 2015 21:26
    4
    When using a powerful thyristor, for example KU202N installed on a radiator, you can regulate the load up to 1 kilowatt.
    But such a scheme will become a source of noticeable interference in the electrical network.
    A two-kilowatt regulator on a powerful triac, which does not create interference, can be removed (or assembled according to the circuit) from a household vacuum cleaner. (LG, Samsung, etc.).
  8. Victor Lapshev
    #8 Victor Lapshev Guests 13 May 2015 15:10
    1
    Is KU104G suitable?
  9. Taras
    #9 Taras Guests 18 May 2015 09:42
    5
    Do I understand correctly that if a switch is placed in series with the VD1 diode, then by breaking the circuit on the VD1 diode the adjustment will be 0-50%, and by closing the circuit on it the adjustment will be 50-100%?
  10. -serg-
    #10 -serg- Guests 24 May 2015 13:24
    1
    KU104G is quite suitable.
    Control of one half-wave generates noticeable interference, if smooth power control of 0-100% is required, perhaps it is worth using a dimmer circuit on a triac.

Crochet sweater for little fashionistas | Do it yourself

15 DIY life hacks for all occasions

Vintage envelope with wax seal | Do it yourself

Homemade soap “Game of Colors” | Do it yourself

«Do it yourself - with your own hands» - a site of interesting homemade products made from scrap materials and items at home. Step-by-step master classes with photos and descriptions, technologies, life hacks - everything a real master or just a craftsman needs for needlework. Crafts of any complexity, a large selection of directions and ideas for creativity.

We recommend reading

Washing machine error codes