Do it yourself
Life hacks, master classes, useful tips, recipes.
home » Electronics » DIY electronics » The simplest temperature controller for a soldering iron tip.
Almost every radio amateur is faced with the problem of an overheated soldering iron, when the tip heats up more than necessary. Soldering with such a soldering iron is not very convenient: the solder begins to change color, becoming covered with an oxide film, the flux instantly evaporates or even begins to shoot, etc. The way out can be very simple.
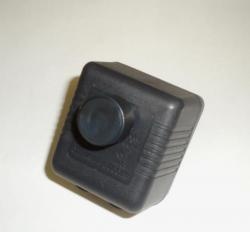
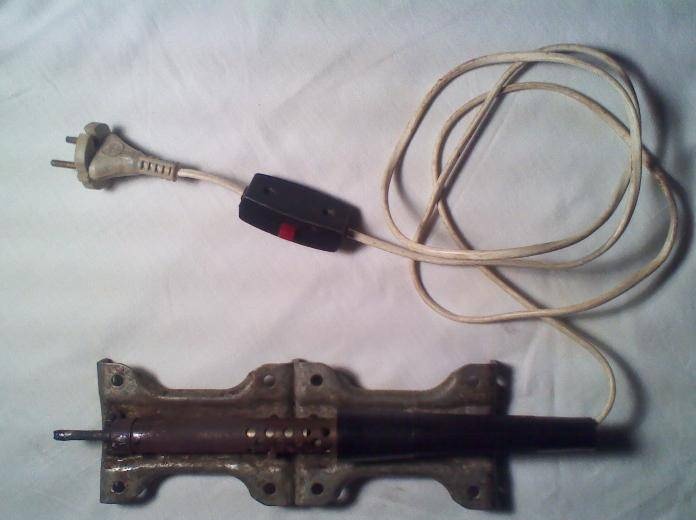
We need two things: a wired switch (which is attached directly to the wire) and a diode with a reverse current voltage of at least 250 volts and a current of more than 0.5 amperes (depending on the power of the soldering iron, based on 100 W = 0.5 A).

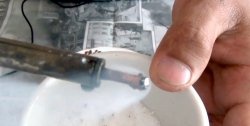
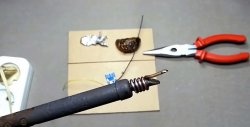
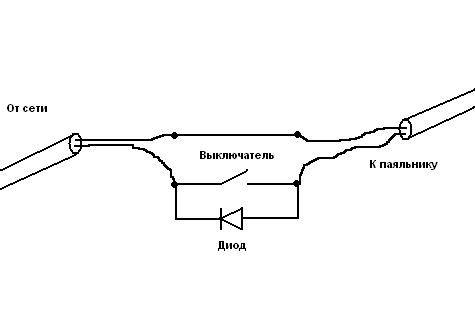
Let's start assembling. To do this, in a place convenient for you, you need to open the insulation of the current-carrying wire, namely one of the wires, and connect the switch. Install a diode into the switch, connecting it in parallel with the contacts of the switch. See the diagram.


We assemble, turn on, check.


The device works like this: when the contacts of the switch are closed, 100% of the power flows to the soldering iron, and accordingly the tip heats up by the same amount. This mode is used to quickly warm up the soldering iron.As soon as the soldering iron has warmed up (5-20 minutes), turn off the switch. When the switch is turned off, the current will flow through the diode, and the diode will pass only half of the alternating voltage phase and therefore 50% of the power, the temperature of the soldering iron will decrease.
I have a 60 watt soldering iron. The temperature in the second mode is excellent for soldering with the most common solders. I also had a soldering iron with a power of 100 and 30 watts with this regulator and it was also pleasant to work with them without overheating.
I would like to note that with the use of this simple regulator, I completely lost the desire to make more complex ones or buy expensive ones.

But still I want to offer one more option for the regulator. I haven’t used it myself, but friends say that this regulator works quite well.
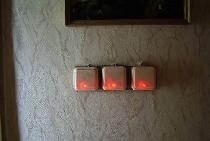
Here's the idea. Electrical goods stores sell ready-made regulators, albeit for lighting devices. It looks a little larger than a regular switch and can be successfully used for a soldering iron. See picture.


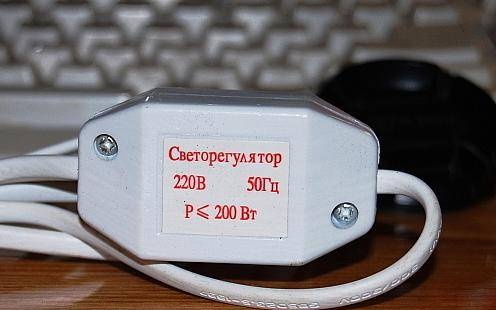
The disadvantage of such a regulator is its “invisibility of adjustment”. In other words, if you use it for a light bulb, then you obviously see the level of adjustable brightness. But with the soldering iron everything is sad. You cannot visually surprise its temperature and you have to adjust it from time to time. But there is still a way out. You just need to simply calibrate the regulator and mark the positions with a marker.
Whatever regulator you choose, when installing or adjusting it, do not forget to disconnect it from the network! Good luck.

come back
Comment
  • bowtiesmilelaughingblushsmileyrelaxed relaxedsmirk
    heart_eyeskissing_heartkissing_closed_eyesflushedrelievedsatisfiedgrin
    winkstuck_out_tongue_winking_eyestuck_out_tongue_closed_eyesgrinningkissingstuck_out_tonguesleeping
    worriedfrowninganguishedopen_mouthgrimacingconfusedhushed
    expressionlessunamusedsweat_smilesweatdisappointed_relievedwearypassive
    disappointedconfoundedfearfulcold_sweatperseverecrysob
    joyastonishedscreamtired_faceangryragetriumph
    sleepyyummasksunglassesdizzy_faceimpsmiling_imp
    neutral_faceno_mouthinnocent
3+three=
Comments (17)
  1. dimansid
    #1 dimansid Guests December 8, 2010 19:53
    3
    Please note that the soldering iron stand is made from transformer core mounting caps. These two covers are fastened together with bolts and nuts. This stand has served me for over 5 years.
  2. Danbaz
    #2 Danbaz Guests 26 September 2011 22:05
    0
    Marker is correct. You can assemble a soldering station yourself: we buy a dimmer in a store, make a base, and calibrate the dimmer control with a marker using a high-temperature thermometer (included with some multimeters). A dimmer (a device for voltage regulation) will cost 150 rubles here, and a soldering station will cost from 1500, if you can still find it. So consider it.
  3. Veent
    #3 Veent Guests 26 September 2011 22:20
    1
    Are you sure the dimmer will work? Have you assembled such a device?
    Just as far as I know, a dimmer is not a rheostat; it requires special load parameters
  4. Daniel
    #4 Daniel Guests April 5, 2013 05:36
    1
    It will work with a dimer, I’ve seen this on the Internet more than once.
    By the way, according to the principle described in the post, many soldering irons “with a button” work, I use this myself, it’s convenient
  5. Victor
    #5 Victor Guests March 26, 2015 11:23
    2
    The dimer will work with any active load (incandescent lamps, spirals, etc.).
  6. Artyom
    #6 Artyom Guests 8 December 2015 19:33
    0
    Marking is useless.
    Phase regulators of this type are critical to changes in mains voltage.
  7. Ruslan
    #7 Ruslan Guests 27 February 2016 21:22
    0
    please tell me what diode is needed for a 40-watt soldering iron, otherwise I’m not an expert in electronics
  8. Ilya
    #8 Ilya Guests 10 June 2016 23:32
    0
    Yes, the most affordable one is for example IN4007 (5, 6), you can find them in many places.
  9. Peter Garin
    #9 Peter Garin Guests 25 October 2017 17:31
    2
    And this is called a regulator? Loud!
  10. Yuri
    #10 Yuri Guests 30 October 2017 10:42
    1
    Once upon a time I made a soldering iron powered by a battery, take a tip from a soldering iron with a diameter of 4-5mm, clamp it into a drill and drill a blind hole at the end 1cm shorter than the length of the tip with a 2-2.5mm drill, break the radio tube, I used GU50, and pull it out it is heated, pour regular office glue into the drilled hole and insert a spiral there, attach a handle and the soldering iron is ready...... you can use a spiral from a 6 volt radio tube.... I made the tip from bronze, it burns out less..... heats up in 7-10 seconds

Tiara headband | Do it yourself

12 useful tips for all occasions

How to make a simple valve clamp with your own hands

Roll up birch sap | Do it yourself

«Do it yourself - with your own hands» - a site of interesting homemade products made from scrap materials and items at home. Step-by-step master classes with photos and descriptions, technologies, life hacks - everything a real master or just a craftsman needs for needlework. Crafts of any complexity, a large selection of directions and ideas for creativity.

We recommend reading

Washing machine error codes