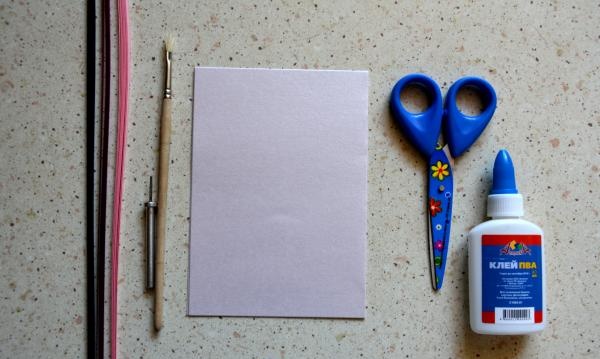
First, let's prepare the necessary materials for work. This:
1. The base for the card is pure white or with a pink tint.
2. Quilling paper: pink, dark crimson and black (dark blue) colors. The width is 3 mm.
3. Quilling tool (you can use a toothpick).
4. PVA glue.
5. Brush.
6. Scissors.
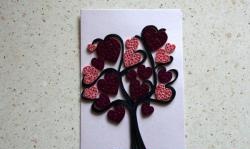
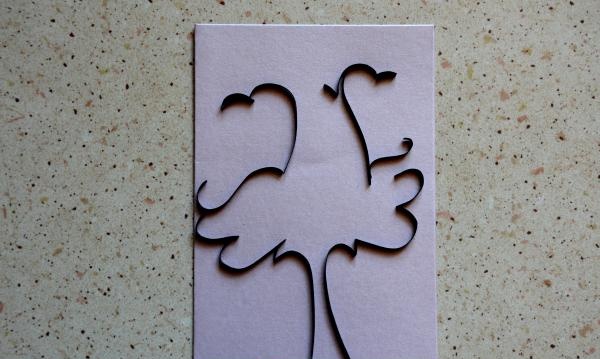
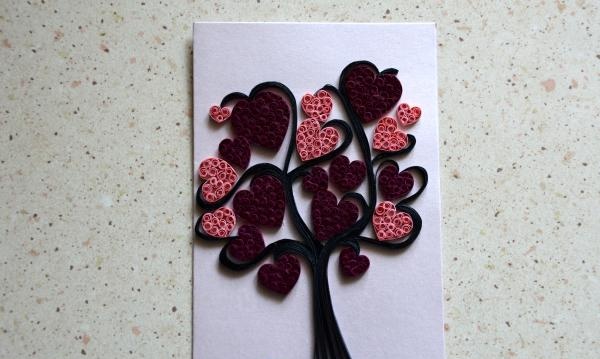
It is recommended to first visually determine the general layout of the tree and its branches, think about how it will be located and in what part of the postcard. You can mark it with a pencil, but do it carefully to preserve the base. We apply the strips of paper themselves to the imagined or actually drawn drawing. The wood will be dark in color, black with slight tints.Usually the strips are coated with glue on the side so that the PVA is not visible on the finished work and thus does not spoil it. Here you don’t have to strive for this, since almost all the space will be occupied either by hearts or wood - the adhesive will not be noticeable.
Then it is necessary to work out the internal structure of the tree, that is, add central details and here and there additional elements, for example, at the branches. Using pink and dark crimson paper, we will make hearts of different sizes, placing them on the crown of the tree, as if they were its leaves or fruits. Hearts can be made using two slightly curved spirals connected into the appropriate shape. Second option: take only one strip of paper, bend it in half and twist the ends into the inside.

Let's start filling out the hearts. To do this, we will make many colored open (with a loose end) spirals and place them in the voids. Spirals can be of different sizes. It all depends on the idea: you will need more small ones, with them the hearts will look sophisticated and more expressive upon closer examination; if you take large enough ones, you can pay attention to the curvature of the lines and give some delicacy to the figure.
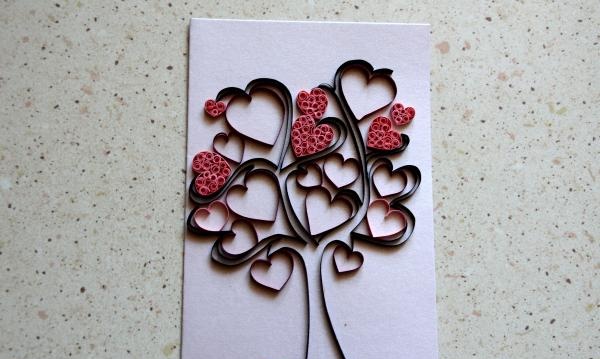
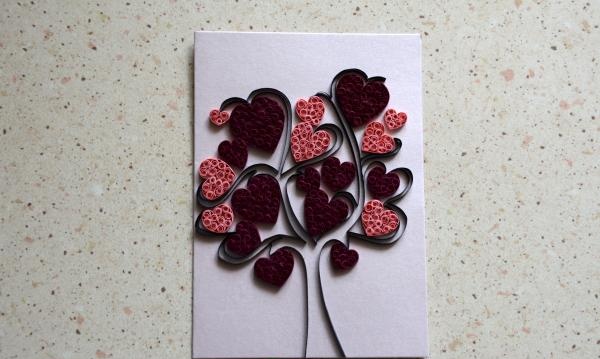
It's time to finish the tree trunk and its branches - the most difficult part of the work. The lengths of the stripes need to be selected by eye and then tried on. It's easier to first fill in the main elements - long branches and trunk. It looks more harmonious if the lines flow smoothly into one another, without obvious breaks or unnatural transitions.
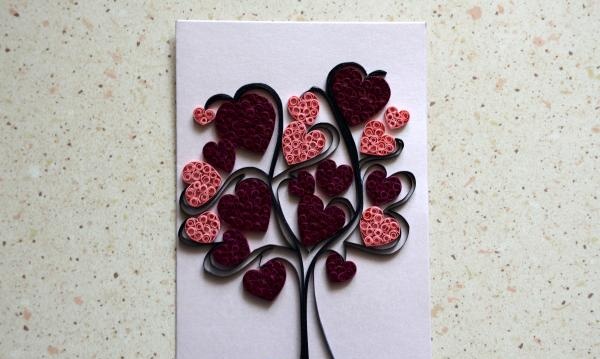
To get the effect that the tree is drawn and represents a single whole, you need to use more paper when creating it and avoid any gaps in the figure. Although it is enough to use 4-5 lines on each branch and about 12 on the trunk to give the tree texture. So, everything is ready.
Good luck and further success on the path of creating your own masterpieces!