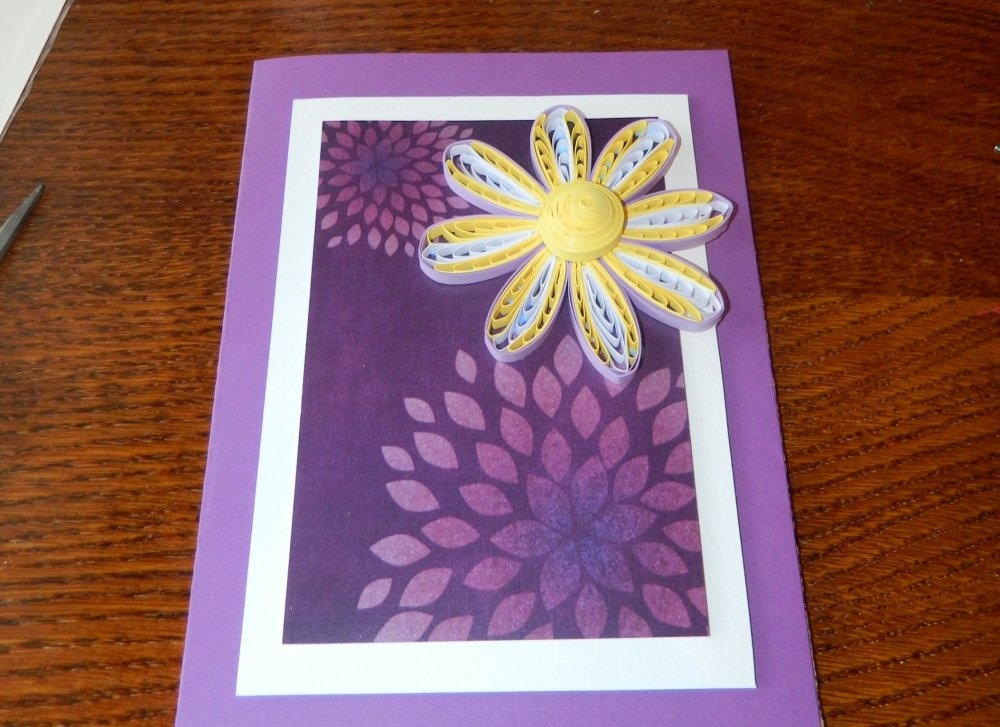
To complete the work, you will need to prepare the list of materials presented below. Some materials can be replaced at your discretion, and in the same way you can take an idea from this work and make your own unique postcard, which will be an exclusive product.
List of materials for making a postcard:
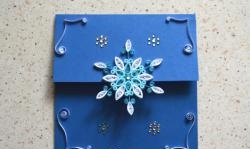
- A sheet of dark purple pastel paper or cardboard A4;
- White cardboard or thick paper;
- Purple patterned designer paper;
- Double-sided foam tape;
- Quilling paper – yellow, pale purple, white;
- White and purple rhinestones of different sizes;
- Comb tool;
- Quilling tool, scissors, glue, tweezers.
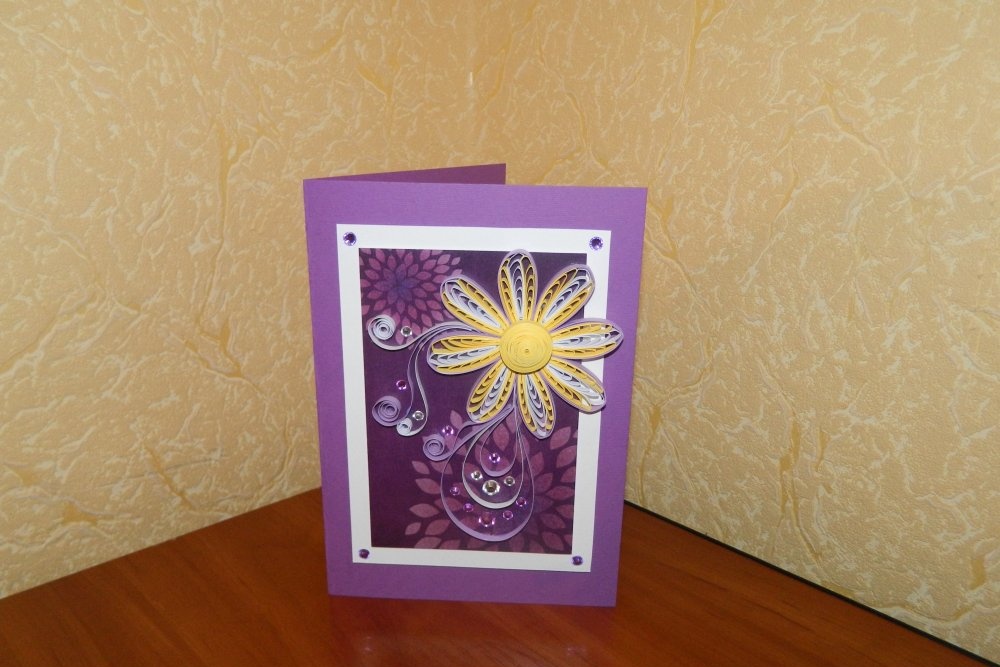
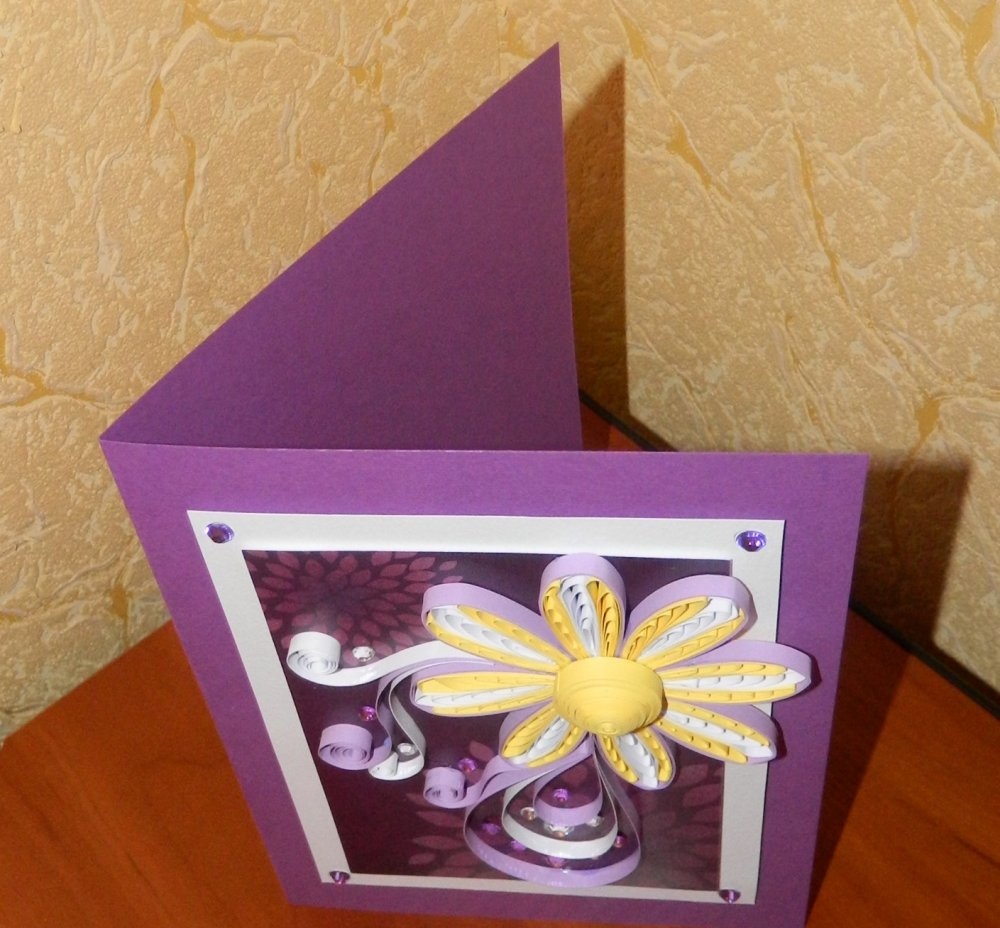
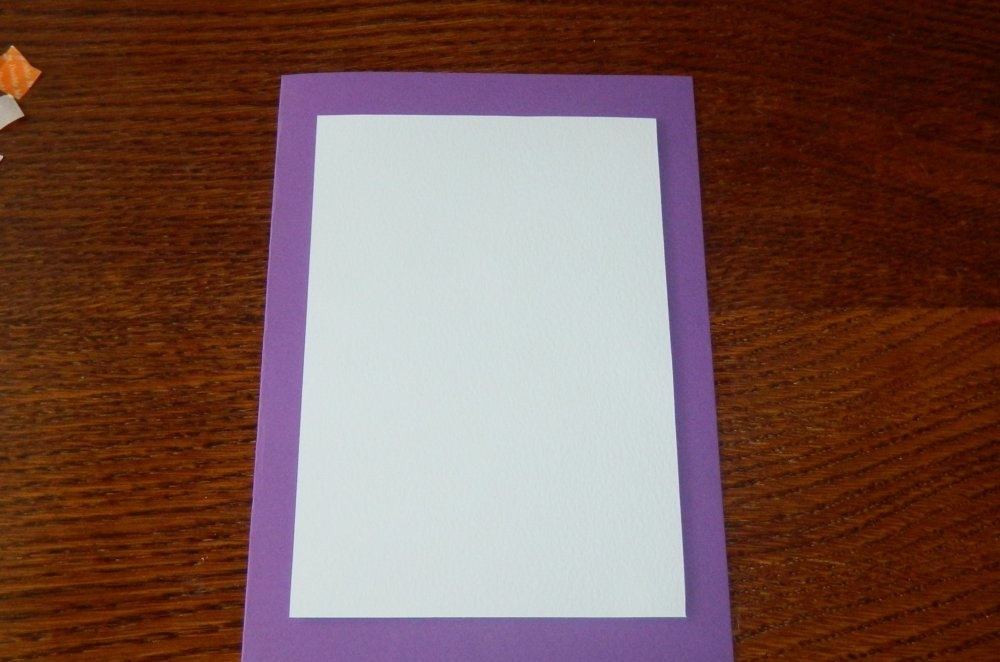
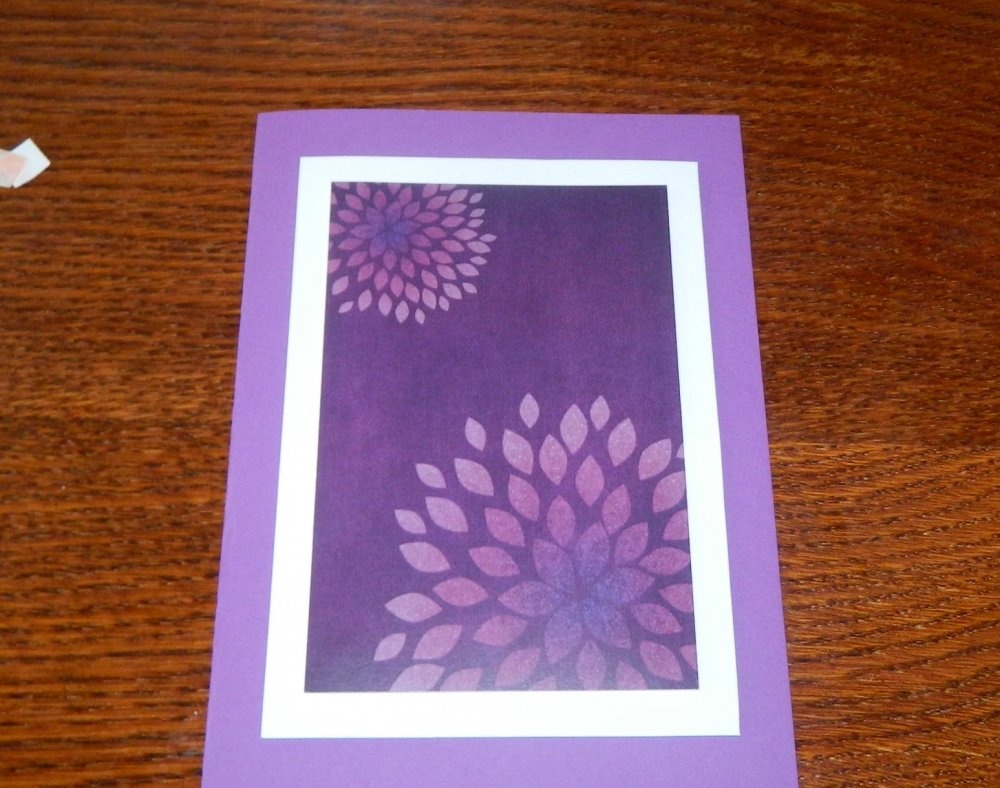
We make the base from purple cardboard, bending the A4 sheet in half.The fold line should be drawn with a sharp object so that the cardboard bends easily and as evenly as possible.
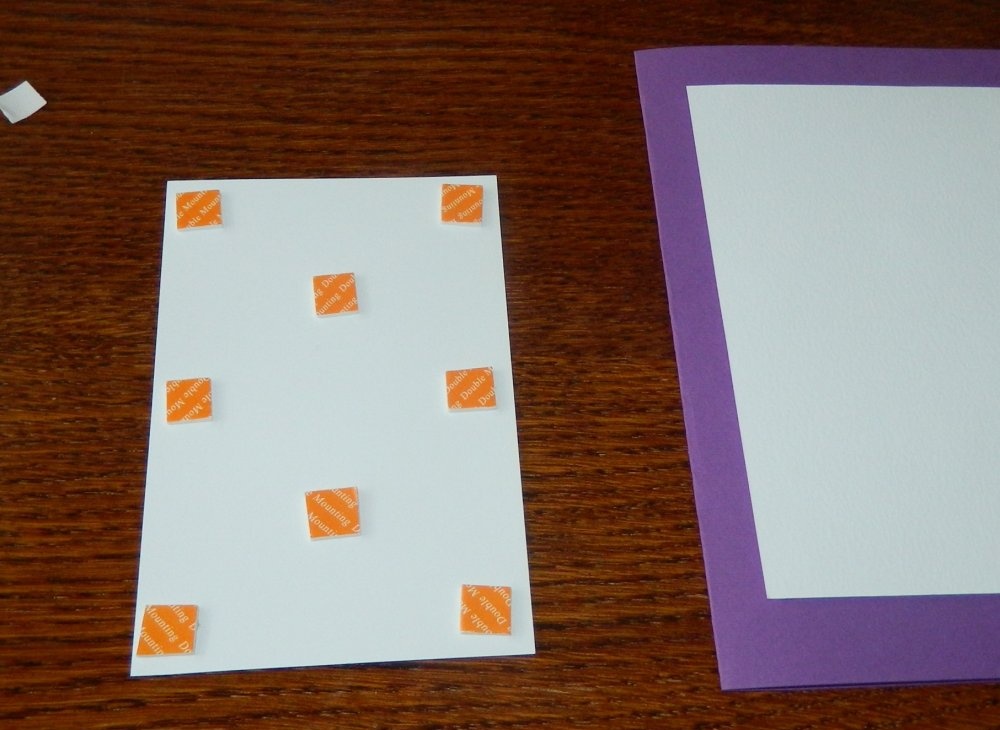
We cut out a 12x17 cm piece from white cardboard and glue squares of foam tape on the back side.
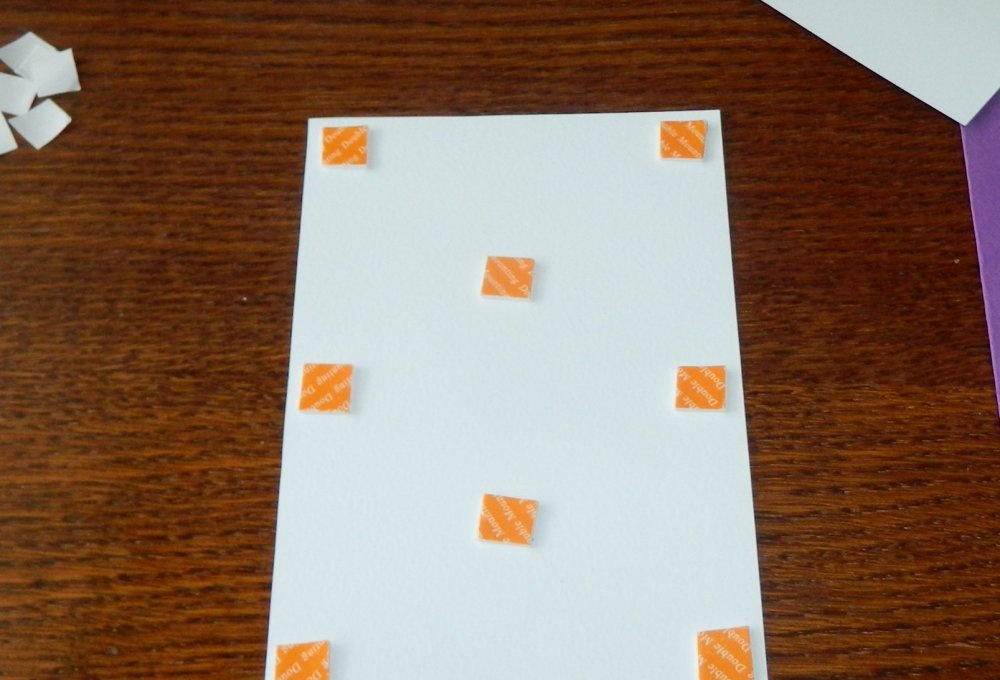
We attach white cardboard to the base.
Take designer paper. It is desirable that it is also quite dense, since a voluminous flower will be attached to it.

The dimensions of the purple design paper are 10x15 cm. We also cover it on the back side with double-sided foam tape and attach it on top to a white rectangle on the base.
We take 20 cm yellow quilling paper and, using the comb tool, begin to form the part. We attach the end of a strip of paper to the comb.
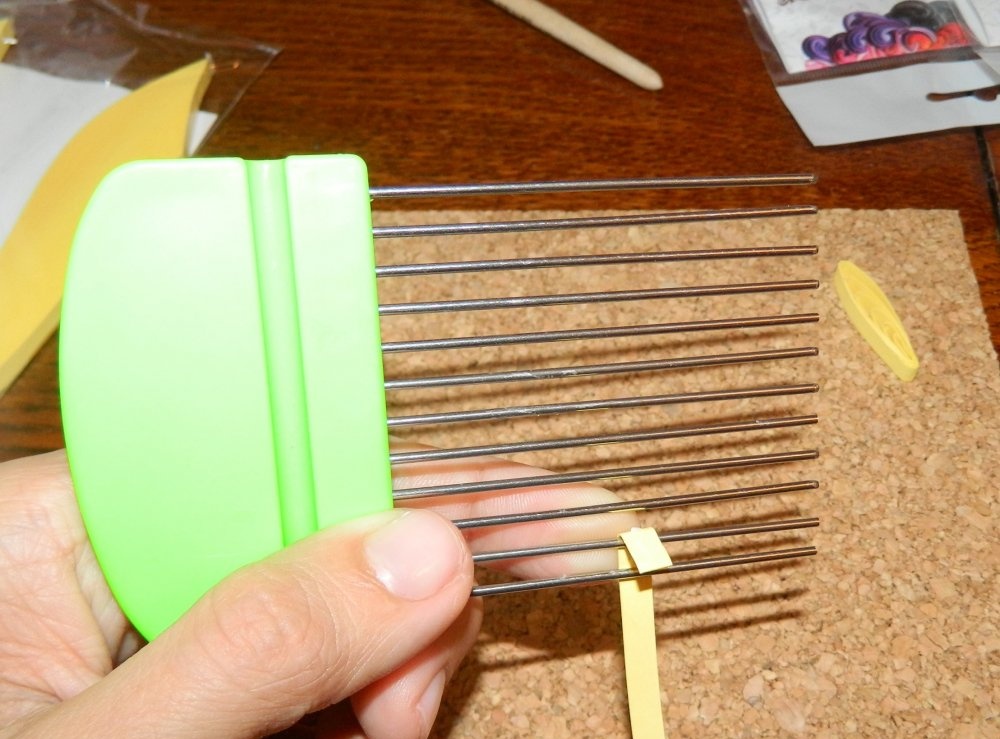
Next we make loops, increasing the size of the element being performed each time.
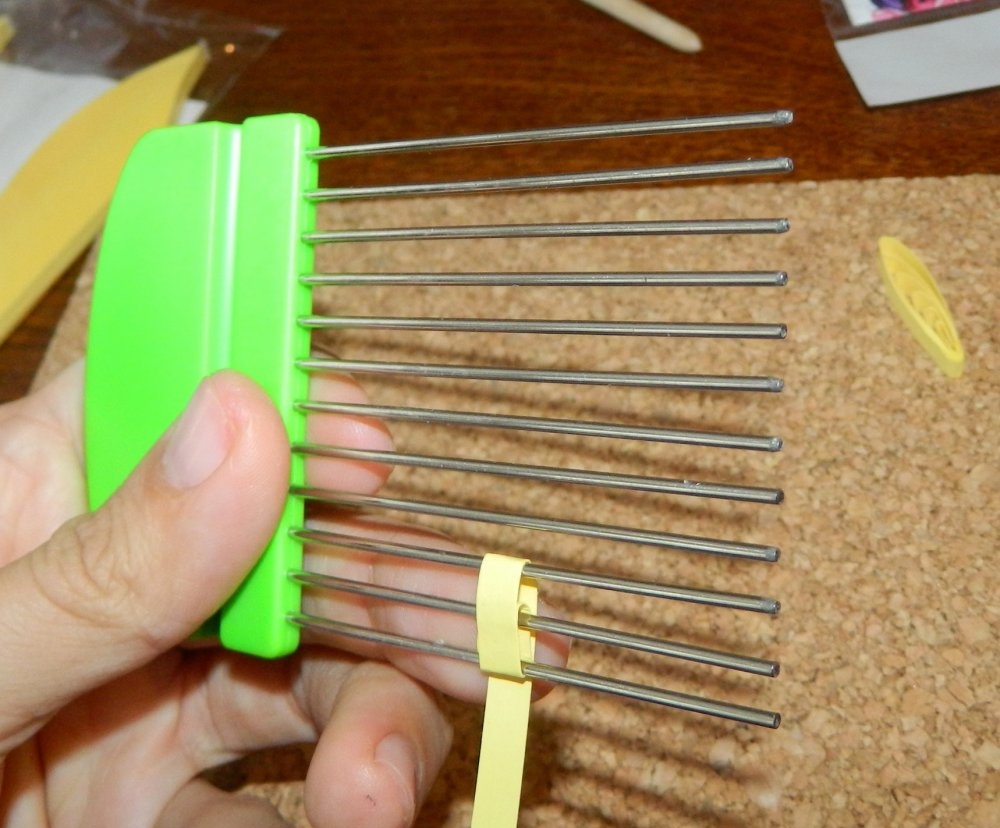
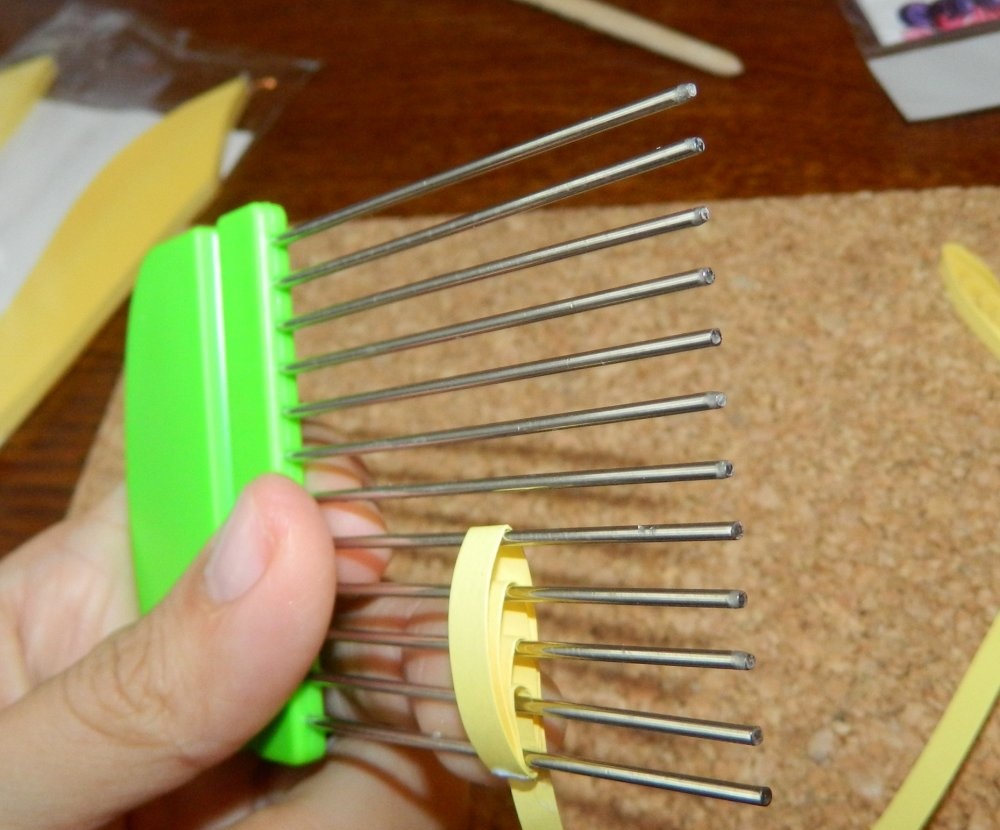
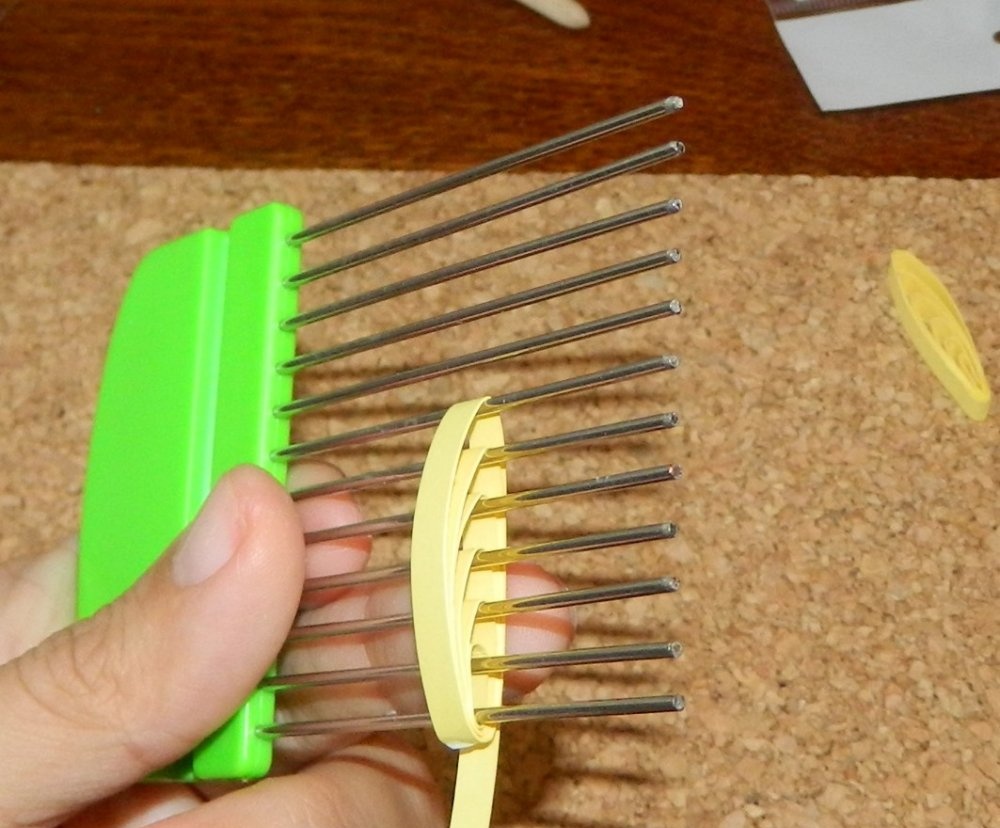
At the point of contact between the paper loops, you should lubricate them with a little glue so that the element does not fall apart, but holds securely.
It turns out such a detail. You will need to make 16 of them.
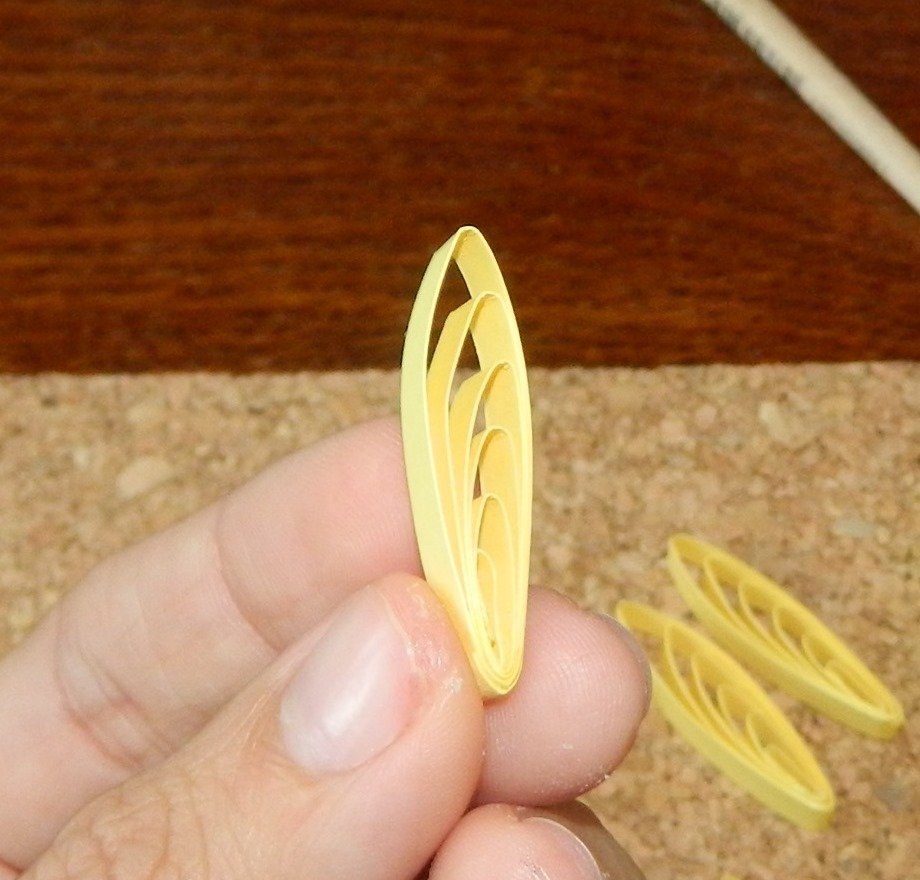
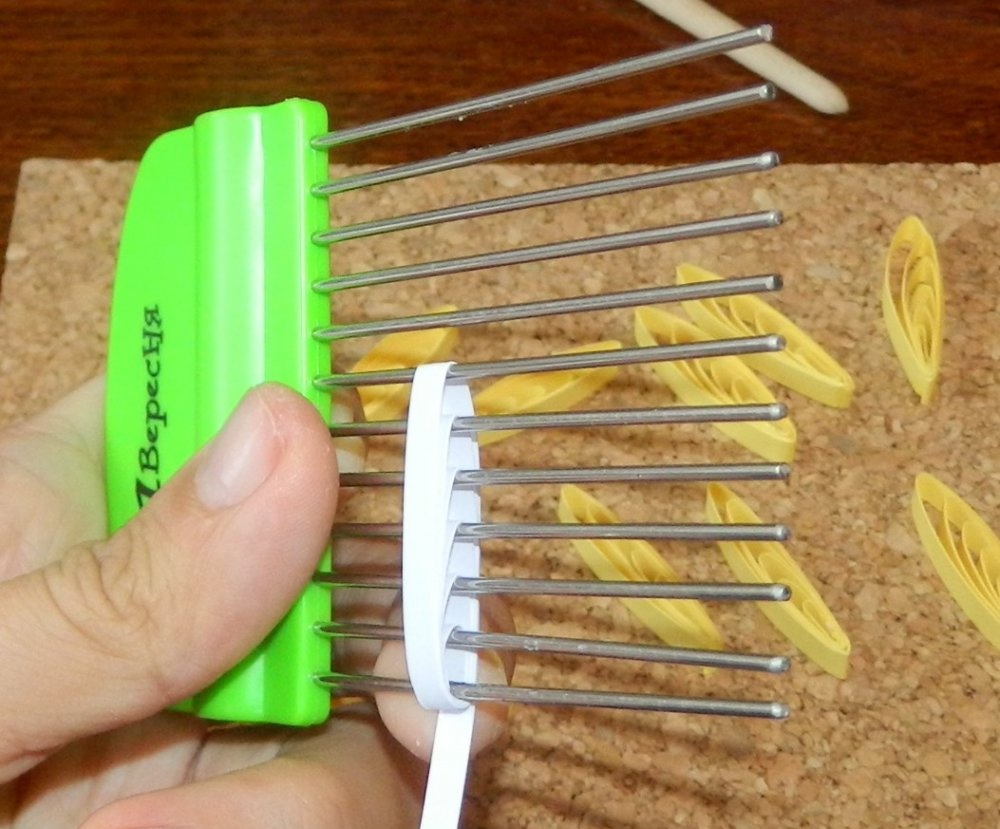
We make the same eight elements from 20 cm white paper.
Using glue, we connect two yellow and one white parts together so that the white is in the middle.
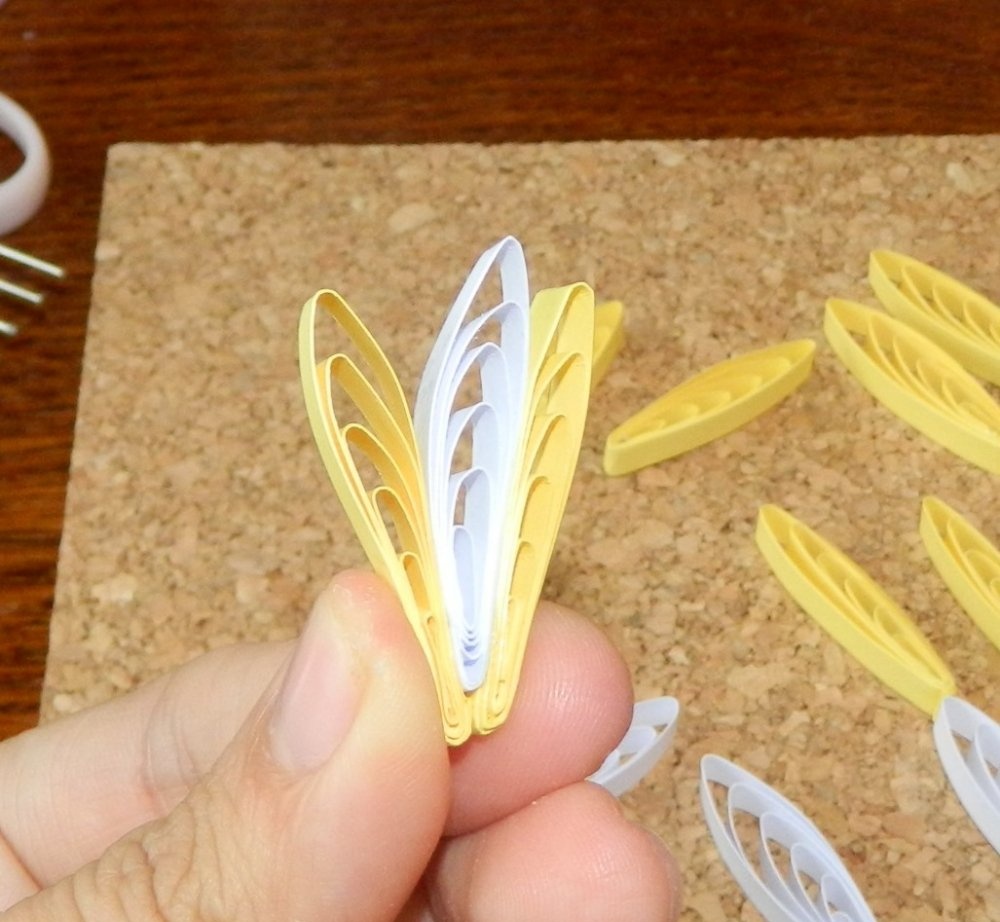
Now we take a soft purple strip of paper 20 cm long and wrap it around these three parts.
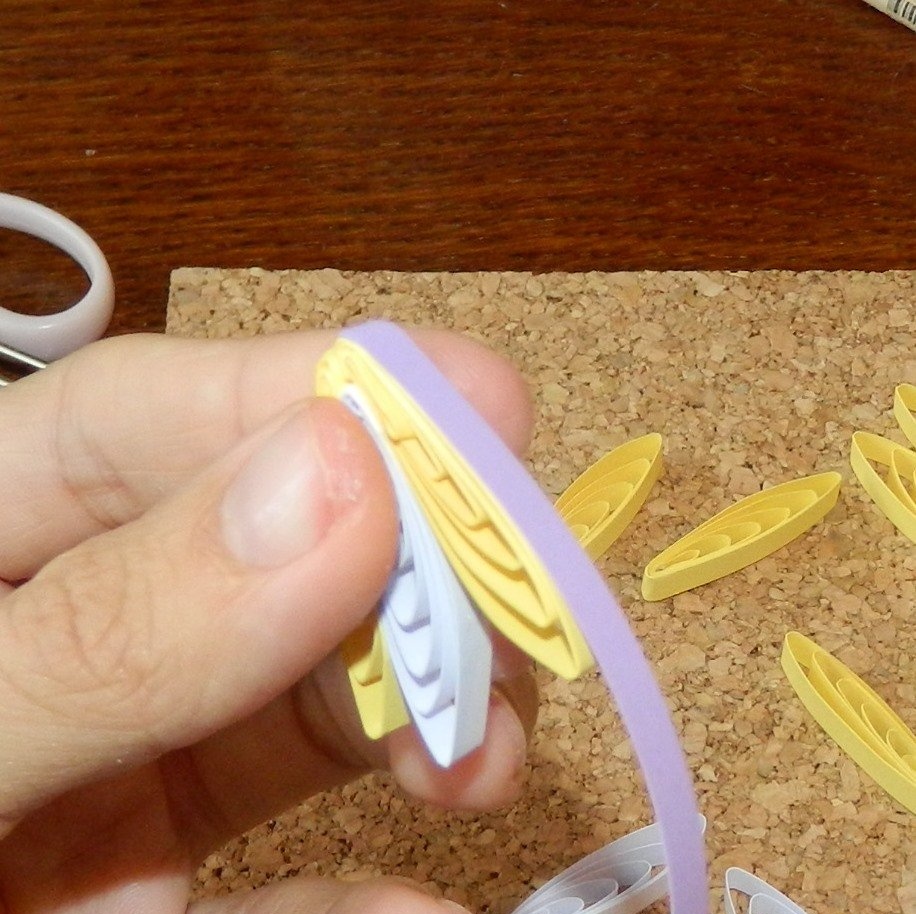
We cut the edge and secure it with glue. The first petal is ready.
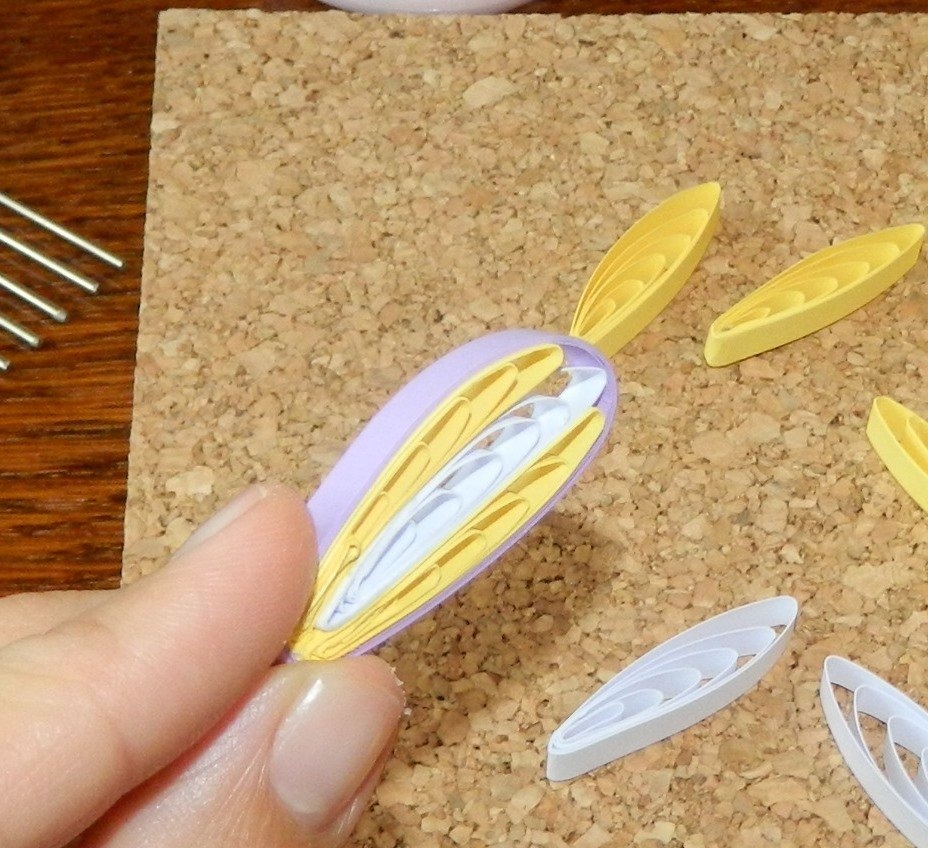
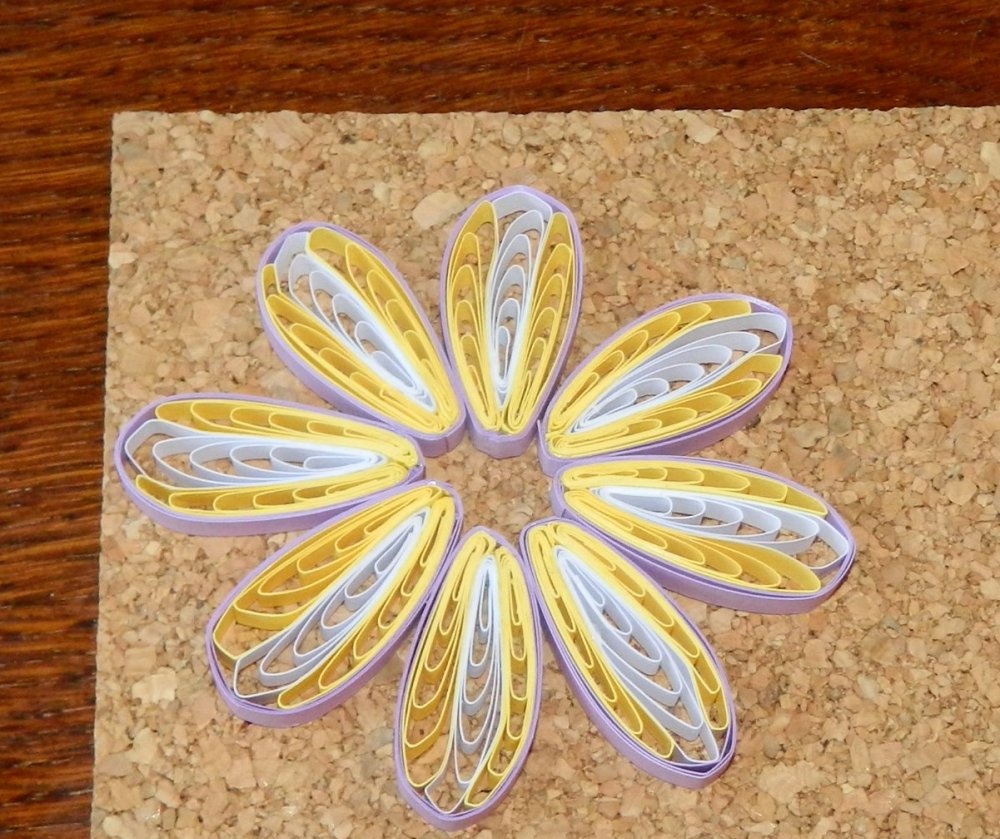
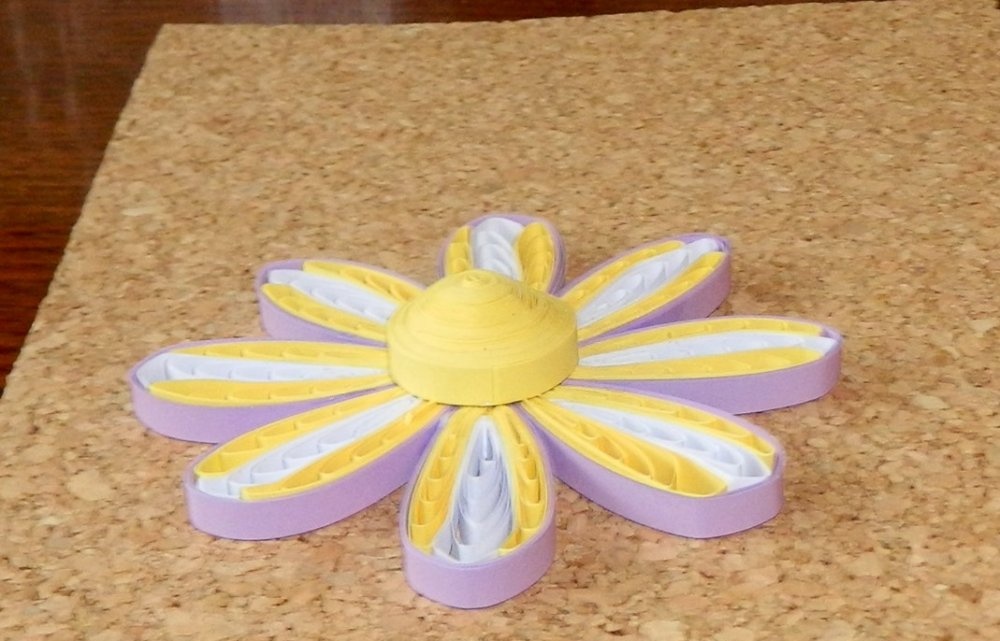
We make 8 petals like this for our flower.
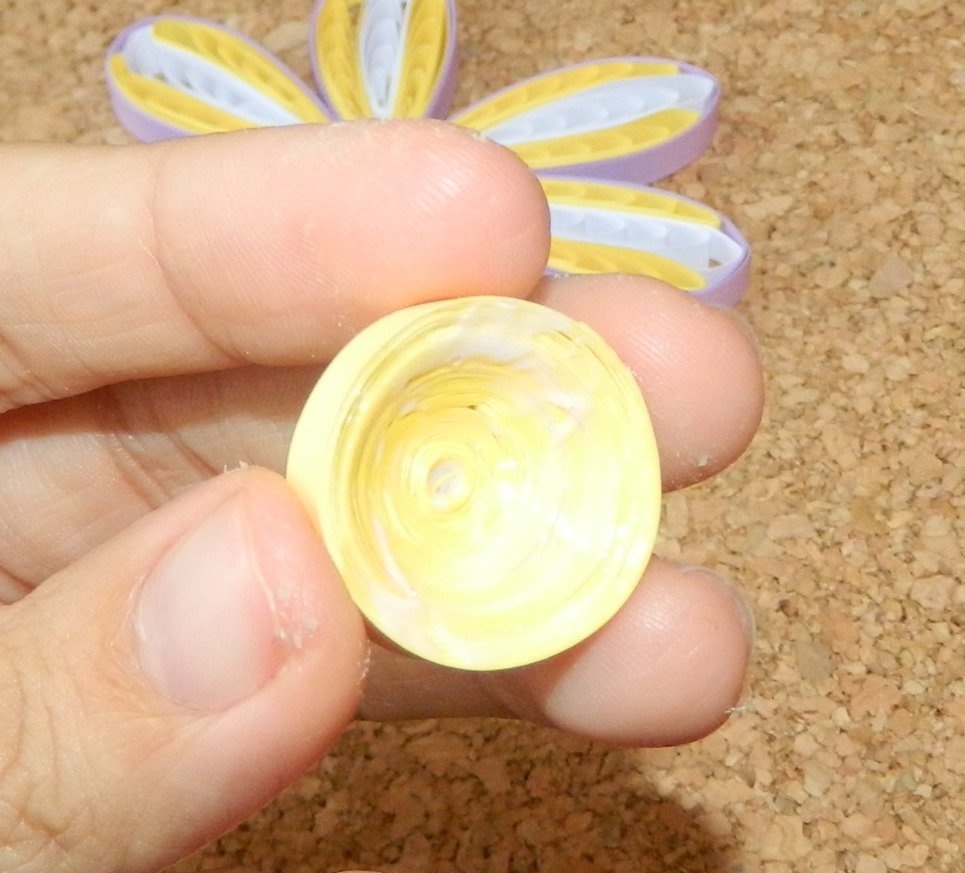
Take yellow quilling paper and form a tight roll. The length of the strip should be about 100 cm depending on the thickness of the paper. The roll diameter should be about 2.5 mm.

Now carefully press the finished roll inside so that you get a voluminous part.
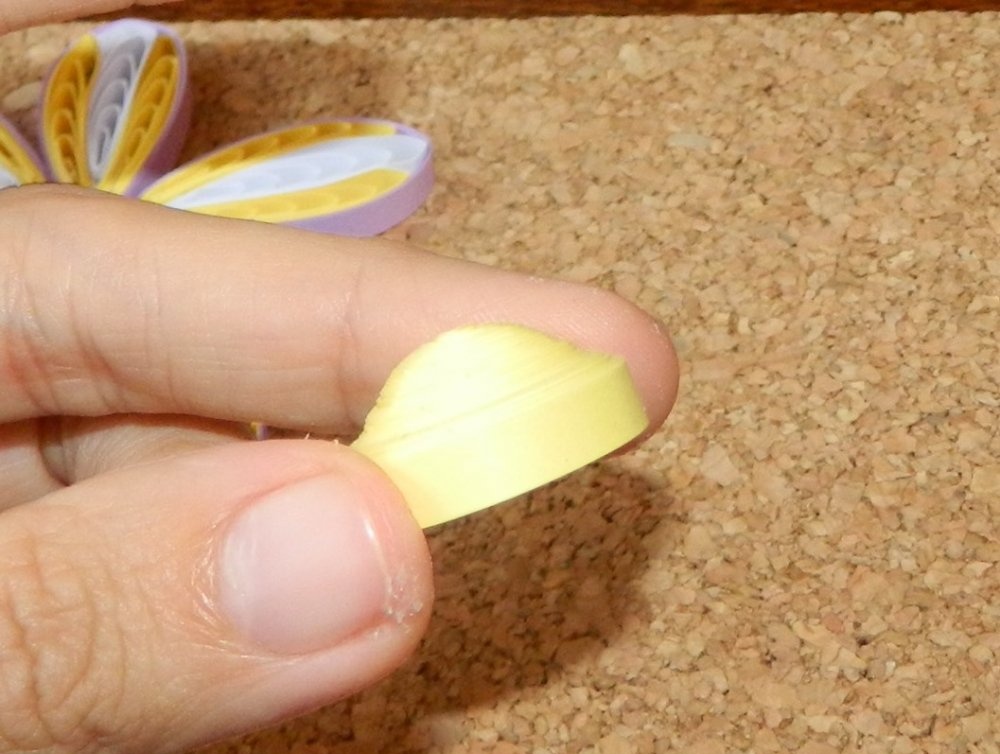
The inside of the part must be well lubricated with glue so that it retains its shape.
We attach the flower petals to each other using glue at the points of contact.We attach the middle of the flower in the center, which should dry completely.
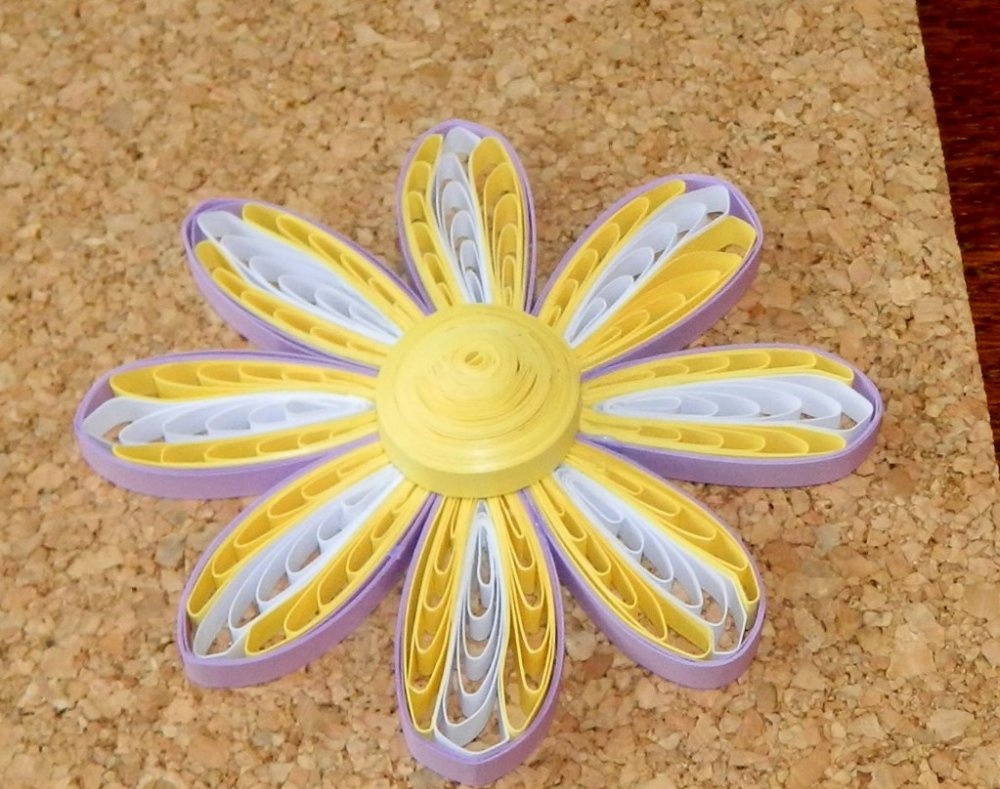
The flower turns out voluminous.
We coat the finished flower with glue on the back side, and then fix it on the base of the card at the top right.
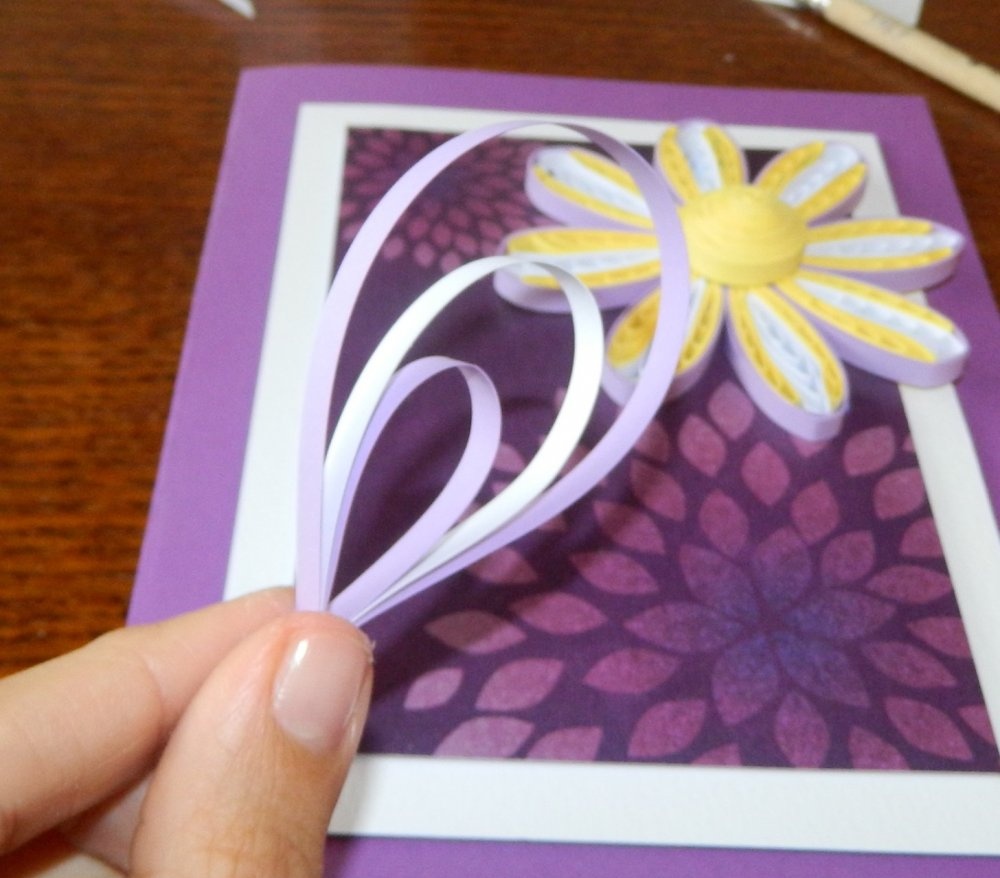
From purple and white quilling paper we make the following detail, making loops alternately: a small purple loop - a slightly larger white loop - an even larger purple loop. At the base, the ends of the part are fastened with glue.
We coat the part with glue and glue it to the base.
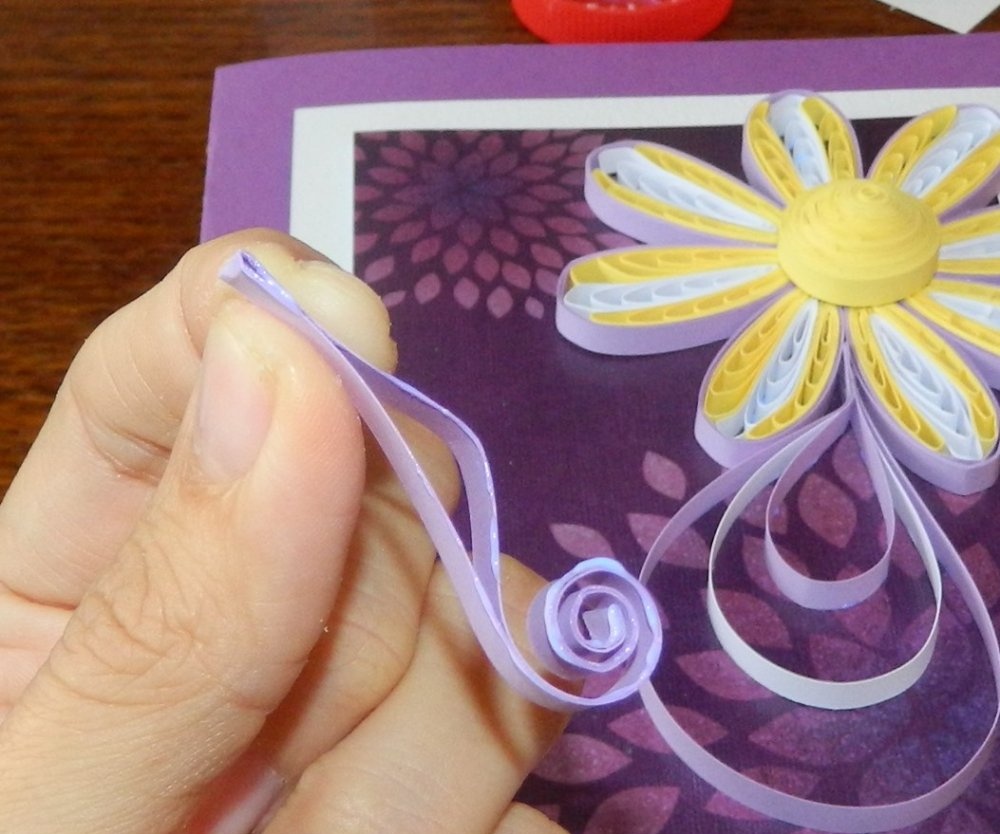
Next, take a strip of purple paper 20 cm long and fold it in half. We fix the edges of the strip with glue, then we begin to wind it with a tool. Lubricate the resulting part with a small layer of glue and fix it to the base.
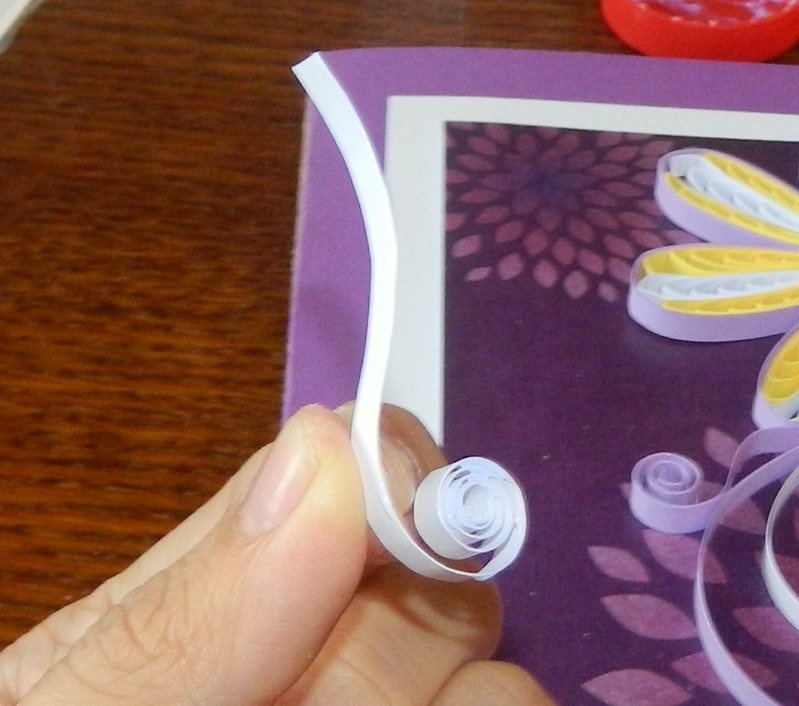
Take a small strip of white quilling paper and twist it on one side with a tool. We also attach the finished element to the base using glue. Let's make another similar detail.
The number of parts and their arrangement can be done at your discretion.
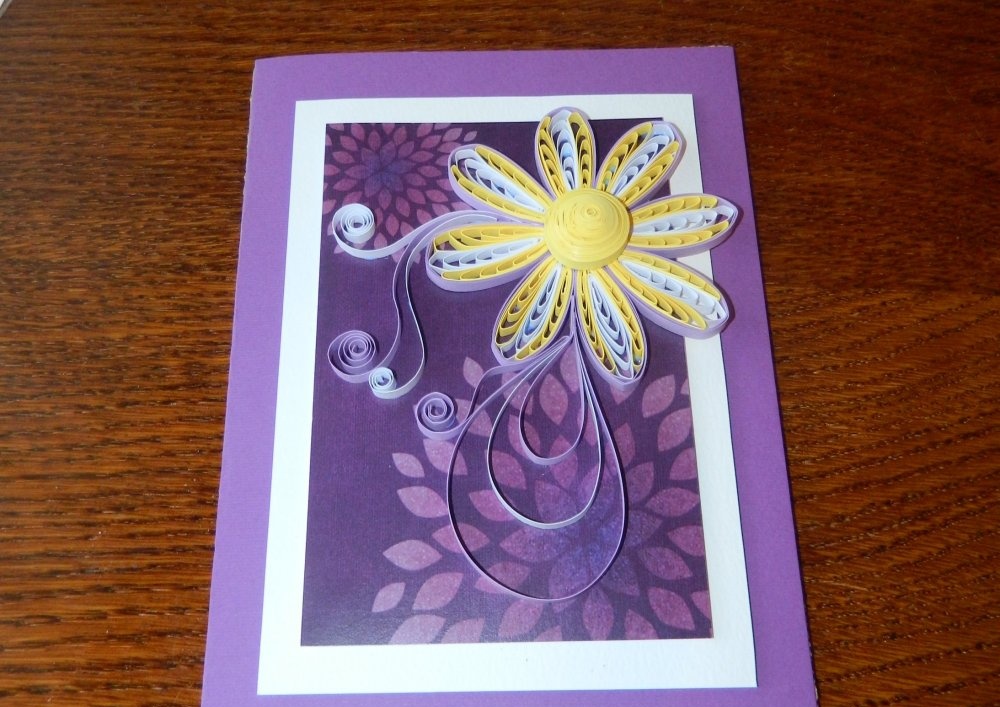
Using tweezers, attach the rhinestones to the card.
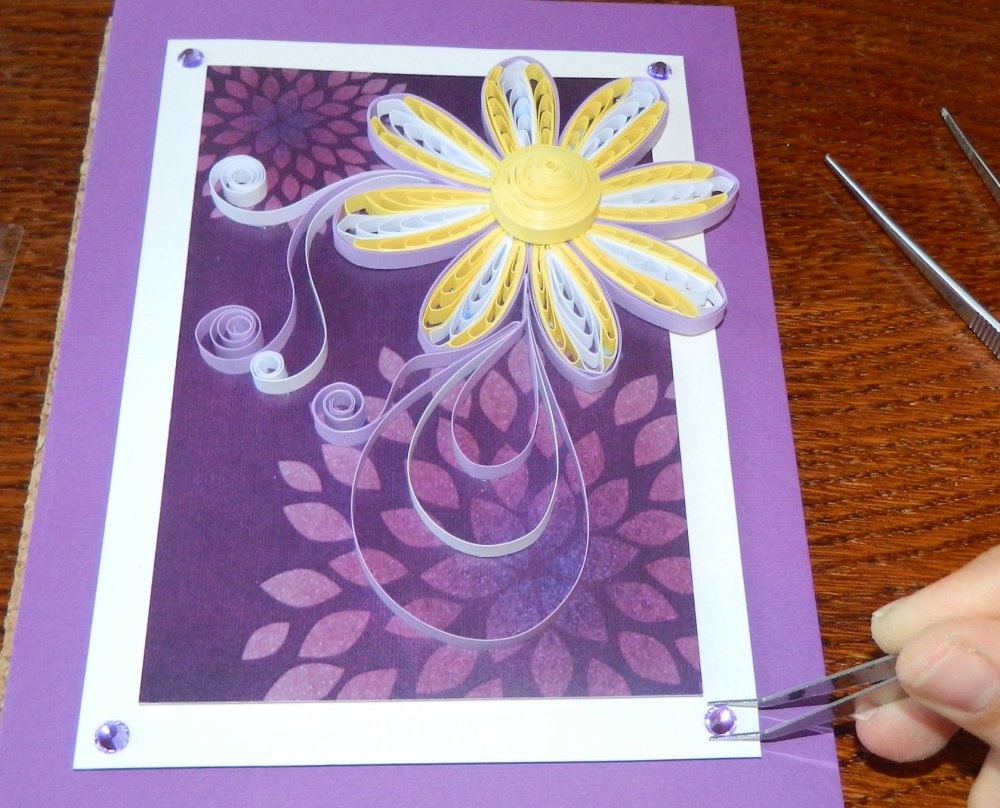
Here you can also rely on your imagination and place rhinestones to your taste.
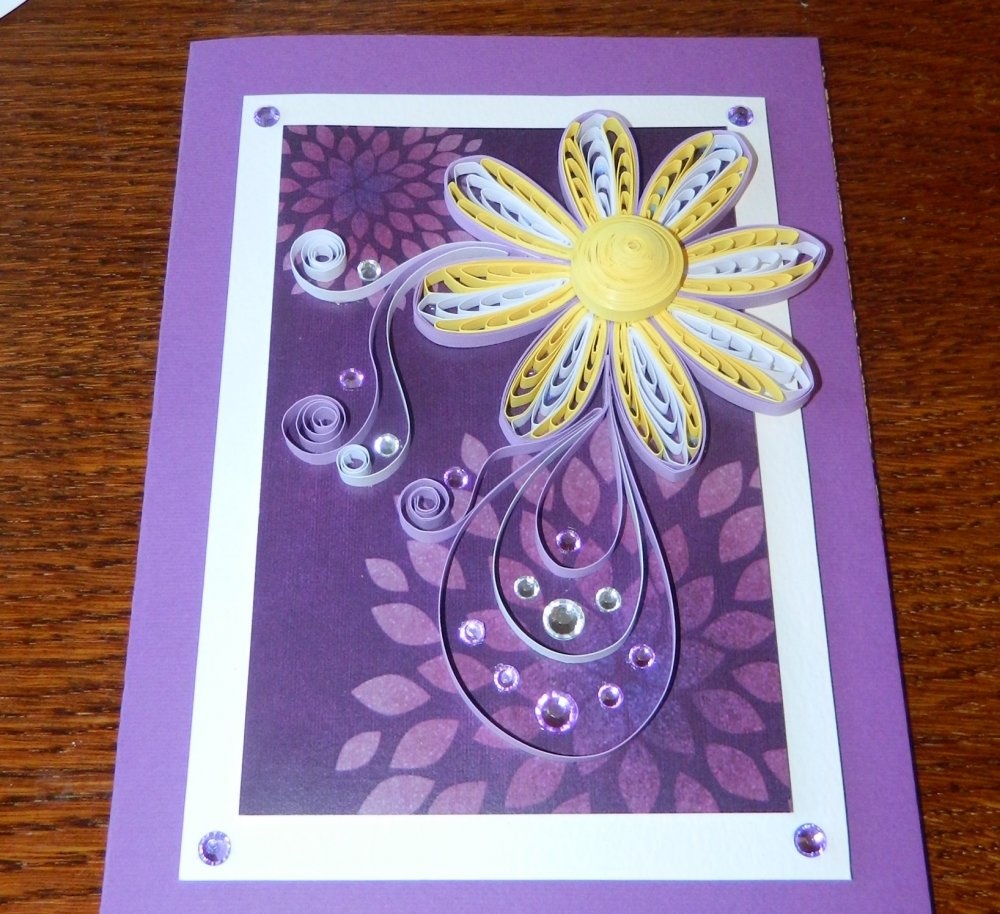
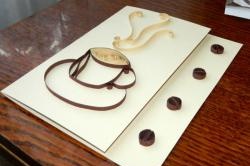
A very original and unusual DIY postcard using the quilling technique is ready!