Do it yourself
Life hacks, master classes, useful tips, recipes.
home » Handicraft techniques » Quilling » Quilling cards » Postcard “Coffee”
The discreet style of this card will not leave anyone indifferent. This work is quite simple, but at the same time very unusual. To perform it, simple materials are used. Even if you don’t have special paper for quilling, it can be made from ordinary double-sided colored paper.
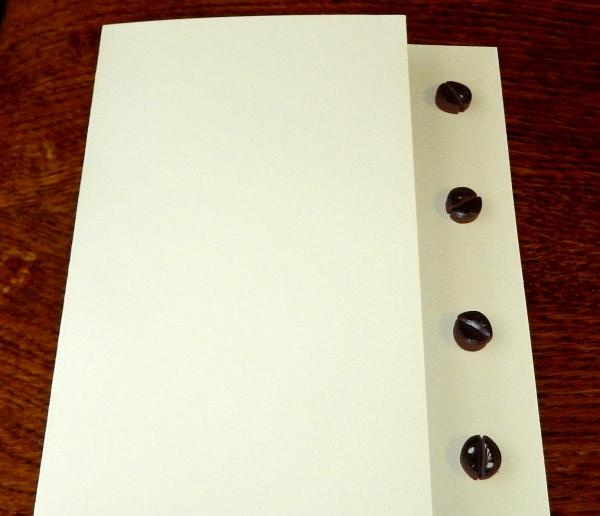
To work you need to take:
1. Beige cardboard A4;
2. Quilling paper - beige, brown;
3. Glue, tweezers, scissors, quilling tool.
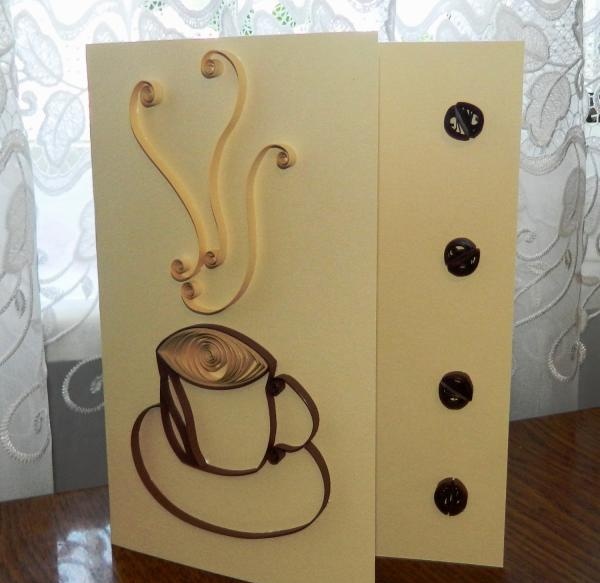
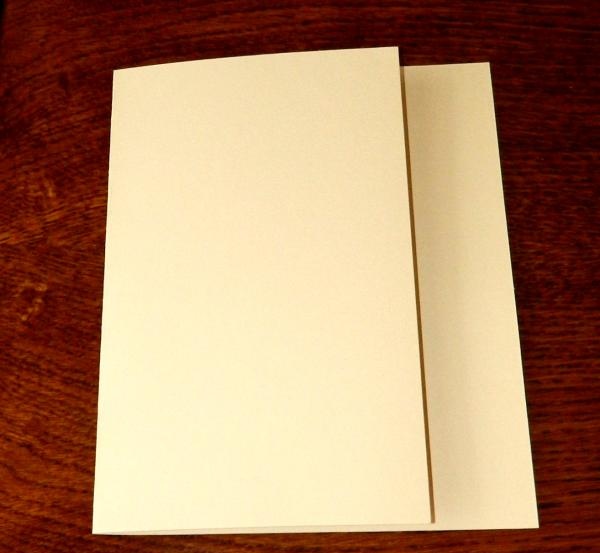
We bend the beige cardboard so that about 2.5 cm of the card remains open on the right, as in the photo.
DIY Coffee Postcard

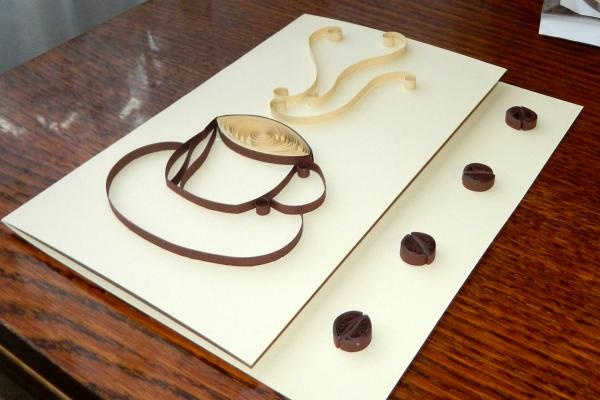
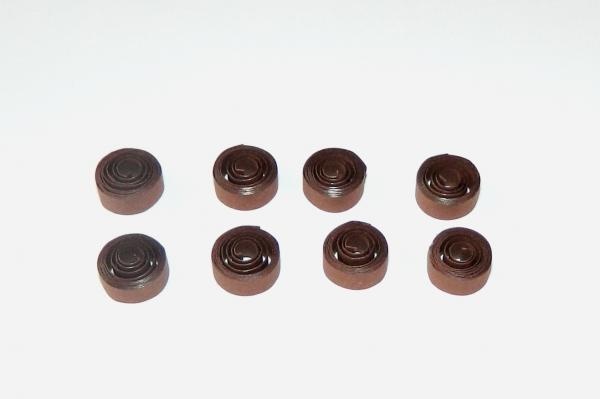
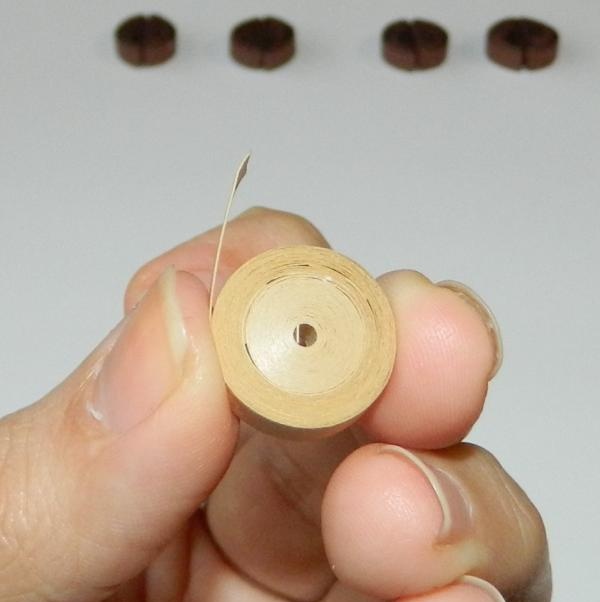
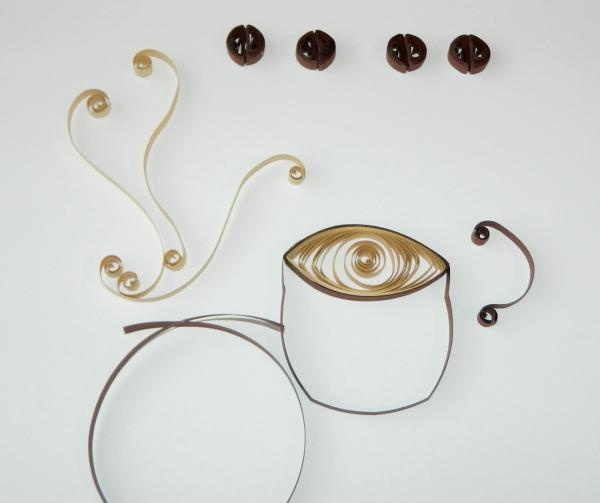
Take brown quilling paper 20 cm long and form a roll using a quilling tool.
DIY Coffee Postcard

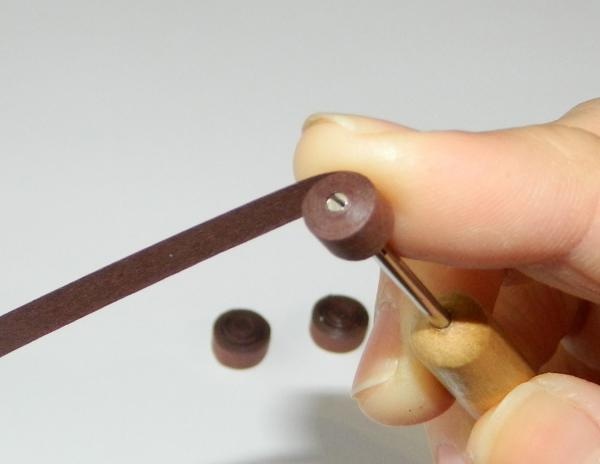
Unravel it a little and fix the tip with glue.
DIY Coffee Postcard

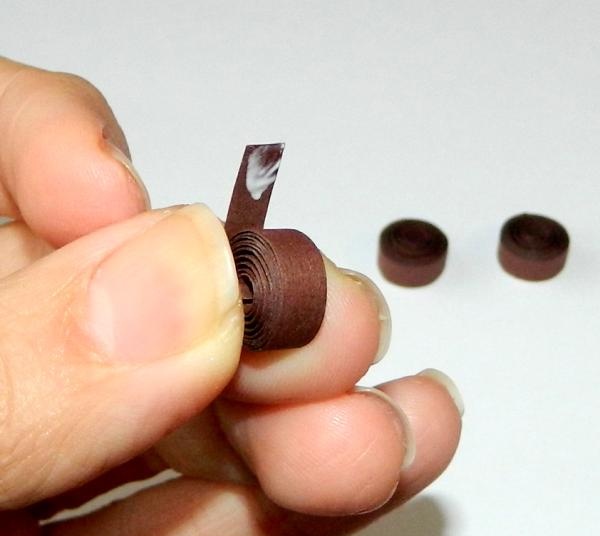
You need to make 8 of these rolls.
DIY Coffee Postcard

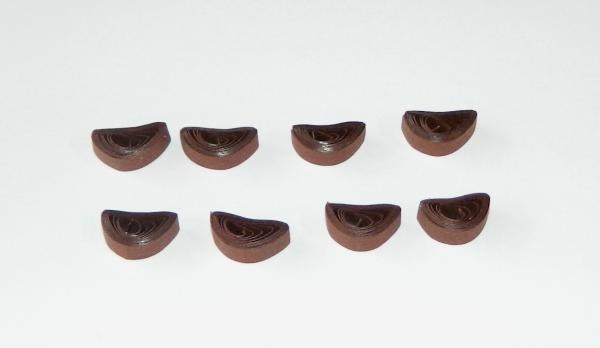
Now we give each of them a crescent shape.
DIY Coffee Postcard

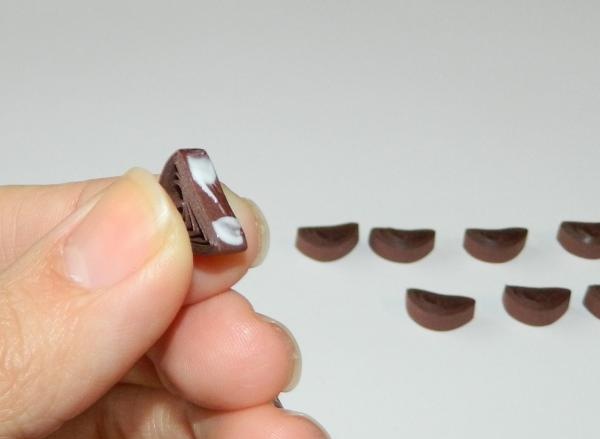
Next, take one obtained element, coat it with glue and connect it to another.
DIY Coffee Postcard

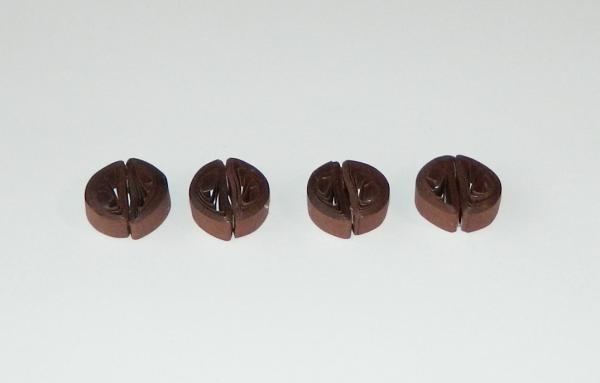
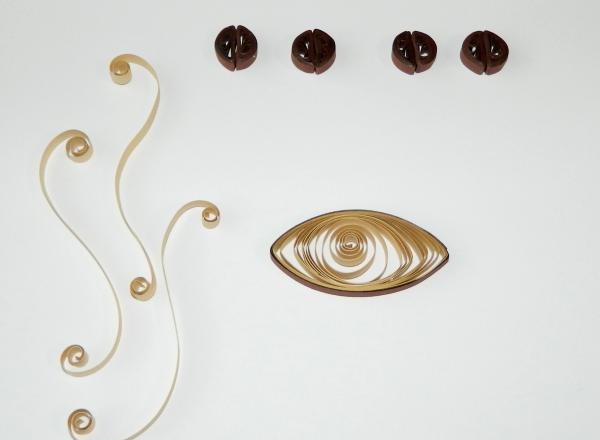
We get 8 elements in the form of coffee beans.
DIY Coffee Postcard

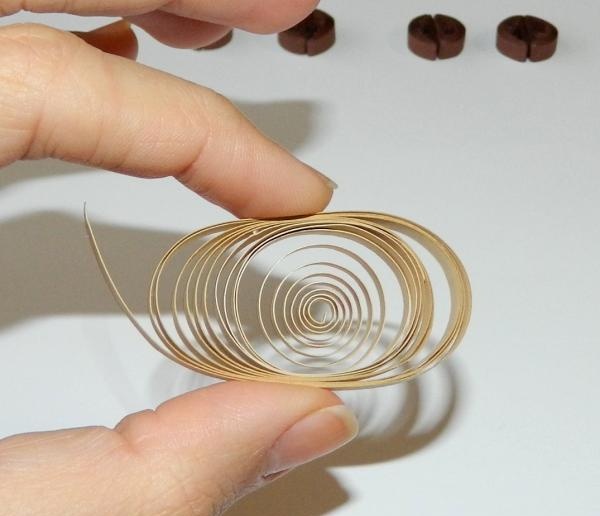
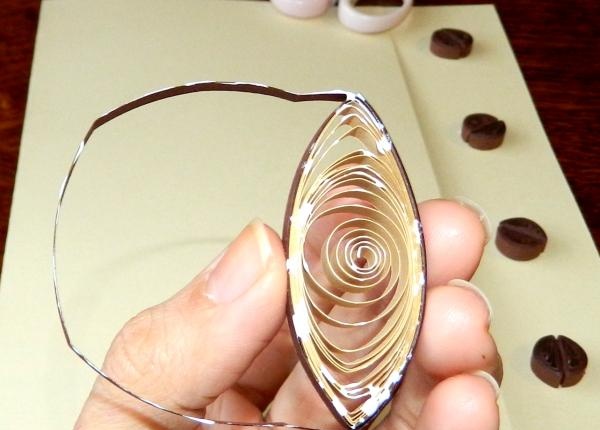
Take beige quilling paper 80 cm long (to do this, connect two standard strips with glue). Form a large roll.
DIY Coffee Postcard

Let's dissolve it. Then fix it with glue.
DIY Coffee Postcard

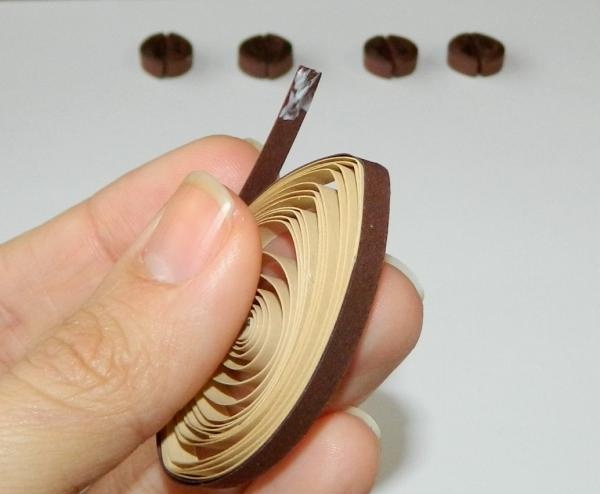
We fasten it on top along the contour of the resulting element. brown strip of quilling paper 15 cm long.
DIY Coffee Postcard

We make three parts from beige quilling paper that will be attached above the coffee cup.
DIY Coffee Postcard

We form the cup itself and the handle from brown quilling paper.
DIY Coffee Postcard

We attach elements in the form of coffee beans to the base of the postcard, as in the photo.
DIY Coffee Postcard

Apply glue to the cup-shaped element.
DIY Coffee Postcard

We attach it to the postcard base.
DIY Coffee Postcard

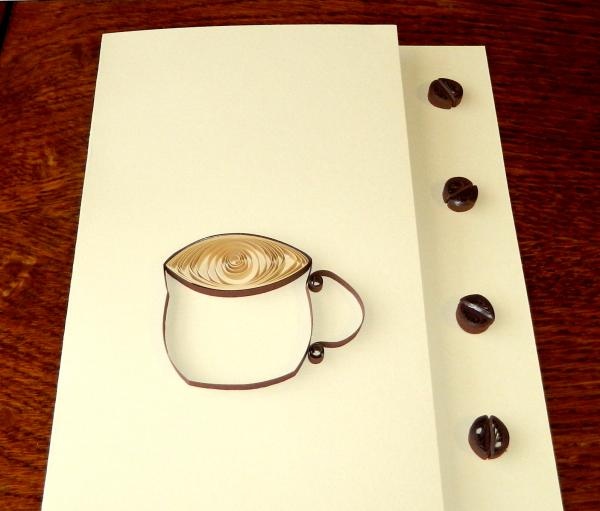
We attach other elements in the same way.
DIY Coffee Postcard

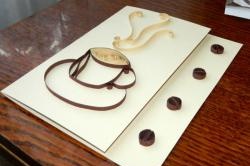
An original and quite discreet DIY postcard is ready!
DIY Coffee Postcard

DIY Coffee Postcard
Comment
  • bowtiesmilelaughingblushsmileyrelaxed relaxedsmirk
    heart_eyeskissing_heartkissing_closed_eyesflushedrelievedsatisfiedgrin
    winkstuck_out_tongue_winking_eyestuck_out_tongue_closed_eyesgrinningkissingstuck_out_tonguesleeping
    worriedfrowninganguishedopen_mouthgrimacingconfusedhushed
    expressionlessunamusedsweat_smilesweatdisappointed_relievedwearypassive
    disappointedconfoundedfearfulcold_sweatperseverecrysob
    joyastonishedscreamtired_faceangryragetriumph
    sleepyyummasksunglassesdizzy_faceimpsmiling_imp
    neutral_faceno_mouthinnocent
3+three=
Comments (0)

How to adjust the blades of a hair clipper to cut the smallest hairs

Recipe “Salad with “Kirieshki”” | Do it yourself

Painting dishes | Do it yourself

Bathroom rug | Do it yourself

«Do it yourself - with your own hands» - a site of interesting homemade products made from scrap materials and items at home. Step-by-step master classes with photos and descriptions, technologies, life hacks - everything a real master or just a craftsman needs for needlework. Crafts of any complexity, a large selection of directions and ideas for creativity.

We recommend reading

Washing machine error codes