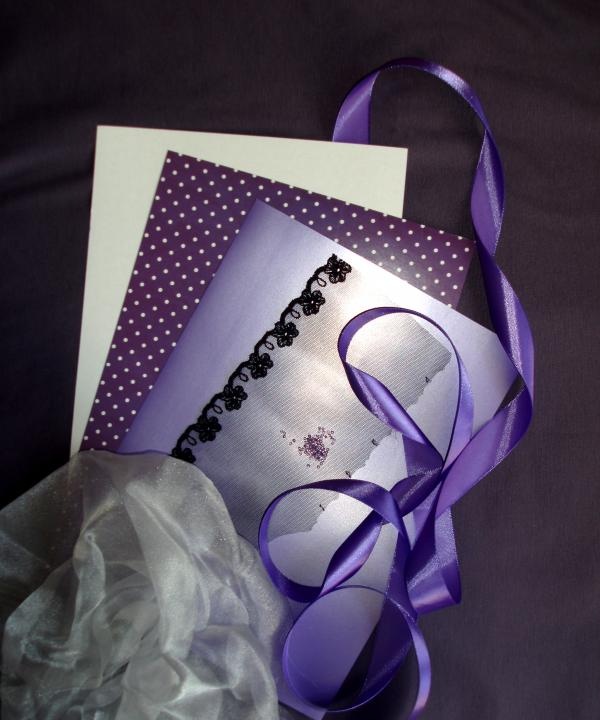
To create a mini handmade masterpiece you will need:
- cardboard base for a postcard or just a sheet of cardboard;
- 2 types of cardboard for creativity that are in harmony with each other: with a pattern and plain;
- shreds of shiny organza;
- about 1 meter of shiny satin ribbon 2.5 - 3 cm wide;
- several beads or seed beads;
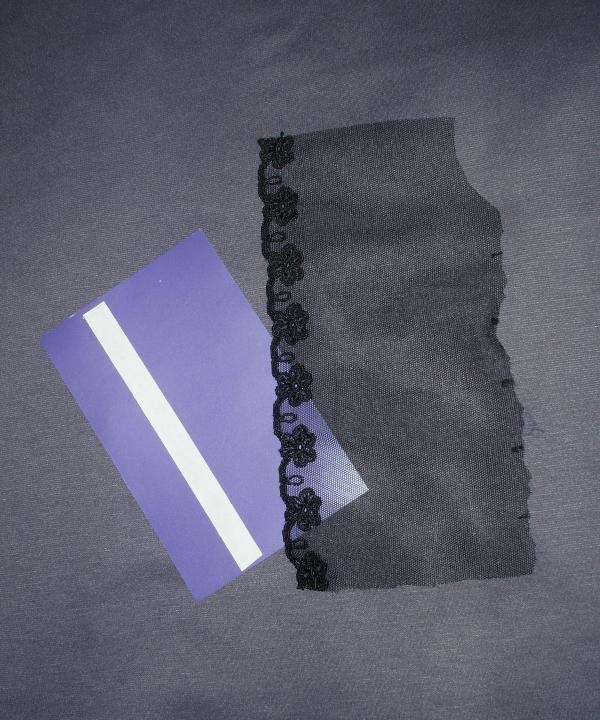
- a piece of lace about 18 cm long, in this example one-sided guipure lace on a mesh is presented, but you can also take lace with scallops on both sides.
In addition, you will need auxiliary tools:
- needle and thread to match the satin ribbon;
- pins;
- double sided tape; in the absence of such adhesive tape, you can work with glue, but still, adhesive tape is preferable: working with it is cleaner, more accurate, you don’t need to wait until it dries, the cardboard is not deformed by the adhesive tape;
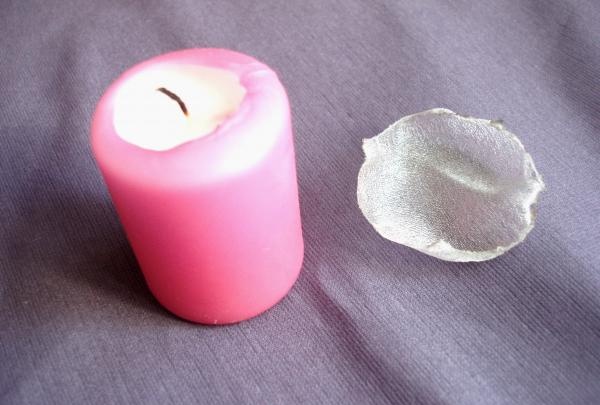
- an ordinary candle and matches for singeing the edges of the organza;
- scissors;
- pencil;
- ruler.
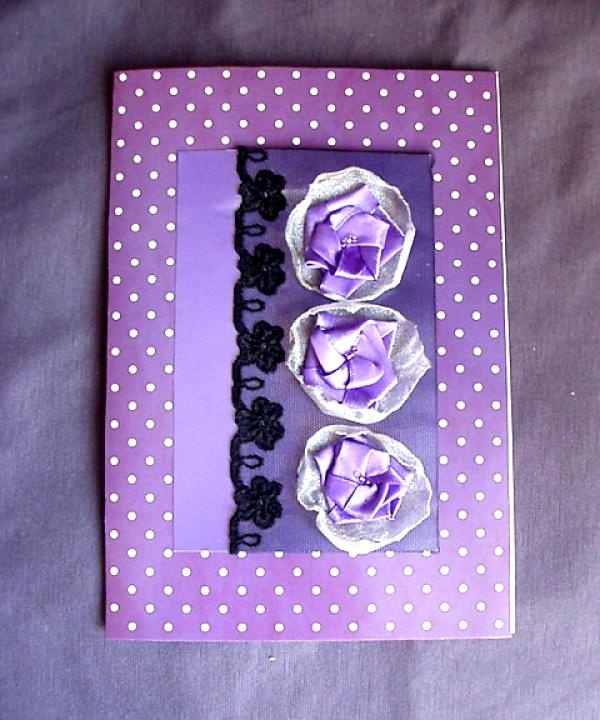
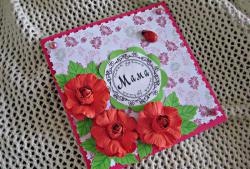
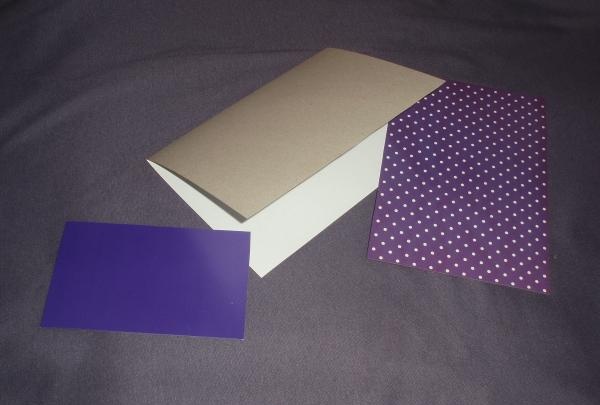
Cut out rectangles of the required size from cardboard. We fold a regular sheet of cardboard with the white side inward - this way we get a blank for a postcard measuring about 20x13.5 cm when folded in half (respectively, 27x20 cm when unfolded). From cardboard with a pattern we cut out the future background of the front side measuring 20x13.5 cm. Plain cardboard is needed for the decorative detail of the postcard - we cut out a rectangle of about 9x14 cm from it.
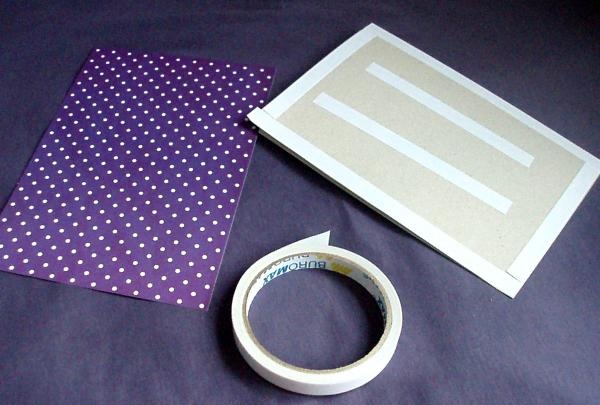
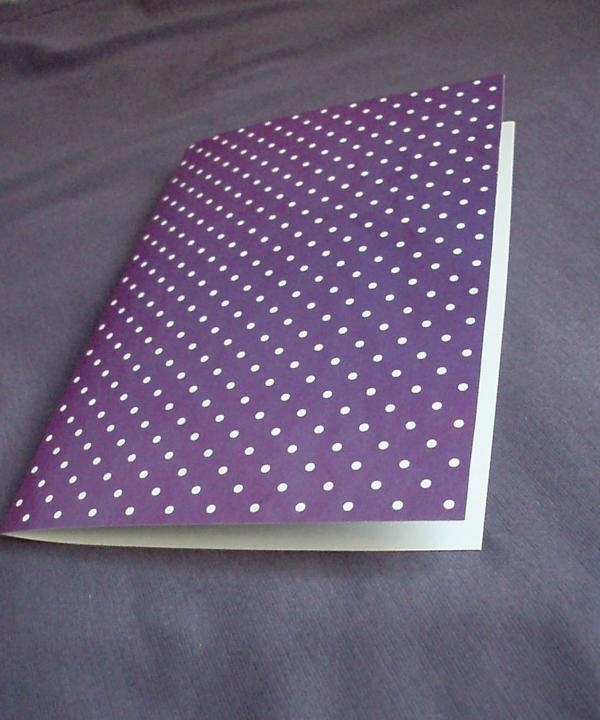
We cover one side of the blank under the card with double-sided tape - you need to carefully cover the entire perimeter with it and stick several strips in the middle. We remove the protective layer on the double-sided tape and then place the piece of colored cardboard on the side of the postcard treated with tape.
Now we put aside the base for the postcard and proceed to the most entertaining and creative part of the work. We take a small piece of plain cardboard and begin to decorate it. First of all, glue the lace along the rectangle along the front side. This can easily be done using double-sided tape, since it is transparent, durable and completely invisible. Glue a strip of tape along a rectangle of plain cardboard, stepping back from one of the long edges by 2-3 cm.
Then remove the protective film on the tape and carefully press the scalloped edge of the lace to it.
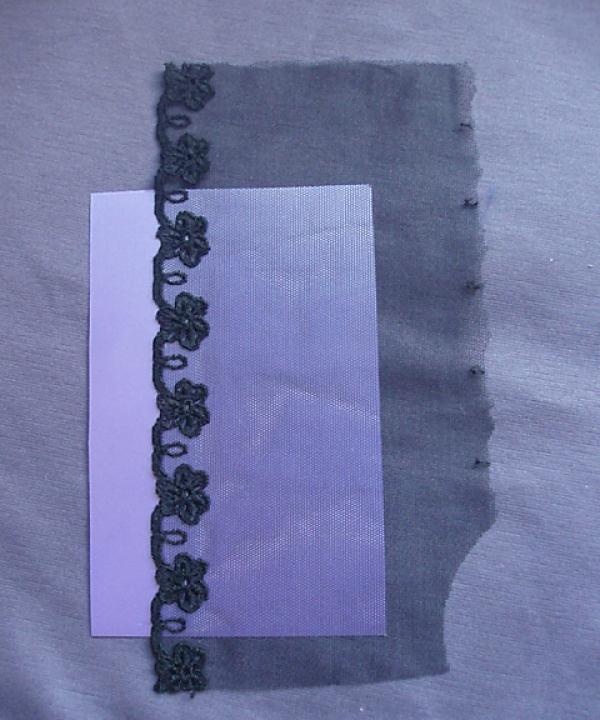
After this, we turn the part over and carefully glue the edges of the lace, shortening them with scissors if necessary. It turns out to be a neat decorative detail.

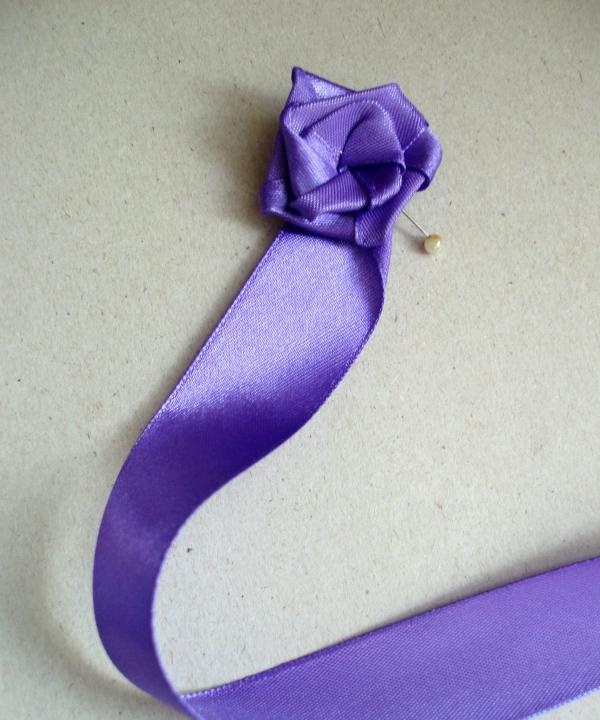
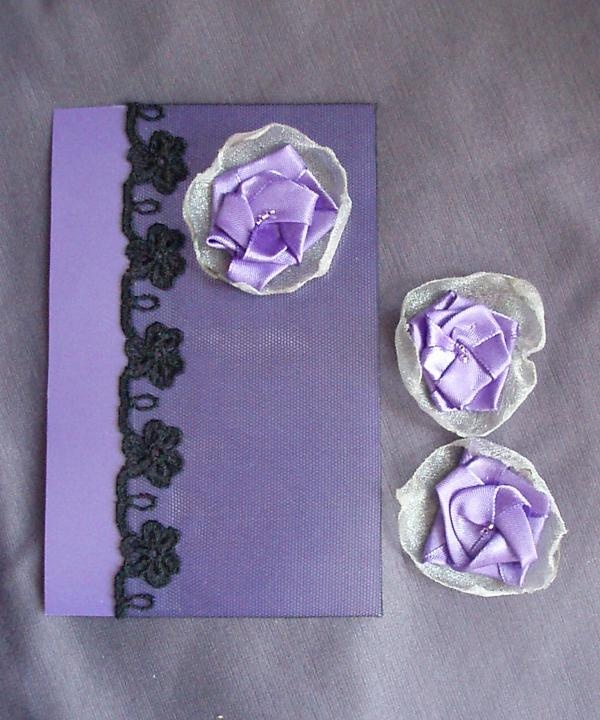
We put this detail aside and proceed to the implementation of other decorative elements - flowers from satin ribbon, which will be the main leitmotif of the entire card.We roll up a small rose from the ribbon, the finished diameter of which is about 3 cm. To do this, we gently but firmly hold the end of the ribbon with our left hand, and with our right hand we begin to build a flower, as if twisting the ribbon around the end of the ribbon. At the same time, do not forget to bend the ribbon diagonally, so that on the front side of the rose you get one or the other side of the ribbon. Each bend of the ribbon is equal to one petal. After making 2-3 rows of petals, secure your work with a pin.
Now we temporarily put the rose aside and start working with organza, from which we make beautiful “sepals”. Cut out a piece with a diameter of about 5 cm.
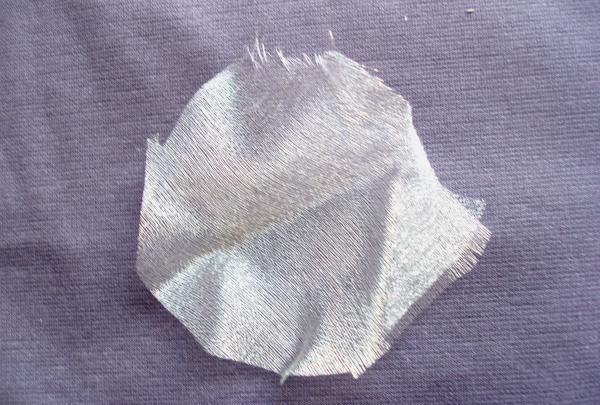
Light a candle and singe the edges of the organza on its fire. Since organza is a predominantly synthetic fabric, its edges do not burn, but melt. To make the edges beautifully curved, the edge should be kept at a distance of 3-4 cm above the flame. If you hold the edge of the organza to the side of the fire, its edges will melt, but will not bend, but will remain smooth.
When the organza sepal is ready, you can return to working with the flower. We take a needle with a double thread to match the ribbon and carefully sew all layers of rose petals from the wrong side, without leaving the needle on the front side. Finally, we sew several beads into the middle of the flower.
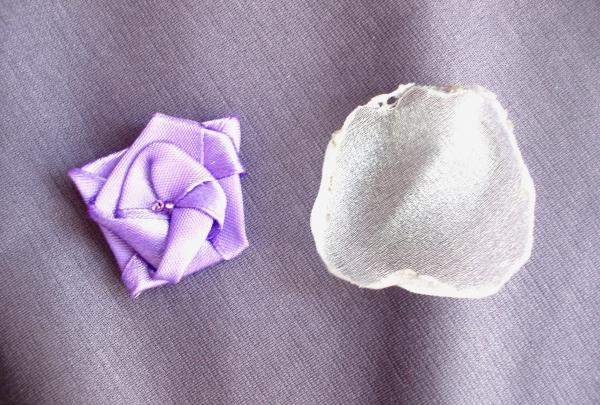
Now, without cutting the thread, sew the sepal to the back of the rose, placing the flower in it, like in a “nest”. Secure at the back with a couple of stitches and leave the thread again.
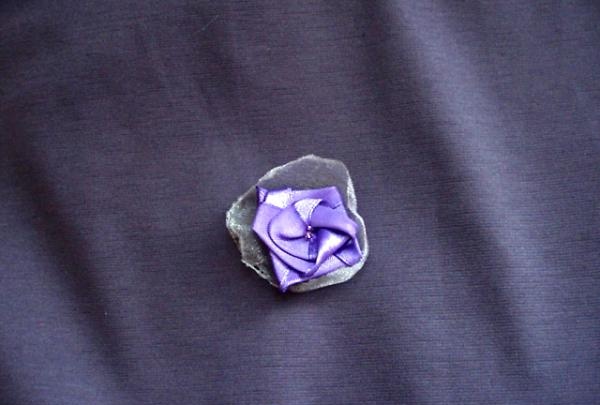
In total, make three such roses in sepals of the same size. When all the flowers are ready, you can return to the plain cardboard piece and begin the overall assembly of the card.
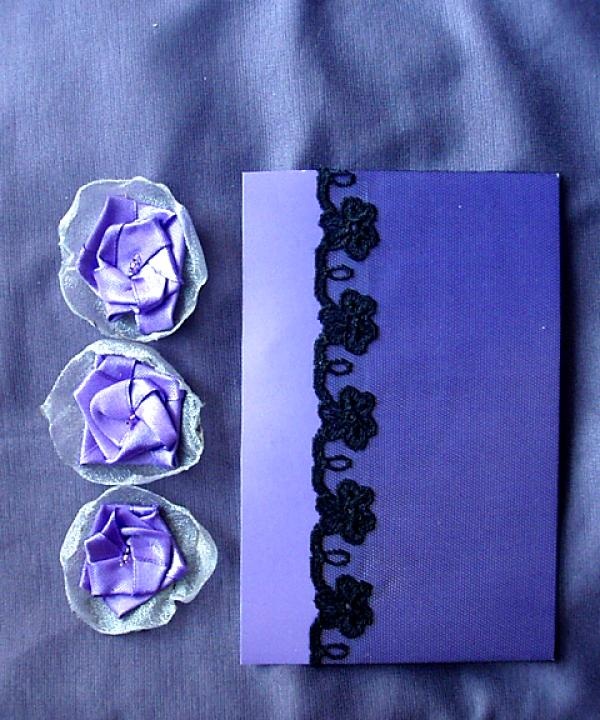
To do this, carefully sew each flower onto the cardboard using the thread that you left after assembling the flower. Sew two layers under the flower at once - both lace and cardboard.At the same time, make sure that you do not tighten the thread too much and that folds do not form on the lace.

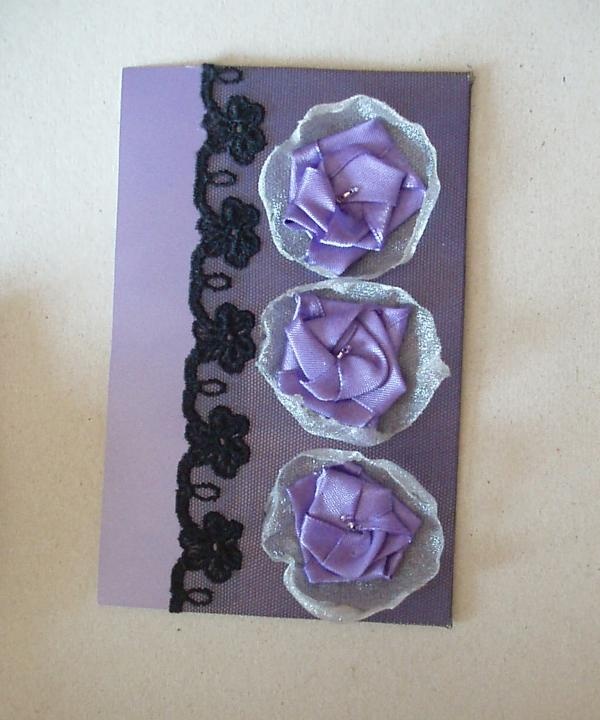
When all three flowers are sewn onto the small piece, you can attach it to the large blank piece.
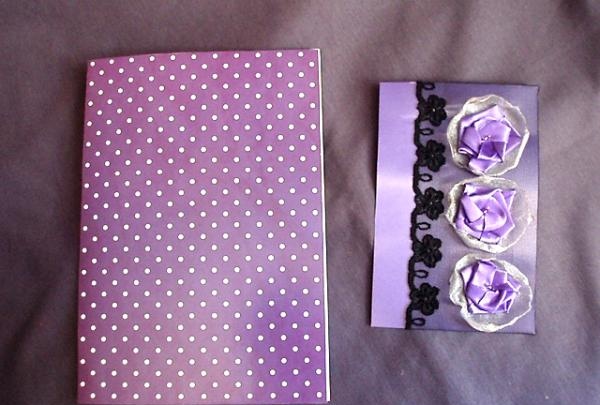
To do this, we again use double-sided tape - carefully glue it from the wrong side of the decorated part to the entire perimeter, as well as several strips to the middle of the part. We remove the protective layer on the tape and attach the small part to the middle of the large part. Now your card is ready to congratulate the lucky recipient.