Do it yourself
Life hacks, master classes, useful tips, recipes.
home » Handicraft techniques » Origami » Origami for beginners » Volumetric Christmas tree made of paper
New Year is a holiday that people of all nationalities and ages look forward to. So in our family, even before the onset of the first winter month, debates arose regarding the menu, home decoration and everything related to the upcoming celebration. And since the Christmas tree is its integral attribute, we, following the good old tradition, decided not only to place and decorate a lush beauty (albeit artificial) in the central room, but also to make several miniature copies of it with our own hands.

Volumetric Christmas tree made of paper


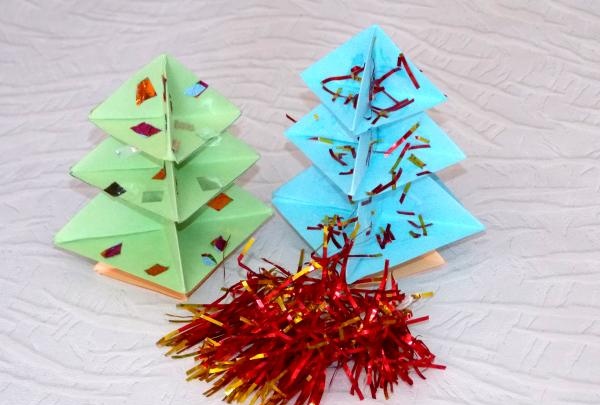
After all, even a small voluminous Christmas tree made of paper, made using the technique origami, can become a wonderful element that will complement the New Year's 2016 interior of our apartment. And it consists of only 4 parts, and is quite simple to do.
Materials for creativity:
• 2 sheets of A4 paper in matching colors (we have pale blue and pale orange);
• scissors;
• ruler with pen (or pencil);
• PVA glue (a simple glue stick will also work);
• a little tinsel - to decorate the Christmas tree.

Volumetric Christmas tree made of paper


Operating procedure:
Draw and cut out the details:

Volumetric Christmas tree made of paper

Volumetric Christmas tree made of paper


• 3 squares of blue paper with sides of 12 cm, 10 cm and 8 cm.– from them we will make “branches” of the Christmas tree;
• 1 square from a sheet of the second color with a side of 8 cm - we need it to make the trunk (leg).
Now let's get down to the process of working with paper.
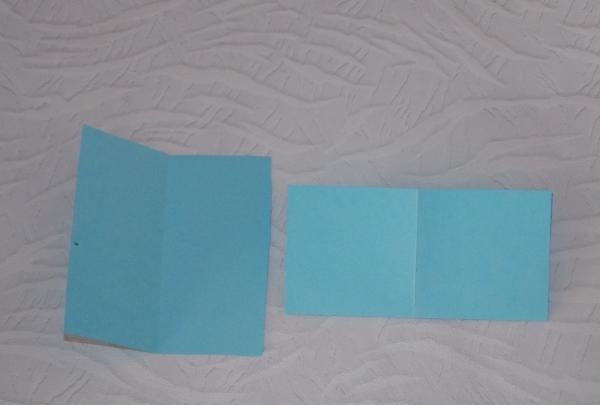
We are preparing the details. We bend the square in half, first vertically, then horizontally, placing corner to corner evenly.
Volumetric Christmas tree made of paper


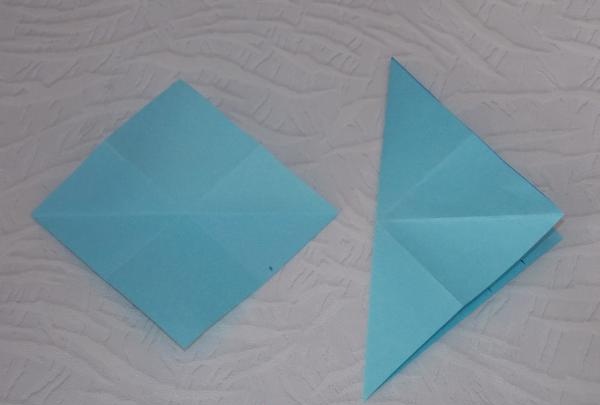
Now we make folds along both diagonals.
Volumetric Christmas tree made of paper


We bend all 4 corners towards the center of the figure.
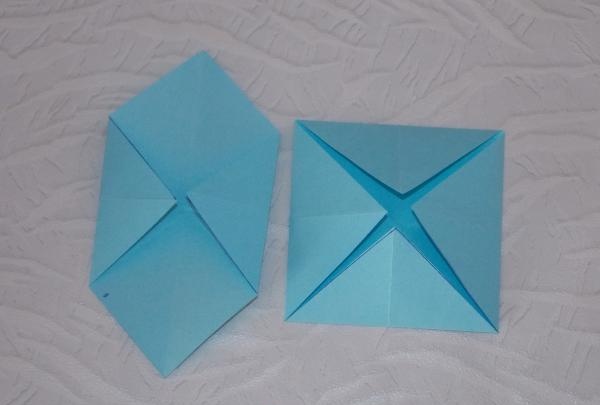
Volumetric Christmas tree made of paper


We take the resulting square by the sides in the middle and move it towards each other, connecting it in the center.
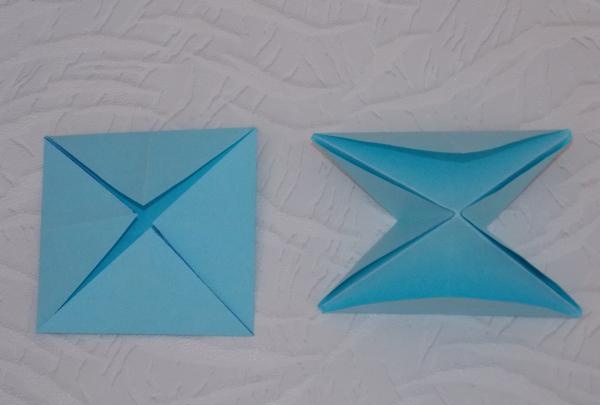
Volumetric Christmas tree made of paper


We do the same with the top and bottom sides of the figure. We get a cross.

Volumetric Christmas tree made of paper


We bend one of the corners of the top layer.

Volumetric Christmas tree made of paper


We shift the previously made fold line to the side (left) side, forming a small triangle below (under the figure).
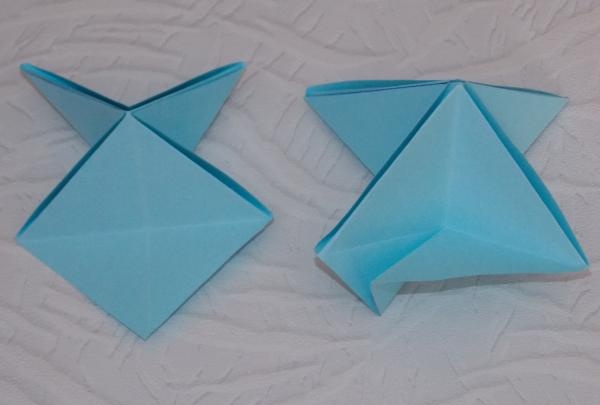
Volumetric Christmas tree made of paper


We move it behind the thigh of the resulting figure.
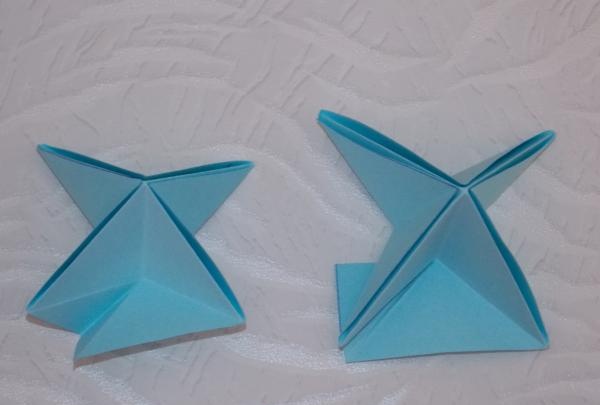
Volumetric Christmas tree made of paper


We turn the entire paper blank upside down and bend this triangle inward.
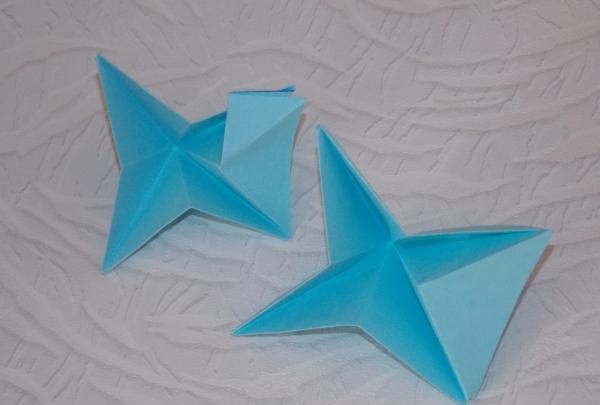
Volumetric Christmas tree made of paper


We put the workpiece in its original position, turn away the next corner of the top layer and repeat the same manipulations, as well as with the remaining two other corners.
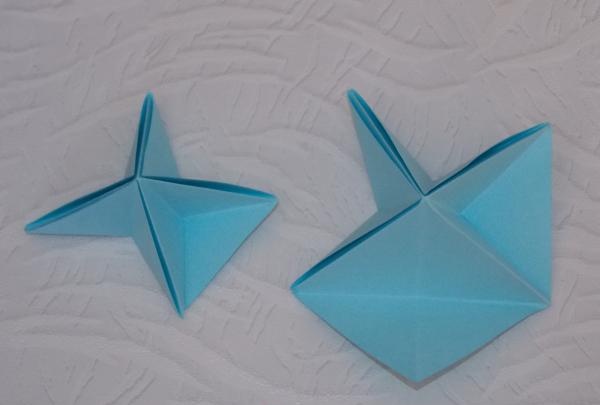
Volumetric Christmas tree made of paper


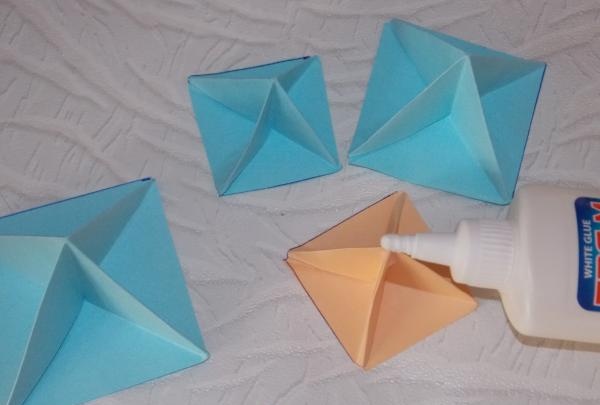
We get a paper figure that looks like a pyramid.
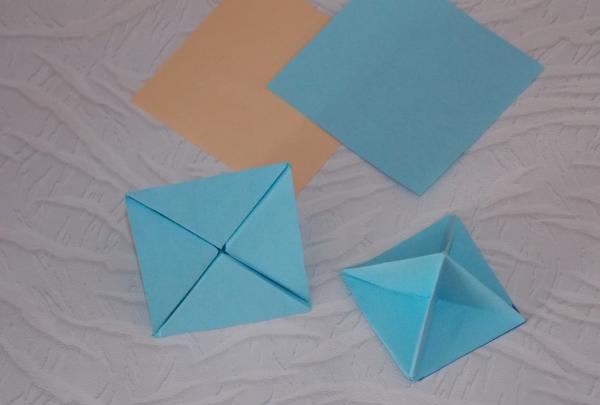
Volumetric Christmas tree made of paper


We fold all 4 parts of our Christmas tree in the same way.
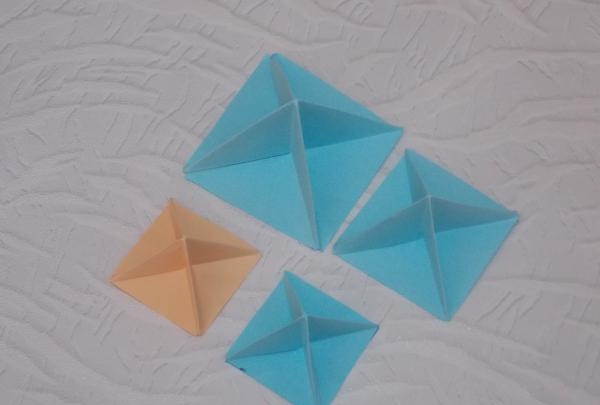
Volumetric Christmas tree made of paper


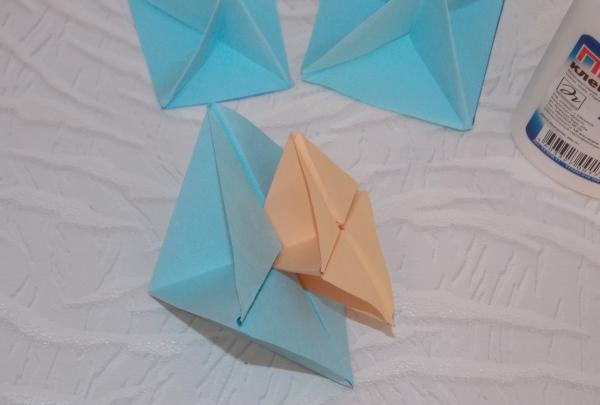
Putting the craft together. We coat the top of the orange pyramid with glue and insert it about 0.5 cm into the slots at the “bottom” of the largest blue part.
Volumetric Christmas tree made of paper

Volumetric Christmas tree made of paper


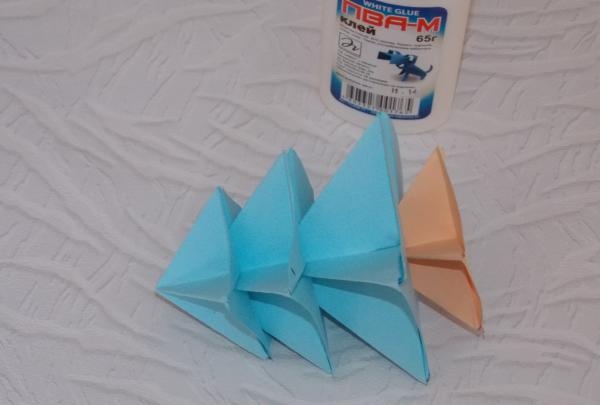
Then we glue a slightly smaller pyramid in the same way and finish assembling the craft with the smallest part.
Volumetric Christmas tree made of paper


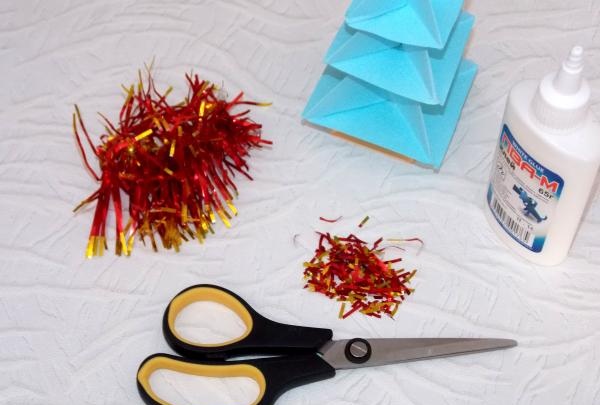
Now all we have to do is decorate the finished Christmas tree by gluing bright strips cut from tinsel in disarray.
Volumetric Christmas tree made of paper


And our paper Christmas tree is ready to become a New Year’s decoration in any corner of your office or apartment.

Volumetric Christmas tree made of paper


Happy creativity and happy holidays!
come back
Comment
  • bowtiesmilelaughingblushsmileyrelaxed relaxedsmirk
    heart_eyeskissing_heartkissing_closed_eyesflushedrelievedsatisfiedgrin
    winkstuck_out_tongue_winking_eyestuck_out_tongue_closed_eyesgrinningkissingstuck_out_tonguesleeping
    worriedfrowninganguishedopen_mouthgrimacingconfusedhushed
    expressionlessunamusedsweat_smilesweatdisappointed_relievedwearypassive
    disappointedconfoundedfearfulcold_sweatperseverecrysob
    joyastonishedscreamtired_faceangryragetriumph
    sleepyyummasksunglassesdizzy_faceimpsmiling_imp
    neutral_faceno_mouthinnocent
3+three=
Comments (0)

How to cook Ukrainian sausage at home

Replacing the lower gearbox of a brush cutter (trimmer)

With such a pinwheel made of PET bottles, birds will fly around your area

How to prepare a tangerine-shaped snack

«Do it yourself - with your own hands» - a site of interesting homemade products made from scrap materials and items at home. Step-by-step master classes with photos and descriptions, technologies, life hacks - everything a real master or just a craftsman needs for needlework. Crafts of any complexity, a large selection of directions and ideas for creativity.

We recommend reading

Washing machine error codes