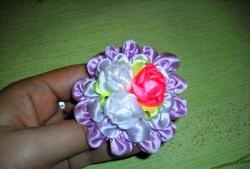
- large hair clip.
- silver brocade ribbon 25 mm wide.
- stamens with large beads on the edge.
- white cabochon, 12 mm in diameter.
- white satin ribbon with a width of 25 mm.
- thermo gun.
- scissors.
- sewing thread and needle.
- lighter.
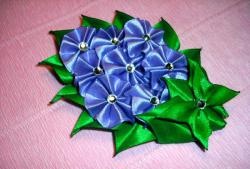
Making decorations.
First you need to prepare 10 cm long pieces. They will be needed to create tulip buds. A total of 6 such parts should be made.

Then you need to make pieces 6 cm long. They will be needed to make the outer petals of each flower. A total of 6 such segments need to be prepared.
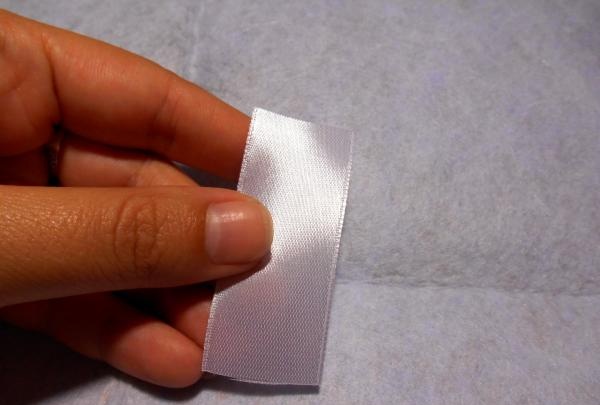
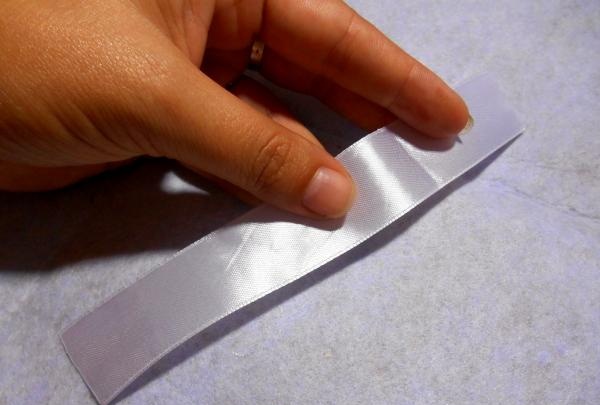
Next you need to start creating flowers. To do this, you need to take one long piece and singe its sections with a lighter, protecting them from shedding. Having placed the piece horizontally in front of you, turn it wrong side up. Then the corner of the left edge must be bent to the edge line.
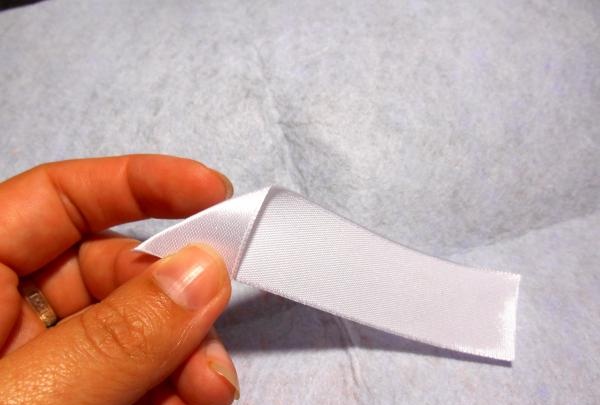
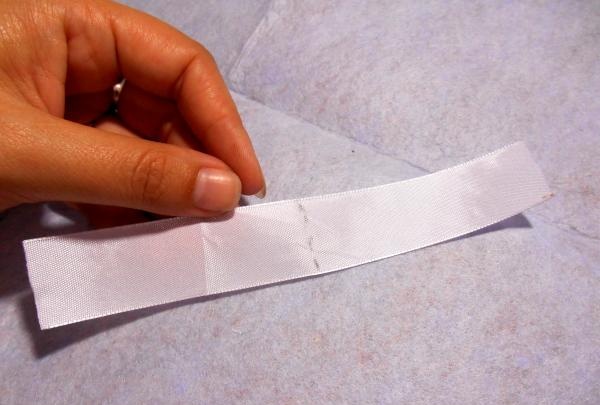
The created angle must be folded in half.

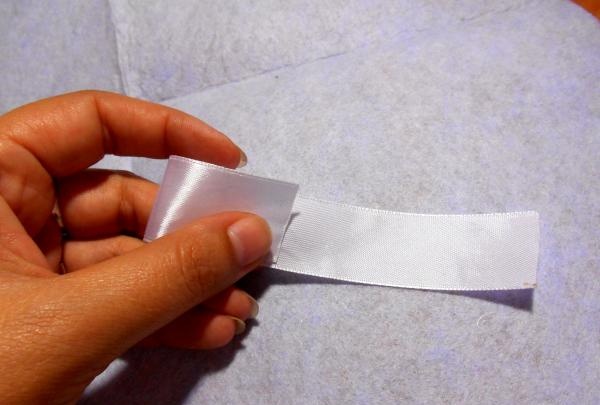
Now you need to thread the sewing thread through the needle and tie a knot at the edge. Then you need to use a needle to make an even stitch of small stitches. The seam should be laid from the edge of the corner, while simultaneously securing its folds.
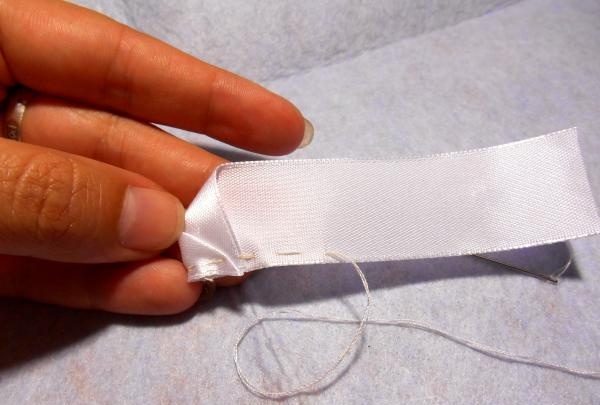
The stitching should run along the entire part, not reaching the edge 2 mm. The second singed edge of the segment must also be wrapped, completely repeating the steps on the left side.
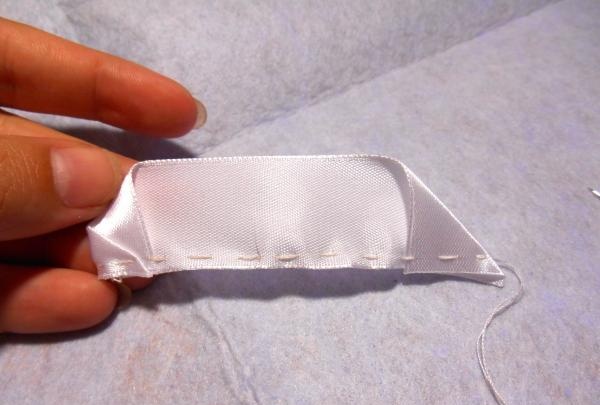
Without cutting the thread, you need to pull the created stitch a little and make two tacks.

Now, starting from the corner, the piece should be twisted into a soft tube; the remaining thread should be used to secure the position of the tape. After making several fastenings, the thread can be cut.
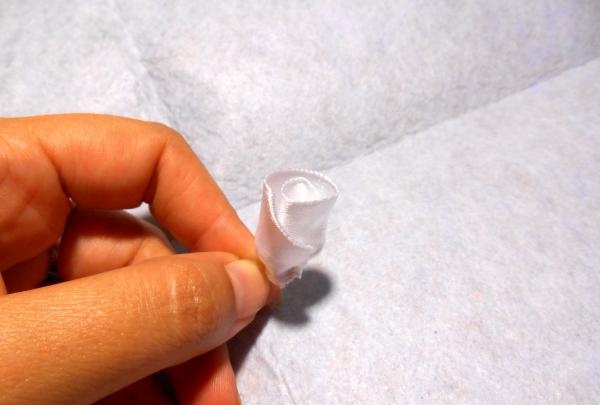
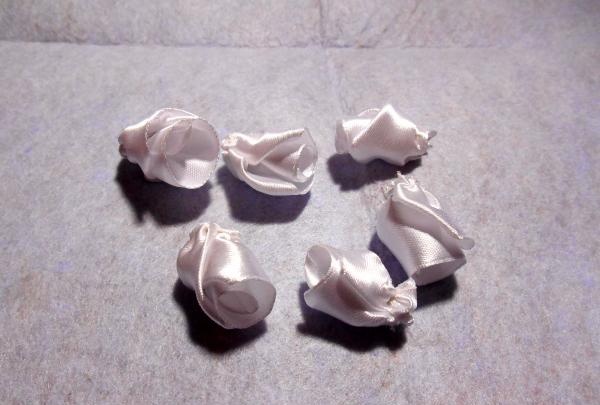
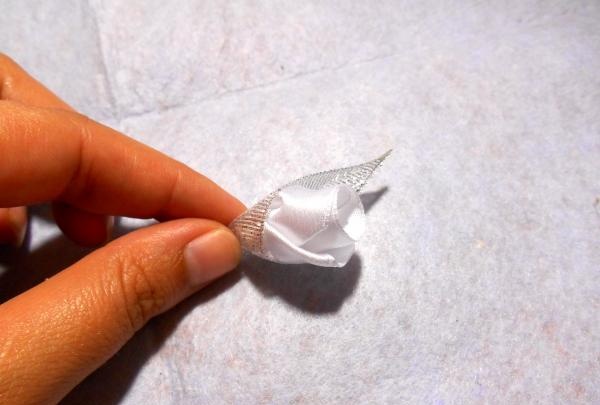
It turns out to be a small bud, from the remaining 5 long pieces you should make the same blanks, repeating each action exactly.
Now you need to make petals from the remaining small sections. To do this, take one piece, place it horizontally in front of you and turn in the corners on both sides. Holding the part in this position, you need to use a rune needle to make a simple stitch running along the edge strip.
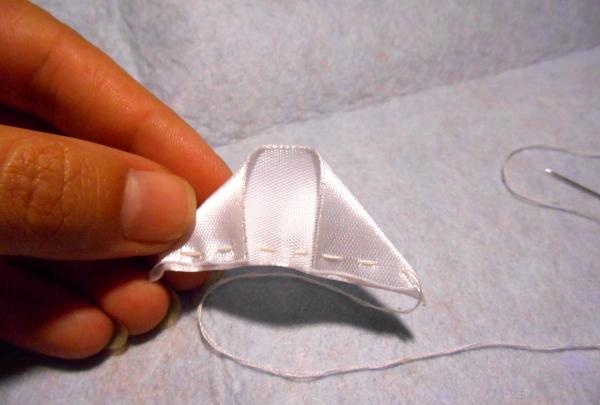
The stitch should be pulled together and several securing knots should be made so that the petal retains its shape.
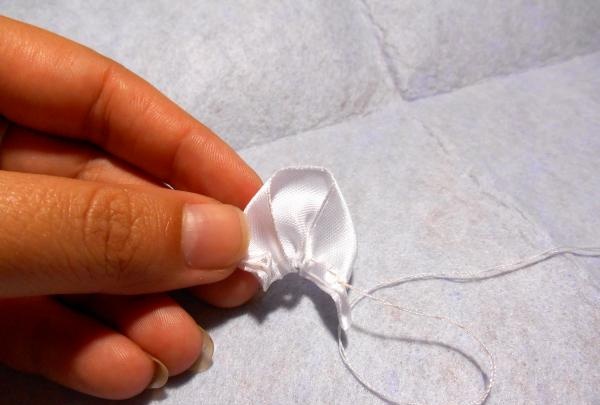
The resulting petal should be secured on top of one of the prepared buds. After sewing on the petal, the thread can be cut.
It turns out an unopened tulip bud. From the remaining segments, you should prepare the same single petals, which then need to be secured to the buds.
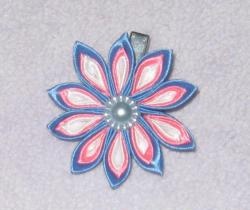
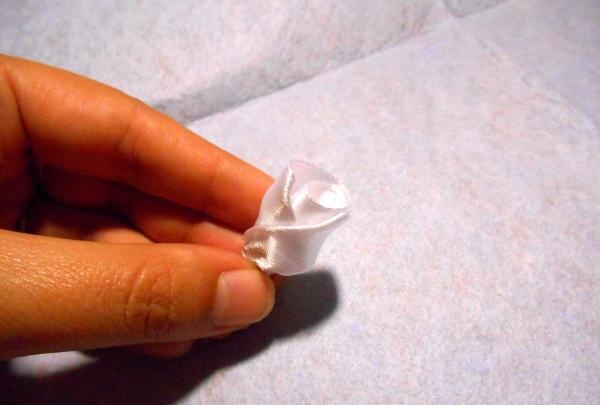
The result will be beautiful tulip flowers.
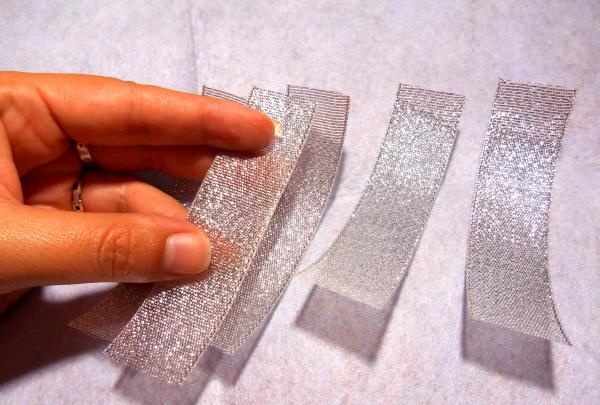
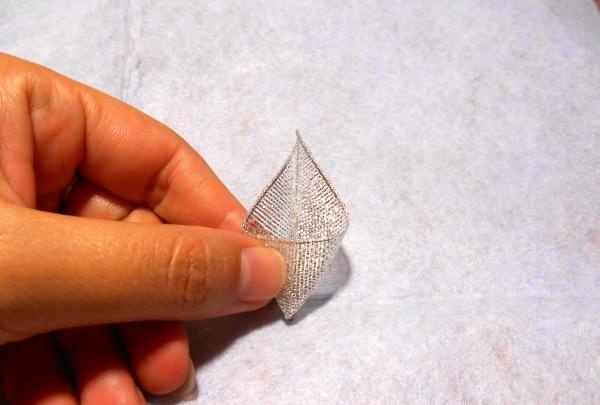
Now you need to make leaves for the flowers. For this you will need a silver brocade ribbon. From it you should prepare 5 pieces of 10 cm each.
These segments need to be folded in half along their length, additionally squeezing the fold line with your fingers.

Next, remove the corner by cutting it diagonally from the fold line to the upper left corner.
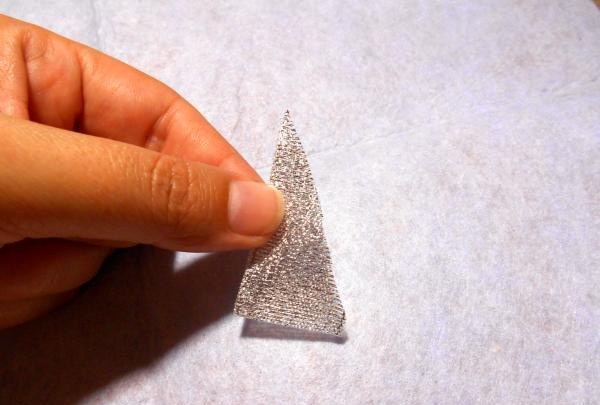
The resulting edge must be singed immediately, simultaneously soldering two layers of tape and protecting the fabric from fraying.
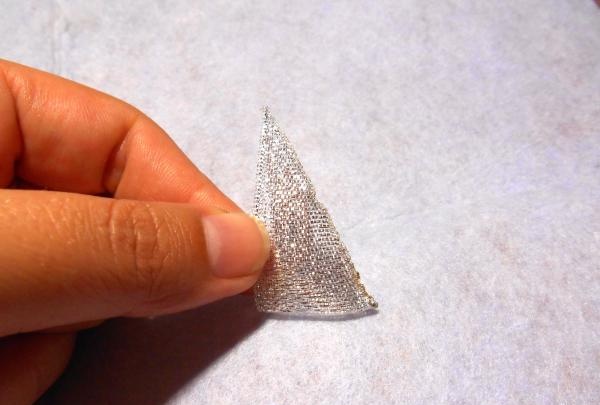
The resulting sheet must be straightened, giving it volume.
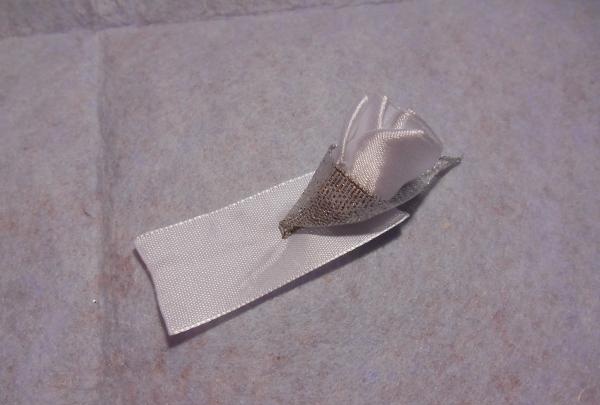
The created tulip bud should be glued into the middle of this leaf.
From the remaining ribbons you need to make the same leaves, in the middle of which you should glue flowers.

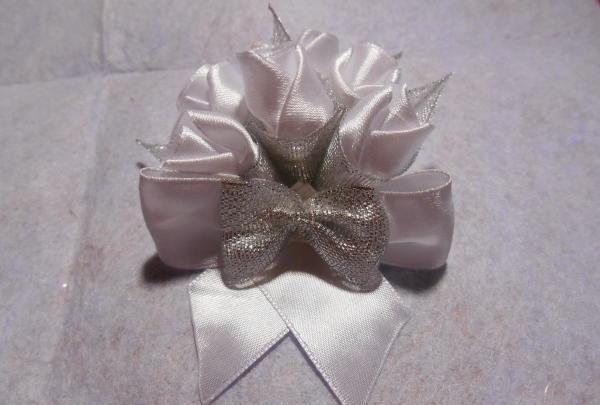
Now you can start assembling the decoration. Taking a piece of white tape 8 cm long, you need to singe its sections and place it face down. One bud should be attached to its left edge.
On two sides of the flower you need to glue two stamens with large beads on the edge.
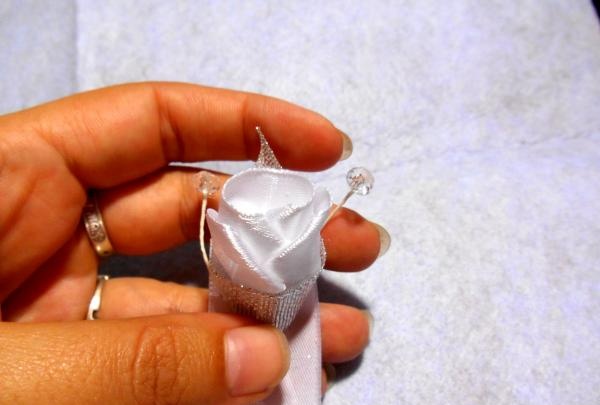
On top of the stamens, on both sides of the bud, you need to secure the flowers.


The remaining three flowers must be secured in one row, covering the junctions of the first buds with them.
A small edge of the base tape was left untouched, it will be useful later. Now you need to prepare a large bow for decoration.
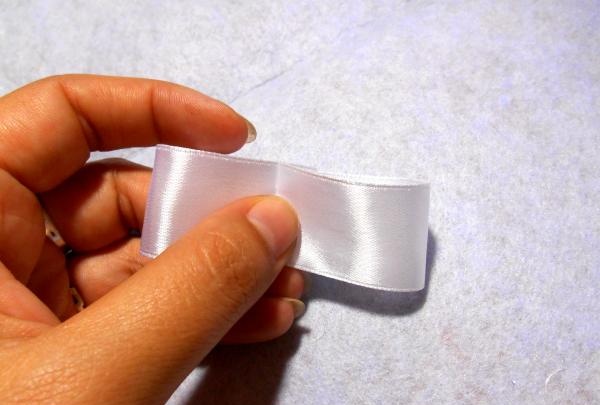
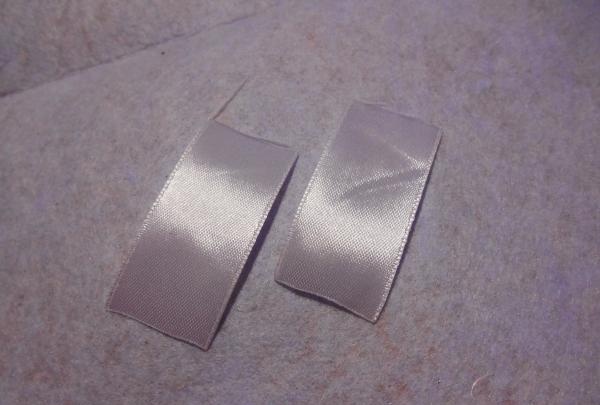
To do this, you need a piece of white tape, 16 cm long.
It should be turned inside out and the middle should be marked by drawing several lines with a pencil.
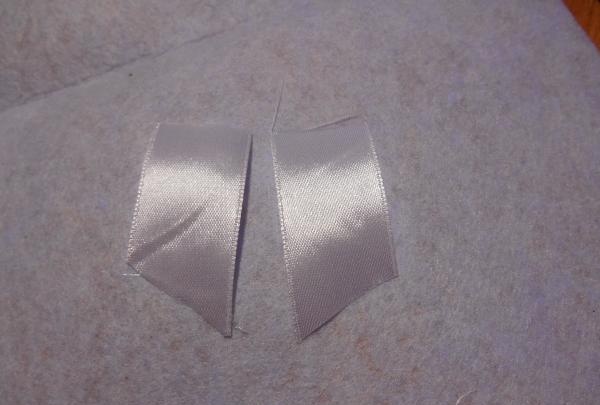
Towards the middle of the segment, you now need to wrap the edges of the tape, slightly overlapping them.
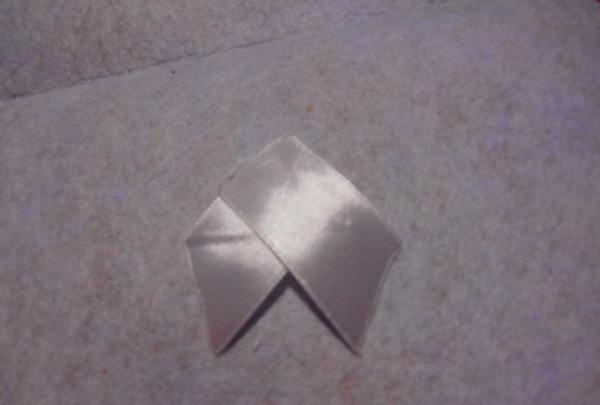
Having folded the part, you need to hold it with your fingers.
Using a needle and thread, you need to sew through the middle of the part.
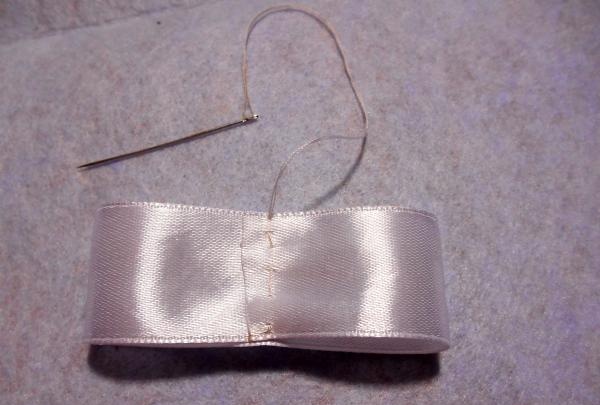
Now you need to pull the thread tightly and secure the seam.
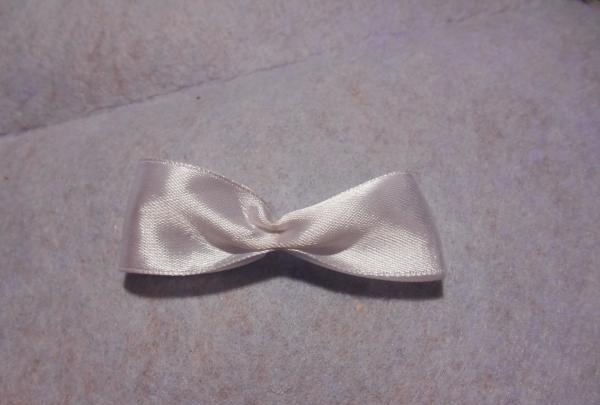
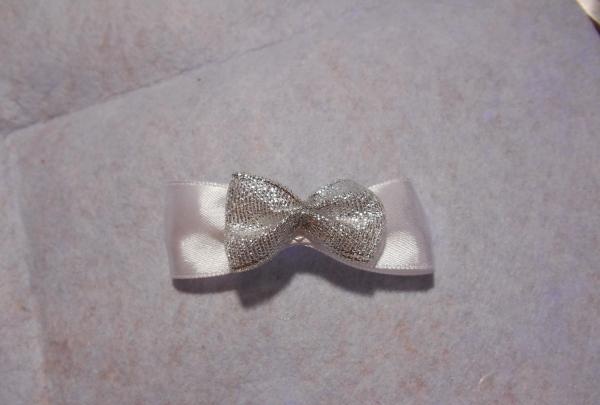
It turns out to be a small bow. Next, you need to make a small bow from a 5 cm piece of silver ribbon.
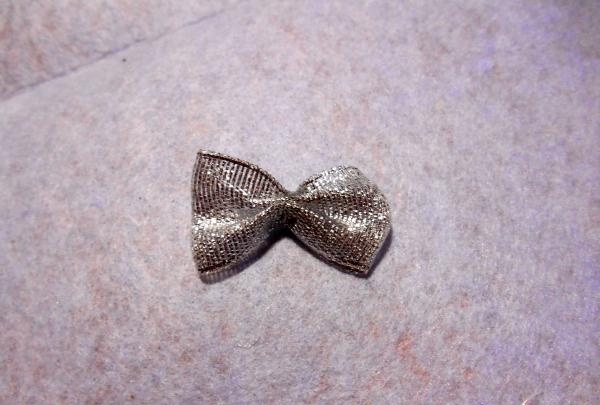
All that remains is to combine these two bows by gluing one on top of the other.
Now you will need two 6 cm pieces of white ribbon to create the tails of the bow.
Their edges need to be cut at a slight angle and immediately scorched with fire.
Then, placing the parts one on top of the other, they should be glued together.
The resulting tail must be attached to the ribbon of the base of the decoration.

Next, it remains to secure the prepared double bow.
The middle of the bow must be complemented with a white cabochon.
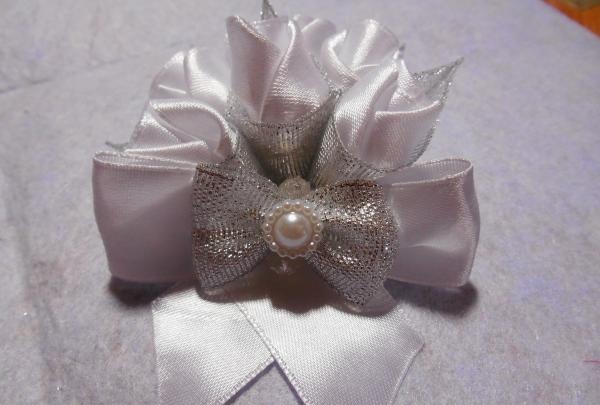
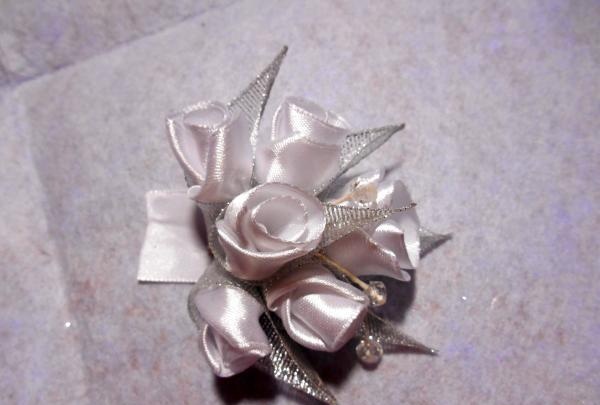
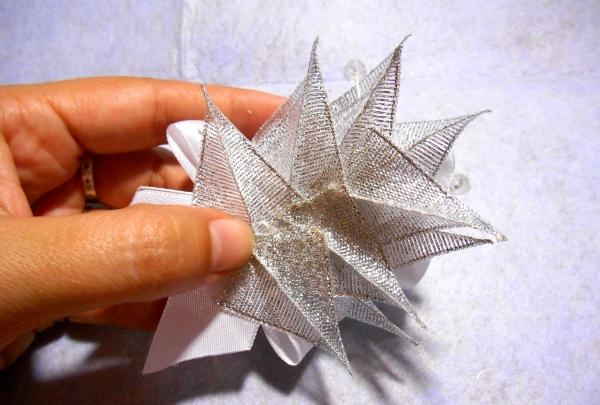
On the reverse side, the prepared bouquet should be supplemented with leaves made of silver ribbon.
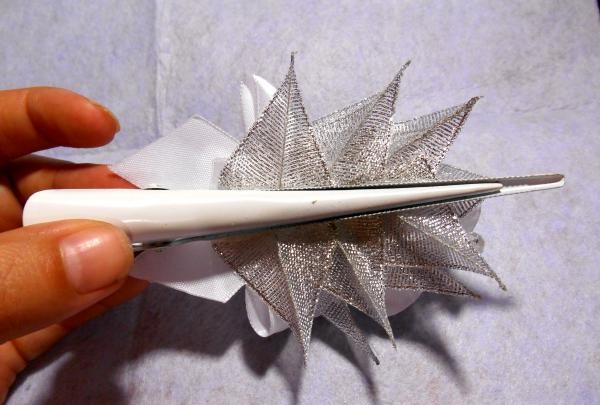
A large clip must be attached on top of the fixed leaves, positioning it along the decoration.
All that remains is to unwrap the bouquet and straighten the leaves and flowers.
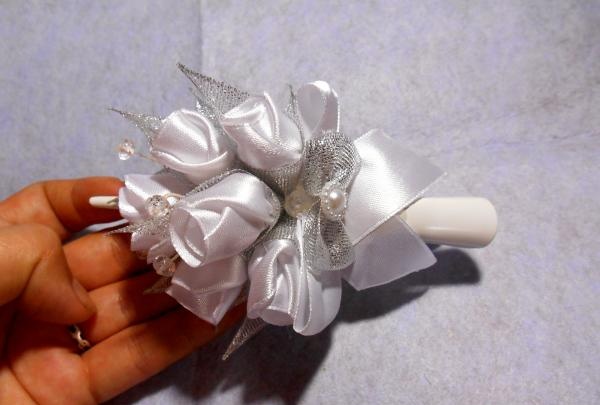
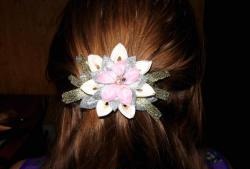
The bouquet is ready!