If you haven't chosen yet present For your beloved mother, grandmother or sister, you should think about a handmade gift. Today we will talk about a simple postcard using the technique of curly cutting or punching. In addition, it can become either an independent gift if, for example, you add a pocket with money to it, or a pleasant addition to something purchased in a store. After all, a gift made with your own hands is always individual, it reflects all the love and tenderness that you can convey to your family and friends with the help of a small sheet of paper.
So, we will need:
- Watercolor sheet of paper;
- Paints and brush (optional);
- Thin synthetic glue brush;
- PVA glue;
- Sequins;
- Spatula for applying glitter;
- Breadboard knife;
- Layout of a postcard made of thin paper;
- Paper clips;
- Curly and simple scissors.
Materials
As with any work, the final appearance of the product depends on the materials chosen.You can use any paper for the base, but it should not be too thin or dense, like cardboard. The choice of cardboard in this case will complicate the cutting process. Therefore, it is better to take special paper for scrapbooking or sheets for watercolors, which, if desired, can be painted in any color. The layout of the postcard must be prepared in advance. Print on a printer or draw by hand. Instead of a breadboard knife, you can use a stationery knife, but it is more difficult for them to cut out small parts. The rest of the materials can be replaced or not used at all.
Process of creation
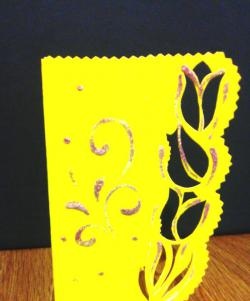
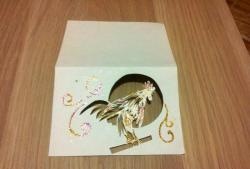
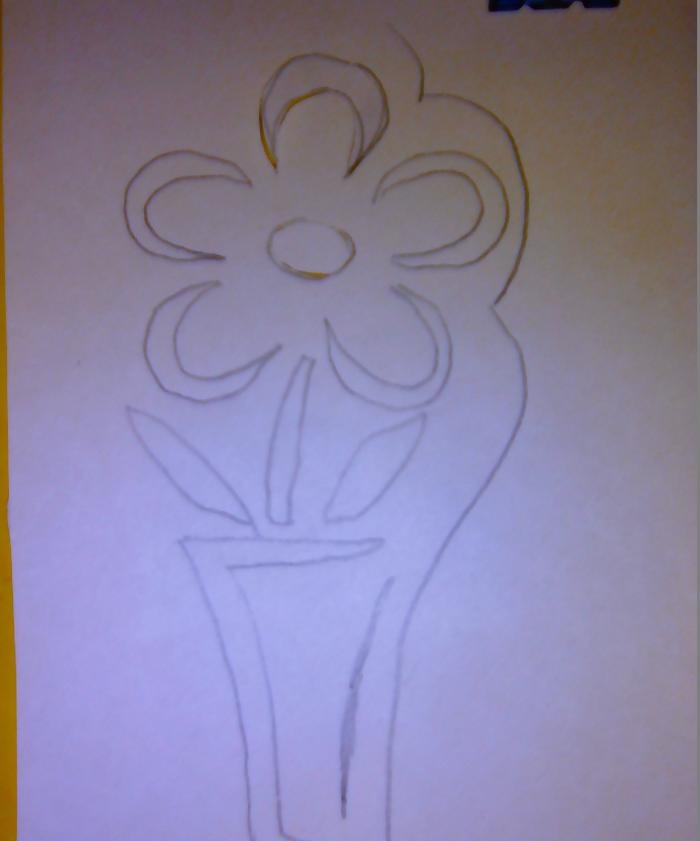
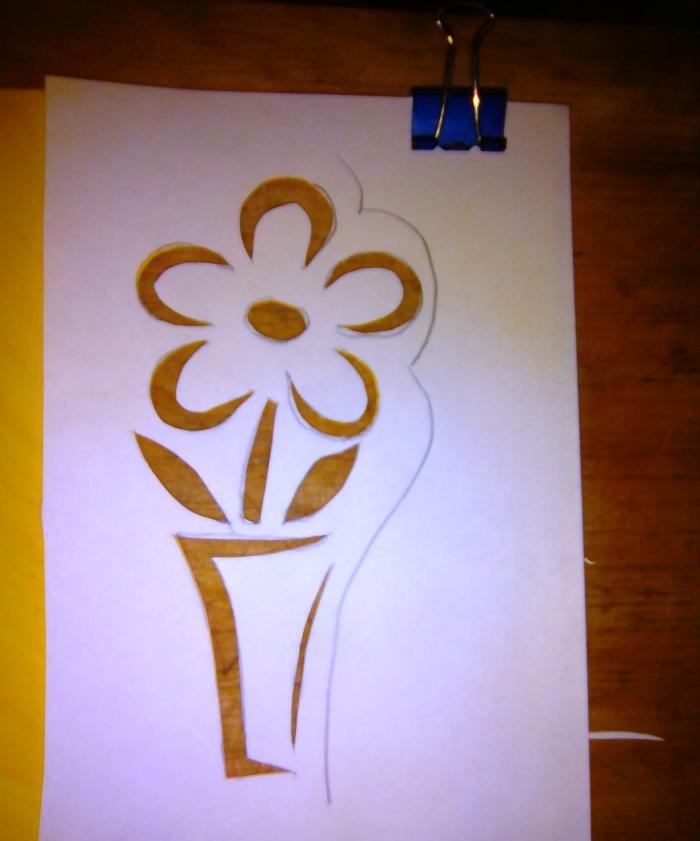
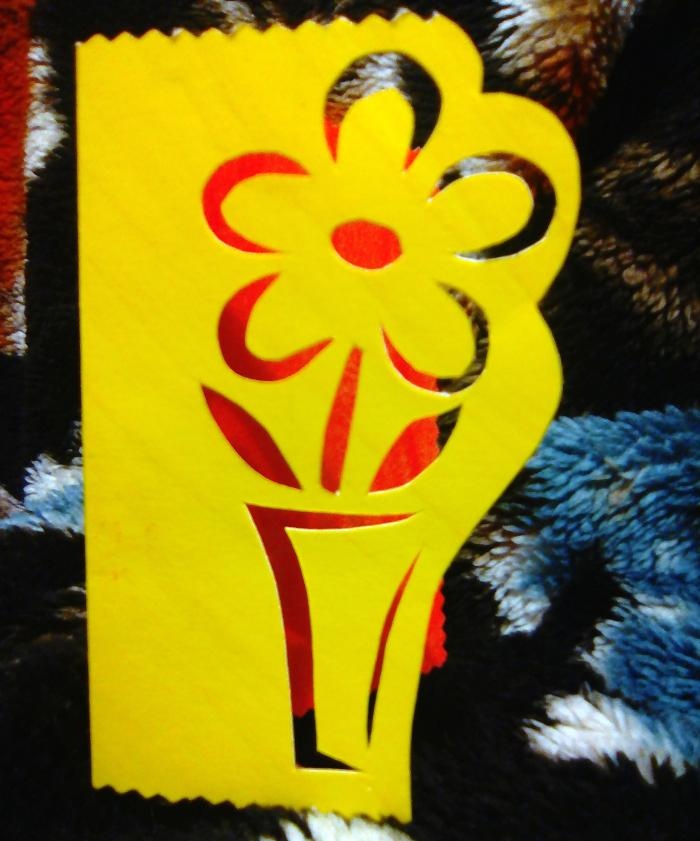
First, let's come up with and draw a layout of the postcard.
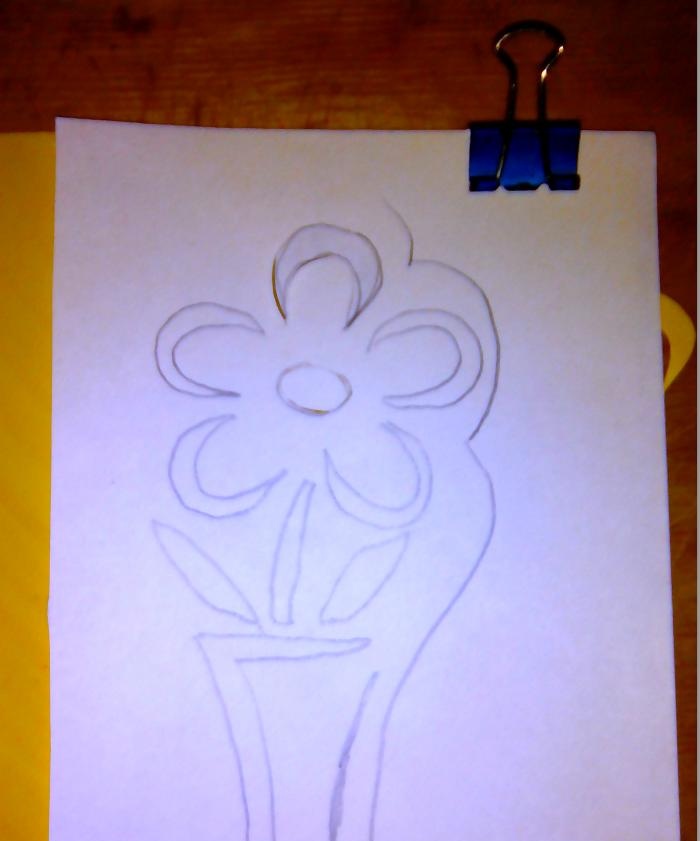
We secure the resulting layout to watercolor paper pre-painted in different colors using clamps.
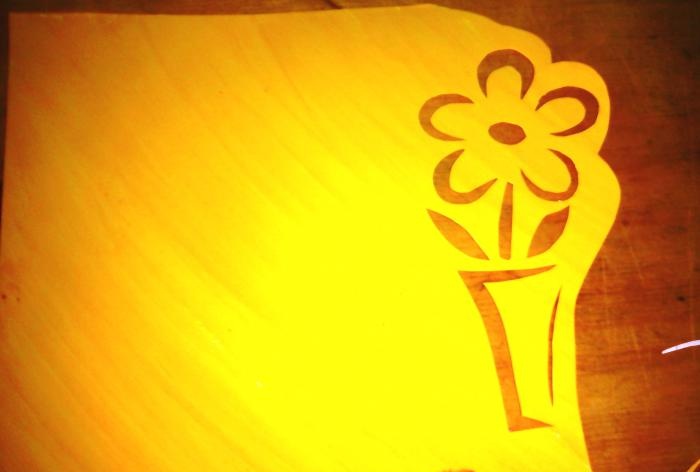
Let's start cutting. Don't forget about safety precautions. We use a mock-up mat or a wooden board as a backing.
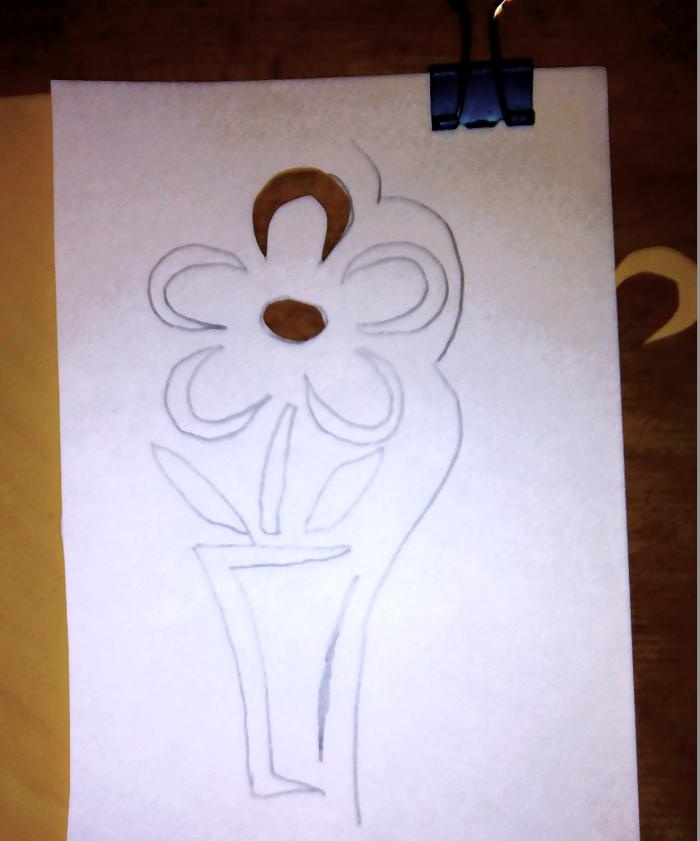
We remove the layout from the base.
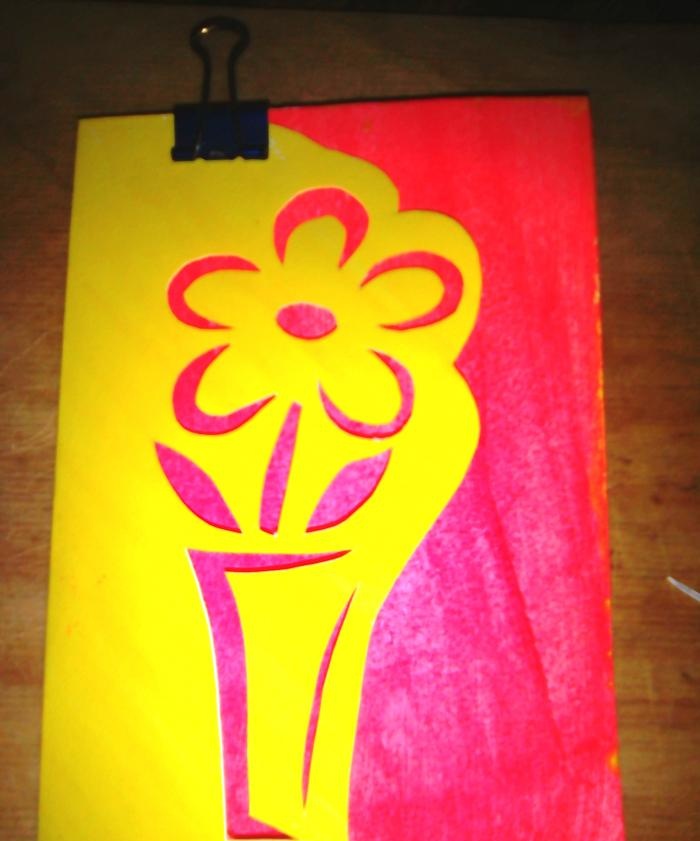
We bend the card, it is not necessary to do it in half.
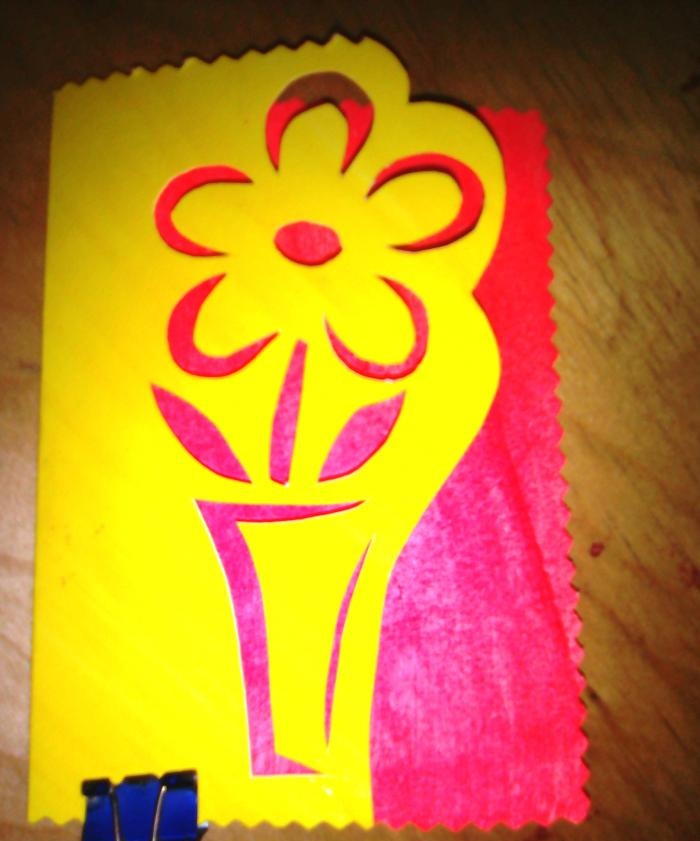
We shape the edge using curly scissors.
Using a thin brush, apply glue to the places where we want to see glitter and sprinkle with them using a spatula. Any glitter that doesn't stick can be shaken back into the jar.
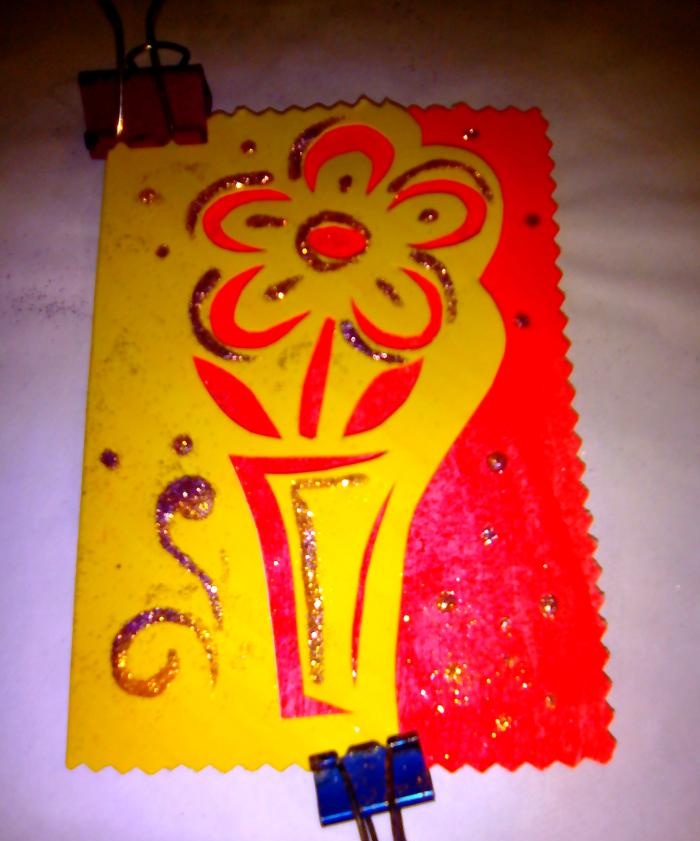
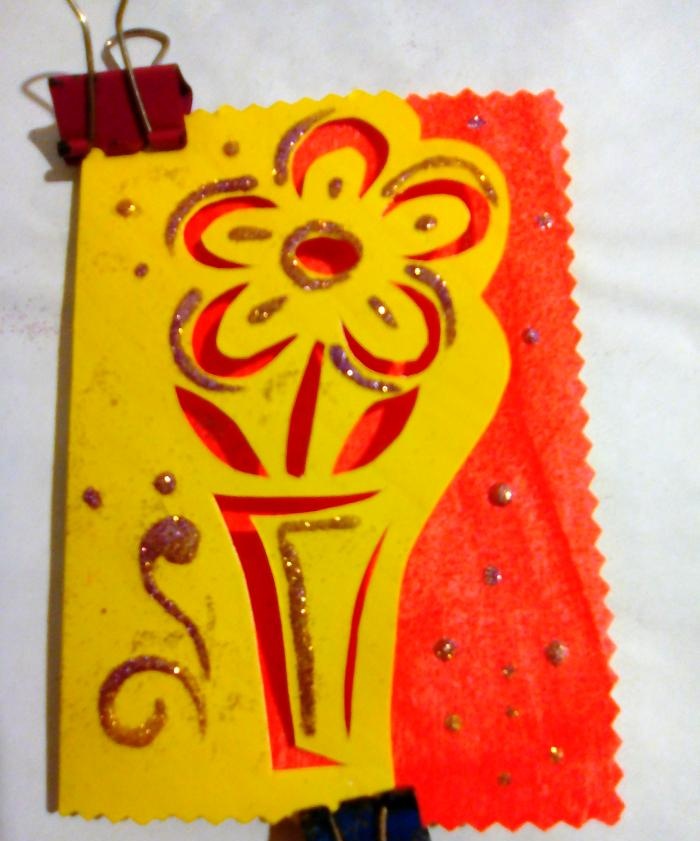
We admire the result.