


I want to make it clear right away that this is not an advertisement for Coca-Cola. This is a puzzle that you can make and amaze your friends, give them a chance to "brainstorm" and think about how it could be done. Of course, you will tell them that this is magic, and they, in turn, will throw out their guesses about how this arrow pierced the bottle and got stuck there. An arrow stuck in a bottle without seams, without breaks, not glued together. Thus, you will not give your friends a chance to solve such a puzzle.
Of course, reading this article, most likely you yourself don’t yet know how this is done, but believe me, everything is simpler than it seems.
So let's get started. We will need:
- - Glass bottle.
- - A small piece of board.
From the tools:
- - Drill or drilling machine.
- - Band saw or jigsaw.
- - Sander.
- - Clamps.
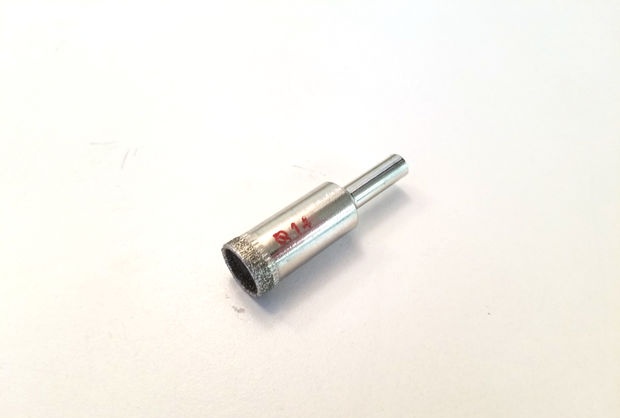
- - Diamond drills.
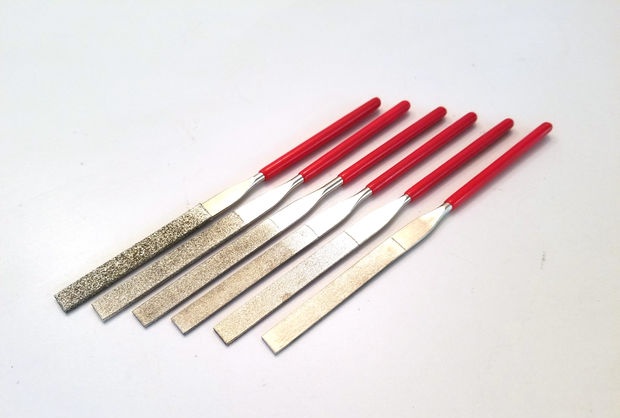
- - Diamond flat files.
And further:
- - Boiling water.
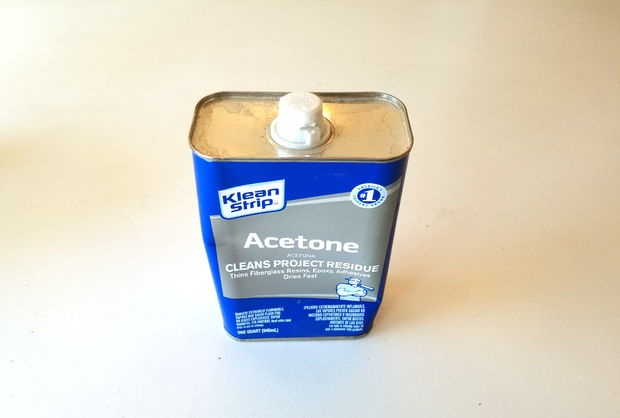
- - Acetone.
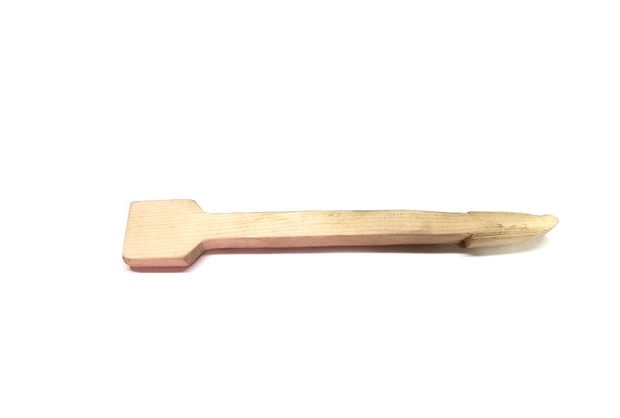
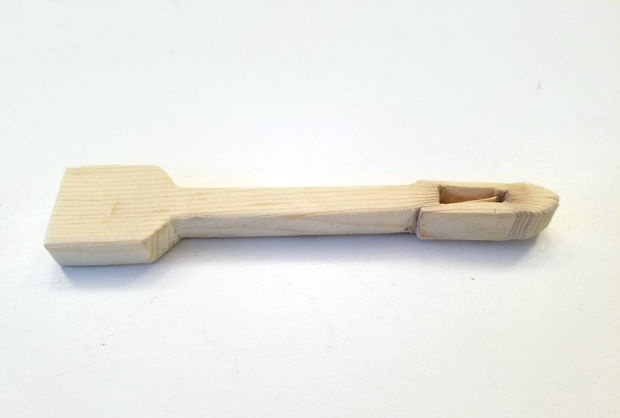
Choosing wood for the arrow.
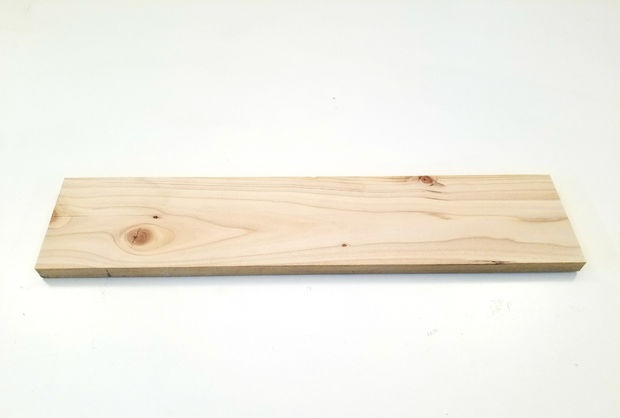
Here special requirements are imposed on the tree. I took a piece of pine from an old bed. Before cutting out the arrow, you need to pay attention to where the layers of wood go. The length of the arrow should be cut parallel to these layers.Otherwise, in the future the wooden arrow will be pressed unevenly or even delaminate. See photo.
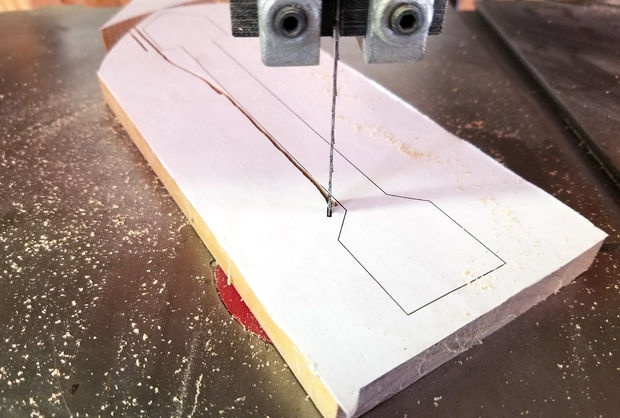
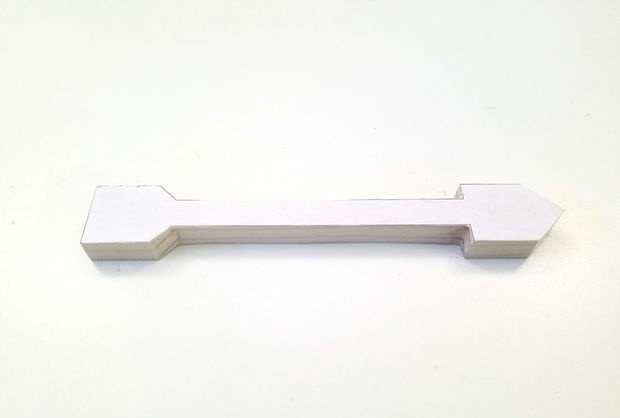
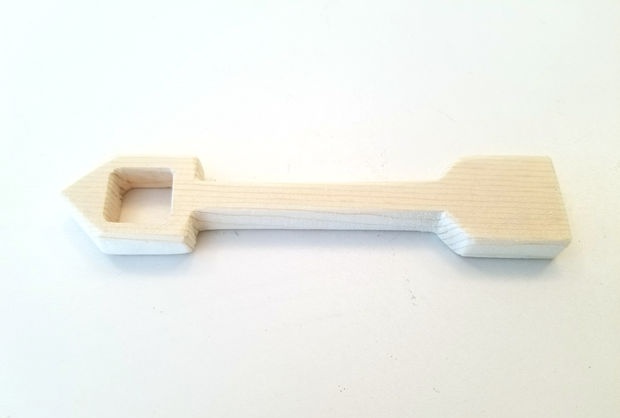
Arrow drawing.
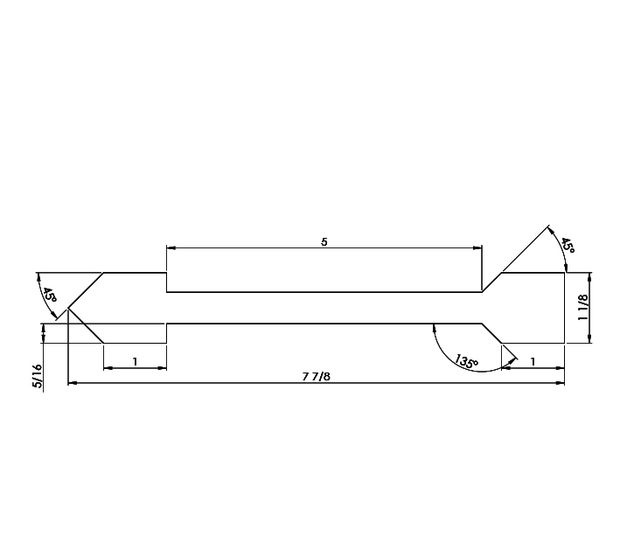
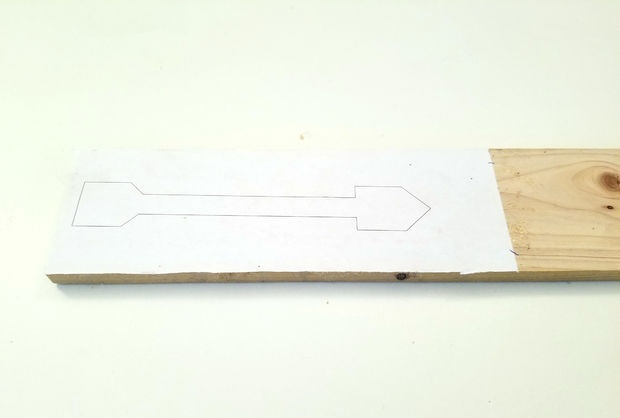
We print in the scale you need. We take the wood and apply the printout to the block and glue it with some water-soluble terminals. Better with starch.
We cut it on a band saw or using other tools you have.
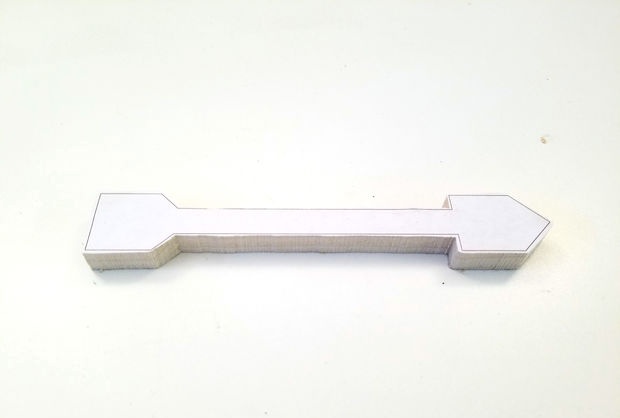
This is our arrow.
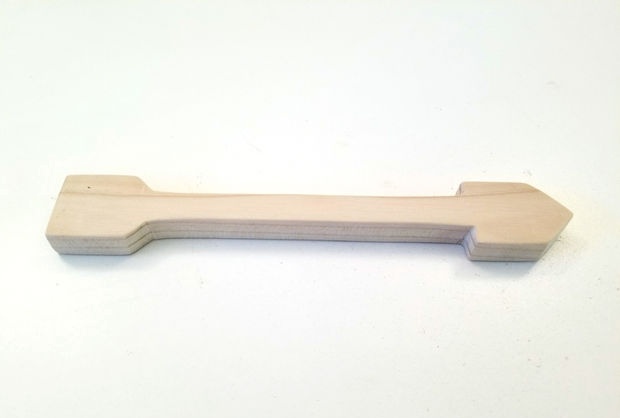
Now let's polish.
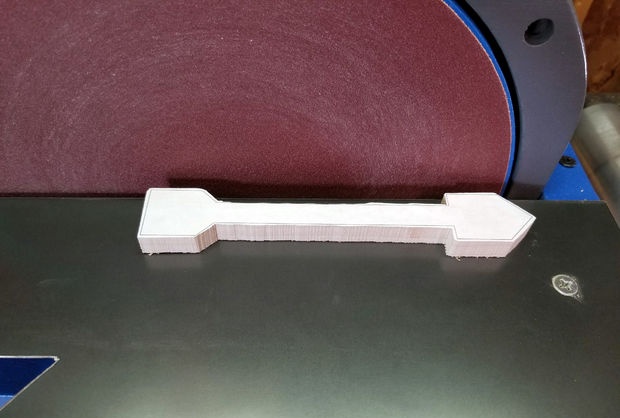
We remove all burrs and drawing paper.
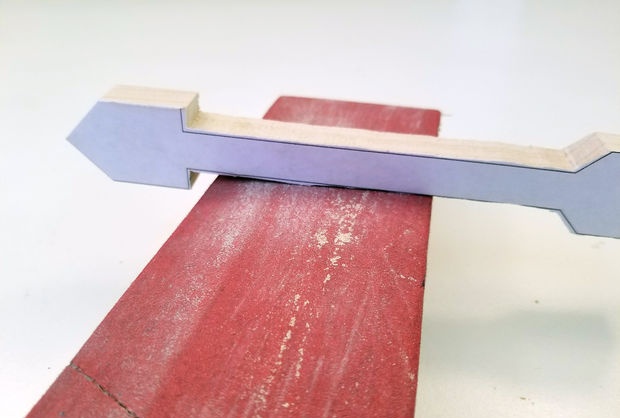
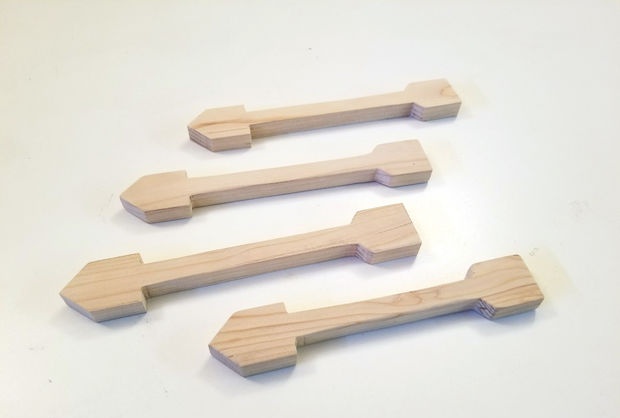
It is advisable to make several such arrows, because it may not always be possible to compress the arrow the first time. So let's insure ourselves in advance.
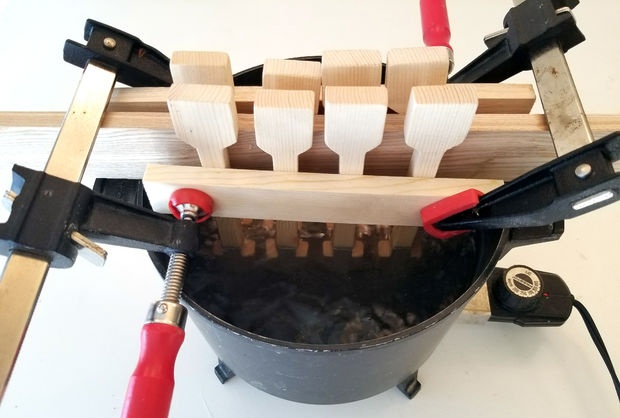
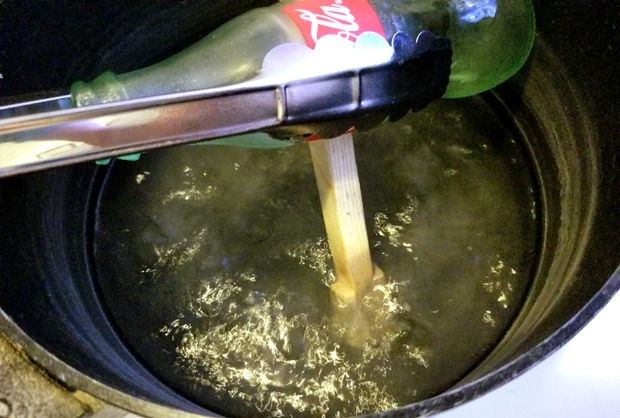
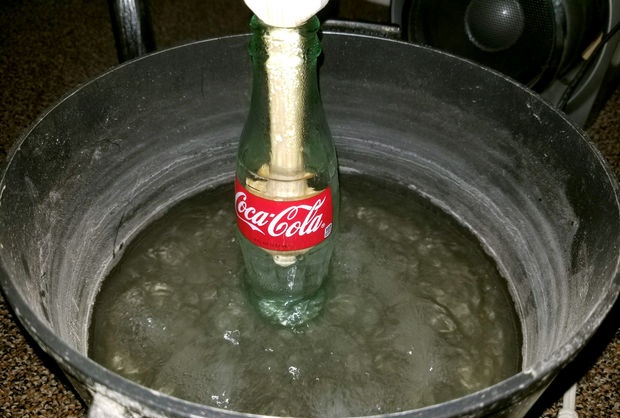
Time to boil our arrows.
We take the arrows and secure them in the device. And boil for 45 minutes. After this, the wood will become soft and press well.
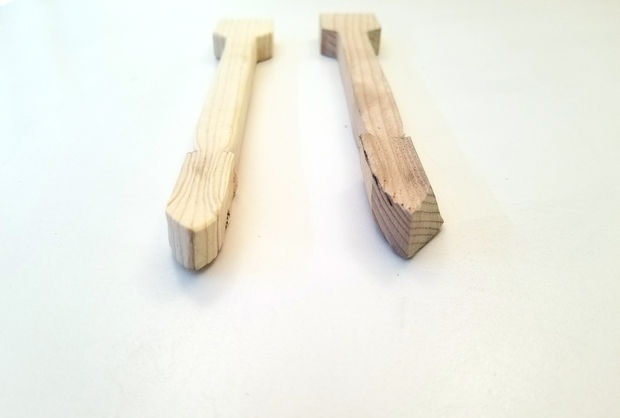
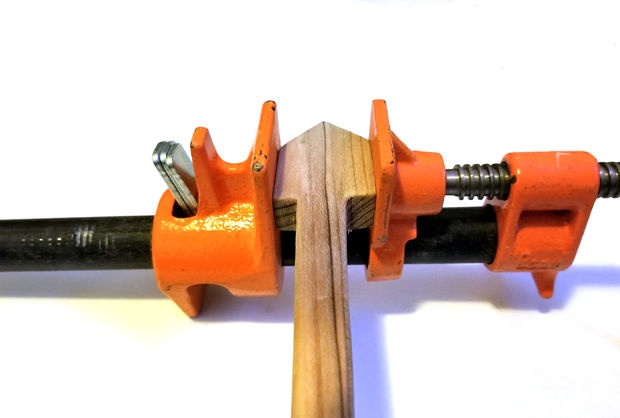
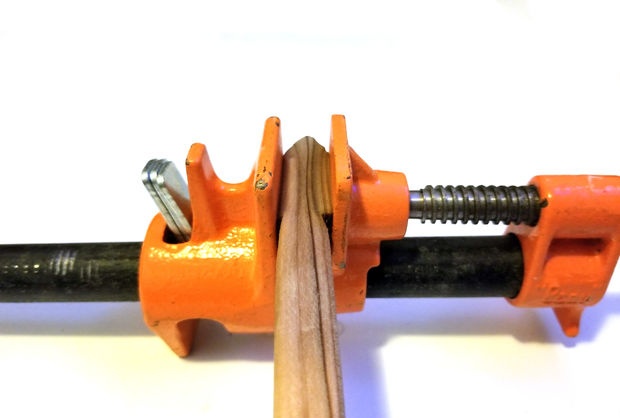
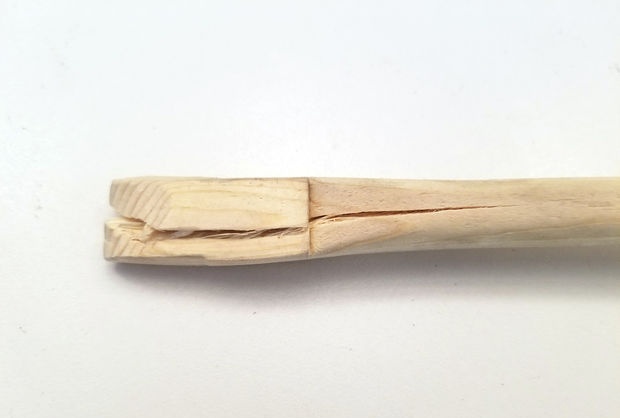
We clamp it in the grip and slowly begin to squeeze the arrowhead. Here is the first failure: the arrow cracked. We try again until the arrow shrinks to the minimum possible size. We measure the distance between the cups of the vice and remember. Leave the arrow in this state for 72 hours to dry. You can try after 24 hours, but if the arrow begins to recover after unclamping, clamp it back and let it dry further.
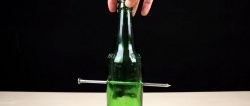
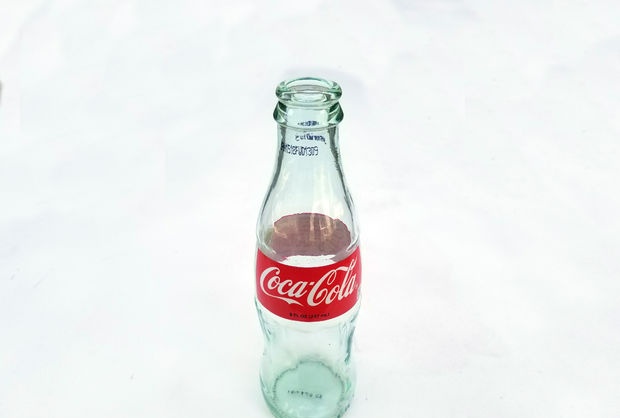
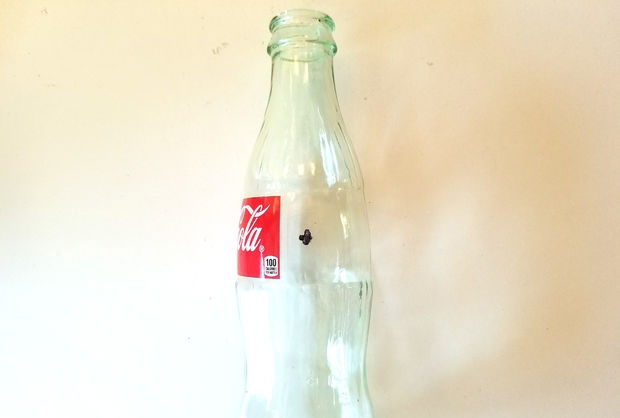
Let's prepare the bottle.
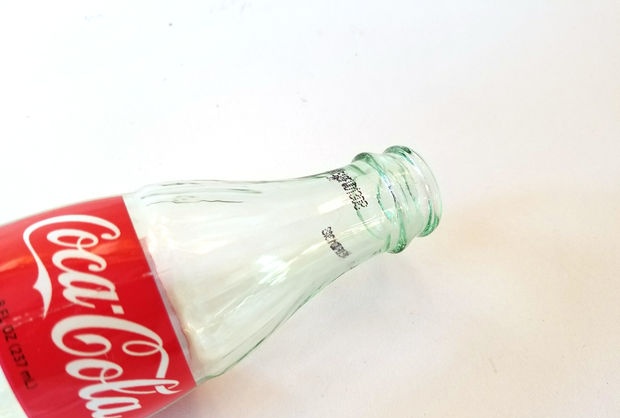
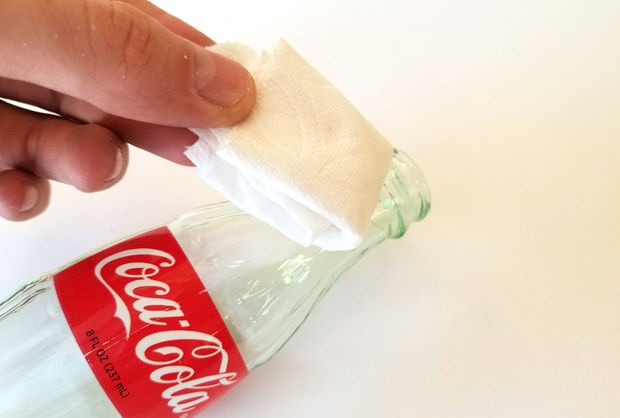
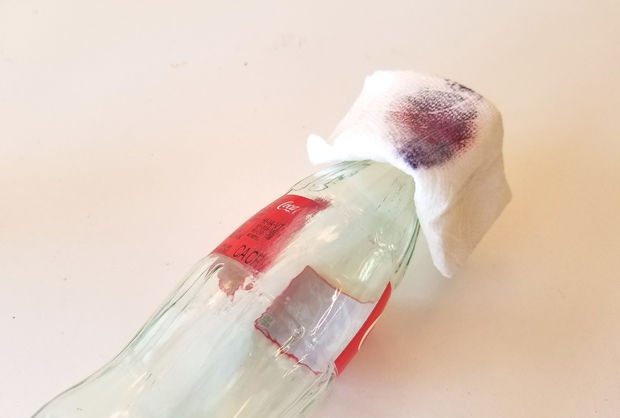
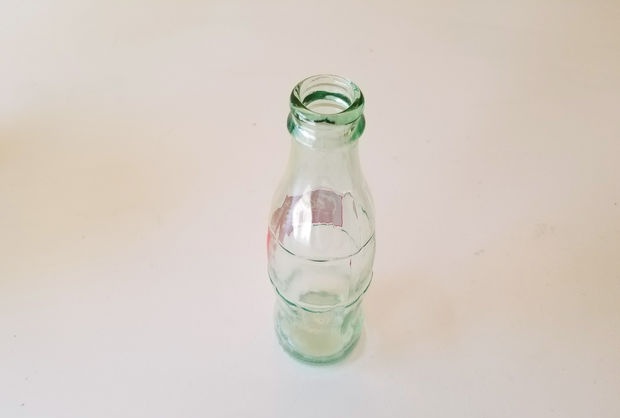
Take acetone or another solvent and remove the markings from the neck. It is up to you to remove the label. I decided not to delete it.
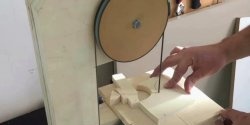
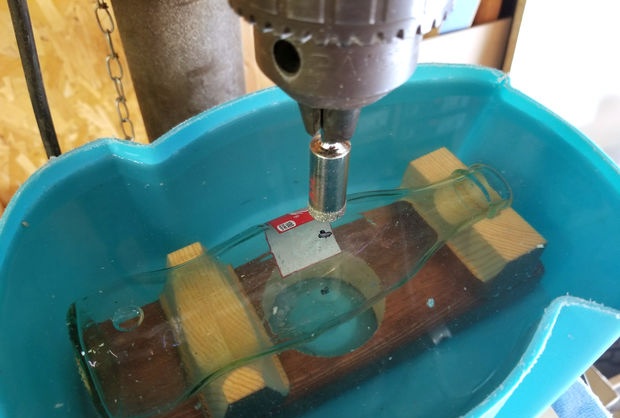
Preparing the bottle for drilling.
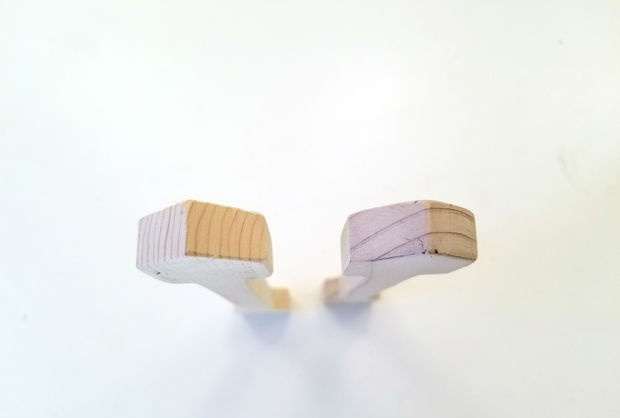
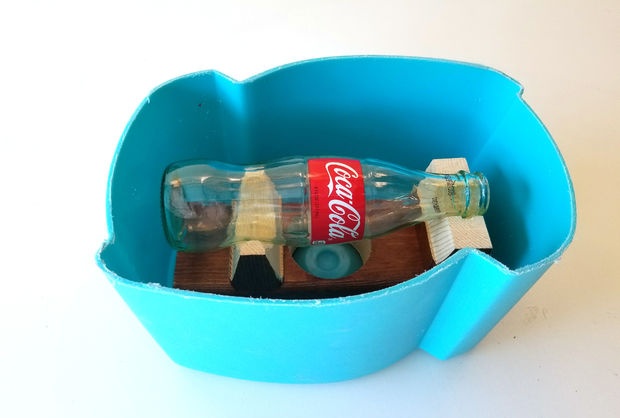
Before we start drilling the bottle, we need to make a device in which the bottle will hold firmly and not vibrate. Otherwise, it may crack when drilling.
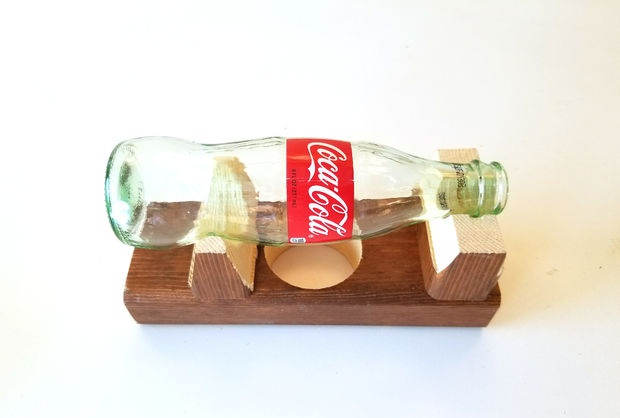
I made the devices from scrap pieces of wood. It’s as simple as shelling pears, I don’t think it needs any explanation, see the photo.
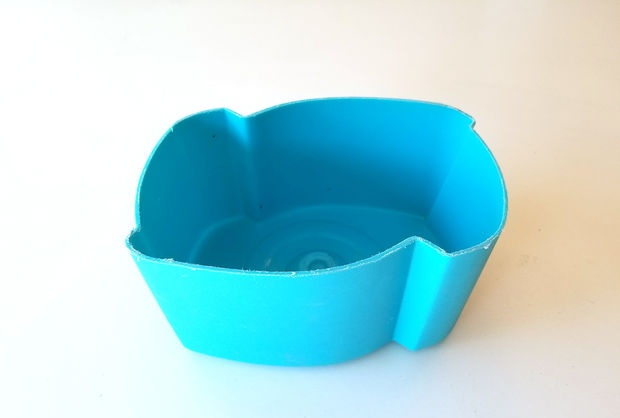
Also, we need a container, because we will perform all manipulations with glass in water. This is the shape my friends made for me on a 3D printer. Of course, not the best use of a 3D printer, but still.
Before you start drilling a bottle, it's time to remember safety precautions. Be careful when working with glass. Always use safety glasses and gloves.
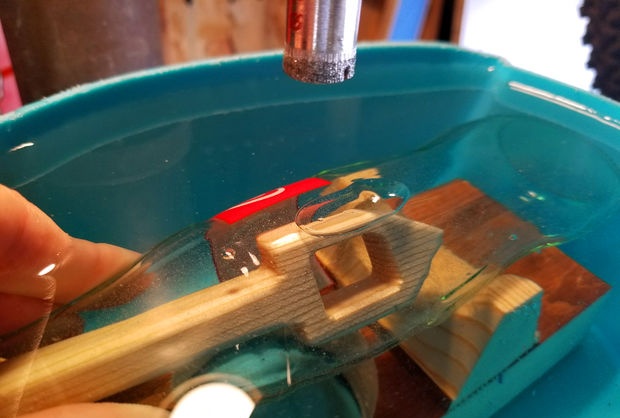
Let's get started. We install the bottle in the device. Mark the drilling location on both sides with a permanent marker. Pour cold water into the mold.
We drill with a diamond head, carefully, at a speed of approximately 1000 rpm. We drilled on one side - turn it over to the other and drill.
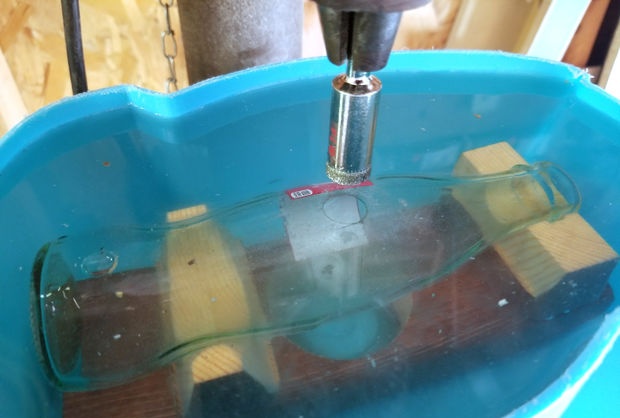
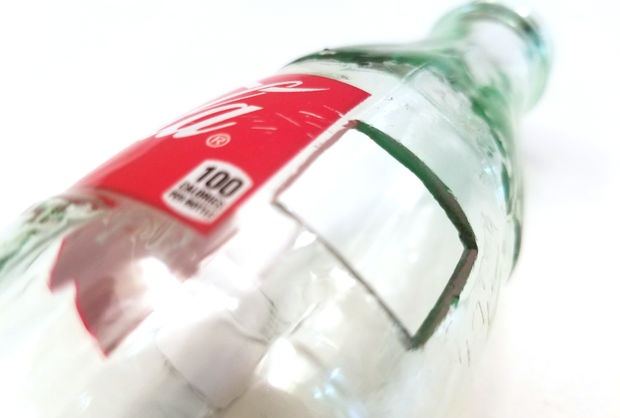
Next, without removing the bottle from the water, use a diamond file to cut out a rectangular hole for our arrow from under the press. On both sides.
After completing all manipulations, drain the water and rinse the bottle again, removing all glass chips. Especially from the inside of the bottle.
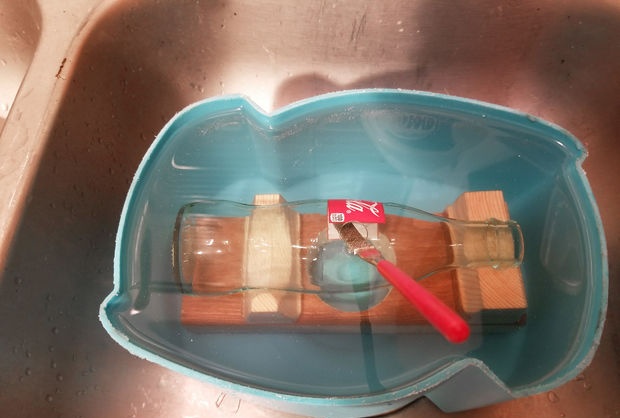
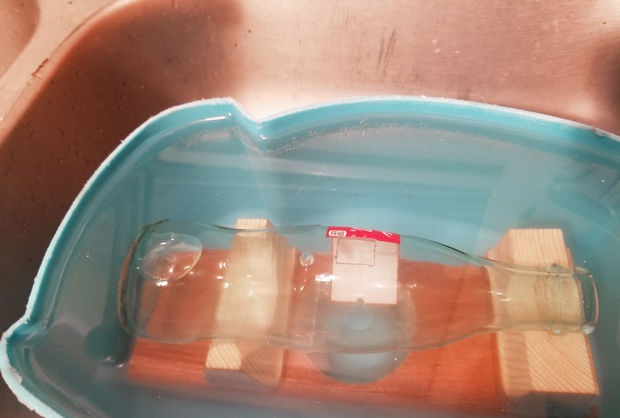
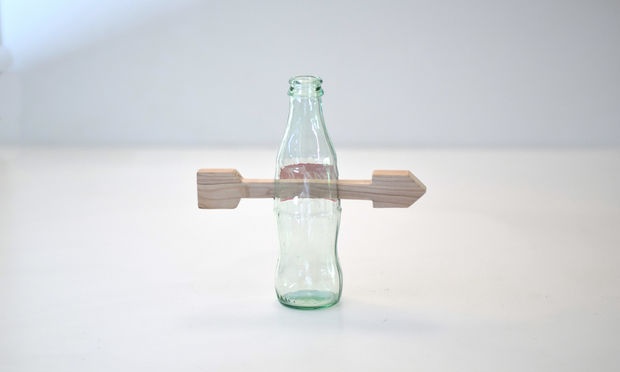
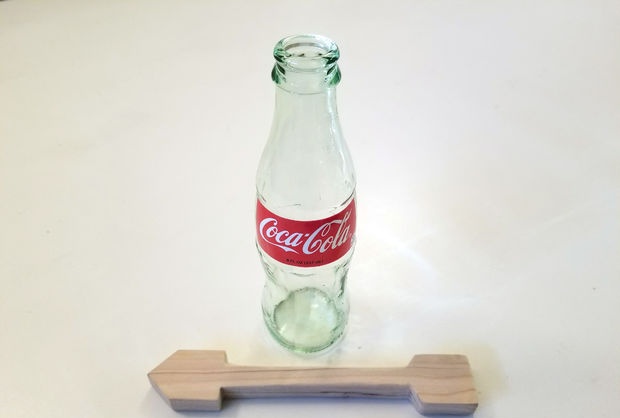
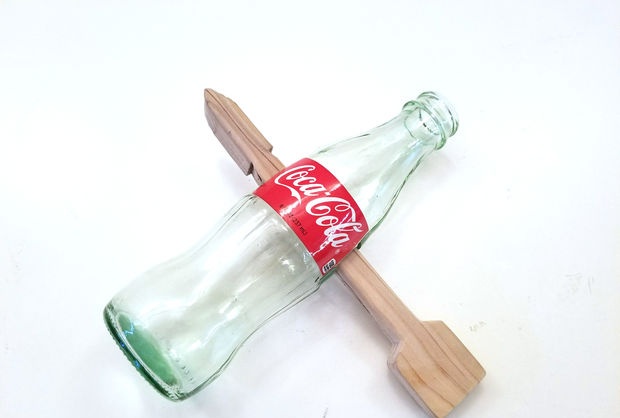
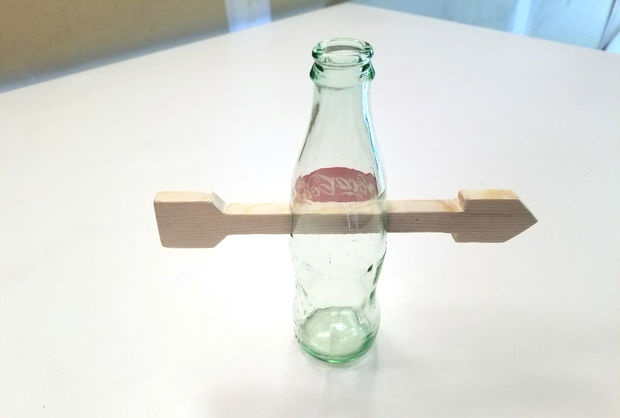
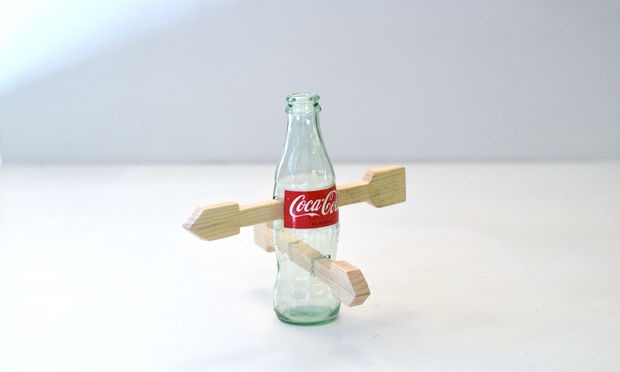
We insert our arrow into the sawn holes.
Place the compressed end of the arrow in boiling water. About 10 minutes. This should be enough, since the arrow will quickly return to its original state.
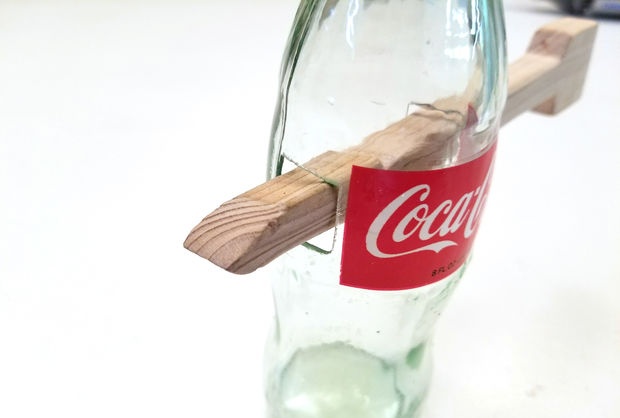
That's it, take it out and let it dry.
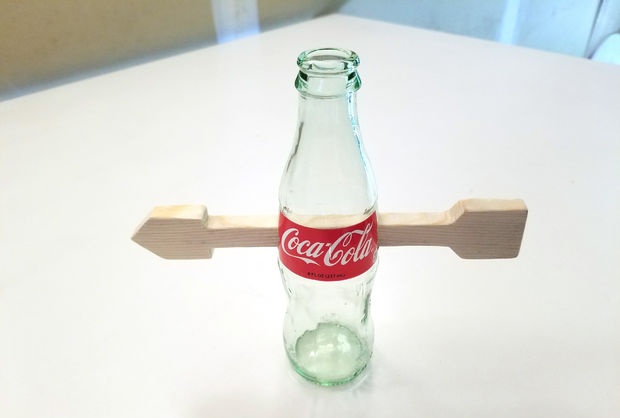
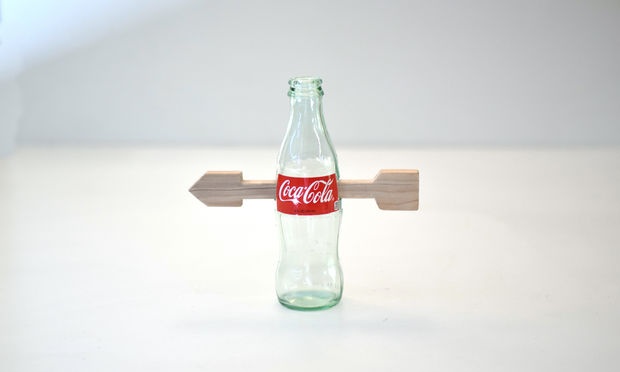
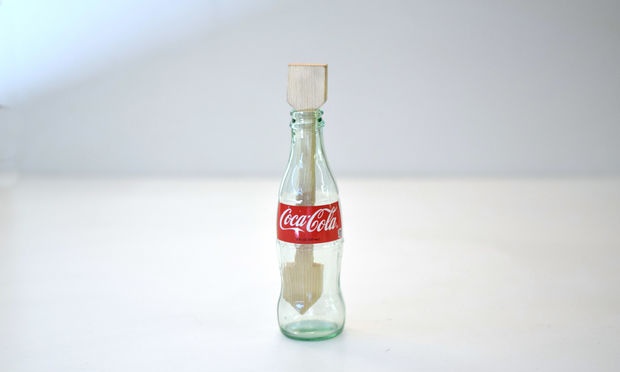
Now you can show off to your friends and acquaintances.
There is another option to make a puzzle with two arrows.
To do this, you need to do an intermediate option by boiling the first arrow in a bottle. And it's so simple. True, it is difficult to cut a hole in the arrow and there is a high probability that the arrow will crack during pressing. But the result will be simply amazing. For this, you can bother and work harder.


Option with two arrows.
Option with one arrow, but in the neck of a bottle.
As for beginners, without drilling glass, that’s it. Don't take weapons.
Give joy and surprise to people, it’s so nice! See you again!
Original article in English