One day, after waking up at night, I saw that a tree had fallen near my neighbor’s house. The wind was very strong and did not spare him. To remove the tree, the neighbor decided to first cut it into pieces, and then put it in a truck and take it away.
I passed by when the tree had already been cut down. And I noticed that some of the logs were hollow inside. Either the parasites ate it, or it just grew like that - I didn’t go into details.

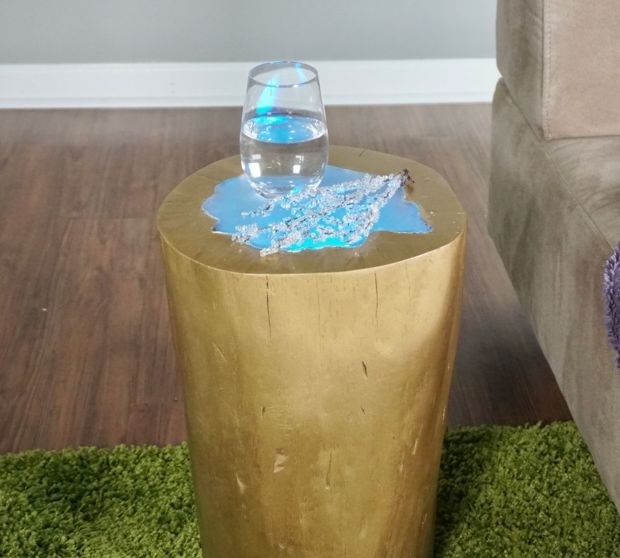
I don’t know how this idea was born, but I decided to make a backlit stand.
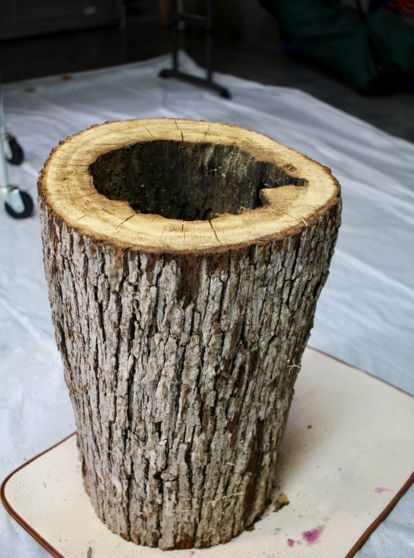
In general, I brought home one log with a through hole.
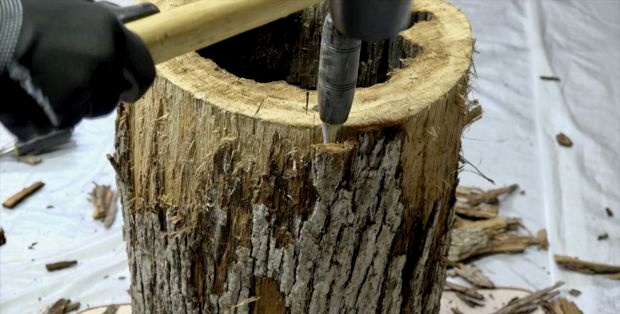
The first thing I did was remove the bark; it won’t be needed. To remove it I used a hammer and chisel.
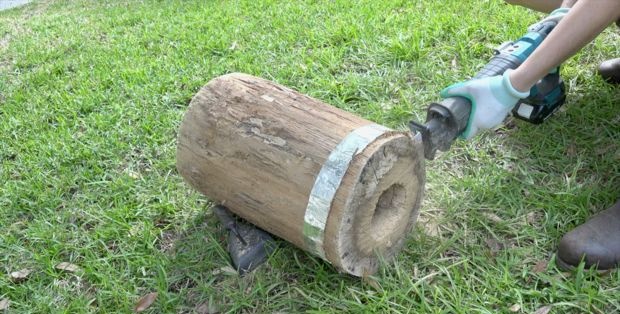
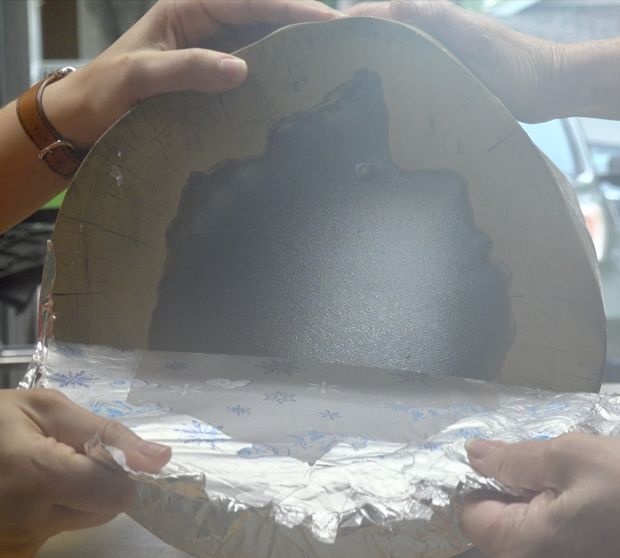
After removing the bark, it is necessary to level the surfaces. If the neighbor had cut it straight, then this would not have been necessary. Although, in one step with leveling, I adjusted the log to the tedious height. To determine where to cut, I wrapped it in aluminum foil. I cut the surface with a gasoline saw. You can use a circular saw or a hand saw.
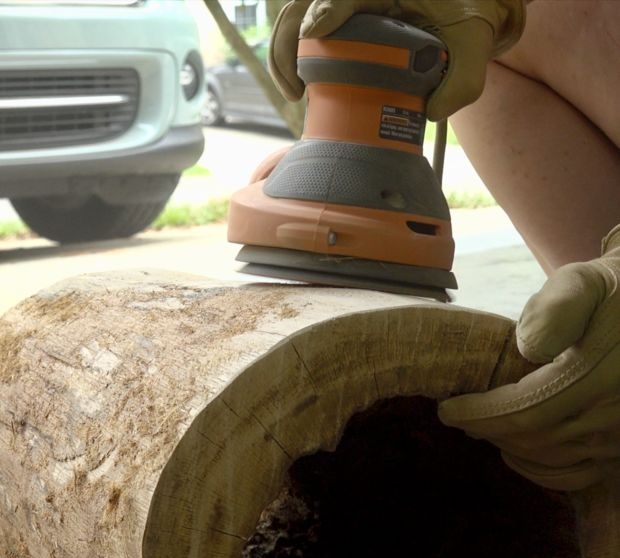
Once all the surfaces have been prepared, the surfaces must be prepared and made smooth and ready for coating.
I used a sander with replaceable sandpaper discs.
After all the external surfaces are prepared, we move on to the internal ones.
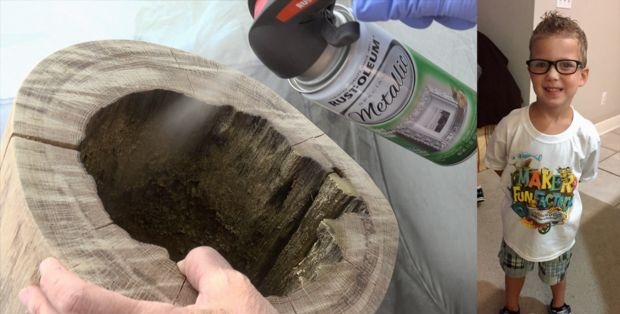
I took gold paint and covered the inner hollow from an aerosol can.
I forgot to say: if the log is wet or damp enough, then it needs to be dried at room temperature for 3-5 days.
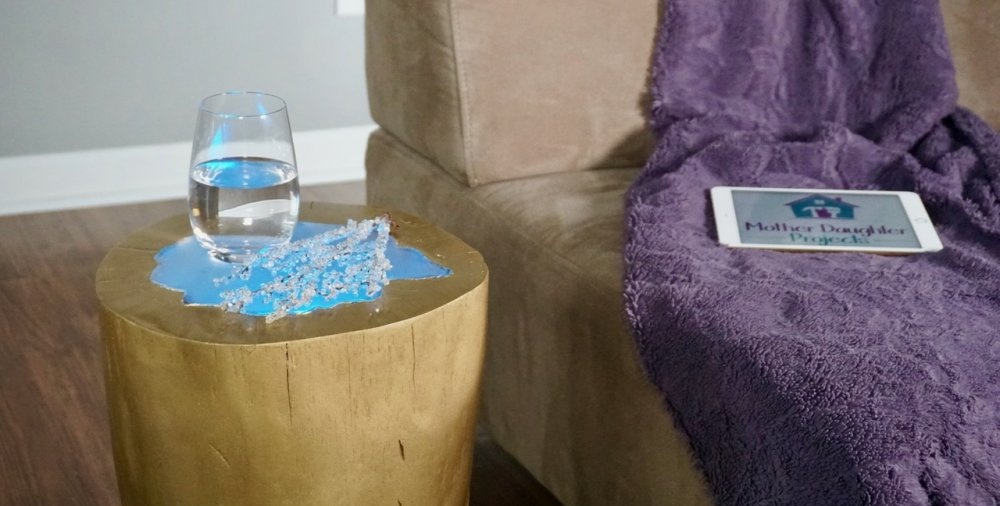
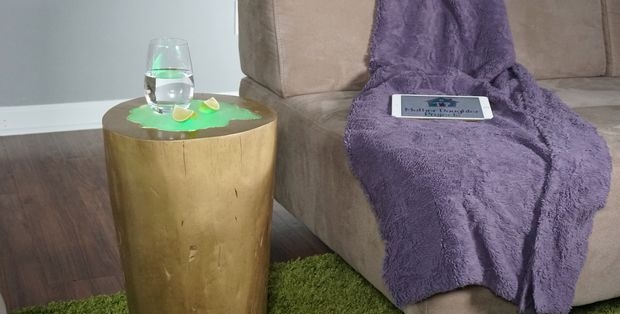
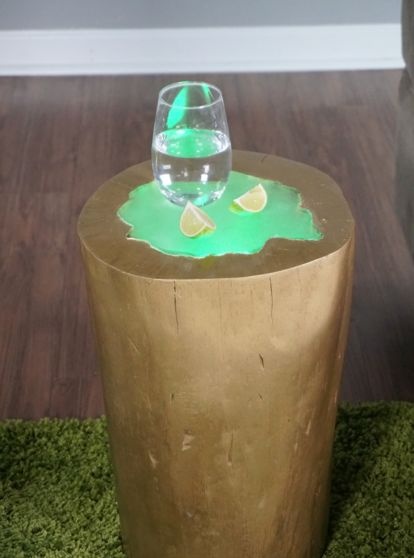
Now we need to create a “glass” tabletop on one of the surfaces. To do this, cover the surface with contact paper for storing epoxy resin. It can be replaced with glossy paper, to which the epoxy resin does not stick when it hardens. To do this, you can first conduct several experiments to find what you need.
Cover the surface with contact paper and secure it tightly with tape.
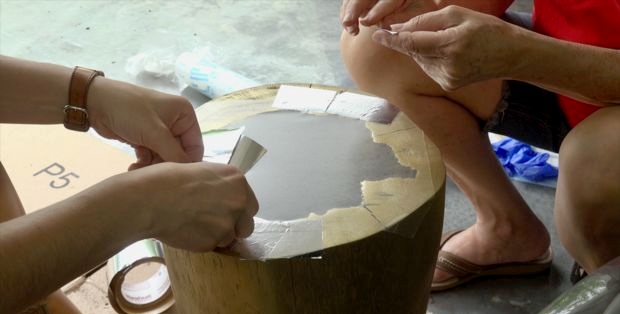
Turn the log over. This should be done on a flat surface, as the epoxy resin will absorb any surface irregularities as it hardens.
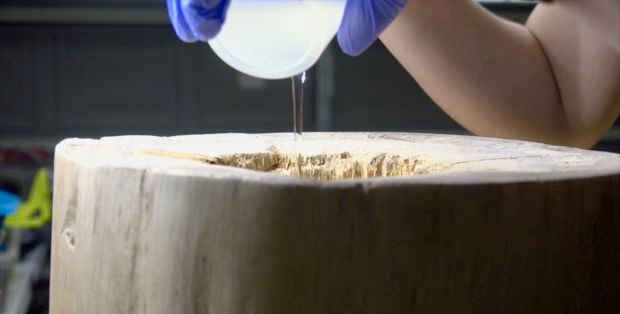
We prepare the epoxy resin by mixing its components well. I took transparent resin, it can also be yellow. The amount of mixture depends on the diameter of the hollow and the thickness of the desired wall. I needed 200 ml. On the opposite side, carefully pour in the resin.
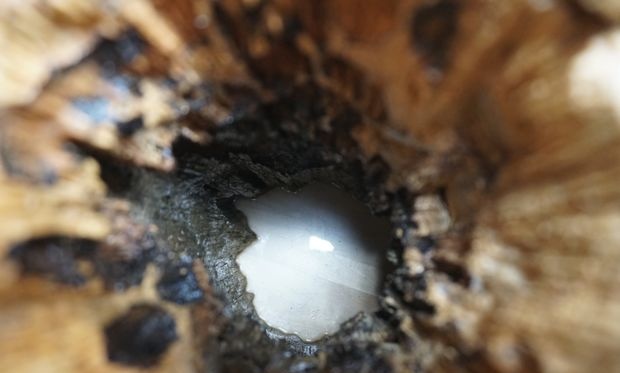
We wait for the resin to harden for about 24 hours. After this, remove the contact braid. The surface turned out to be smooth.
If you want to get a smoother result, you can apply another layer of epoxy resin or varnish on top.
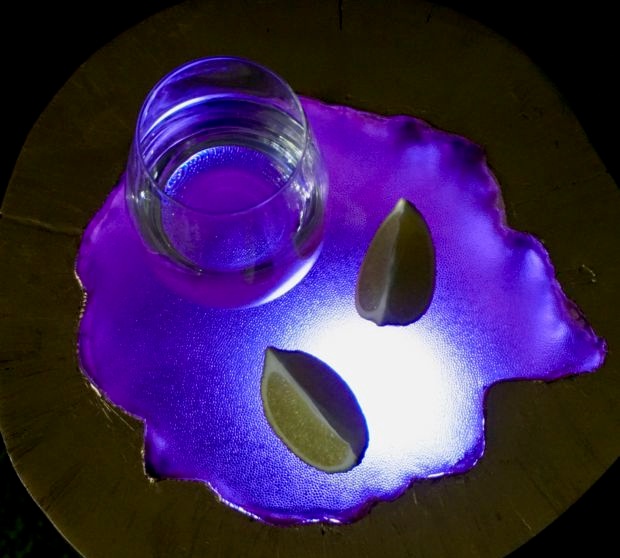
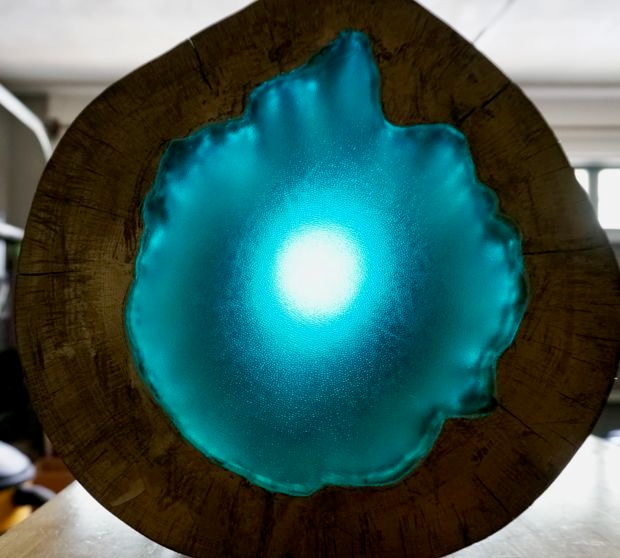
We cover the entire outer surface with varnish.
Now you need to prepare the lamp for the interior. With a stand along the diameter of the inner hollow. I took a 220 volt light bulb, multi-colored, with a remote control. Using the remote control, you can set the color or make an automatic color change after a certain period of time.
You can buy it here - Aliexpress
We take a PVC pipe of diameter, insert foam rubber insulation for the pipes, pass the wire through and attach the light bulb socket. This is what was on hand.
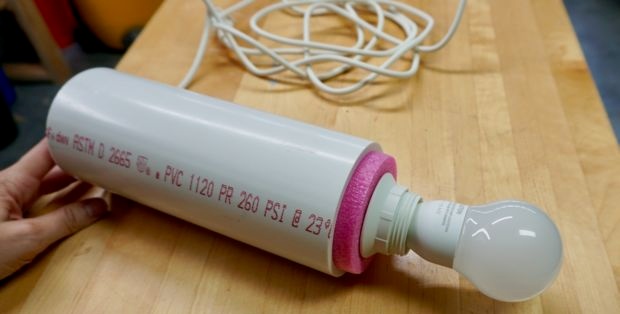
We insert it into the log and press it with a small helmet of wood so that our entire structure does not fall out.
We glue the racks from the sealant and our craft can be considered complete.
We turn on and check our lamp-night light-stand.
Watch the video about making a backlit stand
Original article in English