Preparation.
Marking the board.
Manufacturing of parts, grinding.
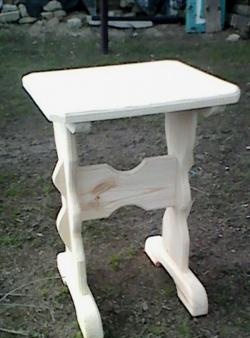
Assembling the stool.
Painting.
Preparation.
Preparing the material and necessary tools plays an important role and saves time in the future. To make a stool we will need:
- hewn board measuring 800x200x25 mm (dimensions are approximate, you can proceed from what is available),
- 8 shiny screws (50-60 mm),
- sandpaper,
- jigsaw,
- screwdriver or screwdriver,
- paint and varnish on wood,
- tape measure, pencil and corner.
Marking the board.
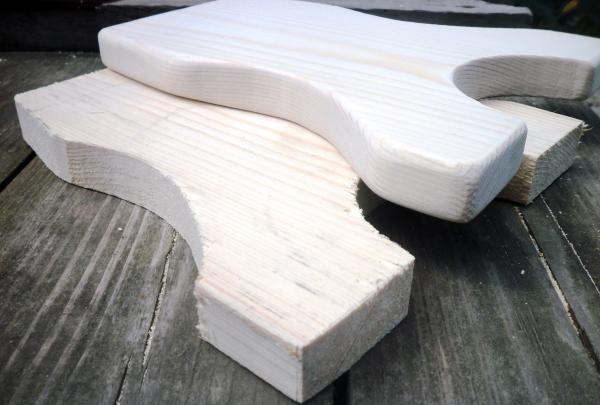
You need to start by marking the board. First of all, using a corner, a pencil and a tape measure, we mark a rectangular section without knots, 32-33 cm long. This will be the upper part of our high chair.Next, we mark two segments of 23 cm each - these will be the sides. Now it is advisable to give them some kind of curly pattern. You can use any objects that have a circle for this, simply outlining them with a pencil. But, this method involves an irrational waste of time. After all, you will have to mark the center and other dimensions in each side. Therefore, for the sides it is better to use a pattern pre-cut from thick cardboard or other material. It will allow you to easily and quickly mark a large number of sides. Just attach the pattern and trace it with a pencil.
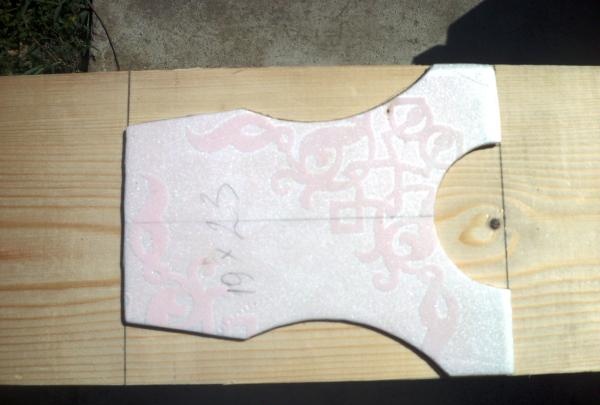
By the way, the use of a curly pattern on the side not only gives them a beautiful look, but also allows you to trim off all unwanted knots.
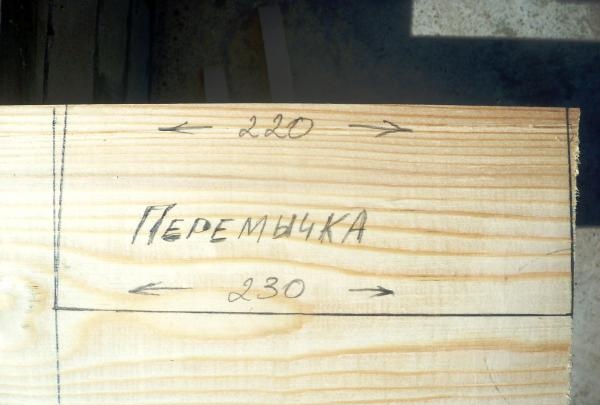
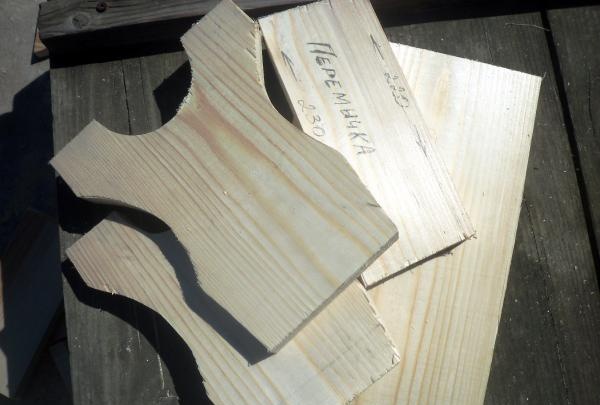
And immediately mark the jumper. It should be trapezoidal in shape and have sides of 230 and 220 mm. The width of the jumper is not important - from 80 to 120 mm.
So, has a marked board.
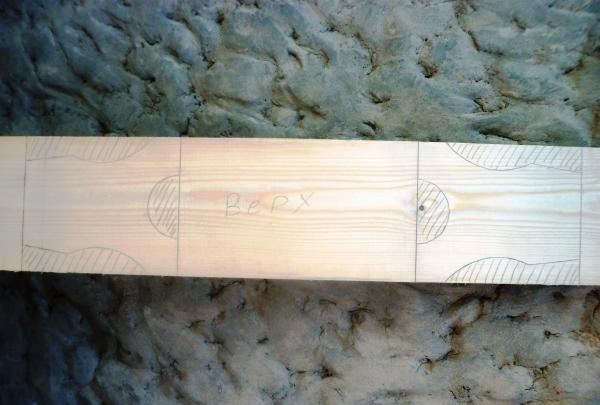
Important! You should not draw too thick lines - this affects the evenness of the trim. And the pencil is not so easy to erase.
Manufacturing of parts.
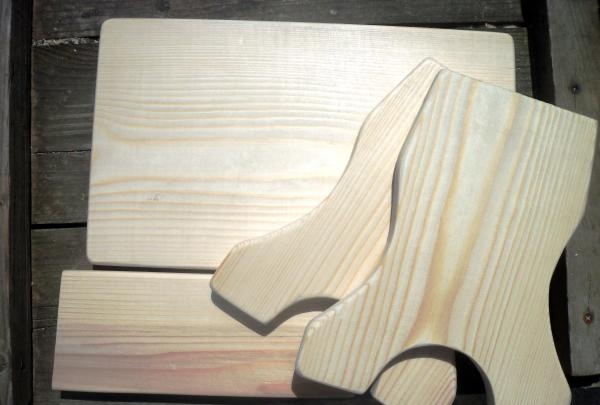
Using a jigsaw we cut out all our parts. Evenness is important here. To trim the cut evenly, it is better to guide the tool blade not along the line, but to the side of it.
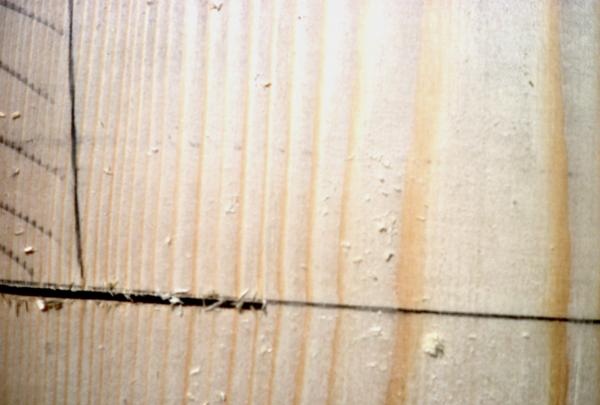
You can learn to cut evenly using unnecessary waste. So, let's cut out all the details.
Next, I use coarse sandpaper to smooth out the sharp corners of the parts around the entire circumference and grind the ends.
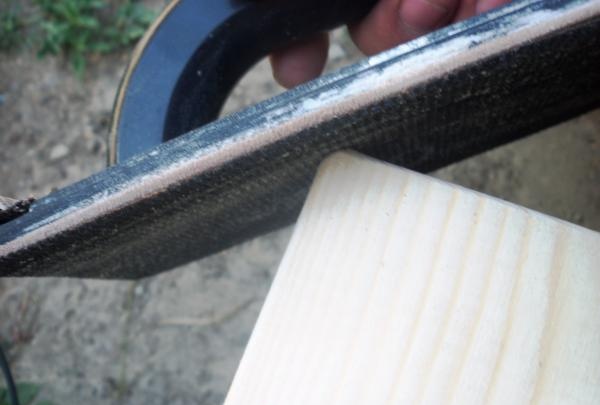
This will give the product not only a beautiful look, but will also hide all possible irregularities in the cutting.
Next, we carefully sand all these parts with fine sandpaper. It is most rational to carry out this procedure at this stage, since a number of inconveniences may arise when grinding the finished structure.It is convenient to sand smooth surfaces by putting sandpaper on a wooden block, or using a manual machine for grouting putty. The main thing is quality, since after painting all defects will appear and be visible.
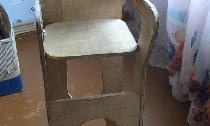
This is what sanded and unpolished sides look like.
So, it has the same parts, but ready for assembly.
Assembling the stool.
It is advisable to carry out the assembly in this order:
- connect the sides with the jumper (1 screw on each side);
- place this structure on a flat surface and screw on the top cover (2 screws on each side);
- We strengthen the connection of the sides with the jumper (1 more screw each).
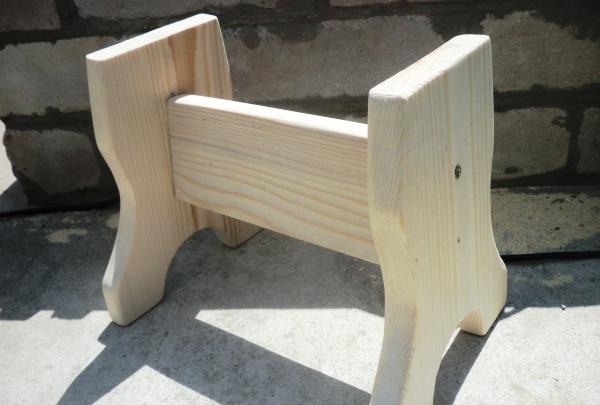
The chair is assembled! We check it again on a flat plane. If the stool is a little wobbly, then we tighten the legs until the product is completely stable.
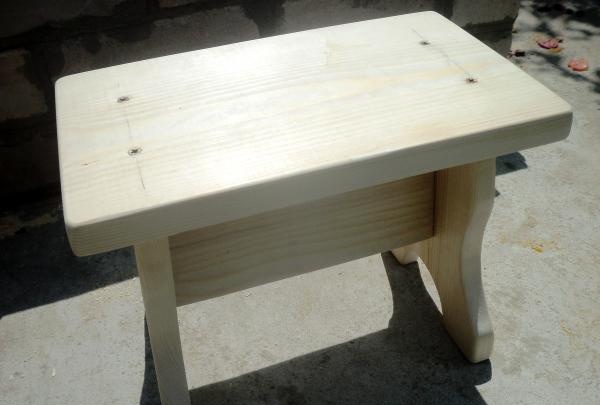
Painting.
Before painting, we check the product again for defects, and if necessary, erase them and pencil residues. Using a brush, we clean the stool from wood dust and begin painting.
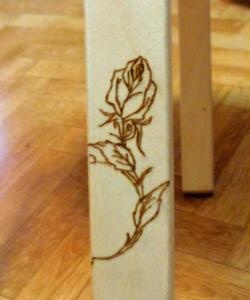
Here “there is no comrade to taste and color”! You can leave the natural color of the wood by painting it with clear varnish. You can give the product a certain color using a variety of wood paints, which are abundant in all hardware stores. In principle, one coat is sufficient for painting. But, if, after the first layer has completely dried, the surfaces are lightly sanded again with fine sandpaper and a new layer of varnish is applied, the shine of the product will noticeably increase.
Important! Poorly sanded ends absorb more paint and become darker.

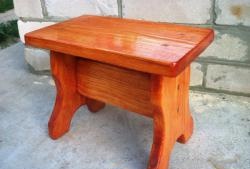
This is what the finished chair looks like, varnished.

It takes a little over two hours to make (not including drying).How to use a ready-made stool - sell, give as a gift or use it yourself - is a personal matter for everyone. The main thing is that this beautiful chair is made by yourself!
And if you are willing to spend more than two hours, for example two days, there is a story about how to make a soft kitchen corner. You can read more about this at this link - how to make a corner in the kitchen.