For work we will need: PVA glue, white paper, thick cardboard, green and brown knitting threads, six wooden skewers, fabric, two chocolate egg containers, adhesive plaster, plaster. For decoration, prepare fishing line, ribbons, beads and a good mood!
Let's make shoes
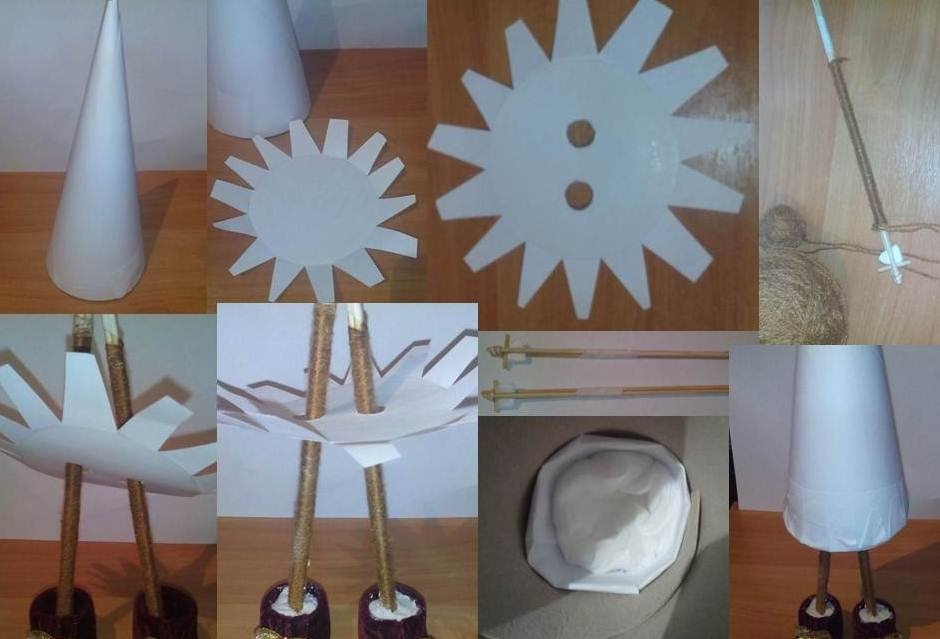
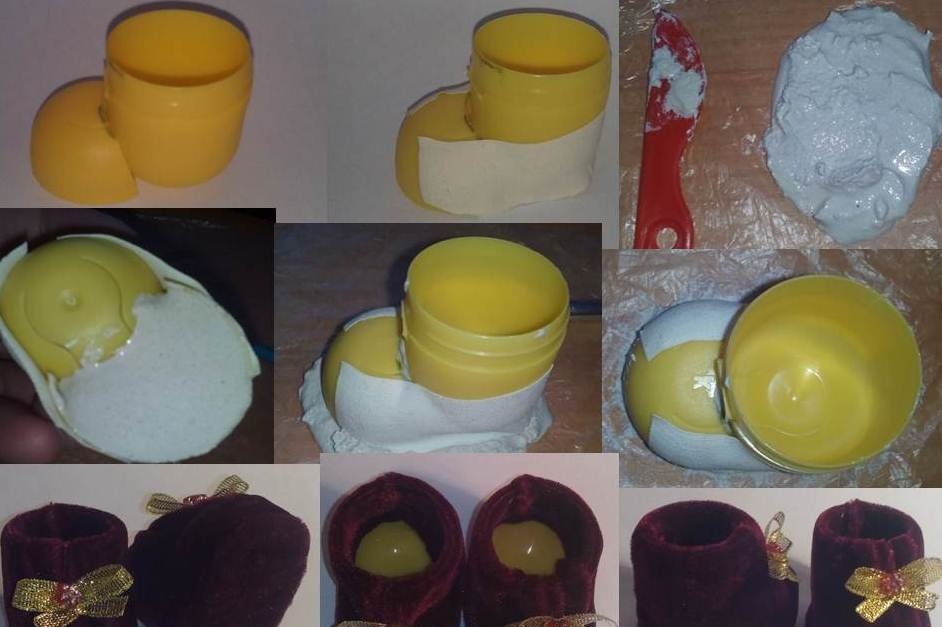
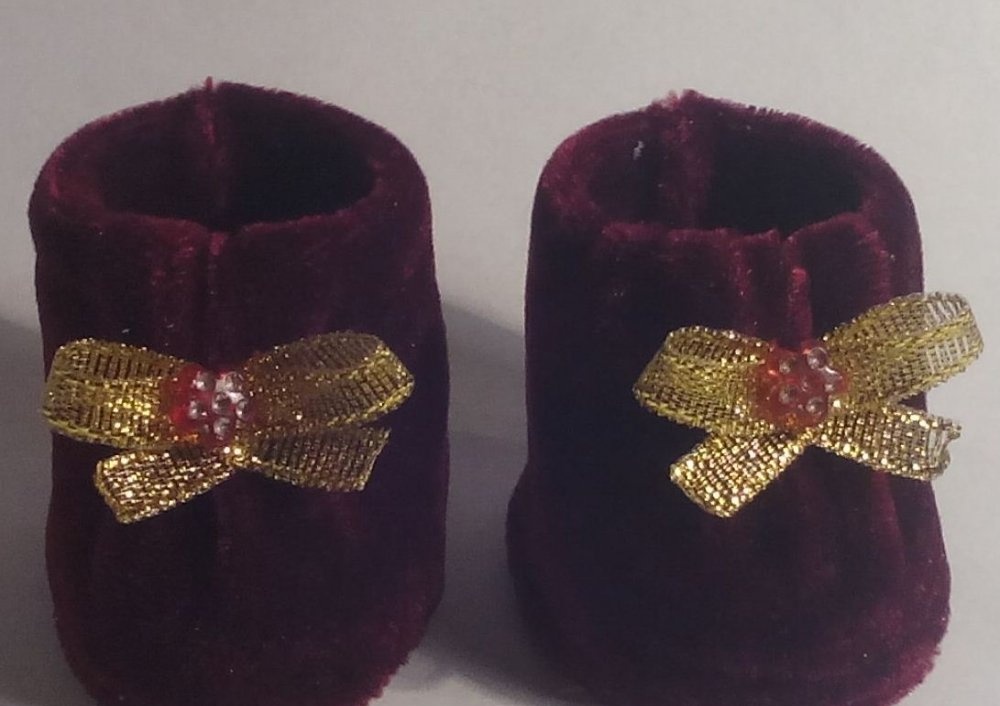
Let's start making shoes from containers. Cut off the top cap completely. Carefully cut out an oval piece in it so that you can easily attach the workpiece to the bottom of the container. Both parts can be secured with hot glue or regular adhesive tape. Next we spread the plaster. Place a little plaster in the toe part of the shoe so that our Christmas tree can stand on its own. Distribute the prepared plaster on a film 5 millimeters thick. Install our shoe blank onto the plaster. Carefully match the plaster to the workpiece to form a sole. Leave until hardened. We do the same with the second shoe.
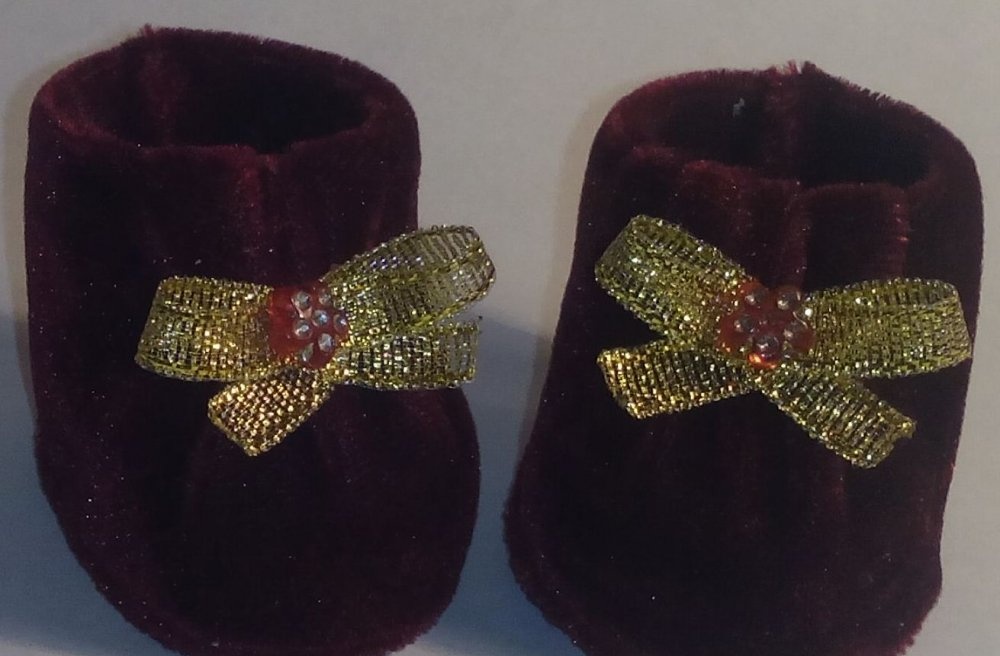
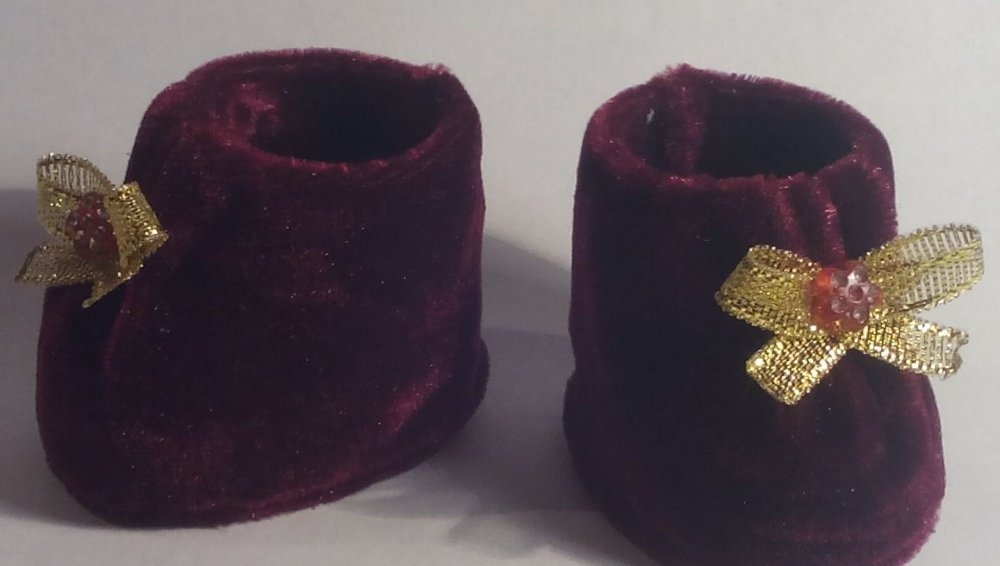
Next, we cut out two parts from the fabric to the size of the shoe: an oval to the size of the sole and a strip around the shoe.Add two centimeters in height above the shoe so that you can then wrap the fabric inside the workpiece. Sew the top part of the pattern. Then we sew the sole pattern to it. We insert the shoe into the pattern and carefully tuck the weave inside. We decorate the boots to your liking. At the same time, we tighten the toe part of the fabric to the shape of the shoe. The shoes are ready!
Now let's take care of the legs of our Christmas tree. To do this, cut off the sharp part of the skewers. We fasten three skewers with adhesive tape. It is necessary to make a slight expansion at the bottom so that the legs are better grasped by the plaster in the boots. To do this, just secure pieces of sticks, polystyrene foam or cardboard between the skewers. For convenience, you can use elastic bands or threads. We wrap the legs with brown thread.
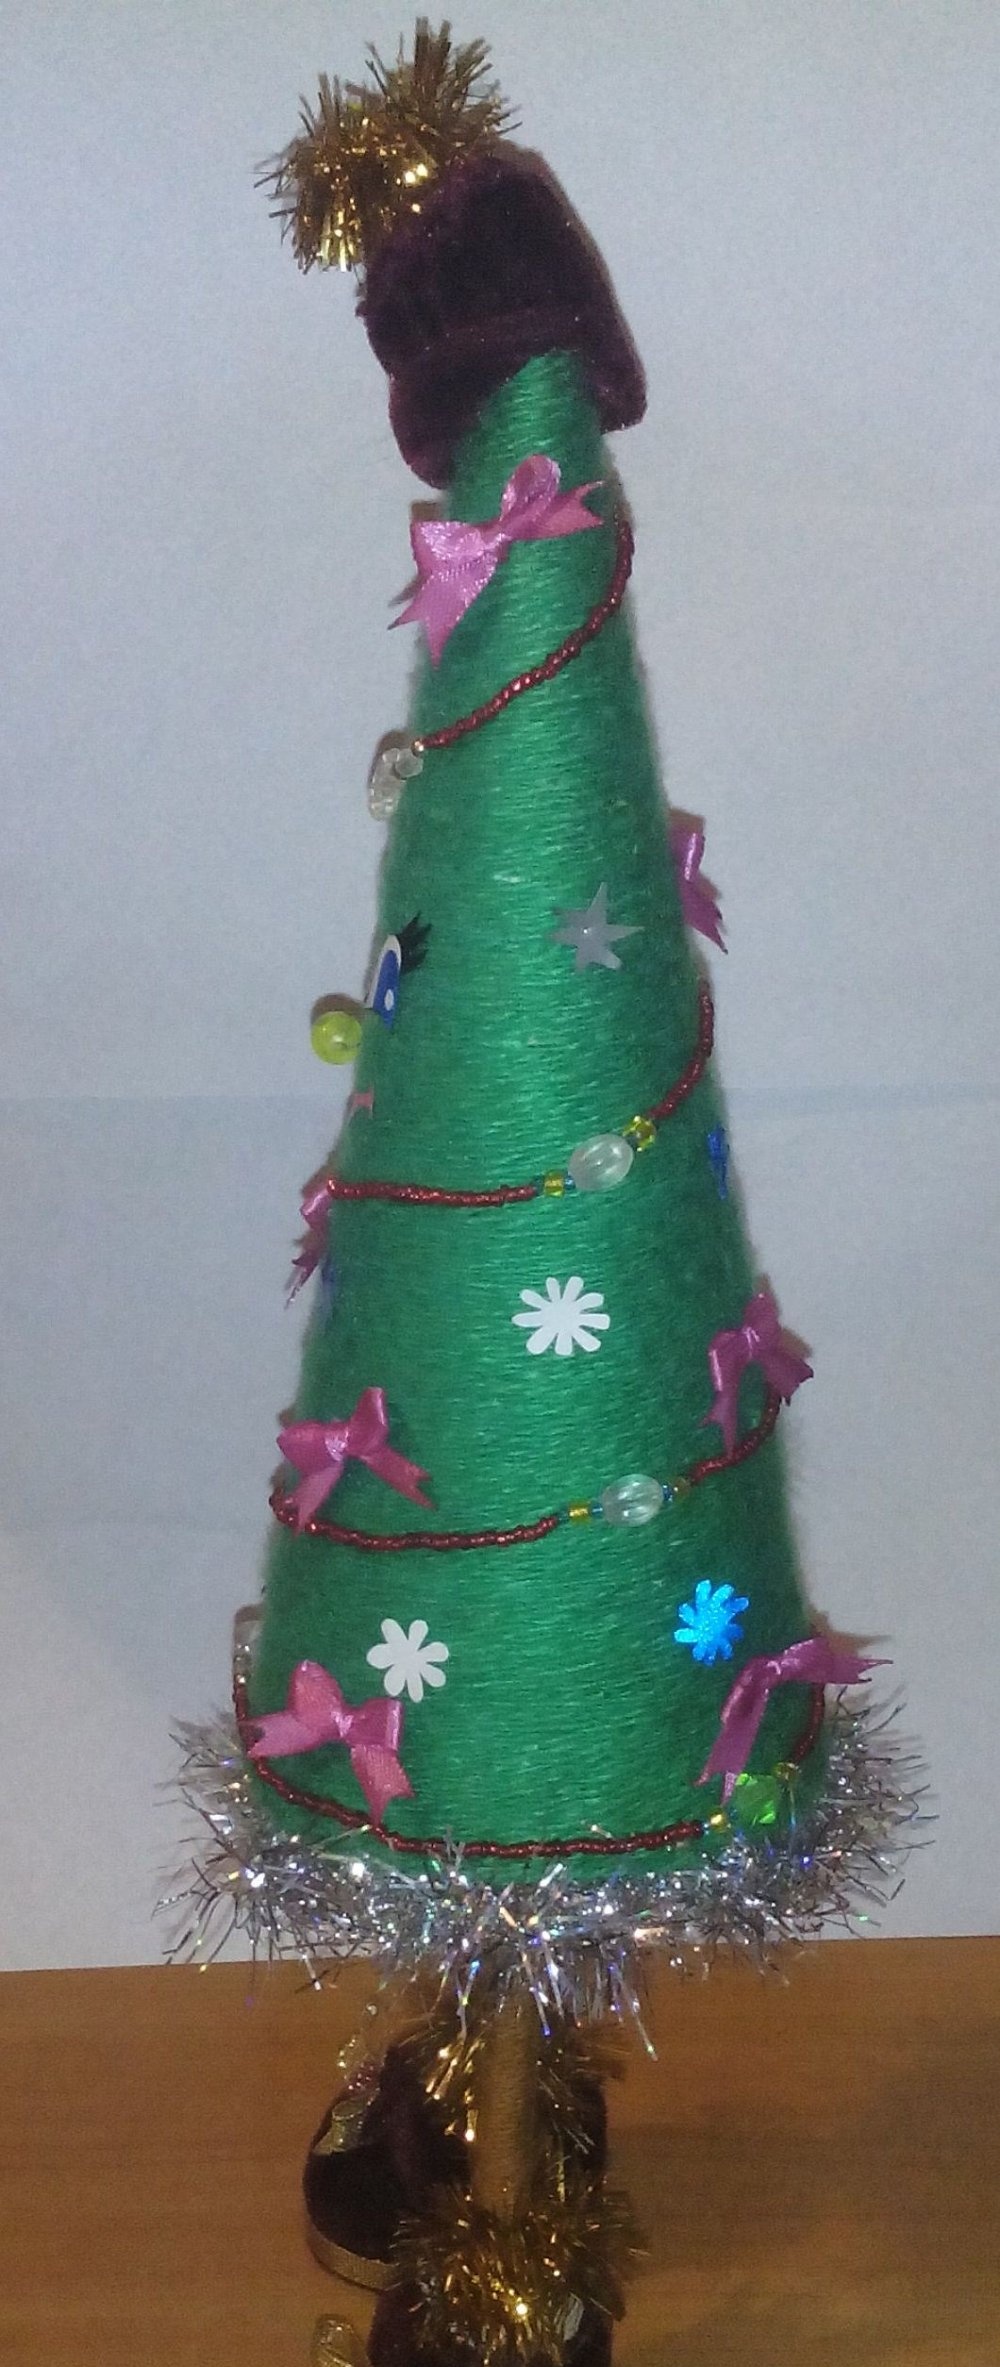
Let's make a Christmas tree with our own hands
The next stage is the formation of the Christmas tree. We make two cones from cardboard and paper and glue them to each other. The paper from the PVA glue gets wet quickly, and the cardboard will hold the shape of our Christmas tree. Therefore, the denser the cardboard, the better. The cardboard cone can also be secured with adhesive tape so that the Christmas tree is securely fastened.
According to the size of the lower circumference of the cone, we cut out two circles: one with a margin for fastening, the second from cardboard to give the product density. Glue these two circles to each other. In the resulting part we cut out two holes through which we thread the legs of the Christmas tree. The top of the sticks can be secured with an elastic band or thread to form a slope.
We insert the workpiece into the shoes and carefully fill it with plaster. Let's hold it a little while the plaster sets. And leave until completely hardened.
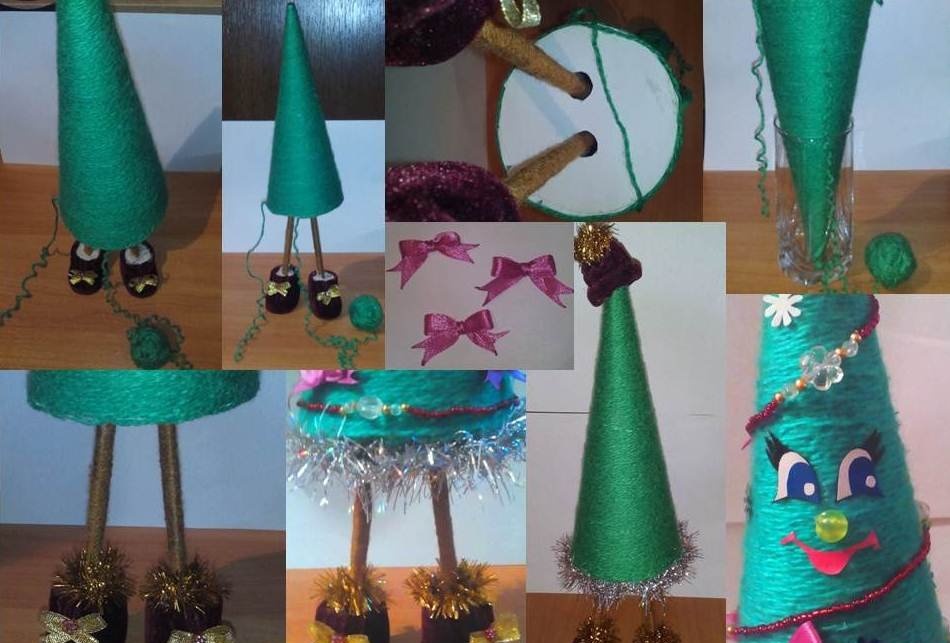
We roughly note at what height our Christmas tree will be. We place cotton pads or paper inside so that the top of the legs can rest.Glue the finished cone to the bottom of the Christmas tree.
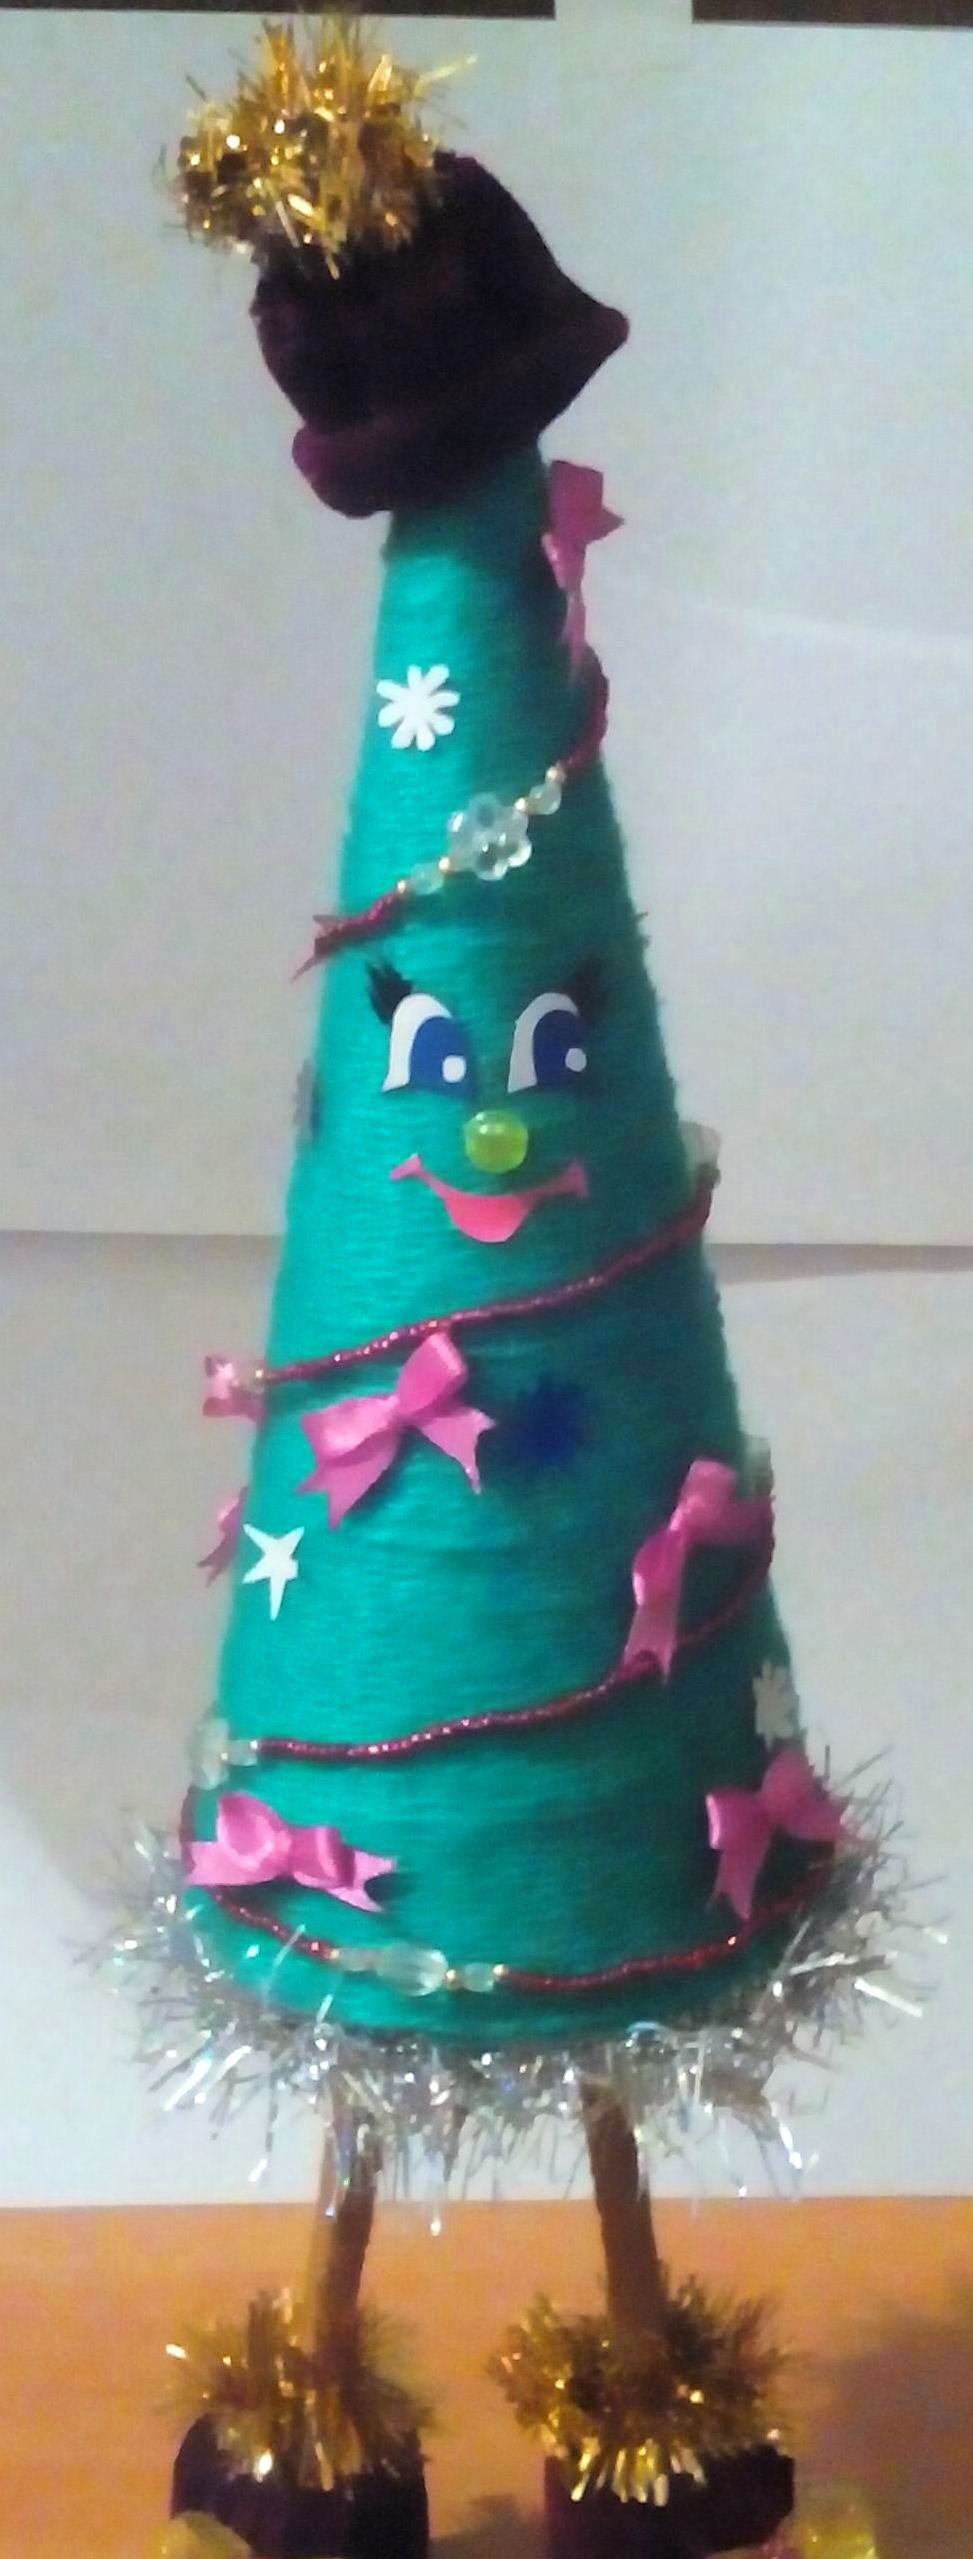
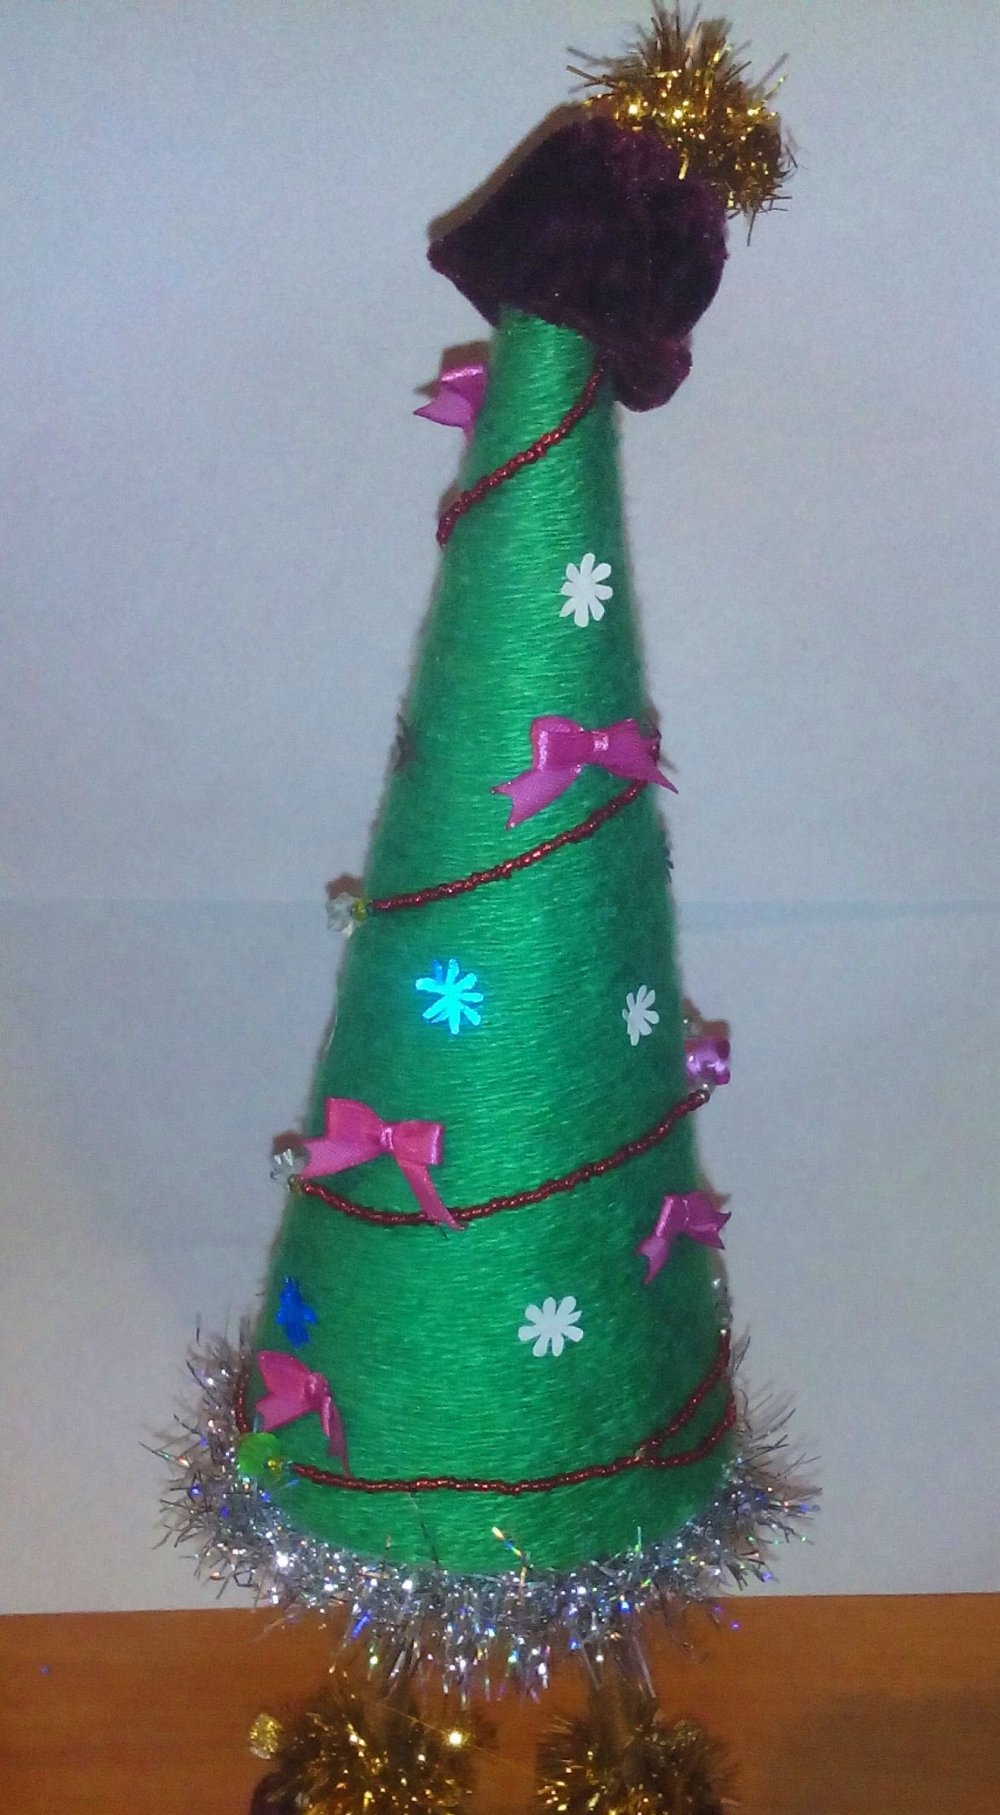
Next, we begin to decorate the cone itself. We coat it with glue, gluing it around the thread. For convenience, turn the finished product over and glue the tinsel. So our Christmas tree is ready. Now give free rein to your imagination to make the Christmas tree sparkle with colors.